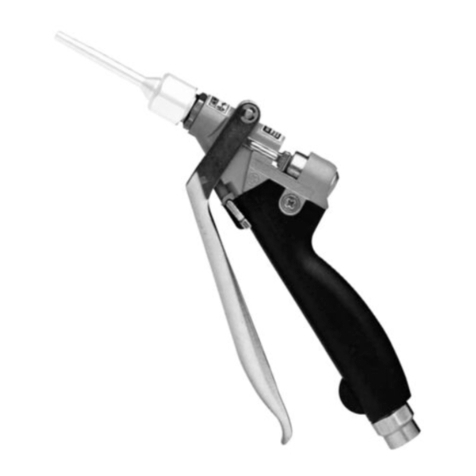
Graco 17Y907 Instruction Manual

Warnings
2309495L
Warnings
The following warnings are for the setup, use, grounding, maintenance, and repair of this
equipment. The exclamation point symbol alerts you to a general warning and the hazard symbols
refer to procedure-specific risks. When these symbols appear in the body of this manual or on
warning labels, refer back to these Warnings. Product-specific hazard symbols and warnings not
covered in this section may appear throughout the body of this manual where applicable.
SKIN INJECTION HAZARD
High-pressure spray is able to inject toxins into the body and cause serious bodily injury.
In the event that injection occurs, get immediate surgical treatment.
•Do not aim the gun at, or spray any person or animal.
•Keep hands and other body parts away from the discharge. For example, do not try
to stop leaks with any part of the body.
•Always use the spray tip guard. Do not spray without spray tip guard in place.
•Use Graco spray tips.
•Use caution when cleaning and changing spray tips. In the case where the spray tip
clogs while spraying, follow the Pressure Relief Procedure for turning off the unit
and relieving the pressure before removing the spray tip to clean.
•Equipment maintains pressure after power is shut off. Do not leave the equipment
energized or under pressure while unattended. Follow the Pressure Relief
Procedure when the equipment is unattended or not in use, and before servicing,
cleaning, or removing parts.
•Check hoses and parts for signs of damage. Replace any damaged hoses or parts.
•This system is capable of producing 4000 psi. Use Graco replacement parts or
accessories that are rated a minimum of 4000 psi.
•Always engage the trigger lock when not spraying. Verify the trigger lock is
functioning properly.
•Verify that all connections are secure before operating the unit.
•Know how to stop the unit and bleed pressure quickly. Be thoroughly familiar with the
controls.
FIRE AND EXPLOSION HAZARD
Flammable fumes, such as solvent and paint fumes, in work area can ignite or explode.
Paint or solvent flowing through the equipment can cause static sparking. To help prevent
fire and explosion:
•Use equipment only in well ventilated area.
•Eliminate all ignition sources; such as pilot lights, cigarettes, portable electric lamps,
and plastic drop cloths (potential static sparking).
•Ground all equipment in the work area. See Grounding instructions.
•Never spray or flush solvent at high pressure.
•Keep work area free of debris, including solvent, rags and gasoline.
•Do not plug or unplug power cords, or turn power or light switches on or off when
flammable fumes are present.
•Use only grounded hoses.
•Hold gun firmly to side of grounded pail when triggering into pail. Do not use pail liners
unless they are anti-static or conductive.
•Stop operation immediately if static sparking occurs or you feel a shock.Do not use
equipment until you identify and correct the problem.
•Keep a working fire extinguisher in the work area.

Warnings
309495L 3
EQUIPMENT MISUSE HAZARD
Misuse can cause death or serious injury.
•Always wear appropriate gloves, eye protection, and a respirator or mask when
painting.
•Do not operate or spray near children. Keep children away from equipment at all
times.
•Do not overreach or stand on an unstable support. Keep effective footing and balance
at all times.
•Stay alert and watch what you are doing.
•Do not operate the unit when fatigued or under the influence of drugs or alcohol.
•Do not kink or over-bend the hose.
•Do not expose the hose to temperatures or to pressures in excess of those specified
by Graco.
•Do not use the hose as a strength member to pull or lift the equipment.
•Do not spray with a hose shorter than 25 feet.
•Do not alter or modify equipment. Alterations or modifications may void agency
approvals and create safety hazards.
•Make sure all equipment is rated and approved for the environment in which you are
using it.
PRESSURIZED ALUMINUM PARTS HAZARD
Use of fluids that are incompatible with aluminum in pressurized equipment can cause
serious chemical reaction and equipment rupture. Failure to follow this warning can result
in death, serious injury, or property damage.
•Do not use 1,1,1-trichloroethane, methylene chloride, other halogenated
hydrocarbon solvents or fluids containing such solvents.
•Do not use chlorine bleach.
•Many other fluids may contain chemicals that can react with aluminum. Contact your
material supplier for compatibility.
PERSONAL PROTECTIVE EQUIPMENT
Wear appropriate protective equipment when in the work area to help prevent serious
injury, including eye injury, hearing loss, inhalation of toxic fumes, and burns. This
protective equipment includes but is not limited to:
•Protective eyewear, and hearing protection.
•Respirators, protective clothing, and gloves as recommended by the fluid and solvent
manufacturer.

Operation
4309495L
Operation
Pressure Relief Procedure
Follow the Pressure Relief
Procedure whenever you see this
symbol.
1. Turn sprayer OFF.
2. Engage the trigger lock. Always engage
the trigger lock when sprayer is stopped
to prevent the gun from being triggered
accidentally.
3. Turn pressure control knob to lowest
setting.
4. Put drain tube into a waste pail and turn
Prime/Spray valve in PRIME position
(drain) to relieve pressure.
5. Hold the gun firmly to a pail. Point gun
into pail. Disengage the trigger lock and
trigger the gun to relieve pressure.
6. Engage the trigger lock.
7. If you suspect the spray tip or hose is
clogged or that pressure has not been
fully relieved:
a. VERY SLOWLY loosen the tip
guard retaining nut or the hose end
coupling to relieve pressure
gradually.
b. Loosen the nut or coupling
completely.
c. Clear airless hose or spray tip
obstruction. See Clear Tip Clog,
page 7.
Gun Trigger Lock
This equipment stays pressurized until
pressure is manually relieved. To help
prevent serious injury from pressurized fluid,
such as skin injection or splashed fluid, follow
the Pressure Relief Procedure whenever
sprayer is stopped and before sprayer is
cleaned or checked, and before equipment is
serviced.
ti29239a
To prevent injury when the gun is not in
use, always engage the gun’s trigger lock
if unit is being shut down or left
unattended.
ti29240a

Operation
309495L 5
Setup
Connect Gun to Sprayer
Make sure sprayer is turned off and
unplugged from power source. Refer to your
sprayer instruction manual for priming and
spray instructions.
1. Attach Graco airless hose to sprayer
fluid outlet.
2. Attach other end of hose to gun swivel.
Use two wrenches (one on the swivel
and one on the hose), to tighten all
connections securely.
3. Refer to sprayer instruction manual for
priming instructions.
Installing Tip and Tip Guard on Gun
To prevent spray tip leaks make certain spray
tip and tip guard are installed properly.
1. Perform Pressure Relief Procedure,
page 4.
2. Engage trigger lock.
3. Verify spray tip and tip guard parts are
assembled in the order shown.
a. Use spray tip to align gasket and
seal in the tip guard.
If equipment has recently been operated,
perform Pressure Relief Procedure,
page 4, and engage trigger lock. To avoid
serious injury from skin injection, do not
place your hand in front of the spray tip
when installing or removing the spray tip.
High-pressure spray is able to inject toxins
into the body and cause serious bodily
injury. Do not stop leaks with hand or rag.
ti29241a
SPRAY TIP
RUBBER
GASKET/METAL
SEAL
RETAINING
NUT
TIP GUARD
ti29242a

Operation
6309495L
b. Spray tip must be pushed all the
way into the tip guard. Turn spray tip
to push down.
c. Turn the arrow shaped handle on
the spray tip forward to the spray
position.
4. Screw spray tip and tip guard assembly
onto the gun and tighten.
Spraying
1. Unlock trigger lock.
2. Be sure the arrow shaped tip faces
forward (spray).
3. Hold gun perpendicular and
approximately 12-inches (30 cm) from
surface. Move gun first, then pull gun
trigger to spray a test pattern.
4. Slowly increase pump pressure until
coverage is uniform and even (see
sprayer instruction manual for additional
information).
5. Periodically inspect gun handle vent for
fluid buildup, this could indicate an
internal leak. Service fluid tube and
o-ring as necessary.
Aligning Spray
1. Perform Pressure Relief Procedure,
page 4.
2. Loosen tip guard retaining nut.
3. Align tip guard horizontally to spray a
horizontal pattern.
4. Align tip guard vertically to spray a
vertical pattern.
ti29243a
ti29244a
Vent
ti29245a
HORIZONTAL VERTICAL
ti29246a

Operation
309495L 7
Clear Tip Clog
In the event that particles or debris clog the
spray tip, this sprayer is designed with a
reversible spray tip that quickly and easily
clears the particles without disassembling the
sprayer.
1. Engage trigger lock. Rotate spray tip to
unclog position. Disengage trigger lock.
Trigger gun at waste area to clear clog.
UNCLOG
NOTE: If spray tip is difficult to rotate when
turning to the unclog position perform,
Pressure Relief Procedure, page 4, then
turn Prime/Spray valve to spray position and
repeat step 1.
2. Engage trigger lock. Rotate spray tip
back to spray position. Disengage
trigger lock and continue spraying.
SPRAY
Cleanup
Flush gun after each work shift and store in
a dry location. Do not leave the gun or any
parts in water or cleaning solvents.
To avoid serious injury from skin injection
do not put your hand in front of the spray tip
when installing or removing the spray tip
and tip guard.
ti29247a
ti29248a

Repair
8309495L
Repair
1. Perform Pressure Relief Procedure,
page 4, and engage trigger lock.
2. When removing gun from hose, hold hex
end of fluid tube assembly (19) securely
to avoid loosening fluid tube from gun
body.
3. If fluid continues to flow after trigger is
released, gun valve may need
adjustment, be obstructed or damaged,
or valve stem (24), seat (26), or seal (3)
may be worn or damaged.
a. Adjust valve or spring tension as
instructed on page 8.
b. Replace valve seal, stem, or seat as
instructed on page 10.
c. To inspect valve for obstruction or
damage, disassemble gun as
instructed on page 10. Clean and
inspect parts. Replace any worn or
damaged parts and assemble gun
as instructed on page 10.
4. Follow torque, sealant and lubrication
notes.
After adjusting or servicing the gun make
certain fluid does not flow or spray when
trigger lock is engaged. If fluid does flow or
spray, gun is not assembled properly or
trigger lock is damaged. Reassemble gun or
take to your nearest Graco distributor. Do not
use the gun until problem is corrected.
Valve Adjustment
Trigger travel and valve opening is factory set
to 1 in. (25.4 mm). Use following procedure
to adjust setting,
1. Perform Pressure Relief Procedure,
page 4, and engage trigger lock.
2. Disconnect gun from hose.
3. Loosen stem nut (1) and spring housing
(28).
4. Insert a 1/8 hex allen wrench through
hole in spring adjustment screw (21) and
into spring housing (28).
5. Turn spring housing (28) and stem nut
(1) to change trigger travel and size of
valve opening.
6. Tighten stem nut (1) to set adjustment.
7. Adjust spring adjustment screw (21) to
desired trigger pull force.
Spring Tension
Adjustment
1. Perform Pressure Relief Procedure,
page 4, and engage trigger lock.
2. Disconnect gun from hose.
3. Turn spring adjustment screw (21) as
needed until spring force is adjusted to
close valve.
Before performing any repairs on the gun,
read all warnings in this manual and the
equipment manual.

Repair
309495L 9
NOTES:
M
E
O
A
F
A
KG
24
5
21
4
28
27
3
1
20
7
2
17
29
15
914 32
19
8
42
6
44
43
E H
a
b
F
F
F
13
F
35
F
F
ti13869b
F
CN
A
Ref. Description
Torque to 6–10 in-lb (0.68–1.13 N•m)
Torque to 26–32 ft-lb (35.3–43.4 N•m)
Apply lithium base grease to threads
Apply lithium base grease
When removing fluid hose, use wrench on end of fluid tube assembly (19)
hex to avoid loosening fluid tube assembly (19)
Torque to 100–125 in-lb (11.3–14.1 N•m)
Torque to 200–250 in-lb (22.6–28.2 N•m)
Apply low strength anaerobic sealant (blue)
Apply high strength anaerobic sealant (red)
Apply anti-seize lubricant to threads
A
C
E
F
G
H
K
M
N
O

Repair
10 309495L
Valve Stem and Seal
Replacement
If fluid leaks past v-block seal (3), v-block seal
or valve stem (24) may be worn or damaged.
Use following procedure to replace v-block
seal or valve stem.
1. Perform Pressure Relief Procedure,
page 4, and engage trigger lock.
2. Disconnect gun from hose.
3. Unscrew spring retainer (21) and
remove spring (4).
4. Unscrew spring housing (28) with a 1/8
inch hex allen wrench.
5. Unscrew valve seat (35).
6. Remove adjustment bracket (20) and
stem nut (1) from stem.
7. Remove valve stem (24).
8. Remove seal retainer (27) and v-block
seal (3). Replace v-block seal.
9. Secure gun body (17) in an assembly
fixture.
10. Lubricate and install v-block seal (3) into
gun body (17) with lips of seal facing into
housing.
11. Lubricate and torque seal retainer (27)
into gun body (17) to 100–125 in-lb
(11.3–14.1 N•m).
12. Lubricate and install valve stem threads
(24) into gun body (17). Thread stem
assembly through v-block seal (3).
13. Thread nut (1) all way onto valve stem
(24).
14. Install adjustment bracket (20) and
spring housing (28) onto valve stem (24).
15. 15. Apply high strength anaerobic
sealant (red) to threads on valve seat
(35). Torque valve seat into gun body
(17) to 26–32 ft-lb (35.3–43.4 N•m).
16. Lubricate and install spring (4) and spring
retainer threads (21) in gun body (17).
17. Insert a 1/8 inch hex allen wrench
through spring retainer (21) and into
spring housing (28). Adjust trigger travel
and valve opening to desired position.
18. Tighten stem nut (1) to set adjustment.
19. Adjust spring adjustment screw (21) to
desired trigger pull force.
Gun Disassembly and
Assembly
Disassembly
1. Perform Pressure Relief Procedure,
page 4, and engage trigger lock.
2. See Valve Stem and Seal
Replacement and perform Steps 2 – 7.
3. Remove two retaining rings (8), rod (13)
and trigger (29).
4. Unscrew setscrew (42), then unscrew
fluid tube assembly (19) from gun body
(17).
5. Remove gun handle screws (9), gun
handle (14), trigger lock (15), ball (2) and
spring (7).
6. Remove seal retainer (27), seal (3) and
o-rings (5 and 6).
Assembly
1. See Valve Stem and Seal
Replacement and perform Steps 9 – 11.
2. Lubricate o-ring (6) and install into gun
body.
3. See Valve Stem and Seal
Replacement and perform Steps 12 –
14.
NOTICE
Installing valve stem (24) without
turning it clockwise could damage
v-block seal and result in fluid leakage.
NOTICE
To avoid loosening connections and
damaging gun, grip gun body (17), not
handle (14), when removing fluid tube
assembly (19).
Repair
309495L 11
4. Lubricate trigger pivot holes (a) bracket
guide (b), and rod (13).
5. Install trigger (29) with rod (13) and
retaining rings (8).
6. Apply high strength anaerobic sealant
(red) to threads on valve seat (35).
Torque valve seat into gun body (17) to
26–32 ft-lb (35.3–43.4 N•m).
7. Lubricate trigger lock housing area (c)
and apply low strength anaerobic
sealant to screws (9).
8. Install spring (7) into gun body (17).
Place ball (2) in center of spring. (Use
small amount of grease to hold ball to
spring.)
9. Align trigger lock detent (d) with ball (2).
Compress ball (2) and spring (7) with
trigger lock (15) until trigger lock is
seated in housing.
10. While holding trigger lock (15) in place,
install gun handle (14). Secure gun
handle with screws (9). Torque screws to
6–10 in-lb (7.9–9.0 N•m).
11. Install fluid tube assembly (19) through
gun handle (14) and screw it into gun
body (17). Torque fluid tube assembly
(19) to 200–250 in-lb (22.6–28.2 N•m).
Secure fluid tube assembly with
setscrew (42), and torque setscrew to
6–10 in-lb (0.7–1.13 N•m).
12. Adjust free travel of trigger as instructed
under Valve Adjustment, page 8.
13. See Valve Stem and Seal
Replacement and perform Steps 15 –
19.
NOTES:
NOTICE
To avoid loosening connections and
damaging gun, grip gun body (17), not
handle (14), when installing fluid tube
assembly (19).
ti29249a
17 c7
d
b
a
2
15
9
8
13
29
c
14
AM
F
F
F
F
F
Ref. Description
Torque to 6–10 in-lb (0.68–1.13 N•m)
Apply lithium base grease
A
F
Apply low strength anaerobic
sealant (blue)
Ref. Description
M

Parts
12 309495L
Parts
i
Model 245820
24*
5
21
4*
28
27*
3*
1*
20*
7
2
17
29
15
914 32†
19
8
13
42†
6†
44†
43
A
ti29236a
16
35
Ref. Part Description Qty.
1* 100975 NUT, hex, 5-40 1
2 102233 BALL, stainless steel 1
3* 102921 SEAL, v-block 1
4* 129864 SPRING, compression 1
5* 102982 PACKING, o-ring 1
6† 111457 PACKING, o-ring 1
7 111902 SPRING, compression 1
8 112410 RING, retaining 2
9 111904 SCREW, machine,
flathead
2
13 15Y468 ROD, trigger 1
14 188231 Handle, housing plastic 1
15 188232 LOCK, trigger 1
16 15Y469 COVER, gun 1
17 15A977 HOUSING, fluid,
stainless steel
1
19 24B570 KIT, fluid tube swivel
assembly
1
20* 188246 LINK 1
21 188247 SCREW, spring
adjustment
1
24* 236234 STEM, valve 1
27* 188271 RETAINER, seal 1
28 188275 Housing, spring 1
29 237604 TRIGGER 1
32† 155332 O-ring 1
35* 245655 SEAT, valve 1
42† 103187 SETSCREW 1
43 15A555 GUARD, trigger 1
44† 15A556 RETAINER, guard 1
45222385 CARD, medical alert (not
shown)
1
* Parts included in Repair Kit 245808, pur-
chased separately.
†Parts included in Repair Kit 24B570, pur-
chased separately.
Replacement Warning labels, tags and cards
are available at no cost.
Ref. Part Description Qty.

Parts
309495L 13
Parts
i
Model 17Y907
Ref. Part Description Qty.
1* 100975 NUT, hex, 5-40 1
2 102233 BALL, stainless steel 1
3* 102921 SEAL, v-block 1
4* 129864 SPRING, compression 1
5* 102982 PACKING, o-ring 1
6† 111457 PACKING, o-ring 1
7 111902 SPRING, compression 1
8 112410 RING, retaining 2
9 111904 SCREW, machine,
flathead
2
13 15Y468 ROD, trigger 1
14 188231 Handle, housing plastic 1
15 188232 LOCK, trigger 1
16 15Y469 COVER, gun 1
17 15A977 HOUSING, fluid,
stainless steel
1
19 24B570 KIT, fluid tube swivel
assembly
1
20* 188246 LINK 1
21 188247 SCREW, spring
adjustment
1
24* 236234 STEM, valve 1
27* 188271 RETAINER, seal 1
28 188275 Housing, spring 1
29 237604 TRIGGER 1
32† 155332 O-ring 1
35* 245655 SEAT, valve 1
42† 103187 SETSCREW 1
43 15A555 GUARD, trigger 1
44† 15A556 RETAINER, guard 1
45222385 CARD, medical alert (not
shown)
1
46 158491 FITTING, nipple 1
47 100380 BUSHING, pipe 1
48 289874 COUPLER, female 1
* Parts included in Repair Kit 245808, pur-
chased separately.
†Parts included in Repair Kit 24B570, pur-
chased separately.
Replacement Warning labels, tags and cards
are available at no cost.
Ref. Part Description Qty.

Technical Specifications
14 309495L
Technical Specifications
245820 Texture Gun
US Metric
Maximum working pressure 4000 psi 28 MPa, 280 bar
Outlet port size 7/8-14
Inlet port size 1/2 npt(f)
Valve orifice
with carbide ball
0.19 in.
0.25 in.
4.83 mm
6.35 mm
Dimensions
Height 5.60 in. 142.24 mm
Length 11.40 in. 289.56 mm
Width 1.2 in. 30.48 mm
Weight 33.79 oz. 958 g
Materials of Construction
Wetted materials on all models Stainless Steel, carbide, Fluoroelastomer, PTFE,
and Polyurethane
17Y907 Texture Gun
US Metric
Maximum working pressure 1000 psi 6.9 MPa, 69 bar
Outlet port size 7/8-14
Inlet port size 1/2 npt(f)
Valve orifice
with carbide ball
0.19 in.
0.25 in.
4.83 mm
6.35 mm
Dimensions
Height 5.60 in. 142.24 mm
Length 11.40 in. 289.56 mm
Width 1.2 in. 30.48 mm
Weight 33.79 oz. 958 g
Materials of Construction
Wetted materials on all models zinc- and nickel-plated carbon steel, nylon, stainless steel,
PTFE, acetal, leather, UHMWPE, aluminum, tungsten
carbide, polyethylene, fluoroelastomer, urethane
WARNING: This product can expose you to chemicals known to the State of California
to cause cancer and birth defects or other reproductive harm. For more information
go to www.P65Warnings.ca.gov.
CALIFORNIA PROPOSITION 65

Graco Standard Warranty
309495L 15
Graco Standard Warranty
Graco warrants all equipment referenced in this document which is manufactured by Graco and bearing
its name to be free from defects in material and workmanship on the date of sale to the original purchaser
for use. With the exception of any special, extended, or limited warranty published by Graco, Graco will,
for a period of twelve months from the date of sale, repair or replace any part of the equipment
determined by Graco to be defective. This warranty applies only when the equipment is installed,
operated and maintained in accordance with Graco’s written recommendations.
This warranty does not cover, and Graco shall not be liable for general wear and tear, or any malfunction,
damage or wear caused by faulty installation, misapplication, abrasion, corrosion, inadequate or
improper maintenance, negligence, accident, tampering, or substitution of non-Graco component parts.
Nor shall Graco be liable for malfunction, damage or wear caused by the incompatibility of Graco
equipment with structures, accessories, equipment or materials not supplied by Graco, or the improper
design, manufacture, installation, operation or maintenance of structures, accessories, equipment or
materials not supplied by Graco.
This warranty is conditioned upon the prepaid return of the equipment claimed to be defective to an
authorized Graco distributor for verification of the claimed defect. If the claimed defect is verified, Graco
will repair or replace free of charge any defective parts. The equipment will be returned to the original
purchaser transportation prepaid. If inspection of the equipment does not disclose any defect in material
or workmanship, repairs will be made at a reasonable charge, which charges may include the costs of
parts, labor, and transportation.
THIS WARRANTY IS EXCLUSIVE, AND IS IN LIEU OF ANY OTHER WARRANTIES, EXPRESS OR
IMPLIED, INCLUDING BUT NOT LIMITED TO WARRANTY OF MERCHANTABILITY OR WARRANTY
OF FITNESS FOR A PARTICULAR PURPOSE.
Graco’s sole obligation and buyer’s sole remedy for any breach of warranty shall be as set forth above.
The buyer agrees that no other remedy (including, but not limited to, incidental or consequential
damages for lost profits, lost sales, injury to person or property, or any other incidental or consequential
loss) shall be available. Any action for breach of warranty must be brought within two (2) years of the
date of sale.
GRACO MAKES NO WARRANTY, AND DISCLAIMS ALL IMPLIED WARRANTIES OF
MERCHANTABILITY AND FITNESS FOR A PARTICULAR PURPOSE, IN CONNECTION WITH
ACCESSORIES, EQUIPMENT, MATERIALS OR COMPONENTS SOLD BUT NOT MANUFACTURED
BY GRACO. These items sold, but not manufactured by Graco (such as electric motors, switches, hose,
etc.), are subject to the warranty, if any, of their manufacturer. Graco will provide purchaser with
reasonable assistance in making any claim for breach of these warranties.
In no event will Graco be liable for indirect, incidental, special or consequential damages resulting from
Graco supplying equipment hereunder, or the furnishing, performance, or use of any products or other
goods sold hereto, whether due to a breach of contract, breach of warranty, the negligence of Graco, or
otherwise.
FOR GRACO CANADA CUSTOMERS
The Parties acknowledge that they have required that the present document, as well as all documents,
notices and legal proceedings entered into, given or instituted pursuant hereto or relating directly or
indirectly hereto, be drawn up in English. Les parties reconnaissent avoir convenu que la rédaction du
présente document sera en Anglais, ainsi que tous documents, avis et procédures judiciaires exécutés,
donnés ou intentés, à la suite de ou en rapport, directement ou indirectement, avec les procédures
concernées.

Информация о компании Graco
Чтобы ознакомиться с последними сведениями о продукции Graco,
посетите веб-сайт
www.graco.com.
Сведения о патентах смотрите на веб-сайте www.graco.com/patents.
ЧТОБЫ РАЗМЕСТИТЬ ЗАКАЗ, обратитесь к своему дистрибьютору
компании Graco
GENERAL ENGINEERING - ОФИЦИАЛЬНЫЙ ДИСТРИБЬЮТОР И
СЕРВИСНЫЙ ЦЕНТР
КОМПАНИИ «GRACO» В РОССИИ
107023, г.Москва, ул.Малая Семеновская, д.11/2, стр.2, этаж 1, офис 1
тел/факс: +7( 495) 540-42-40
www.gnrg.ru
e-mail: [email protected]
Table of contents
Other Graco Tools manuals

Graco
Graco 700 Series Operation manual

Graco
Graco 350 Series Operation manual

Graco
Graco Pro–Shot 242055 B Series Operation manual

Graco
Graco LD Series User manual

Graco
Graco Ultra-lite A Series Operation manual

Graco
Graco MAGNUM C Series Manual

Graco
Graco LD Series User manual

Graco
Graco SD Composite Series User manual

Graco
Graco SD Series User manual

Graco
Graco 24N719 User manual

Graco
Graco 24M510 Owner's manual

Graco
Graco XD40 Setup guide

Graco
Graco Twistork 224854 Parts list manual

Graco
Graco 208-327 Operation manual

Graco
Graco XD40 User manual

Graco
Graco 224268 Operation manual

Graco
Graco SD Series Use and care manual

Graco
Graco SD Series User manual

Graco
Graco 17J866 User manual

Graco
Graco 245820 User manual