manuals.online logo
Brands
  1. Home
  2. •
  3. Brands
  4. •
  5. Graff
  6. •
  7. Bathroom Fixture
  8. •
  9. Graff E-7057 Operator's manual

Graff E-7057 Operator's manual

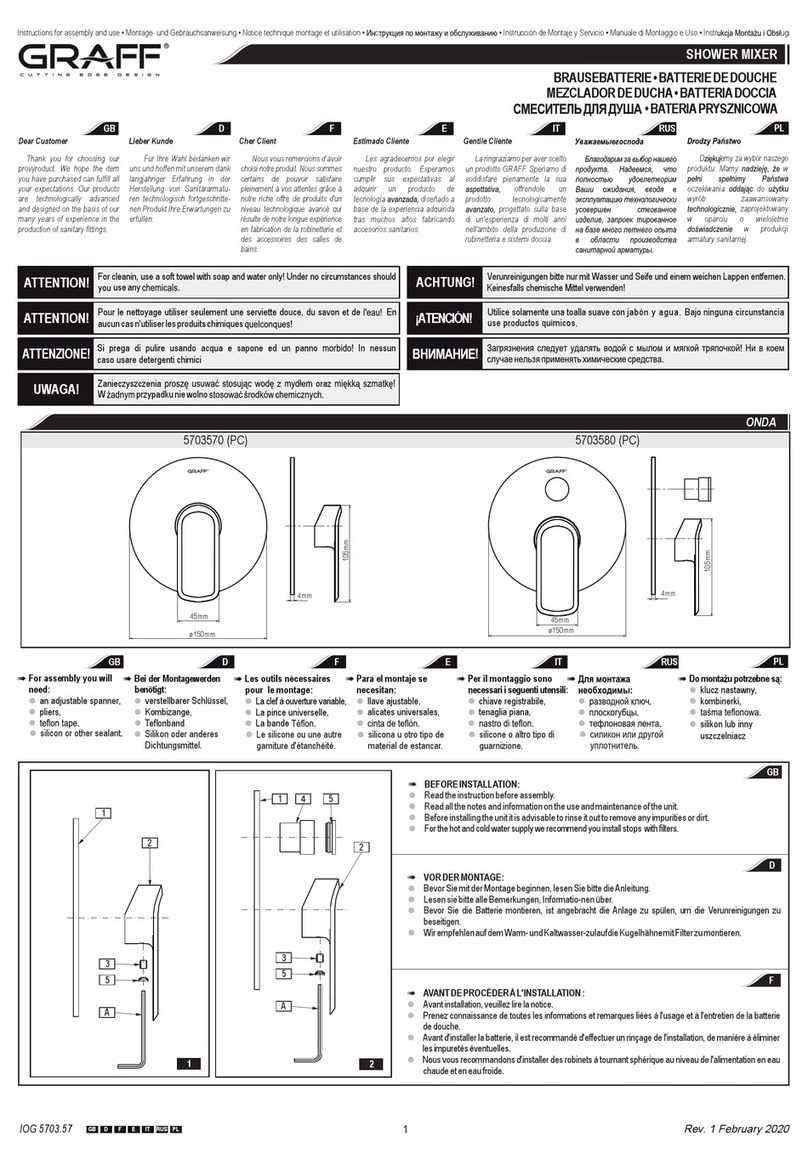
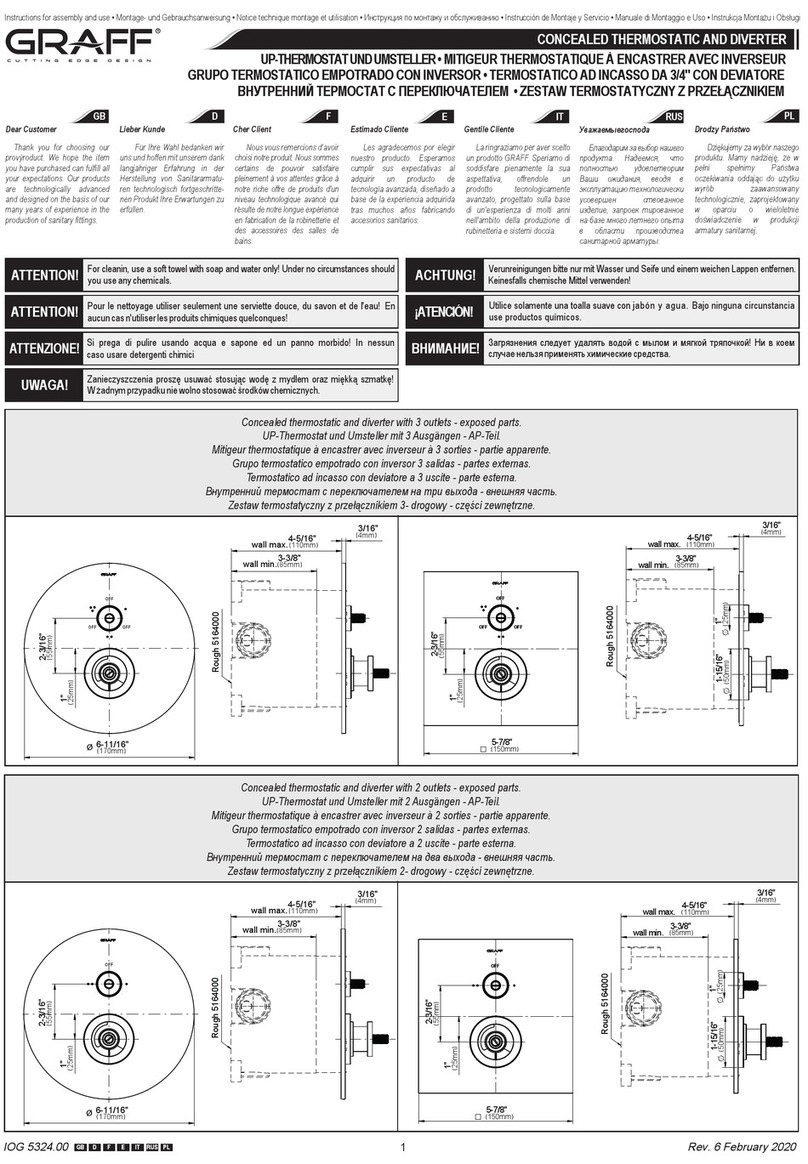
Instructions for assembly and use • Montage- und Gebrauchsanweisung • Notice technique montage et utilisation • Инcтрукция по монтажу иобслуживанию • Instrucción de Montaje y Servicio • Manuale di Montaggio e Uso • Instrukcja Montażu i Obsługi
IOG 5338.40
1Rev. 2 December 2018
silicon or other sealant. Silikon oder anderes
Dichtungsmittel.
Le silicone ou une autre
garniture d'étanchéité.
silicona u otro tipo de
material de estancar.
силикон или другой
уплотнитель.

silicone o altro tipo di
guarnizione.

For assembly you will
need:
an adjustable spanner,
pliers,
teflon tape.



Para el montaje se
necesitan:
llave ajustable,
alicates universales,
cinta de teflón.



GB D F PL
RUS
EIT
Bei der Montagewerden
benötigt:
verstellbarer Schlüssel,
Kombizange,
Teflonband



Les outils nécessaires
pour le montage:
La clef à ouverture variable,
La pince universelle,
La bande Téflon.



Per il montaggio sono
necessari i seguenti utensili:
chiave registrabile,
tenaglia piana,
nastro di teflon.



Для монтажа
необходимы:
разводной ключ,
плоскогубцы,
тефлоновая лента.



Do montażu potrzebne są:
klucz nastawny,
kombinerki,
taśma teflonowa.



sylikin lub inny
uszczelniacz.

GB D F RUS
E IT PL
5338400
5338500
G3/4
O44mm
36mm
wall min.
37mm
wall max.
57mm
108mm
108mm
130mm
44mm
O
wall min.
37mm
wall max.
57mm
Загрязнения следует удалять водой смылом имягкой тряпочкой! Ни вкоем
случаенельзя применятьхимические средства.
ВНИМАНИЕ!
Dear Customer
Lieber Kunde
Cher Client
GB D F
Thank you for choosing our
provýroduct. We hope the item
you have purchased can fulfill all
your expectations. Our products
are technologically advanced
and designed on the basis of our
many years of experience in the
production of sanitary fittings.
Für Ihre Wahl bedanken wir
uns und hoffen mit unserem dank
langjähriger Erfahrung in der
Herstellung von Sanitärarmatu-
ren technologisch fortgeschritte-
nen Produkt Ihre Erwartungen zu
erfüllen.
Nous vous remercions d’avoir
choisi notre produit. Nous sommes
certains de pouvoir satisfaire
pleinement à vos attentes grâce à
notre riche offre de produits d'un
niveau technologique avancé qui
résulte de notre longue expérience
en fabrication de la robinetterie et
des accessoires des salles de
bains.
Dziękujemy za wybór naszego
produktu. Mamy nadzieję, że w
pełni spełnimy Państwa
oczekiwania oddając do użytku
wyrób zaawansowany
technologicznie, zaprojektowany
w oparciu o wieloletnie
doświadczenie w produkcji
armatury sanitarnej.
Drodzy Państwo
PL
Уважаемыегоспода
Estimado Cliente
RUSE
Gentile Cliente
IT
Благодарим за выбор нашего
продукта. Надеемся, что
полностью удовлетворим
Ваши ожидания, вводя в
эксплуатацию технологически
усовершен ствованное
изделие, запроек тированное
на базе много летнего опыта
вобласти производства
санитарной арматуры.
Les agradecemos por elegir
nuestro producto. Esperamos
cumplir sus expectativas al
adquirir un producto de
tecnología avanzada, diseñado a
base de la experiencia adquirida
tras muchos años fabricando
accesorios sanitarios.
La ringraziamo per aver scelto
un prodotto GRAFF. Speriamo di
soddisfare pienamente la sua
aspettativa, offrendole un
prodotto tecnologicamente
avanzato, progettato sulla base
di un'esperienza di molti anni
nell'ambito della produzione di
rubinetteria e sistemi doccia.
For cleanin, use a soft towel with soap and water only!Under no circumstances should
you useany chemicals.
ATTENTION!
Verunreinigungen bitte nur mit Wasser und Seife und einem weichen Lappen entfernen.
Keinesfalls chemische Mittel verwenden!
ACHTUNG!
ATTENTION! Pour le nettoyage utiliser seulement une serviette douce, du savon et de l'eau! En
aucuncas n'utiliserles produitschimiques quelconques!
Zanieczyszczenia proszę usuwać stosując wodę z mydłem oraz miękką szmatkę!
Wżadnym przypadku niewolno stosowaćśrodków chemicznych.
UWAGA!
¡ATENCIÓN! Utilice solamente una toalla suave con jabón y agua. Bajo ninguna circunstancia
use productos químicos.
ATTENZIONE!
Si prega di pulire usando acqua e sapone ed un panno morbido! In nessun
caso usare detergenti chimici
Instructions for assembly and use • Montage- und Gebrauchsanweisung • Notice technique montage et utilisation • Инcтрукция по монтажу иобслуживанию • Instrucción de Montaje y Servicio • Manuale di Montaggio e Uso • Instrukcja Montażu i Obsługi
IOG 5338.40
2Rev. 2 December 2018
GB D F RUS
E IT PL
123456
78910
GB
D
F E IT
Valve shield
Valve body
O-ring seal
Mixer sleeve
Ø35mm progressive
mixer
Mixer nut (cap)
Insert
Fitting cover
Bolt (2 pieces)
Mixer installation cover
RUS PL
Ventilblende
Ventilkörper
O-Ring
Wassermischerhülse
Progressive Wassermischer
Ø35mm
Wassermischermutter
Einlage
Montageblende
Schraube (2 Stck.)
Montageblende des Mischers
Cache du robinet
Corps de la vanne
Joint de type o-ring
Douille du mitigeur
Progressive mitigeur Ø35mm
Écrou du mitigeur
Insertion
Ecran-cache
Vis (x 2)
Cache de fixation du
mélangeur
1
2
3
4
5
6
7
8
9
10
Tapa de la válvula
Cuerpo de la válvula
Empaquetadura de anillo
Casquillo del mezclador
Progresivo mezclador
Ø35mm
Tuerca del mezclador
Relleno
Protección de montaje
Tornillo (2 unidades)
Tapa de montaje para el
cartucho
Protezione della valvola
Corpo della valvola
Guarnizione tipo o-ring
Canna del miscelatore
progressivo miscelatore
Ø35mm
Dado del miscelatore
Inserto
Protezione di montaggio
Bullone (2 pez.)
Protezione di montaggio
del miscelatore
Защита клапана
Корпус клапана
Прокладка типа о-ринг
Втулка смесителя
Прогрессирующий смеситель
Ø35мм
Гайка смесителя
Вкладыш
Монтажная защита
Болт (2 шт.)
Монтажная защита
смесителя
Osłona zaworu
Korpus zaworu
Uszczelka typu o-ring
Tuleja mieszacza
Mieszacz progresywny
Ø35mm
Nakrętka mieszacza
Wkładka
Osłona montażowa
Śruba (2 szt.)
Osłona montażowa
mieszacza
12
3467
8910 11
12
5
1
2
Instructions for assembly and use • Montage- und Gebrauchsanweisung • Notice technique montage et utilisation • Инcтрукция по монтажу иобслуживанию • Instrucción de Montaje y Servicio • Manuale di Montaggio e Uso • Instrukcja Montażu i Obsługi
IOG 5338.40
3Rev. 2 December 2018
GB D F RUS
E IT PL
GB
D
F E IT
Valve shield
Valve body
O-ring seal
Mixer sleeve
Valve switch
Ø35mm progressive
mixer
Mixer nut (cap)
Insert
Fitting cover
Bolt (2 pieces)
Mixer installation cover
Plug
RUS PL
Ventilblende
Ventilkörper
O-Ring
Wassermischerhülse
Ventilschalthebel
Progressive Wassermischer
Ø35mm
Wassermischermutter
Einlage
Montageblende
Schraube (2 Stck.)
Montageblende des Mischers
Blindplatte
Cache du robinet
Corps de la vanne
Joint de type o-ring
Douille du mitigeur
Commutateur de la vanne
Progressive mitigeur Ø35mm
Écrou du mitigeur
Insertion
Ecran-cache
Vis (x 2)
Cache de fixation du
mélangeur
Obturateur
1
2
3
4
5
6
7
8
9
10
11
12
Tapa de la válvula
Cuerpo de la válvula
Empaquetadura de anillo
Casquillo del mezclador
Conmutador de la válvula
Progresivo mezclador
Ø35mm
Tuerca del mezclador
Relleno
Protección de montaje
Tornillo (2 unidades)
Tapa de montaje para el
cartucho
Obturador
Protezione della valvola
Corpo della valvola
Guarnizione tipo o-ring
Canna del miscelatore
Deviatore della valvola
Progressivo miscelatore
Ø35mm
Dado del miscelatore
Inserto
Protezione di montaggio
Bullone (2 pez.)
Protezione di montaggio
del miscelatore
Tappo
Защита клапана
Корпус клапана
Прокладка типа о-ринг
Втулка смесителя
Переключатель клапана
Прогрессирующий смеситель
Ø35мм
Гайка смесителя
Вкладыш
Монтажная защита
Болт (2 шт.)
Монтажная защита
смесителя
Заглушка
Osłona zaworu
Korpus zaworu
Uszczelka typu o-ring
Tuleja mieszacza
Przełącznik zaworu
Mieszacz progresywny
Ø35mm
Nakrętka mieszacza
Wkładka
Osłona montażowa
Śruba (2 szt.)
Osłona montażowa
mieszacza
Zaślepka
3.2
3.1
62
74
Ø 5.5
Instructions for assembly and use • Montage- und Gebrauchsanweisung • Notice technique montage et utilisation • Инcтрукция по монтажу иобслуживанию • Instrucción de Montaje y Servicio • Manuale di Montaggio e Uso • Instrukcja Montażu i Obsługi
IOG 5338.40
4Rev. 2 December 2018
GB D F RUS
E IT PL
3.4
3.3
35
Ø 5.5
72
62
60
130
Instructions for assembly and use • Montage- und Gebrauchsanweisung • Notice technique montage et utilisation • Инcтрукция по монтажу иобслуживанию • Instrucción de Montaje y Servicio • Manuale di Montaggio e Uso • Instrukcja Montażu i Obsługi
IOG 5338.40
5Rev. 2 December 2018
GB D F RUS
E IT PL
Important mounting advice • Wichtiger Montagehinweis • Instructions importantes de montage • Instrucción importante para el monta-
jeImportante indicazione per il montaggio • Важные указания по монтажу • Wskazówki montażowe
To ensure that a wall-mounted installation is totally water tight, press the supporting gasket into PCI
Lastogum or other sealing comound which is similar according to the manufacturer's details, spread
before on the wall.
GB
Um bei der Vorwandinstallation absolute Dichtheit zu garantieren, wird der Dichtflansch in den auf
die Wand vorher aufgetragenen PCILastogum oder einen nach Herstellerangaben vergleichbaren
Dichtstoff einged rückt.
D
Pour assurer une étanchéité hydraulique de l’installation montée contre le mur, insérer le joint de
support à la masse PCI Lastogum ou une autre masse d’étanchéité présentant des caractéristiques
comparables selon les renseigmenents du fabricant, en l’appliquant au préalable contre le mur.
F
Con el objetivo de garantizar la estanqueidad completa de la instalación hidráulica montada en la
pared, presionar a fuerza la junta de soporte contra la masa PCI Lastogum u otra masa de
estanqueidad de funcionamiento semejante según los datos del fabricante, distribuyéndola
anteriormente en la pared.
E
Per garantire la perfetta tenuta idraulica dell’installazione a parete, inserire la guarnizione di
appoggio nella membrana PCI Lastogum o in un’altra membrana impermeabile dalle simili
caratteristiche secondo i dati forniti dal produttore, applicata precedentemente sulla parete.
IT
Чтобы обеспечить полную гидрогерметичность устанавливаемой на стене системы, следует
погрузить опорную прокладку в PCI Lastogum либо иную герметизирующую массу подобного
действия согласно информации производителя, предварительно укладывая её на стене.
RUS
Aby zapewnić absolutną szczelność instalacji przyściennej, dociskamy zawarty w zestawie kołnierz
uszczelniający do nałożonego na ścianę tworzywa PCI Lastogum lub innego porównywalnego
tworzywa uszczelniającego.
PL
To ensure leak tightness also against sparkling water, please seal the gap between G-Box and the
tiles with silicone.
GB
Damit die Dichtigkeit auch Spritzwasser gegenüber gewährleistet ist, muss die Nahtstelle zwischen
G-Box und Fliesen mit Silikon ausgespritzt werden
D
Pour assurer encore une étanchéité par rapport à l’eau aérée, étancher le joint entre G-Box et les
carreaux avec un silicone.
F
Con el objetivo de garantizar también la estanqueidad frente al agua con
gas/aire, por favor hagan estanque también la grieta entre el GBox y las losas
usando la silicona para ello.
E
Al fine di garantire anche la tenuta all’acqua gassata / aerata sigillare la fessura tra il G-Box e le
piastrelle con il silicone.
IT
Чтобы обеспечить также герметичность по отношению к газо/воздухонасыщенной воде,
следует уплотнить с использованием силикона щель между G-Box и плитками.
RUS
W celu zapewnienia szczelności lukę pomiędzy G-box a płytkami wypełnić silikonem.
PL
3.5
3.6
Instructions for assembly and use • Montage- und Gebrauchsanweisung • Notice technique montage et utilisation • Инcтрукция по монтажу иобслуживанию • Instrucción de Montaje y Servicio • Manuale di Montaggio e Uso • Instrukcja Montażu i Obsługi
IOG 5338.40
6Rev. 2 December 2018
GB D F RUS
E IT PL
Coloque la válvula de ducha (R) con la protección de montaje (3) en el nicho de la pared.
La superficie de la pared de acabado (W) debería caber en el espacio determinado por las paredes de
la brida de la protección de montaje (MIN-MAX) dos posiciones extremas de la frente de la pared de
acabado.
The faucet is operated by turning the handle. Right rotation enables on-off function and
temperature control (no flow control).The temperature is increased by turning 90° from cold
water to full hot.
Die Armatur wird durch Drehen des Griffes betätigt. Das Drehen nach rechts ermöglicht die
Aktivierung und Deaktivierung der Temperaturkontrolle (ohne Mengenregulierung). Die Temperatur
erhöht sich durch eine 90°-Drehung von Kaltwasser bis zu komplett heißem Wasser.
Le robinet est actionné en tournant la poignée. L'action rotation droite permet l’ouverture-fermeture et
le contrôle de la température (pas de contrôle du débit) .La température est augmentée en tournant
de 90 ° de l'eau froide jusqu’à l’eau chaude et à sa température maximale.
El grifo se hace funcionar girando la maneta. La acción de rotación a la derecha le permite activar y
desactivar el control de temperatura (sin control de flujo). La temperatura se puede aumentar girando
90 ° desde agua fría a completamente caliente.
Il rubinetto viene azionato ruotando la maniglia. L'azione di rotazione a destra consente di attivare e
disattivare il controllo della temperatura (senza controllo del flusso). La temperatura può essere
aumentata ruotando di 90° dall'acqua fredda a quella completamente calda.
Кран включается поворотом ручки. Вращения направо позволяет включить и выключить
контроль температуры (без управления потоком). Температуру можно увеличить, повернув
ручку на 90 ° от холодной до горячей воды.
Otwarcie wypływu wody nastepuje przez obrót dźwigni. Otwarcie wypływu wody oraz regulacja
temperatury nastepuje przez obrót dźwigni w prawą strone (stały przepływ). Temperatura wody
wzrasta przez obrót o 90° od wody zimnej do goracej.
Instructions for assembly and use • Montage- und Gebrauchsanweisung • Notice technique montage et utilisation • Инcтрукция по монтажу иобслуживанию • Instrucción de Montaje y Servicio • Manuale di Montaggio e Uso • Instrukcja Montażu i Obsługi
IOG 5338.40
7Rev. 2 December 2018
GB D F RUS
E IT PL
Clean water guarantees that a mixer equipped with ceramic flow regulators will work correctly, i.e. the water should not contain any impurities such as sand, boiler scale etc. Because of this, the pipe system
should be equipped with sieve filters or, if there is no such possibility, with individual cut-off valves with filters designed for such units.
In the event of increased steering resistance, greater pressure should not be exerted on the handle, as this may cause damage to the flow regulator. In such a situation, the regulator should be removed and
cleaned of the dirt and impurities which have accumulated on it.
The seals should be maintained with vaseline or silicon oil.
Cleaning the outer coating:
dirt or stains on the external surfaces of the mixer resulting from scale deposits should be removed by washing the unit with soapy water only. Scale deposits should be dissolved with vinegar then the surface
rinsed with clean water and rubbed dry with a soft cloth,
under no circumstances should the surface of the mixer should be cleaned with coarse cloths or cleaning agents containing abrasive materials or acids,
plastic or lacquered parts must not be cleaned with chemicals containing alcohol, disinfectants or solvents.
MAINTENANCE






GB
WARTUNG
Reinigungder äußerenOberflächen:






D
Garant für das korrekte Funktionieren von Armaturen mit Keramik-Durchflussregler ist sauberes
Wasser, das heißt Wasser ohne Verunreinigungen, wie: Sand, Kesselstein, etc. Deswegen wird
empfohlen, die Wasserversorgung mit Gitterfiltern zu versehen, und sollte dies nicht möglich sein,
sollten im System Absperrventile montiert werden, die diese Filter enthalten.
Bei vergrößertem Einstellungswiderstand soll kein höherer Druck auf die Griffe ausgeübt werden, da
dies eine Beschädigung des Durchflussreglers verursachen kann. In diesem Falle sollte der Regler
ausgebaut werden, um die Verunreinigungen, die sich dort angesammelt haben, zu entfernen.
Die Dichtungen sollen mit Vaseline oder Silikonöl gewartet werden.
schmutz oder Flecken, welche durch Kalkablagerungen entstanden sind, können durch Abspülen mit
Seifenwasser entfernt werden, Kalk mit Essig lösen, danach die Oberfläche mit sauberem Wasser
abspülen und mit weichem Lappen trocknen,
die Armatur auf keinen Fall mit Scheuerlappen, -mittel oder säurehaltigen Reinigungsmitteln säubern,
für die Reinigung der Kunststoff- oder Lackteile keine Reinigungsmittel mit Alkohol, Desinfektions-
oder Lösungsmittel benutzen.
ENTRETIEN
La garantie du fonctionnement correct de la robinetterie équipée en régulateurs de flux céramiques est
l'eau propre, c'est-à-dire une eau qui ne contient pas de polluants tels que : sable, tartre, etc. Pour cette
raison, il est exigé d'équiper les installations d'eau en crépines et, en cas d'absence d'une telle
possibilité, en vannes d'arrêt individuelles avec un filtre destiné à la robinetterie.
En cas de résistance accrue de la commande, il est interdit d'exercer un plus grand appui sur le levier
car cela peut provoquer l'endommagement du régulateur de flux. Dans ce cas, il faut démonter le
régulateuret enleverles polluantsqui s'ysont rassemblés.
Entretenirles jointsd'étanchéité avecde lavaseline oude l'huilede moteur.
Nettoyagedes couchesexternes:
éliminer les salissures ou les taches apparues suite au dépôt du tartre sur les surfaces externes de la
robinetterie en la lavant uniquement avec de l'eau et du savon ; pour dissoudre le tartre, utiliser du
vinaigre,rincer ensuitela surfaceavec del'eau propreet essuyeravec unchiffon secet doux,
en aucun cas, il ne faut nettoyer la surface de la robinetterie avec des chiffons rugueux ou des produits
denettoyage contenantdes matériauxabrasifs etdes acides,
il est interdit d'utiliser, pour le nettoyage des parties réalisées en matière plastique et vernies, des
produitscontenant del'alcool, dessubstances dedésinfection oudes dissolvants.






F
MANUTENZIONE
Per la manutenzione delle guarnizioni usare vaselina o olio di silicone.
Pulizia dei rivestimenti esterni:






CONSERVACIÓN
En caso de una resistencia aumentada del mando no se puede ejercer una presión mayor en la palanca
porque esto puede provocar una avería del regulador de flujo. En este caso hay que desmontar el
reguladory quitartoda labasura agrupada.
Conservarlas guarniciones conla vaselinao elaceite desilicona.
Limpiezade lassuperficies exteriores:
de la batería hay que quitarlas lavando la batería sólo con el agua y el jabón, para diluir el sarro use
vinagre,después enjuaguela superficiecon elagua limpiay séquelacon untrapo suave,
en cualquier caso no se puede limpiar la superficie de la batería con trapos ásperos o medios de
limpiezaque contienenabrasivos yácidos,
para limpiar las partes hechas de materias plásticas y barnizadas no se puede usar medios que
contienen alcohol, sustancias desinfectante o disolventes.






EIT
La garanzia per un funzionamento corretto delle batterie fornite di regolatori ceramici di portata è
l'acqua pulita, ossia priva di elementi come sabbia, incrostazioni ecc. In relazione a quanto suddetto
si è tenuti a equipaggiare l'impianto idrico di filtri a ret, nel caso in cui fosse impossibile, di
individuali valvole di arresto con un filtro predisposto per la batteria.
Nel caso in cui la resistenza del comando aumenti,nonèammesso esercitare una pressione maggiore
sulla leva, in quanto si può danneggiare il regolatore della portata. In tal caso bisogna
smontare il regolatore ed eliminare le impurità in esso accumulate.
eliminare lo sporco o le macchie formatesi in conseguenza dalla sedimentazione del calcare sulle
superfici esterne della batteria, lavando la batteria esclusivamente con acqua e sapone. Per lo
scioglimento del calcare usare l'aceto, in seguito sciacquare la superficie con acqua pulita ed
asciugare perfettamente con un panno morbido ed asciutto,
non è ammessa in alcun caso la pulizia della superficie della batteria con panni ruvidi o detergenti
di pulizia che contengono sostanze abrasive e acidi,
per la pulizia delle parti eseguite di materie plastiche e verniciate non è ammesso l'uso di
detergenti, che contengono alcol, sostanze disinfettanti o solventi.
Para el buen funcionamiento de las baterías equipadas en reguladores cerámicos del flujo es
necesaria el agua limpia, que quiere decir el agua desprovista de elementos tales como la arena, la
piedra de caldera etc. Por eso es imprescindible equipar la instalación de cañerías en filtros de tela
metálica, y en caso de la falta de tales posibilidades, en válvulas particulares cortadoras con el filtro
adecuadas para la batería.
КОНСЕРВИРОВАНИЕ
Гарантией правильной работы смесителей, оснащенных керамическими регуляторами
протекания, является чистая вода, т.е. которая не содержит таких загрязнений, как : песок,
накипь, ит.п. Всвязи свышесказанным, требуется оснащение водопроводной системы
сетчатыми фильтрами, аесли это невозможно, индивидуальными запорными клапанами
сфильтром, предназначеннымидля смесителей.
Вслучае повышенного сопротивления при регулировании запрещается увеличивать силу
нажима на рычаг т.к. это может привести кповреждению регулятора протекания. Вэтой
ситуации необходимодемонтировать регуляториочистить его отзагрязнений.
Уплотненияконсервировать вазелиномили силиконовым маслом.
Очистка наружных поверхностей:
загрязнение или пятна, возникшие врезультате оседания камня на внешних поверхностях
смесителя, смывать исключительно водой смылом, для растворения камня применять уксус,
затемпромыть поверхностьчистой водойидосуха вытеретьмягкой тряпочкой,
ни вкаком случае нельзя чистить поверхность смесителя шероховатыми тряпочками или
чистящими средствамиссодержанием абразивных компонентов икислот,
для чистки элементов, выполненных из пластмассы или лакированных, запрещается
использовать средства,содержащие алкоголь,дезинфицирующие средства илирастворители.






RUS
Gwarancją prawidłowegodziałania baterii wyposażonych w ceramiczne regulatory przepływu jest
czysta woda, to znaczy nie zawierająca takich zanieczyszczeń, jak: piasek, kamień kotłowy itp. W
związku z powyższym wymagane jest wyposażenie instalacji wodociągowej w filtry siatkowe, a w
przypadku braku takich możliwości w indywidualne zawory odcinające z filtrem przeznaczone do
baterii.
W przypadku zwiększonego oporu sterowania nie wolno wywierać większego nacisku na dźwignię,
gdyż może to spowodowaćuszkodzenie regulatora przepływu. W takiej sytuacji należywymontować
regulatori usunąćzanieczyszczenia w nim zgromadzone.
Uszczelkikonserwowaćwazelinąlub olejemsilikonowym.
:
brud lub plamy, powstałe w wyniku osadzania siękamienia na powierzchniach zewnętrznych baterii,
usuwać przemywając baterię wyłącznie wodązmydłem, do rozpuszczania kamienia użyć octu,
następnieprzepłukaćpowierzchnięczystąwodąi wytrzećdosucha miękkąszmatką,
wżadnym przypadku nie wolno czyścić powierzchni baterii chropowatymi ściereczkami lub środkami
czyszczącymizawierającymimateriałyściernei kwasy,
do czyszczenia części wykonanych z tworzywa sztucznego i lakierowanych nie wolno używać środków
zawierającychalkohol, substancje dezynfekujące lubrozpuszczalniki.
KONSERWACJA
Czyszczeniepow ok zewn trznychł ę
PL






GUARANTEE:
The guarantee conditions are contained in a separate sheet.
IN THE EVENT OF A PROBLEM:
e-mail: [email protected]
GARANTIE:
Les conditions de garantie se trouvent dans une feuille séparée.
EN CAS DE PROBLEME:
e-mail: [email protected]
GARANTÍA:
Las condiciones de la garant
en otra hoja
ía se encuentran
EN CASO DE PROBLEMAS:
e-mail: [email protected]
GARANTIE:
Die Garantiebedingungen sind auf einem separaten Blatt beigefügt.
SOLLTEN PROBLEME AUFTRETEN wenden Sie sich an uns
e-mail: [email protected]
GARANZIA:
Le condizioni di garanzia sono indicate sul foglio
separato.
NEL CASO IN CUI SI VERIFICHINO PROBLEMI:
e-mail: [email protected]
ГАРАНТИЯ:
Гарантийные условия на отдельном листе.
ЕСЛИ ВОЗНИКНЕТ ПРОБЛЕМА:
e-mail: [email protected]
GB D F
RUSE IT GWARANCJA:
Warunki gwarancji są zawarte na osobnej kartce.
GDY POJAWI SIĘPROBLEM:
e-mail: [email protected]
PL
la suciedad o las manchas que se produjeron a causa de depositarel sarro en las superficies exteriores

This manual suits for next models

3

Other Graff Bathroom Fixture manuals

Graff E-6111N-C17B Operator's manual

Graff

Graff E-6111N-C17B Operator's manual

Graff IMMERSION 2310-C9 User manual

Graff

Graff IMMERSION 2310-C9 User manual

Graff TEP92 User manual

Graff

Graff TEP92 User manual

Graff Aqua-Sense Operator's manual

Graff

Graff Aqua-Sense Operator's manual

Graff E-6830-LM47B 5595400 Operator's manual

Graff

Graff E-6830-LM47B 5595400 Operator's manual

Graff E-11462-C19L Operator's manual

Graff

Graff E-11462-C19L Operator's manual

Graff Cameo E-11905-LM69 User manual

Graff

Graff Cameo E-11905-LM69 User manual

Graff GX-6170-LM3F User manual

Graff

Graff GX-6170-LM3F User manual

Graff 2335000 Operator's manual

Graff

Graff 2335000 Operator's manual

Graff C14U-WS Series User manual

Graff

Graff C14U-WS Series User manual

Graff E-11559 L1 Series Operator's manual

Graff

Graff E-11559 L1 Series Operator's manual

Graff ME25 6101-LM41 User manual

Graff

Graff ME25 6101-LM41 User manual

Graff LMB40-BS User manual

Graff

Graff LMB40-BS User manual

Graff E-11551 L1 Series Operator's manual

Graff

Graff E-11551 L1 Series Operator's manual

Graff JAVA E-7070-LM54W Operator's manual

Graff

Graff JAVA E-7070-LM54W Operator's manual

Graff Canterbury 3800-C2 User manual

Graff

Graff Canterbury 3800-C2 User manual

Graff SADE G-1835-LM36W User manual

Graff

Graff SADE G-1835-LM36W User manual

Graff E-6910-C16B-PC Operator's manual

Graff

Graff E-6910-C16B-PC Operator's manual

Graff AMETIS E-8755 Operator's manual

Graff

Graff AMETIS E-8755 Operator's manual

Graff Immersion 2357-LM31N-T User manual

Graff

Graff Immersion 2357-LM31N-T User manual

Graff ONDA E-7080-LM61N-T Operator's manual

Graff

Graff ONDA E-7080-LM61N-T Operator's manual

Graff PHASE G-6610-LM45B-BNI User manual

Graff

Graff PHASE G-6610-LM45B-BNI User manual

Graff ME 25 E-6153-C17B Operator's manual

Graff

Graff ME 25 E-6153-C17B Operator's manual

Graff Ametis G-6430-LM43PC User manual

Graff

Graff Ametis G-6430-LM43PC User manual

Popular Bathroom Fixture manuals by other brands

VADO AXCES IRLO AX-IRO-137-CP Installation & user manual

VADO

VADO AXCES IRLO AX-IRO-137-CP Installation & user manual

TESA POWER.KIT BK 43-2 installation guide

TESA

TESA POWER.KIT BK 43-2 installation guide

Gasmate HWS0012 instructions

Gasmate

Gasmate HWS0012 instructions

Santec LYRA ESTATE Series Instruction booklet

Santec

Santec LYRA ESTATE Series Instruction booklet

Bossini ACCIAIO INOX Instructions for installation, operation and maintenance

Bossini

Bossini ACCIAIO INOX Instructions for installation, operation and maintenance

Zenna Home 2128BM Assembly instructions

Zenna Home

Zenna Home 2128BM Assembly instructions

Allen + Roth Davidson-60GP-CH installation manual

Allen + Roth

Allen + Roth Davidson-60GP-CH installation manual

Zenna Home 2928SS Assembly instructions

Zenna Home

Zenna Home 2928SS Assembly instructions

Hans Grohe Focus manual

Hans Grohe

Hans Grohe Focus manual

Samuel Heath V619 Product data sheet

Samuel Heath

Samuel Heath V619 Product data sheet

Spectrum Brands Pfister Rhen LG49-RH4 Quick installation guide

Spectrum Brands

Spectrum Brands Pfister Rhen LG49-RH4 Quick installation guide

Omnires PM7444BL Installation and Maintenance

Omnires

Omnires PM7444BL Installation and Maintenance

fine fixtures AC2HKD installation manual

fine fixtures

fine fixtures AC2HKD installation manual

Kohler STATEMENT K-26291T-CP installation instructions

Kohler

Kohler STATEMENT K-26291T-CP installation instructions

Oxygenics PowerMax Easy installation instructions

Oxygenics

Oxygenics PowerMax Easy installation instructions

Kohler K-1278 installation guide

Kohler

Kohler K-1278 installation guide

Gessi RILIEVO 59100 manual

Gessi

Gessi RILIEVO 59100 manual

Glacier bay HD67513W-6901 Installation and care guide

Glacier bay

Glacier bay HD67513W-6901 Installation and care guide

manuals.online logo
manuals.online logoBrands
  • About & Mission
  • Contact us
  • Privacy Policy
  • Terms and Conditions

Copyright 2025 Manuals.Online. All Rights Reserved.