manuals.online logo
Brands
  1. Home
  2. •
  3. Brands
  4. •
  5. Grandio
  6. •
  7. Greenhouse Kit
  8. •
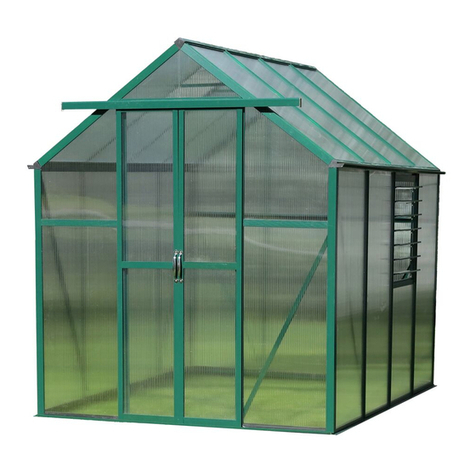
  9. Grandio Summit Series User manual

Grandio Summit Series User manual

1
BASE INSTALLATION MANUAL 1
SUMMIT GREENHOUSE
BASE KIT ASSEMBLY AND INSTALLATION MANUAL
• PREPARING FOR INSTALLATION & WARNINGS
• CHOOSING YOUR SURFACE
• BASE KIT ASSEMBLY INSTRUCTIONS
• SECURING BASE KIT TO SURFACE FOR ALL SIZES
• WARRANTY
GREENHOU S E S
GRANDIO®
© 2018 Grandio Greenhouses, Backyard Living Source Inc. All rights reserved
March 21, 2018 Summit Greenhouse Dimensions, Base Kit Assembly and Installation Manual 1
2
GREENHOU S E S
GRANDIO®
GRANDIO SUMMIT BASE KIT DIMENSIONS,
INSTALLATION & ASSEMBLY INSTRUCTIONS GUIDE
INTRODUCTION: PREPARING FOR ASSEMBLY
CHAPTER 1: 12X8 BASE KIT
CHAPTER 2: 12X12 BASE KIT
CHAPTER 3: 12X16 BASE KIT
CHAPTER 4: 12X20 BASE KIT
CHAPTER 5: 12X24 BASE KIT
CHAPTER 6: 12X28 BASE KIT
CHAPTER 7: 12X32 BASE KIT
WARRANTY
INSTALLATION MANUAL 1
TABLE OF CONTENTS
Introduction...........................................................
Safety Instructions................................................
Box Configurations...............................................
Assembley Preplanning and Placement............
BASE KIT PARTS LISTS
(quick reference for base kit assemblies)......
CHAPTER 1: 12x8 Greenhouse Dimensions &
Base Kit Installation Instructions...................
CHAPTER 2: 12x12 Greenhouse Dimensions &
Base Kit Installation Instructions.................
CHAPTER 3: 12x16 Greenhouse Dimensions &
Base Kit Installation Instructions.................
CHAPTER 4: 12x20 Greenhouse Dimensions &
Base Kit Installation Instructions.................
CHAPTER 5: 12x24 Greenhouse Dimensions &
Base Kit Installation Instructions.................
CHAPTER 6: 12x28 Greenhouse Dimensions &
Base Kit Installation Instructions.................
CHAPTER 6: 12x32 Greenhouse Dimensions &
Base Kit Installation Instructions.................
WARRANTY........................................................
3
4
5
6
7-8
9-18
19-28
29-38
39-48
49-58
59-68
69-78
79
3
GREENHOU S E S
GRANDIO®
Before you begin, take time to complete this check list.
Take inventory of all parts using the parts list in MANUAL 3.
Be cautious where you place the polycarbonate panels as they will burn grass or
plants if left on top of them in direct sunlight. Note that clear film side of panels
should always face the sun and white film side faces inside greenhouse. Panels may
scratch easily so be careful what you clean them with.
Plan out when and where you are going to place the greenhouse, we recommend
that you place it in an area that will receive direct sunlight and will be protected from
the wind as much as possible
It will take at least (2) people to put the greenhouse together, if assembling any
greenhouse longer than 8x16 you will need at least (3) people.
Before you build, make sure you are allowed to build it! Consult all building codes,
as well as City or Municipality ordinances and HOA’s, as you may need a permit or
documentation before you build.
Contact your insurance company to make sure your Grandio Greenhouse will be
covered on your policy.
Call your local utilities companies before digging.
Do not attempt to begin construction on a windy day, plan to complete assembly in
one day. Damage caused by incomplete assembly is not covered by warranty.
Your greenhouse should be built on a flat, level surface allowing for drainage.
Read all 3 Manuals to get familiar with all pieces and parts prior to beginning assem-
bly. Follow the steps outlined in the order presented!
IMPORTANT! PLEASE READ BEFORE BEGINNING ASSEMBLY
Dear Valued Customer,
We would like to congratulate you on your new
Grandio Greenhouse purchase. We are confi-
dent that you have made the right decision in
choosing Grandio. Our greenhouses are made
with high quality aluminum and polycarbonate
that will last for many garden seasons to come.
Please take the time to carefully read this
instruction manual for an easier and more
enjoyable assembly experience.
Cheers!
Grandio Greenhouses
Save this owner’s manual for future
reference and if you need our help.
CONTACT OUR CUSTOMER SERVICE
DEPARTMENT at:
1-866-448-8231
Hours: 8:30a.m.-5:00p.m. Monday through
Friday (Mountain Time)
Backyard Living Source
9543 W. Emerald St., Suite 101
Boise, ID 83704
www.grandiogreenhouses.com
4
BASE INSTALLATION MANUAL 1
SUMMIT GREENHOUSE
BASE KIT ASSEMBLY AND INSTALLATION MANUAL
• PREPARING FOR INSTALLATION & WARNINGS
• CHOOSING YOUR SURFACE
• BASE KIT ASSEMBLY INSTRUCTIONS
• SECURING BASE KIT TO SURFACE FOR ALL SIZES
• WARRANTY
IMPORTANT! SAFETY INSTRUCTIONS
FAILURE TO FOLLOW THESE WARNINGS MAY RESULT IN SERIOUS INJURY OR
PROPERTY DAMAGE AND WILL VOID WARRANTY.
To ensure safety, do not attempt to assemble this product without following the instructions carefully. Check entire
box and inside all packing material for parts and/or additional instruction materials. Before beginning assembly,
locate and read the instruction Manuals 1, 2, and 3. Complete assembly and proper usage are essential to reduce
the risk of accident or injury when using your Grandio Greenhouse.
CAUTION: Do not leave polycarbonate panels laying on grass, in direct sun light, or extreme heat. Keep in a cool dry place until
they are to be installed!! (May cause burning to plants or grass if left directly on top of them, also may damage panels due to the
protective film adhering to panels.) Panels may scratch easily.
* DO NOT USE SOLVENT BASED CLEANERS ON POLYCARBONATE PANELS.
• Each of the polycarbonate panels have a clear film side that should always face the sun, and a white film side which faces inside.
The clear side has a UV coating and we recommend marking a small “x” on a corner of each panel to determine which side has the
UV Coating as you cannot visually determine with your eye in the case of future disassembly.
• Due to shipping, the grooves of some of the aluminum profiles may be too small to insert into the polycarbonate sheet, you may
carefully use a screwdriver to pry the framework open so the polycarbonate sheet can be inserted smoothly.
• Do not use or store hot objects such as grills, blow torches, welding equipment, etc. in or near your greenhouse.
• Do not allow children or pets to play in greenhouse or in the set up area until assembly is complete.
• If using a ladder during assembly, use extreme caution.
• A clean level surface is essential to maintaining the solid integrity of the structure. Install the base correctly as described in this
manual for your surface. The greenhouse must be anchored down to a firm and level base. If not properly installed warranty will
be void.
NEEDED FOR ASSEMBLY
• Tape Measure • 2-4 Ladders For Larger Sizes • Safety Glasses
• Level • Work Gloves • Drill
• Carpenter Square • Permanent Marker • Folding Utility Table
• At Least 2 Adults • Masking Tape
GRANDIO
TIP When you see this icon
pay special attention to
the helpful tips we have provided that
will make installation more efficient.
5
Introduction...........................................................
Safety Instructions................................................
Box Configurations...............................................
Assembley Preplanning and Placement............
BASE KIT PARTS LISTS
(quick reference for base kit assemblies)......
CHAPTER 1: 12x8 Greenhouse Dimensions &
Base Kit Installation Instructions...................
CHAPTER 2: 12x12 Greenhouse Dimensions &
Base Kit Installation Instructions.................
CHAPTER 3: 12x16 Greenhouse Dimensions &
Base Kit Installation Instructions.................
CHAPTER 4: 12x20 Greenhouse Dimensions &
Base Kit Installation Instructions.................
CHAPTER 5: 12x24 Greenhouse Dimensions &
Base Kit Installation Instructions.................
CHAPTER 6: 12x28 Greenhouse Dimensions &
Base Kit Installation Instructions.................
CHAPTER 6: 12x32 Greenhouse Dimensions &
Base Kit Installation Instructions.................
WARRANTY........................................................
3
4
5
6
7-8
9-18
19-28
29-38
39-48
49-58
59-68
69-78
79
GRA-SUM-12A-1 Aluminum Extrusions Box 1
GRA-SUM-12A-2 Aluminum Extrusions Box 2
GRA-SUM-12P-2
Polycarbonate Panels Box 2
GRA-SUM-12P-1
Polycarbonate Panels Box 1
GRANDIO SUMMIT 12X8
GRA-SUM-4X
4’ Extension Aluminum Extrusions
4’ Extension Polycarbonate Panels
GRANDIO SUMMIT 4’ X
GRA-SUM-8XA 8’ Extension Aluminum Extrusions
GRA-SUM-8XP
8’ Extension Polycarbonate Panels
GRANDIO SUMMIT 8’ X
GRA-BASE-S4X 4’ Steel Base Kit Extension
GRANDIO STEEL BASE KIT 4’ X
GRA-BASE-S8X 8’ Steel Base Kit Extension
GRANDIO STEEL BASE KIT 8’ X
GRA-BASE-S128 12x8 Steel Base Kit
GRANDIO STEEL BASE KIT 12X8
Summit 12x8 1 0 0
Summit 12x12 1 1 0
Summit 12x16 1 0 1
Summit 12x20 1 1 1
Summit 12x24 1 0 2
Summit 12x28 1 1 2
Summit 12x32 1 0 3
SUMMIT BOX CONFIGURATION LAYOUT
We recommend laying all of your boxes out as shown on the graphic below for an organized assembly.
Locate your greenhouse size and situate your boxes near your assembly site as shown in the order listed below.
Inventory the parts and lay out on a tarp as to not lose items in the grass or dirt near your building site, a folding table is very helpful as well.
*See the reference diagrams for each greenhouse size in MANUAL 1. For more information about how the parts will go together and what makes
up each section for the assembly see MANUAL 2. See MANUAL 3 for detailed parts lists. See videos on our website at www.GrandioGreenhous-
es.com.
* If building a back door you will follow the instructions in the manual included with the Back Door Kit box, the parts will be in box GRA-SUM-BD.
MODEL 12’X8’ SUMMIT GREENHOUSE KIT
& OPTIONAL STEEL BASE KIT
SUMMIT GREENHOUSE 4’ EXTENSION KIT
& OPTIONAL 4’ STEEL BASE EXTENSION KIT
SUMMIT GREENHOUSE 8’ EXTENSION KIT
& OPTIONAL 8’ STEEL BASE EXTENSION KIT
6
PRE-PLANNING YOUR GREENHOUSE PLACEMENT
Pre-Plan The Placement Of Your Structure: The best placement depends on the features of your property, it is suggested in
most scenarios to have your greenhouse face South on its broadest side and to have the door face East or West depending on
typical wind directions in your area. Do not worry if your orientation will not allow for the suggested placement, as a greenhouse
that is facing North is better than having no greenhouse at all.
Avoid building your greenhouse at the base of a slope as these are often frost pockets where cold air collects, this will not be
good for your greenhouse in keeping the temperature up inside.
Allow enough room to get a wheel barrow in and around your structure. Be sure you have adequate room around the exterior
sides and rear of your greenhouse for maintenance of your property and the structure.
Drainage: Be sure the orientation will allow for proper drainage in and around your greenhouse.
Sunlight and Wind Protection: It is recommended that you place your greenhouse in an area of your property that receives the
most sunlight but is also somewhat protected by trees, fencing or your home for wind protection. The more direct sunlight will
keep the temperatures up during early spring and late fall. Typically the goal is to get at least 6 hours of sunlight daily throughout
the year.
Extreme Wind Conditions: If you live in a windy location there is no way to build a 100% storm safe greenhouse, but there are a
number of things you can do to minimize the chance of damage. Ensure that the base is level and square, be sure all panels are
secured in place and that all aluminum extrusions are tight. The main problem is usually that wind gets into the greenhouse and
the pressure pushes a panel out and then the force of the wind on the interior causes more damage. It is best if you are expecting
an extreme weather event that you disable any auto roof vents and make sure all doors and windows are closed and locked shut.
Also you may need to build a wind break for extreme condition areas where wind is constant and extreme.
Utilities: It is ideal for your greenhouse to have water, electricity and even gas plumbed into place before construction. This will
make watering plants and keeping temperatures and air circulation to the max efficiency.
You will need to choose an anchoring system prior to installation, see our website for options:
www.GrandioGreenhouses.com or call 1-866-448-8231
For Cement Base Installation: You will use Tapcon® style screws to secure your Flat Mount Base Kit to the concrete surface.
For Deck Base Installation: You will use wood screws to secure your Flat Mount Base Kit to the wood surface.
For Earth Installation: You will use the Grandio Summit Steel Base Kit with the BA-A1 / L-BOLT anchoring system. With this
method you will dig holes, place the L-Bolts into the ground and secure into place with quickrete.
* YOUR CHOSEN ANCHOR KIT OPTION SHOULD BE FOUND IN YOUR WELCOME KIT OR ACCESSORY BOX.
7
FLAT MOUNT BASE PARTS LIST
SUMMIT FLAT MOUNT BASE KIT PARTS LIST (FOR CONCRETE OR WOOD SURFACE INSTALLATIONS)
(FOUND IN THE 12X8 ALUMINUM PARTS BOXES)
70 1/2 in / 1791 mm
FM FRONT WALL LEFT
70 1/2 in / 1791 mm
FM FRONT WALL RIGHT
94 5/16 in / 2396 mm
SIDE/BACK FM 8’ PIECE
46 3/4 in / 1187 mm
FM 4’ EXTENSION LEFT OR BACK
46 3/4 in / 1187 mm
FM 4’ EXTENSION RIGHT
93 7/16 in / 2374 mm
FM 8’ EXTENSION LEFT
93 7/16 in / 2374 mm
FM 8’ EXTENSION RIGHT
11 3/16” / 300 mm
609 CONNECTOR
ALLEN FLANGED SCREW 6*8
FM BASE CORNER GUARD
100MM CORNER PIECE
FOR ALIGNMENT
BOLT AND NUT COMBO
FOR 1C CORNER PIECE
GRAPHIC PART NAME SIZE/LOCATION 12X8 QTY 4X QTY 8X QTY
12A
12B
12C
12D
12E
12F
12G
14 / AFS-68
C14 / C15
1C
AFS-612 / SQ-NUT-6
1
1
3
1
0
0
0
4 / 17
2 / 2
4
16 / 16
0
0
0
1
1
0
0
4 / 17
0
0
0
0
0
0
0
0
1
1
4 / 17
0
0
0
The 12D, and 12E
may be mislabeled.
Please conrm your
extrusions t correctly.
8
STEEL BASE PARTS LIST
GRAPHIC PART NAME PART NAME SIZE/LOCATION 12X8 QTY 4X QTY 8X QTY
23 5/8” / 1187mm
4’ EXTENSION
BASE PIECE
72” / 1829 mm
6’ FRONT RIGHT
BASE KIT PIECE
72” / 1829 mm
6’ FRONT LEFT
BASE KIT PIECE
94 1/4” / 2394 mm
8’ BASE KIT PIECE
93 7/16” / 2374 mm
8’ EXTENSION
BASE PIECE
CARRIAGE BOLT 6*10
FLANGED NUT
MID BRACKET FOR BASE
5 7/16 in /138 mm
END BRACKET FOR BASE
3 15/16 in /100 mm
12” EARTH ANCHOR
1/2 x 3/4
COMBOS FOR ATTACHING
FLAT MOUNT TO THE STEEL BASE
0
2
2
2
0
52 / 52
2
4
12
0
42 / 42
BA-4X-R
BA-4X-L
BA-6-RIGHT
BA-6-LEFT
BA-8
BA-8X-R
BA-8X-L
CB-610 / ML01
BA-MID-BR
BA-CORNER-BR
BA-A1
BA-S10
ABS-625 / ML01
SUMMIT STEEL BASE KIT PARTS LIST (FOR EARTH INSTALLATIONS)
1/1
0
0
0
0
20 / 20
2
0
2
2
8 / 8
0
0
0
0
1/1
20 / 20
2
0
4
2
16 / 16
front view
front view
R
L
R
L
R
L
9
GRANDIO SUMMIT 12x8 DIMENSIONS
111”
2819 mm
144” / 3658 mm
41 1/2” / 1041 mm
97 1/4” / 2471 mm
144” / 3658 mm
41 1/2” / 1041 mm
97 1/4” / 2471 mm
3 1/4” / 82.6 mm
114 1/4”
2902 mm
89 3/4”
2279mm
86 1/2”
2197 mm
12x8 Grandio Summit with Flat Mount Base Kit
* The Flat Mount Base is included in each Summit Greenhouse Kit
and is designed to be installed on a wooden deck or concrete slab.
Exterior Dimensions: 144” W x 97.25” L
Interior Dimensions: 141.25” W x 94.25” L
Door Dimensions: 41.5” W x 85.25” H
Bottom Side of Gutter Height: 57”H
Peak Roof Height: 111” H
12x8 Grandio Summit with Steel Base Kit Dimensions
*The Steel Base Kit is sold separately from the Summit Greenhouse Kit
and is designed to be installed directly into the Earth using the
included L-Bolts which must be secured into Quikrete® or a similar
concrete material.
The Flat Mount Base Kit will attach on top of the Steel Base Kit.
Exterior Dimensions: 144” W x 97.25” L
Interior Dimensions: 141.25” W x 94.25” L
Door Dimensions: 41.5” W x 85.25” H
Bottom Side of Gutter Height: 60.5” H
Peak Roof Height: 114.25” H
57”
1447 mm
60 1/2”
1536 mm
10
144” / 3658 mm
97 1/4” / 2471 mm
12x8
Flat Mount Base Kit Assembled Dimensions
LEFT
BACK RIGHT
FRONT
* The Flat Mount Base is included in each Summit Greenhouse Kit. The Flat Mount Base is designed to be installed on a wooden deck or concrete
slab type surface. If you are using a Steel Base Kit for installing into the earth you will follow these instructions to assemble the Flat Mount
section, but will then attach the Flat Mount Kit onto your Steel Base Kit.
The Flat Mount Kit will be assembled as shown in this section, then secured to the surface of your choice using the proper anchoring hardware.
You will drill all holes into your surface for the entire base kit and temporarily affix into place, you will need to remove the front and back
sections in order to build your front and back walls as will be shown in the Summit Greenhouse Assembly Manual 2.
GRANDIO SUMMIT 12x8 FLAT MOUNT BASE ASSEMBLY
FRONT SECTION WILL BE TEMPORARILY ATTACHED
BACK SECTION WILL BE TEMPORARILY ATTACHED
12X8 FLAT MOUNT BASE
11
12x8
Flat Mount Base Kit Parts Laid Out
C14
12C
12D
14
12C
C14
C15
1C
1C
12C
12B
14
C15
12A
1C
1C
LEFT
BACK
RIGHT
FRONT
GRANDIO SUMMIT 12x8 FLAT MOUNT BASE ASSEMBLY
1. Lay out all of the parts exactly as shown in the diagram below. Confirm that the front is where you want your doors to be located. Be sure the
pieces are laid out exactly like the diagram, note that notches will have a 23” gap between each other, no notches should be right next to each
other except at the corners. See , , and to confirm you have the correct orientation prior to assembly.
NOTE: WRONG ORIENTATION!!
14
NOTE: WRONG ORIENTATION!!
INTERIOR CORNER VIEW
OF THE FLAT MOUNT BASE KIT
NOTE: CORRECT ORIENTATION
14
NOTE: CORRECT ORIENTATION
BACK INTERIOR VIEW
OF CONNECTIONS
NOTCH
12X8 FLAT MOUNT BASE
12
2. Connect the FRONT 12A and 12B pieces using the 14’s and the AFS-68 screws. See diagram .
3. Connect the BACK section 12C and 12D using the 14’s and the AFS-68 screws. See diagram .
4 Assemble the base kit as shown using the ABS-610 screws with the SQ-NUT-6 nuts at the 1C corners. See diagrams and .
12B
14
12A
FRONT EXTERIOR VIEW
CONNECTION OF 14 PARTS WITH SCREWS
AFS-68
FRONT
12A 12B
GRANDIO SUMMIT 12x8 FLAT MOUNT BASE ASSEMBLY
BACK INTERIOR VIEW
12C
12D
14
LEFT
RIGHT
INTERIOR CORNER VIEW
OF THE FLAT MOUNT BASE KIT
12D 12E
1C
ABS-610
SQ-NUT-6
BIRDS EYE CORNER VIEW
OF THE FLAT MOUNT BASE KIT
12D 12E
C15
1C
ABS-610
SQ-NUT-6
12X8 FLAT MOUNT BASE
13
LEFT
BACK
RIGHT
FRONT
12x8
Flat Mount Base Kit Assembled
GRANDIO SUMMIT 12x8 FLAT MOUNT BASE INSTALLATION
1. Square and Level your Flat Mount Base Kit to your Concrete or Wooden surface or pad.
2. Measure corner to corner and confirm square. Use the appropriate anchoring fastener that was chosen at the time of purchase.
Reference the instructions that come with your anchoring kit. Drill the holes into your surface, blow out the debris, then install the screws. Keep
the Left side (12C) and the Right side (12C ) in place with the anchors installed and tightened into place.
3. You will need to remove the Front and Back Flat Mount Base sections in order to build the Front and Back walls, as the base pieces will be
used for the bottom edge of the Front and Back walls. You will re-attach the base pieces into place once the Front and Back walls are built.
12X8 FLAT MOUNT BASE
14
LEFT
BACK
RIGHT
FRONT
GRANDIO SUMMIT 12x8 STEEL EARTH BASE KIT DIMENSIONS
12x8 Grandio Summit with Steel Base Kit Dimensions
*The Steel Base Kit is sold separately from the Summit Greenhouse Kit and is to be installed directly into the Earth using the included L-Bolts
which must be secured with Quikrete® or a similar concrete material. NOTE: concrete is not included, purchase at a local hardware store.
The side sections of the Flat Mount Base Kit will attach on top of the Steel Base Kit prior to earth install, the front and back walls must be
assembled using the front and back Flat Mount Base pieces as will be instructed in Summit Manual 2.
12C
12C
FRONT FLAT MOUNT SECTION WILL BE SET ASIDE FOR LATER SECTIONS
BACK FLAT MOUNT SECTION WILL BE SET ASIDE FOR LATER SECTIONS
144” / 3658 mm
97 1/4” / 2471 mm
FLAT MOUNT BASE RIGHT SIDE
FLAT MOUNT BASE LEFT SIDE
12x8
Steel Base Kit Assembled
12X8 STEEL EARTH BASE
15
12x8
Steel Earth Base Kit Parts Laid Out
BA-CORNER-BR
BA-CORNER-BR
BA-6-RIGHT
BA-6-LEFT
BA-MID-BR
BA-6-RIGHT
BA-6-LEFT
BA-MID-BR
BA-8
BA-8
LEFT
BACK
RIGHT
FRONT
1. Lay out all the parts for your Steel Base Kit exactly as shown in the diagram below, failure to assemble exactly as shown will cause problems
later in assembly.
2. Confirm that the small oval holes are all on the top side of the base kit, and the large round holes for the BA-A1 and BA-S10 bolts are facing
downward for correct assembly. See the small diagrams on the next page for correct installation and orientation.
GRANDIO SUMMIT 12x8 STEEL BASE KIT ASSEMBLY
12X8 STEEL EARTH BASE
16
CB-610
ML01
CB-610
ML01
CB-610
ML01
CB-610
ML01
BA-S10
BA-A1 BA-A1
BA-S10
CB-610
ML01
CB-610
ML01
CB-610
ML01
BA-A1
BA-S10
CB-610
ML01
BA-A1 BA-A1 BA-A1
CB-610
ML01
CB-610
ML01
CB-610
ML01 CB-610
ML01
MIDDLE INSIDE VIEW MIDDLE INSIDE VIEWMIDDLE OUTSIDE VIEWCORNER INSIDE VIEW CORNER INSIDE VIEWCORNER OUTSIDE VIEW
CB-610
ML01 CB-610
ML01
3. Use the CB-610 bolts with the ML01 nuts to assemble the steel base kit as shown in diagrams , , , , , and , at the
bottom of this page. Note the CB-610’s will be on the outside and the ML01 nut will be on the inside.
4. Install the BA-A1 and BA-S10 bolts into the large circular holes on the bottom side of the base kit, as is shown in the diagrams below. You may
choose to place the BA-A1 and BA-S10 in opposite holes of what are shown in diagram , , and .
GRANDIO SUMMIT 12x8 STEEL BASE KIT ASSEMBLY
12X8 STEEL EARTH BASE
17
GRANDIO SUMMIT 12x8 ATTACHING THE FLAT MOUNT BASE
TO THE STEEL BASE KIT FOR EARTH INSTALLATION
1. Attach the side Flat Mount Base pieces to the Steel Base Kit as shown below using the ABS-625 screws with the ML01 nuts. See , , and .
Tighten the hardware using the (W16) 10 mm Wrench and (W17) Allen Driver.
* Set aside the Front and Back sections of the Flat Mount Base, these sections will be required to assemble the front and back walls in Manual 2.
ABS-625
ABS-625
ML01
ABS-625
FRONT
LEFT FRONT
CORNER VIEW
LEFT SIDE VIEWSCREW AND NUT
12x8
Steel Base Kit Assembled
LEFT
BACK RIGHT
FRONT
12C
FLAT MOUNT BASE RIGHT SIDE
FLAT MOUNT BASE LEFT SIDE
12C
12X8 STEEL EARTH BASE
18
BA-A1 * Must be inserted
into the ground, and secured
with concrete.
12x8
Steel Base Kit Assembled
LEFT
BACK RIGHT
FRONT
BA-A1
BA-A1 BA-A1
BA-A1
BA-A1
BA-A1
BA-A1
BA-A1
BA-A1
BA-A1
BA-A1
BA-A1
GRANDIO 12x8 SUMMIT STEEL BASE KIT EARTH INSTALLATION
**BASE MUST BE LEVEL & SQUARE,
FOUNDATION MUST BE PROPERLY ANCHORED PRIOR TO GREENHOUSE ASSEMBLY
WARNING: BASE KIT MUST BE LEVEL AND SQUARE, AN UNLEVEL BASE WILL AFFECT THE INTEGRITY OF YOUR GREENHOUSE.
1. Align the Steel Base Kit to your desired location. Measure corner to corner to confirm square, check that all sides are level, then mark the
ground where the BA-A1 L-Bolts will reside with a marking paint. You will then move base aside in order to dig out the holes.
2. Dig out the holes for the BA-A1 anchors, then confirm the base is square and level again with the base kit moved back into place and BA-A1’s
in their respective holes. Check with your local building code for depth requirements.
3. We recommend you use a concrete mix such as Quikrete® fast setting concrete to secure the BA-A1 L-Bolts into place.
4. Follow the directions on your concrete mix. Confirm as the mix sets that the base is level and square. The BA-A1 L-Bolts may be adjusted up or
down by turning the nuts attached to each BA-A1 that sandwich the base kit to assist in leveling the base kit after curing.
12X8 STEEL EARTH BASE
19
144” / 3658 mm
41 1/2” / 1041 mm
144” / 3658 mm
111”
2819 mm
57”
1447 mm
86 1/2”
2197 mm
144” / 3658 mm
41 1/2” / 1041 mm
3 1/4” / 82.6 mm
60 1/2”
1536 mm
114 1/4”
2902 mm
89 3/4”
2279 mm
144” / 3658 mm
12x12 Grandio Summit with Flat Mount Base Kit
* The Flat Mount Base is included in each Summit Greenhouse Kit
and is designed to be installed on a wooden deck or concrete slab.
Exterior Dimensions: 144” W x 144” L
Interior Dimensions: 141.25” W x 141.25” L
Door Dimensions: 41.5” W x 85.25” H
Bottom Side of Gutter Height: 57” H
Peak Roof Height: 111” H
12x12 Grandio Summit with Steel Base Kit Dimensions
*The Steel Base Kit is sold separately from the Summit Greenhouse Kit
and is designed to be installed directly into the Earth using the
included L-Bolts which must be secured into Quikrete® or a similar
concrete material.
The Flat Mount Base Kit will attach on top of the Steel Base Kit.
Exterior Dimensions: 144” W x 144” L
Interior Dimensions: 141.25” W x 141.25” L
Door Dimensions: 41.5” W x 85.25” H
Bottom Side of Gutter Height: 60.5” H
Peak Roof Height: 114.25” H
GRANDIO SUMMIT 12x12 DIMENSIONS
20
144” / 3658 mm
144” / 3658 mm
12x12
Flat Mount Base Kit Assembled
LEFT
BACK
RIGHT
FRONT
* The Flat Mount Base is included in each Summit Greenhouse Kit. The Flat Mount Base is designed to be installed on a wooden deck or concrete
slab type surface. If you are using a Steel Base Kit for installing into the earth you will follow these instructions to assemble the Flat Mount
section, but will then attach the Flat Mount Kit onto your Steel Base Kit.
The Flat Mount Kit will be assembled as shown in this section, then secured to the surface of your choice using the proper anchoring hardware.
You will drill all holes into your surface for the entire base kit and temporarily affix into place, you will need to remove the front and back
sections in order to build your front and back walls as will be shown in the Summit Greenhouse Assembly Manual 2.
GRANDIO SUMMIT 12x12 FLAT MOUNT BASE ASSEMBLY
FRONT SECTION WILL BE TEMPORARILY ATTACHED
BACK SECTION WILL BE TEMPORARILY ATTACHED
12X12 FLAT MOUNT BASE

This manual suits for next models

17

Other Grandio Greenhouse Kit manuals

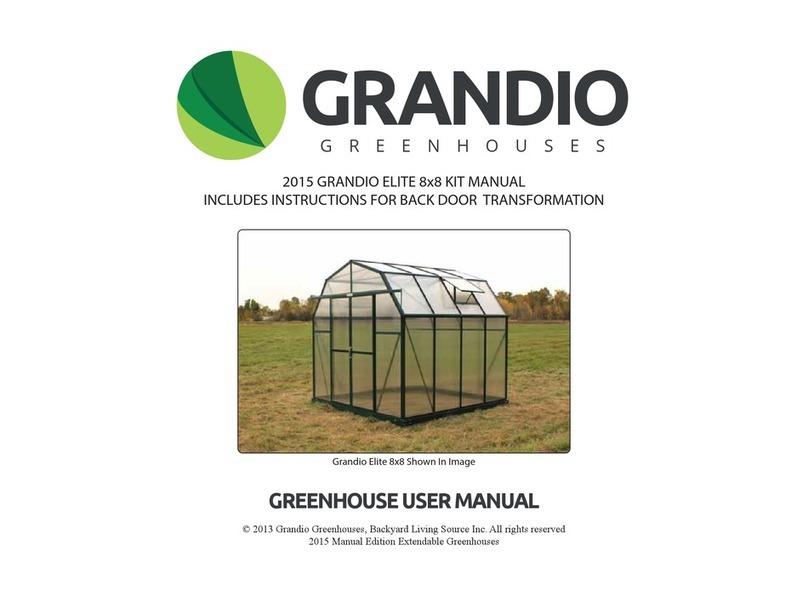
Grandio Grandio Element 6x8 with Base Kit User manual
Grandio

Grandio Grandio Element 6x8 with Base Kit User manual

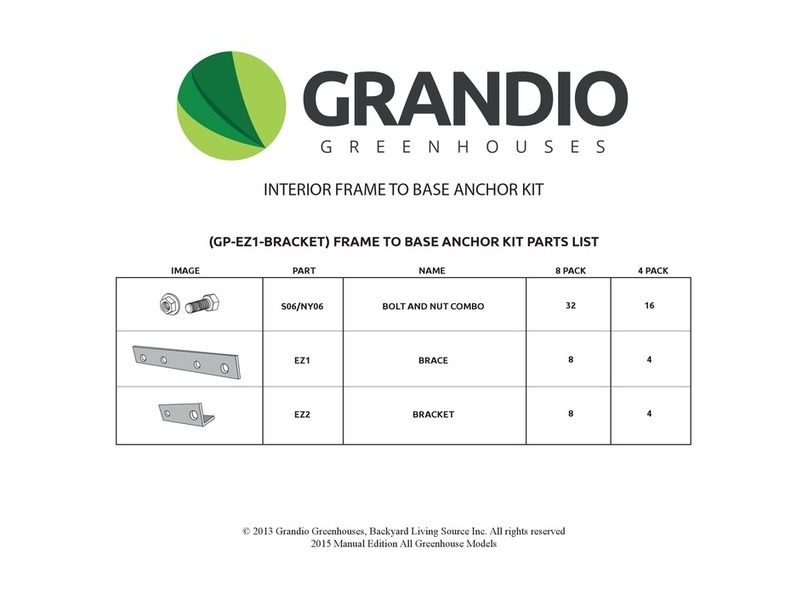
Grandio GP-EZ1 User manual

Grandio

Grandio GP-EZ1 User manual

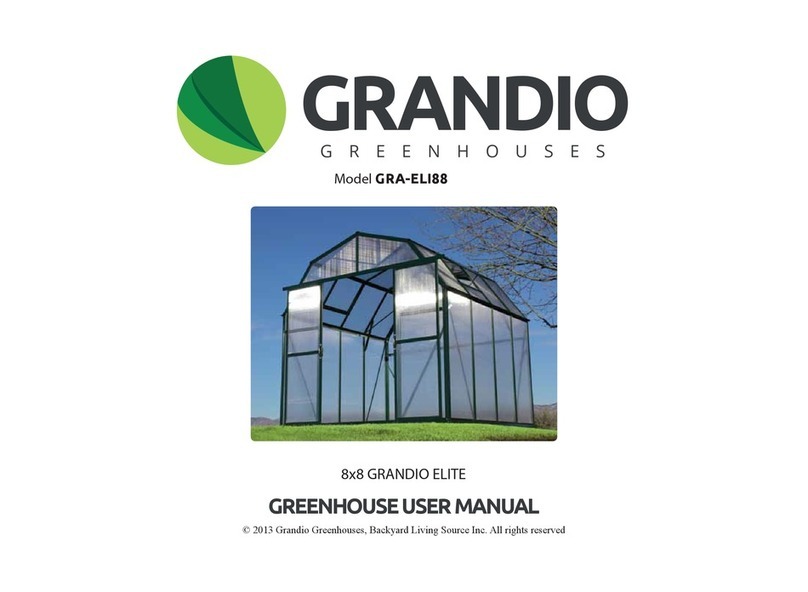
Grandio GRA-ELI88 User manual

Grandio

Grandio GRA-ELI88 User manual

Grandio GRA-88BR-GR User manual

Grandio

Grandio GRA-88BR-GR User manual

Grandio ASCENT GRA-812-GR User manual

Grandio

Grandio ASCENT GRA-812-GR User manual

Grandio GRA-ASC-812 User manual

Grandio

Grandio GRA-ASC-812 User manual

Grandio ELITE User manual

Grandio

Grandio ELITE User manual

Grandio BA-A1 User manual

Grandio

Grandio BA-A1 User manual
Grandio GRANDIO ELITE 8x12 2015 User manual

Grandio

Grandio GRANDIO ELITE 8x12 2015 User manual

Grandio 2015 EARTH & GRASS L-BOLT ANCHORING KIT User manual

Grandio

Grandio 2015 EARTH & GRASS L-BOLT ANCHORING KIT User manual

Grandio GRA-ELEM-VEN User manual

Grandio

Grandio GRA-ELEM-VEN User manual

Grandio GRA-812BR-GR User manual

Grandio

Grandio GRA-812BR-GR User manual
Grandio GRA-ASC-VENT User manual

Grandio

Grandio GRA-ASC-VENT User manual

Grandio 2015 User manual

Grandio

Grandio 2015 User manual

Grandio GRA-ASC-88 User manual

Grandio

Grandio GRA-ASC-88 User manual

Grandio ELITE 8x12 User manual

Grandio

Grandio ELITE 8x12 User manual

Grandio Ascent 8x8 KIT User manual

Grandio

Grandio Ascent 8x8 KIT User manual
Grandio GRA-LVR User manual

Grandio

Grandio GRA-LVR User manual

Popular Greenhouse Kit manuals by other brands

Halls Curved Greenhouse 46 Assembly instructions

Halls

Halls Curved Greenhouse 46 Assembly instructions

Alton Evolution octagonal instruction manual

Alton

Alton Evolution octagonal instruction manual

Farmers Friend Caterpillar Tunnel Assembly and instruction manual

Farmers Friend

Farmers Friend Caterpillar Tunnel Assembly and instruction manual

Palmen Tropic Plusser manual

Palmen

Palmen Tropic Plusser manual

Rion Grand Gardener Assembly instructions

Rion

Rion Grand Gardener Assembly instructions

Harbor Freight Tools 94515 Assembly instructions

Harbor Freight Tools

Harbor Freight Tools 94515 Assembly instructions

Dancover ARROW GH120025 manual

Dancover

Dancover ARROW GH120025 manual

Vitavia VM0028-I 6500 Assembly instructions

Vitavia

Vitavia VM0028-I 6500 Assembly instructions

Vitavia Steel Base 60 quick guide

Vitavia

Vitavia Steel Base 60 quick guide

OPCOM Farm GrowWall quick guide

OPCOM Farm

OPCOM Farm GrowWall quick guide

GREEN PROTECT 28105 Assembly instructions

GREEN PROTECT

GREEN PROTECT 28105 Assembly instructions

Palram Canopia LEAN TO 702969 How to assemble

Palram

Palram Canopia LEAN TO 702969 How to assemble

Exaco VI23 Mounting instructions

Exaco

Exaco VI23 Mounting instructions

Vitavia IDA 900 Assembly instructions

Vitavia

Vitavia IDA 900 Assembly instructions

Vitavia Hera 2 9000 Assembly instructions

Vitavia

Vitavia Hera 2 9000 Assembly instructions

Robinsons Roemoor 15 Assembly instructions

Robinsons

Robinsons Roemoor 15 Assembly instructions

FarmTek Growers Supply GrowSpan Gothic Pro 113836R manual

FarmTek

FarmTek Growers Supply GrowSpan Gothic Pro 113836R manual

Halls Qube+ 88 manual

Halls

Halls Qube+ 88 manual

manuals.online logo
manuals.online logoBrands
  • About & Mission
  • Contact us
  • Privacy Policy
  • Terms and Conditions

Copyright 2025 Manuals.Online. All Rights Reserved.