GRE VCB15 User manual

Ref. VCB15
ELECTRIC CLEANER
LIMPIAFONDOS ELÉCTRICO
NETTOYEUR DE FOND ÉLECTRIQUE
ELEKTROBECKENREINIGER
PULITORE ELETTRICO
ELEKTRISCHE ZWEMBADREINIGER
LIMPAFUNDOS ELÉCTRICO
EN
ES
FR
DE
IT
NL
PT
HIMVCB15.21
Instruction Manual - Manual de Instrucciones
Manuel d´instructions - Bedienungsanleitung
Manuale delle instruzioni - Handleiding met instructies
Manual de instruções
We reserve to change all of part of the articles or contents of this document, without prior notice.
Nos reservamos el derecho de cambiar total o parcialmente las características de nuestros artículos o contenido de este documento sin previo aviso.
Nous nous réservons le droit de modifier totalement ou en partie les caracteristiques de nos articles ou le contenu de ce document sans pré avis.
Wir behalten uns das recht vor die eigenschaften unserer produkte oder den inhalt diese prospektes teilweise oder wollstanding, ohne vorherige benachichtigung su andern.
Ci riservamo il diritto di cambiare totalemente o parzialmente le caratteristiche tecniche dei nostri prodotti ed il contenuto di questo documento senza nessum preavviso.
Wij behouden ons het recht voor geheel of gedeeltelijk de kenmerken van onze artikelen of de inhouk van deze handleiding zonder voorafgaand bericht te wijzigen.
Reservamo-nos no dereito de alterar, total ou parcialmente as caracteristicas os nossos artigos ou o conteúdo deste documento sem aviso prévio.
www.grepool.com
DISTRIBUTED BY / DISTRIBUIDO POR / DISTRIBUÉ PAR / VERTRIEB DURCH / DISTRIBUITO DA / DISTRIBUÍDO POR:
MANUFACTURAS GRE, S.A. ARITZ BIDEA Nº 57 BELAKO INDUSTRIALDEA, APARTADO 69 - 48100 MUNGUIA (VIZCAYA) ESPAÑA Nº Reg. Ind. 48-06762
MADE IN CHINA / FABRICADO EN CHINA / FABRIQUÉ AU CHINE / HERGESTELLT IN CHINA / PRODOTTO IN CHINA / FABRICADO NA RPC


1
EN
Electrical Vacuum Cleaner
SAFETY WARNINGS & INSTRUCTIONS
Read and fallow all instructions in this manual and on the equipment. Failure to
do so could result in severe or fatal injury.
WARNING!
This cleaner is not intended far use by persons lack of experience and knowle-
dge, unless they have been given supervision or instruction concerning use of
the appliance by a person responsible far their safety.
lt is not a TOY. Children should be supervised to ensure that they do not play
with this cleaner and its accessories. Never allow children to operate this pro-
duct. Keep this cleaner and its accessories away from children. Be sure the
cleaner is fully immersed in the water befare operation. DO NOT operate it
outside of water. lt will lead to failure of the shaft seal / motor, and then VOID
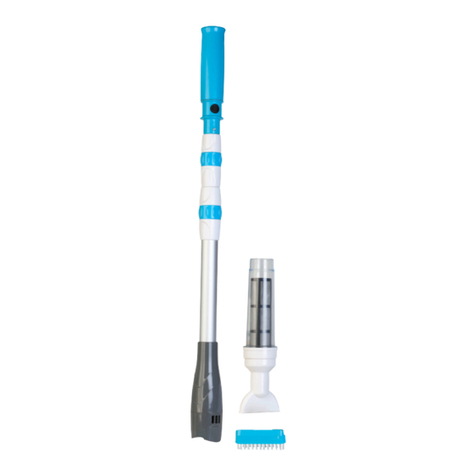
1. Suction head 6. Connector
2. Transparent suction head part 7. Handle
3. Cleaner body 8. Basket
4. Button 9. Filter bag
5. Charging hole 10. Charger

2
the warranty.
Maximum operating depth in water: 3 meters (10ft).
Operating water temperatura: 4 ºC (39.2 ºF}-35ºC (95 ºF}
DO NOT use this cleaner if any damage is found.
lt is necessary to changa parts or assemblies as quickly as possible if they
become damaged. Only use parts certified by the distributor or manufacturer.
Detach the cleaner from charger and make sure the cleaner is power off befa-
re operating the product.
Do not operate this cleaner when people/pets are in the water.
Risk of Suction Entrapment Hazard. This cleaner generates suction. Avoid hair,
body or any loose parts of your clothing to contact with the suction hole of the
cleaner in operation.
Never insert body parts, clothing or other objects into the openings and moving
parts of the cleaner.
DO NOT use this cleaner to pick up any toxic substance, flammable or com-
bustible liquids such as gasolina, ar operate in the presence of explosiva or
flammable fumes.
Nevar attempt in any way to disassemble your cleaner on your own.
Under no circumstances should you attempt to disassemble the cleaner and
replace the impeller, motor by yourself.
Charger:
For indoor use only. The charger should not be used outdoor and not be
exposed to rain, humidity,a ny liquido r heat.
Keep the charger out of reach of children.
Never use the charger if any damage is faund.
DO NOT handle the charger with wet hands.
DO NOT handle the cleaner, the charger while charging with wet hands and
without shoes.
Disconnect the charger from power when not in use.
lf the supply cord is damaged, it must be replaced by the manufacturer or its
service agent ar a similarly qualified person in order to avoid a hazard.
Make sure the cleaner and charger are totally dry befare charging.
CAUTION!
This cleaner is designad for underwater use only, not far use as an all-purpose
vacuum cleaner.
DO NOT attempt to use it to clean anything other than your pool / spa.
Use original accessories delivered with this product.
lt is not recommended to use this cleaner with another cleaner simultaneously.

3
Avoid picking up sharp objects with this product. They may damage the cleaner
and filler.
Use extra care when cleaning stairs in the pool.
Charge the cleaner indoor in a clean, dry place with good ventilation.
lf the cleaner is not to be used far an extended period, detach it from the
charger, use dry damp cloth to clean and dry the cleaner and accessories.
Store them in a well ventilated area away from the sunlight, children, heat,
ignition sources and pool chemicals. Never leave the cleaner plugged far long
term storage. Recharge the cleaner every three months.
lf you do not use the transparent body part, you should take it off the electric
cleaner.
Above warnings and cautions are not intended to incorporate all possible
instances for risks and / or severe injury. Pool / spa owners should always
exercise intensive caution and common sense when operating the cleaner.
GETTING STARTED
Set Up for Battery Charging
(1) Plug one end of the charger into
the socket, and the charger is green.
(2) Then, plug one end of charger to
VCB15, the charger is red, the charger
is working now.
Note: When the battery power completely exhausted, it is normal that the
charging indicator will be flashing for 20-50 seconds.Then the indicator will
turn into red and the battery will be charging correctly.
(3) After charging 3 hours, the charger becomes green, and VCB15 is fully
charged.
(4) Now, it is time to work.
WARNING!
Charging must be done in indoors, in a well ventilated area away from the
sunlight, children, heat and ignition sources. Never use the charger if any
damage is faund. Use the original the charger provided only. Make sure cleaner
and the charger are clean and dry befare set up. NOTE: Charge the cleaner 3
hours prior to the first use. Normally cleaner can be operated far 35 minutes
after fully charged.
Set Up for Operation
The arrow of transparent suction head part and transparent body should be
aligned, and then you can put down the transparent garbage can to the bottom
4
of transparent body. Then rotate 90 degrees rightly ( from open to close).
Handle assembly
lnsert the handle as shown behind big department, according to needs, looking
far what kind of convenient way to clean the wall and bottom of the POOL/
SPA, you find easier to hold the cleaner when cleaning the pool / spa wall and
bottom. lnsert the handle into the cleaner as shown until the side pin on the
handle is secured in the Handle Locking Hale on the cleaner.
To release the handle, press down the side pin and pull out the handle.
Telescopic pole assembly
lnsert the end (with one side pin)of the Pole Connector into the cleaner as
shown until its single side pin is secured in the Hand Locking Hale of the
cleaner. Slide and align the side hales of the telescopic with the side pins of
the Pole Connector.
To release the telescopic pole, press down two side simultaneously and pull
out the pole.
Suction head assembly
lnsert the Suction Head directly to the suction hale of the cleaner tightly by
hand.
In arder to have the better suction effect, please operate the electric cleaner
as the following instructions:
(1) lnsert the suction head when suction the small pebbles and leaves, as the
Picture A shows.

5
(2) No need to insert the suction head onto the
electric cleaner when suction the stones and
other large garbage and so on, as the Picture
B shows.
Brushes on the Suction Head can be removed
by pulling out directly from the head.
For Vinyl, liner and fibreglass pools, it is recommended to keep the brushes on
the suction head to prevent damage to your pool.
Cleaning the cleaner after using the electric cleaner:
(1) Take the transparent body off the electric cleaner (following the OPEN-
CLOSE direction, rotate to OPEN direction
90 degrees), and take the garbage out of the
transparent body, and then clean it.)
(2) Take out the rear part of filter bag, and
take out the filter bag, and get out the
garbage, and then clean the filter bag.
The cleaning steps of filter bag
1. Pull out the basket and filter bag from the rear of pool cleaner;
2. Detach the filter bag from the filter basket;
3. Clean the filter bag and filter basket
(3) Check whether there is garbage on the impeller. lf it has, take out the
garbage, and clean the impeller.
OPERATION
Warning
Do not use the cleaner if any damage is found.
Pollution of the liquid could occur due to leakage of lubricants.
Do not operate this cleaner when people/pets are in the water.
Make sure the cleaner is fully immersed in the water befare operating. DO
NOT operate it outside of water. lt will lead to failure of the shaft seals/motor,
and then VOID the warranty.
Maximum water temperature: 4 ºC (39.2 ºF)-35 ºC (95 ºF) DO NOT use the
cleaner without intact filter sock and sleeve in place. Using you cleaner
without intact filter sock and sleeve in place will VOID your warranty.

6
Risk of Suction Entrapment Hazard. This cleaner generates suction. Avoid hair,
body or any loose parts of your clothing to contact with the suction hole of the
cleaner in operation.
Never insert body parts, clothing or other objects into the openings and moving
parts.
DO NOT use this cleaner to pick up any toxic substance, flammable or
combustible liquids such as gasoline, or operate in the presence of explosive
or flammable fumes.
CAUTION
Use original accessories delivered with this product with this product.
DO NOT use this cleaner immediately after pool shocking. lt is recommended to
leave the pool circulating far at least 24-48 hours.
lt is not recommended to use this cleaner with another cleaner simultaneously.
DO NOT leave the cleaner in the water when not in use ar battery is low as
water leakage may occur.
The transparent suction part should be well installed befare your powering the
electric cleaner. (the transparent suction part has the button protection system
in case the impeller will get your hands hurt).
BATTERY DISPOSAL
Your Rechargeable Pool Vacuum Battery is a NI-MH battery which must be
disposed of properly is required; please contact your local authority far
infarmation.
WARNING!
Never attempt to disassemble a NI-MH battery.
Remove all personal items such as rings, bracelets, necklaces and watches
when unwiring a NI-MH battery from the vacuum unit.
A battery can produce a short circuit current high enough to weld a ring (ar like
item) to metal causing asevere burn.
Wear complete eye protection, gloves and protective clothing when removing
the battery pack.
Take care not to touch wires together ar allow them to contact any metal items,
which would cause sparking and/or short circuit the battery.
Never smoker ar allow a spark ar flame in the vicinity of the cleaner. Batteries
can generate gases, which could possibly ignite.
Do Not expose to fire ar intense heat as this may result in an explosion.
CAUTION!

7
lf a battery leak develops, avoid contact with the leaking acid and place the
damaged battery in a plastic bag.
lf acid comes in contact with skin and clothing, wash immediately with plenty
of soap and water.
lf acid comes in contact with eyes, immediately flood eye with running cool
water far at least 15 minutes. Get medical attention immediately.
The steps of changing the battery
(1) Push the button “a” farward along the arrow direction, until it not stuck the
slot of the connector (as picture A shown)
(2) Holding the body while reversing the connector, and removing the battery
mounting froni the body ( as “b” in picture B shown)
(3) Remove the used battery, and replace new NI-MH battery according to the
sign of positive & negative pole of the battery mounting (as shown in picture C)
(4) lnstall the battery mounting into the body (as picture D shown), pay attention
the positiva & negativa pole of the mounting (as picture “d” shown) and the 2
springs (as picture “d1” shown)alignment.
(5) Twist the connector into the body in clockwise, until the button “a” can
buckle in the slot of connector. As picture E shown.
(6) It is really important that this zone is well closed.
(7) Now you can use the cleaner according to the instruction normally.
CAUTION !
How to judge whether the battery is destroyed or the impeller is jammed?
1. The impeller suddenly is choked after it worked in a very short time. Turn off
the button, and connected the electric cleaner to the civil electricity by means
of the charger. lf the Green LED is on, it proves that the battery is destroyed
(the solution is referring to the step of how to replace the destroyed battery
group ); if the Red LED is on, start the power of VCB 15 to see whether the
impeller will be rotating or not. lf not, it proves that the impeller is jammed.
(The solution is referring to how to resolve the problem that the impeller is
jammed.)
2. The Green LED indicator is on after it is charged. Start the power, whereas

8
Problem Possible
Cause Remedy
Cleaner does
not capture the
debris
Battery is
running out
Charge the battery again.
Normally cleaner can operate 35 minutes
after
fully charged.
Impeller is
jammed
Power off the cleaner and visually check
the gap in middle of the cleaner to see if
the impeller is jammed.
You can use your hand to rotate the
impeller two circles to make the impeller
rotation looser.
WARNING! Make sure cleaner is power
offwhen servicing the cleaner.
Impeller is
Broken Contact your dealer for impeller
replacement.
When the
filter bag is
full
Detach the filter basket and filter bag,
and clean them.
the impeller does not work; turn off the button.
a. Connect the charger, and press the button to check whether there is the
sound of impeller operation. lf it product “Kaka” sound, it proves that the
impeller is jammed (the solution is referring to how to resolve the problem that
the impeller is jammed.)
b. Connect the charger, press the button to check whether the impeller works
normally. Turn off the button, and if the Green indicator is on, pull charger off
the VCB15 electric cleaner. Start the power again. lf the impeller still does not
work, it proves that the battery is destroyed.
c. Using the voltmeter to judge whether the battery is destroyed or the
impeller is obstacle. Firstly charging the battery far more than 1 O minutes.
Pull the battery out the VCB15 electric cleaner, and measure
the voltage of the battery. lf it is “O”, the battery is in dysfunction; if it is not
“O”, it proved that the impeller is jammed.
3. Directly rotate the impeller until it can be moved smoothly (Referring to how
to resolve the problem that the impeller is jammed), and have the battery full
of electricity. The battery is destroyed if the impeller does not rotate.

9
Garbage flowing
out from the
Transparent
Suction
HeadPart
The soft
rubber is
broken
The soft rubber of rear impeller is like a
door in case the garbage in the filter bag
will flow backwards into impeller and the
cover of transparent suction head part
Garbage flow
out from the rear
filter bag
Filter sock is
damaged Replace a new filter sock.
Handle / pole
connector
cannot be
secured in clip
assembly
Side pin
broken Using the new V-shape
Cleaner cannot
be
recharged
Battery is
dead
Make sure it is well closed.
Contact dealer for battery replacement.
WARNING! When you replace the bat-
tery, please contact the local dealers to
purchase the original lithium battery in
case that the electric cleaner is destro-
yed.
The charger
is out of order
Contact dealer for proper transformer.
WARNING! Using wrong charger will
result in damaging the cleaner / battery
and void the warranty.

10
ES
Limpiafondos eléctrico
Imágenes no vinculantes. Sugerencia de instalación.
• Antes de utilizar este producto, lea detenidamente las advertencias y las
instrucciones adjuntas y siga sus indicaciones.
Si no tiene en cuenta las advertencias ni las instrucciones de seguridad, se
pueden producir lesiones personales, fallecimientos o daños materiales.
• Lea este documento con detenimiento y guárdelo para consultas posteriores.
Advertencias de seguridad
• Este limpiafondos no está concebido para su uso por parte de personas inex-
pertas o sin conocimientos a respecto, salvo que una persona responsable de
su seguridad les haya transmitido las instrucciones necesarias para utilizar el
1. Cabezal pivotante 6. Conector empuñadura/mango
2. Cubierta delantera transparente 7. Empuñadura
3. Cuerpo del limpiafondos 8. Filtro trasero - depósito
4. Botón de encendido y apagado 9. Filtro trasero - bolsa
5. Conector para el
cargador
10. Cargador

11
dispositivo.
• Este aparato no es un juguete. Debe vigilar a los niños para que no jueguen
con el aparato ni con sus accesorios. No permita que los niños utilicen este
dispositivo.
Guarde el limpiafondos y sus accesorios fuera del alcance de los niños.
• Asegúrese de que el limpiafondos está completamente sumergido en agua
antes de ponerlo en marcha. No utilice el dispositivo fuera del agua. Esto po-
dría dañar el sistema/motor y anularía la garantía.
• Profundidad máxima de utilización en agua: 3 metros.
• Temperatura de uso del dispositivo: entre 4 ºC y 35 ºC
• Nunca utilice el aparato si ha detectado algún daño.
• Es preciso sustituir las piezas o los ensamblajes lo antes posible en caso de
que estén dañados. Utilice exclusivamente piezas certificadas por el fabrican-
te o el distribuidor.
• Suelte el limpiafondos del cargador y cerciórese de que el dispositivo está
apagado antes de utilizarlo.
• No utilice el limpiafondos si hay personas o mascotas en el agua.
• Grave riesgo de aspiración. Este limpiafondos genera una aspiración. Evite
que el pelo, el cuerpo o las partes sueltas de sus prendas entren en contacto
con el orificio de aspirado del dispositivo en funcionamiento.
• Nunca introduzca partes del cuerpo, prendas u otros objetos en las aberturas
o en las piezas móviles del limpiafondos.
• Nunca utilice este limpiafondos para recoger sustancias tóxicas, inflamables
o combustibles líquidos, como gasolina, ni lo ponga en funcionamiento ante
vapores explosivos o inflamables.
• Nunca intente desmontar o sustituir la hélice o el motor por su cuenta, cual-
quiera que sea el método.
• Este limpiafondos está concebido para un uso exclusivo sumergido en agua y
no para un uso como limpiafondos polivalente.
• No intente utilizarlo para limpiar algo distinto a su piscina / spa.
• Utilice los accesorios originales suministrados junto a este producto.
• No se recomienda utilizar este limpiafondos al mismo tiempo que otro apa-
rato.
• Evite aspirar objetos puntiagudos con este dispositivo. Podrían dañar el lim-
piafondos y el filtro.
• Tenga precaución cuando limpie los peldaños de la escalera de la piscina.
• Recargue el limpiafondos en el interior, en un lugar limpio y seco con buena
ventilación.
• En caso de que no vaya a utilizar el limpiafondos durante un periodo largo,

12
desconéctelo del cargador y limpie y seque el limpiafondos y sus accesorios
con un paño seco. Guárdelos en un lugar bien ventilado, alejado de la luz solar,
del alcance de los niños, de focos de calor, de fuentes inflamables y de pro-
ductos químicos. Nunca deje el dispositivo enchufado cuando lo guarde por un
periodo largo. Recargue el limpiafondos cada tres meses.
• Si no utiliza la parte transparente del cuerpo debe retirarla del limpiafondos
eléctrico.
• No es posible que las advertencias y las precauciones recogidas aquí con-
templen todas las situaciones de riesgo o de lesiones graves. Los propietarios
de la piscina y del spa deben actuar con la máxima prudencia y con sensatez
cuando utilicen el limpiafondos.
Cargador:
Uso exclusivo en interiores. No se debe utilizar el cargador al aire libre ni puede
exponerse a la lluvia, a la humedad, a ningún líquido ni al calor.
• Mantenga el cargador fuera del alcance de los niños.
• Nunca utilice el cargador si ha detectado algún daño.
• Nunca manipule el cargador con las manos mojadas.
• Nunca manipule el limpiafondos ni el cargador en funcionamiento son las
manos mojadas o sin calzado.
• Desenchufe de la corriente eléctrica el cargador cuando no esté en
funcionamiento.
• En caso de que el cable de alimentación esté dañado, la sustitución debe
realizarla el fabricante, su agente de mantenimiento u otra persona cualificada
para evitar todos los riesgos.
•Cercióresedequetantoellimpiafondoscomoelcargadorestáncompletamente
secos antes de recargar el aparato.
PUESTA EN MARCHA
Posición para la reca rga de la batería.
(1) Enchufe un extremo del cargador en el zócalo y el cargador está en verde.
(2) A continuación, conecte un extremo del cargador a VCB15, la carga es roja,
el cargador está funcionando ahora.
Nota: Cuando la batería esté completamente agotada , es norma l que el
indicador de carga parpadee duran te 20/50 segundos. Cuando el indicador
vue lva a ponerse rojo, la batería esta rá cargando correctamente.
(3) Después de cargar 3 horas, el cargador se pone verde, y VCB15 está
completamente cargado.
(4) Ahora, es hora de trabajar.

13
Advertencias de seguridad
La carga debe efectuarse en un lugar bien ventilado , alejado de la luz solar ,
del alcance de los niños , de focos de calor y de fuentes de ignición.
Nunca utilice el cargador si ha detectado algún daño.
Utilice únicamente el cargador original, suministrado.
Compruebe que tanto el aspirador como el cargador están limpios y secos
antes de montarlo .
ATENCIÓN :
Es obliga torio hacer una primera carga de tres horas antes del primer uso.
Tras una carga completa, el limpiafondos funcionará normalmente entre 5
minutos.
MONTAJE PARA EL FUNCIONAMIENTO
La flecha de la cubierta delantera transparente debe estar alineada con la
flecha del cuerpo del disposi tivo. Después hay que realizar una rotación de
90° para abrir o cerrar . Es necesario situar correctamente al fondo la cubierta
transparente en el interior del cuerpo del aparato .
Montaje de la empuñadura
Introduzca la empuñadura como se indica a continuación colocándola sobre
el conector del compartimento trasero. Coloque la empuñadura según sus
necesidades para poder limpiar el fondo o las paredes de la piscina o del
spa. Introduzca la empuñadura en el limpiafondos como se indica, apretando
los cierres laterales y empujando la empuñadura sobre el conector hasta el
bloqueo de la empuñadura sobre este.

14
Para retirar la empuñadura, apriete los cierres laterales y retire hacia atrás la
empuñadura.
Montaje sobre una pértiga telescópica
Apr ete uno de los cierres laterales del conector del aparato e inserte el
extremo de la pértiga telescópica hasta que los cierres se fijen en sus orificios.
Para retirar la pértiga telescópica, apriete los dos cierres laterales para soltar
la pértiga y retírelo hacia atrás.
Montaje del cabezal pivotante
Insertedirectamenteelcabezalpivotanteenlabasedelacubiertatransparente.
Con el fin de obtener una aspiración mejor, utilice el limpiafondos como se
indica:
• Inserte el cabezal pivotante para aspirar
piedrecillas y hojas como en la ilustración A.
• No es necesario utilizar el cabezal pivotante
para aspirar piedras y otros desechos
grandes, como en la ilustración B.
Los cepillos del cabezal pivotante pueden retirarse sacándolos directamente
del cabezal.
Para las piscinas revestidas y de fibras de vidrio se recomienda mantener los
cepillos en el cabezal pivotante para evitar daños en el revestimiento de la
piscina.
Limpieza del limpiafondos tras el uso:
Retirar la cubierta delantera transparente (siguiendo las instrucciones
OPENCLOSE, girar 90° hacia OPEN), retirar los desechos y lavarlo.
Retirar el filtro y la bolsa del filtro, quitar las impurezas y limpiar la bolsa filtrante.
Comprobar si hay impurezas en la hélice y limpiarlas en caso afirmativo.
Etapas de limpieza de la bolsa del filtro posterior.

15
• Retirar la bolsa y el depósito filtrantes de la parte trasera de el limpiafondos.
• Soltar la bolsa del depósito.
• Limpiar la bolsa y el depósito.
Funcionamiento
ATENCIÓN: Nunca utilice el limpiafondos si ha detectado algún daño. Se
puede producir una contaminación del agua debido a la fuga de lubricantes.
No utilice el limpiafondos si hay personas o animales en el agua de la piscina.
Compruebe que el limpiafondos está completamente inmersa antes de
encenderla.
Nunca utilice el limpiafondos fuera del agua, ya que provocaría daños a nivel
de las juntas y del motor y anularía la garantía.
Rango de temperatura del agua para el uso de el limpiafondos: 4 ºC (39,2 ºF)
- 35 ºC (95ºF)
• No utilice el limpiafondos sin una manga filtrante intacta y el depósito del filtro
trasero en su lugar. El uso del limpiafondos sin la manga intacta y sin situar en
su lugar el depósito del filtro anulará la garantía.
• Grave riesgo de aspiración. Este limpiafondos genera un fenómeno de
aspiración.
ATENCIÓN: Nunca utilice el limpiafondos si ha detectado algún daño. Se
puede producir una contaminación del agua debido a la fuga de lubricantes.
No utilice el limpiafondos si hay personas o animales en el agua de la piscina.
• Nunca introduzca partes del cuerpo, prendas u otros objetos en las aberturas
o en las piezas móviles del limpiafondos.
• Nunca utilice este limpiafondos para recoger sustancias tóxicas, inflamables
o combustibles líquidos, como gasolina, ni lo ponga en funcionamiento ante
vapores explosivos o inflamables. Evite que el pelo, el cuerpo o las partes
sueltas de sus prendas entren en contacto con el orificio de aspirado del
dispositivo en funcionamiento.
• Utilice los accesorios originales suministrados junto a este producto.
• No utilice este limpiafondos inmediatamente después de un tratamiento de

16
choque en la piscina. Se recomienda dejar que el agua circule al menos 24-48
horas.
• No utilice este limpiafondos al mismo tiempo que otro aparato .
• No deje el aparato en el aguan mientras no se esté utilizando o si tiene poca
batería, porque se podrían producir fugas.
• La parte transparente del limpiafondos debe estar bien instalada antes de la
puesta en marcha del limpiafondos eléctrico (la parte de aspiración
transparente delantera cuenta con un botón con el sistema de protección para
evitar que la hélice entre en contacto con sus manos).
RECICLADO DE LA BATERÍA
La batería de el limpiafondos eléctr ica para piscinas es de NI-MH y debe
reciclarse conforme a las normas existentes. Póngase en contacto con las
autoridades locales para más información.
ADVERTENCIA
• Nunca trate de desmon tar una batería de NI-MH.
•Quítese todoslos objetospersona lescomo anillos,pulseras ,collares yrelojes
de pulsera cuando desconecte el cable entre la batería y el limpiafondos.
• La batería puede provocar un cortocircuito importante que podría fundir un
anillo (o cualquier otro elemento metálico) y causa r quemaduras graves.
• Utilice un elemento de protección ocular completa junto con guantes y
prendas de protección cuando retire la batería .
• Tenga cuidado para no tocar el ensambalaje de hilos ni permitir que entre en
contacto con elementos metálicos , susceptibles de causar chispas y/o
cortocircuitos con la batería.
• Nunca prenda fuego ni permita que haya chispas o llamas cerca del aspirador.
La batería puede causar gas que en último término podría inflamarse.
• No la expo nga al fuego ni al calor intenso puesto que podría provocar una
explosión.
• En caso de que la batería presen te fugas , evite el contacto con el ácido
volcado y meta la batería dañada en una bolsa de plástico.
• Si el ácido entra en contacto con la piel o la ropa, lávelas inmediata y
abunda nteme nte con agua y jabón.
• Si el ácido entra en contacto con los ojos , aclárelos inmediatamente con
agua fresca duran te al menos 15 minutos. Consulte sin demora a un médico .

17
Pasos para cambiar la batería
(1) Presione el botón “a” y desp lácelo en el sentido de la flecha , hasta que se
sue lte de la ranu ra del conector (como muestra el diagrama A).
(2) Sujete el cuerpo mientras gira el conec tor y suelte la montura de la batería
de l cuerpo (como muestra “b” en el diag rama B).
(3) Extraiga la batería usada y sustitúya la por una nueva de NI-MH respetando
los símbo los de polaridad de la montura (como muestra el diag rama C)
(4) Instale la montura de la bater ía en el cuerpo (como muestra el diagrama D)
respetando la polaridad de la misma (imagen “d”) y la alineación con los dos
resortes (imagen “d 1 “).
(5) Gire el conector en el cuerpo en el sentido de las agujas del reloj, hasta
que el botón “a” aju ste en la ranura del conec tor (como muestra el diagrama
E).
(6) Es muy importante que esta zona esté bien cerrada.
(7) Ya puede utilizar el limpiafondos conforme a las instrucciones.

18
¡PRECAUCIÓN!
¿Cómo se sabe si la batería está estropeada o si el impulsor está
atascado?
1.Elpropulsorseobstruyerepentinayrápidamentedespuésdelfuncionamiento.
Apague el botón y conecte el limpiafondos a la corriente eléctrica mediante
el cargador. Si se enciente el LED verde quiere decir que la batería está
estropeada (puede solucionarse consultando la parte sobre el recambio de
baterías estropeadas); en cambio, si se ilumina el LED rojo, conecte el VCB15
para comprobar si el impulsor gira o no. Si no lo hace, está atascado (puede
consultar la solución en la parte sobre el arreglo de atascos en el impulsor).
2. Cuando termina la carga se enciende el piloto LED verde. Encienda el
dispositivo, aunque si el impulsor no funciona, apáguelo.
a. Conecte el cargador y pulse el botón para comprobar si se oye el ruido del
impulsor en funcionamiento. Si produce un sonido seco (kkkk) demuestra que
hay un atasco en el impulsor (puede consultar la solución en la parte sobre el
arreglo de atascos en el impulsor).
b. Conecte el cargador y pulse el botón para comprobar si funciona el impulsor
con normalidad. Apague el botón y, si está encendido el piloto verde, extraiga
el cargador del limpiafondos eléctrico VCB15. Vuelva a encenderlo. En caso
de que el impulsor siga sin funcionar, es una muestra de que la batería está
estropeada.
c. Por medio de un voltímetro verifique si la batería está estropeada o si el
impulsor está obstruido. En primer lugar, cargue la batería durante más de
1O minutos. Extraiga la batería del limpiafondos eléctrico VCB15 y mida su
voltaje. Si es O, la batería no funciona correctamente; si no es O, muestra que
el impulsor está atascado.
3. Gire directamente el impulsor hasta que se pueda mover con facilidad
(consulte la solución en la parte sobre el arreglo de atascos en el impulsor) y
cargue completamente la batería. Si esta se encuentra estropeada, el impulsor
no gira.
Other manuals for VCB15
1
Table of contents
Languages:
Other GRE Swimming Pool Cleaner manuals
Popular Swimming Pool Cleaner manuals by other brands

Zodiac
Zodiac TornaX Genius Installation and user manual

fluidra
fluidra Astral Pool Net'N'Clean Installation and operating instructions

Paramount Fitness
Paramount Fitness SwingJet installation guide

Paxcess
Paxcess OPTIMUS HJ2052 manual

Dolphin
Dolphin DX5B operating instructions

BWT
BWT ADVANCED FSA1500 operating instructions