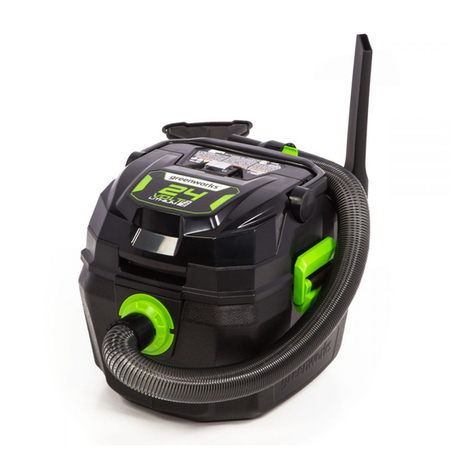
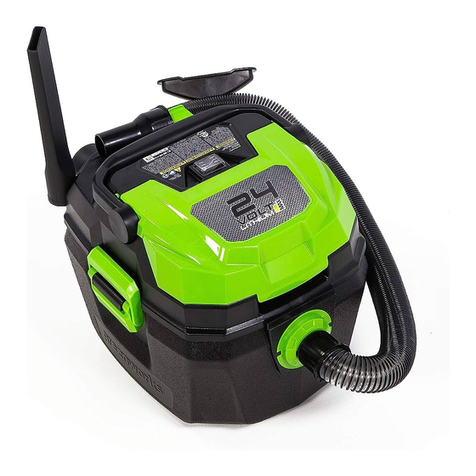
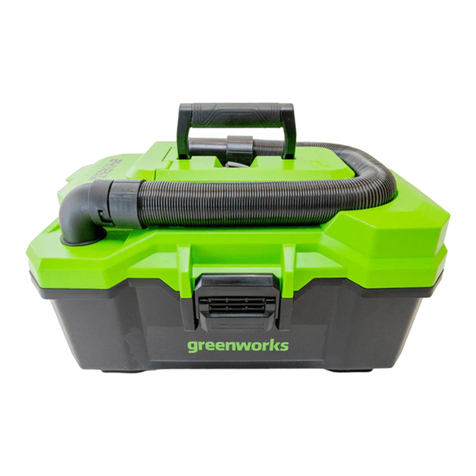
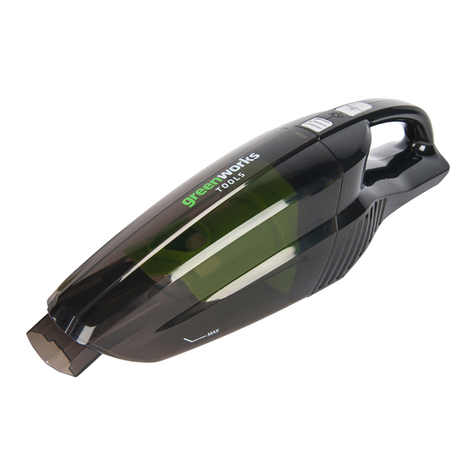
GreenWorks 4700007AU User manual

VUG301
12 3 4
5
67
8
1
2
1. 2. 3.
5.
4. 6.
7. 8.

VUG301
www.greenworksaustralia.com
Greenworks Australia
A Division Jak Max P/L
380 Foley’s Road Derrimut
Victoria, Australia 3026
4700007AU
EN OPERATOR MANUALVacuum

1 Description......................................... 2
1.1 Purpose.............................................................. 2
1.2 Overview........................................................... 2
2 Introduction....................................... 2
2.1 General safety rules........................................... 2
3 Symbols on the product.................... 5
4 Risk levels...........................................6
5 Recycle................................................6
6 Installation......................................... 6
6.1 Unpack the machine.......................................... 6
6.2 Install the battery pack.......................................6
6.3 Remove the battery pack................................... 6
7 Operation........................................... 6
7.1 Start the machine............................................... 7
7.2 Stop the machine............................................... 7
8 Maintenance.......................................7
8.1 Empty the litter.................................................. 7
8.2 Clean the filter................................................... 7
9 Store the machine..............................7
10 Troubleshooting................................. 7
11 Technical data....................................8
12 Warranty............................................ 8
1
English EN

1 DESCRIPTION
1.1 PURPOSE
This machine is intended for vacuuming dust in domestic use.
1.2 OVERVIEW
Figure 1
1ON / OFF Button
2Power Boost
3Power Indicator
4Release Button
5Dust Container
6Filter
7Filter Guard
8Battery release button
2 INTRODUCTION
Your product has been engineered and manufactured to high
standards for dependability, ease of operation, and operator
safety. When properly cared for, it will give you years of
rugged, trouble-free performance.
2.1 GENERAL SAFETY
RULES
WARNING
READ AND UNDERSTAND
ALL INSTRUCTIONS
BEFORE USING THIS
PRODUCT. Failure to follow
all instructions listed below may
result in electric shock, fire,
and/or serious personal injury.
• Use only identical
manufacturer’s replacement
parts and accessories. Use of
any other parts may create a
hazard or cause product
damage.
• Always wear safety glasses
with side shields marked to
comply with ANSI Z87.1.
Everyday glasses have only
impact resistant lenses. They
are NOT safety glasses.
Following this rule will reduce
the risk of eye injury. Use face
mask if operating in dusty
work spaces.
• Do not use in rain.
• Keep all bystanders, children,
and pets at least 50 ft. away.
• Do not use the appliance for
any job except that for which it
is intended.
• Avoid Unintentional Starting –
Do not carry appliance with
fingers on the switch. Be sure
the battery is removed while
transporting.
• Don’t overreach - Keep proper
footing and balance at all
times.
• Stay alert - Watch what you
are doing. Use common sense.
Do not operate this unit when
you are tired, ill or under the
influence of alcohol, drugs or
medication.
• Always store idle appliance
indoors - When not in use,
2
English
EN

appliance should be stored
indoors in a dry place, out of
reach of children.
• Check Damaged Parts –
Before further use of the
appliance, a guard or other part
that is damaged should be
carefully checked to determine
that it will operate properly
and perform its intended
function. Check for alignment
of moving parts, binding of
moving parts, breakage of
parts, damaged mountings, and
any other condition that may
affect its operation. A guard or
other part that is damaged
should be properly repaired or
replaced by an authorized
service center unless indicated
elsewhere in this manual.
• Remove or disconnect battery
before servicing, cleaning or
removing material from the
appliance.
• Do not run the machine
unattended.
• Do not vacuum, or use this
machine near liquids, gases, or
explosive vapours like
gasoline or similar fuels,
lighter fluid, cleaners, oil-
based paints, natural gas or
hydrogen.
• Do not vacuum or use this
machine near explosive dusts
like coal dust, magnesium
dust, grain dust, or gunpowder
as sparks inside the motor can
ignite flammable vapours or
dust.
• Do not vacuum burning or
smoking items such as
cigarettes, matches, or hot
ashes.
• Do not expose to rain. Store
indoors.
• Do not handle the battery or
the machine with wet hands.
• To reduce the risk of health
hazards from vapours or dust,
do not vacuum toxic materials.
• Do not use or store near
hazardous materials.
• Do not use this machine with a
torn filter or without installing
the filter except when
vacuuming liquids as
described in the operation
section of this manual.
• Do not use the vacuum as a
toy. Pay particularly close
3
English EN

attention when it is being used
by or near children.
• Turn off the machine before
inserting the battery. Turn off
switch before removing battery
pack.
• Do not put any objects into the
ventilation openings. Do not
vacuum with any ventilation
openings blocked.
• Keep free of dust, lint, hair or
any other items that may
reduce the air flow.
• Keep hair, loose clothing,
fingers, and all body parts
away from opening and
moving parts.
• To reduce the risk of falling,
use extra care when cleaning
on stairs.
• Do not use to pick up
flammable or combustible
liquids, such as gasoline, or
use in areas where they may be
present.
• Always install float before any
wet pick up operation.
• For household use only.
• To reduce the risk of electric
shock, remove the battery pack
before cleaning or servicing.
• Do not use without filters in
place.
• Do not dispose of the batteries
in a fire. The cells may
explode. Check with local
codes for possible special
disposal instructions.
• Do not open or mutilate the
batteries. Released electrolyte
is corrosive and may cause
damage to the eyes or skin. It
may be toxic if swallowed.
• Exercise care in handling
batteries in order not to short
the battery with conducting
materials such as rings,
bracelets, and keys. The
battery or conductor may
overheat and cause burns.
• Dress Properly – Do not wear
loose clothing or jewelry. They
can be caught in moving parts.
Use of rubber gloves and
substantial footwear is
recommended when working
outdoors. Wear protective hair
covering to contain long hair.
• Do not add unnecessary force
to your appliance – It will do
the job better and with less
likelihood of a risk of injury at
4
English
EN

the rate for which it was
designed.
• Recharge only with the charger
specified by the manufacturer.
A charger that is suitable for
one type of battery pack may
create a risk of fire when used
with another battery pack.
• When battery pack is not in
use, keep it away from other
metal objects, like paper clips,
coins, keys, nails, screws or
other small metal objects, that
can make a connection from
one terminal to another.
Shorting the battery terminals
together may cause a fire.
• Under abusive conditions,
liquid may be ejected from the
battery; avoid contact. If
contact accidentally occurs,
flush with water. If liquid
contacts eyes, additionally
seek medical help. Liquid
ejected from the battery may
cause irritation or burns.
• Do not use a battery pack or
appliance that is damaged or
modified. Damaged or
modified batteries may exhibit
unpredictable behavior
resulting in fire, explosion or
risk of injury.
• Do not expose a battery pack
or appliance to fire or
excessive temperature.
Exposure to fire or
temperature above 265°F
(130°C) may cause explosion.
• This appliance can be used by
children aged from 8 years and
above and persons with
reduced physical, sensory or
mental capabilities or lack of
experience and knowledge if
they have been given
supervision or instruction
concerning use of the
appliance in a safe way and
understand the hazards
involved.
• Children shall not play with
the appliance. Cleaning and
user maintenance shall not be
made by children without
supervision.
3 SYMBOLS ON THE PRODUCT
Some of the following symbols may be used on this product.
Please study them and learn their meaning. Proper
interpretation of these symbols will allow you to operate the
product better and safer.
Symbol Explanation
Precautions that involve your safety.
5
English EN

Symbol Explanation
Read and understand all instructions
before operating the product, and fol-
low all warnings and safety instruc-
tions.
Wear eye and ear protection.
4 RISK LEVELS
The following signal words and meanings are intended to
explain the levels of risk associated with this product.
SYM-
BOL
SIGNAL MEANING
DANGER Indicates an imminently haz-
ardous situation,which, if not
avoided, will result in death
or serious injury.
WARNING Indicates a potentially hazard-
ous situation,which, if not
avoided, could result in death
or serious injury.
CAUTION Indicates a potentially hazard-
ous situation, which, if not
avoided, may result in minor
or moderate injury.
CAUTION (Without Safety Alert Sym-
bol) Indicates a situation that
may result in property dam-
age.
5 RECYCLE
Separate collection. You must not discard
with usual household waste. If it is necessa-
ry to replace the machine, or if it is no more
use to you, do not discard it with household
waste. Make this machine available for sepa-
rate collection.
Separate collection of used machine and
packaging let you recycle materials and use
them again. Use of the recycled materials
helps prevent environmental pollution and
decreases the requirements for raw materi-
als.
At the end of their useful life, discard batter-
ies with a precaution for our environment.
The battery contains material that is danger-
ous to you and the environment. You must
remove and discard these materials separate-
ly at a equipment that accepts lithium-ion
batteries.
6 INSTALLATION
• Replace the battery pack or the charger immediately if the
battery pack or charger cord is damaged.
• Exam that the machine is in the OFF status before you
install or remove the battery pack.
6.1 UNPACK THE MACHINE
WARNING
It is not necessary to assemble the machine.
WARNING
• If the parts have damage, do not use the machine.
• If you do not have all the parts, do not operate the
machine.
• If the parts are damaged or missing, speak to the service
center.
1. Open the package.
2. Read the documentation in the box.
3. Remove the machine from the box.
4. Discard the box and package in compliance with local
regulations.
6.2 INSTALL THE BATTERY PACK
Figure 2
WARNING
• If the battery pack or charger is damaged, replace the
battery pack or the charger.
• Stop the machine and wait until the motor stops before
you install or remove the battery pack.
• Read, know, and do the instructions in the battery and
charger manual.
1. Align the lift ribs on the battery pack with the grooves in
the battery compartment.
2. Push the battery pack into the battery compartment until
the battery pack locks into place.
3. When you hear a click, the battery pack is installed.
6.3 REMOVE THE BATTERY PACK
Figure 2
1. Push and hold the battery release button.
2. Remove the battery pack from the machine.
7 OPERATION
WARNING
Do not handle battery pack, switch, or machine with wet
hands. Do not expose to rain or allow liquid to enter the
motor compartment.
6
English
EN

7.1 START THE MACHINE
Figure 3
1. Push the on/off button to turn the machine on.
NOTE
Press and hold the power booster button for max suction
power and two indicators will be on.
7.2 STOP THE MACHINE
1. Release the ON/OFF button.
8 MAINTENANCE
CAUTION
Do not let brake fluids, gasoline, petroleum-based materials
touch the plastic parts. Chemicals can cause damage to the
plastic, and make the plastic unserviceable.
CAUTION
Do not use strong solvents or detergents on the plastic
housing or components.
WARNING
Remove the battery pack from the machine before
maintenance.
8.1 EMPTY THE LITTER
Figure 4-7
The dust container must be emptied when it’s full. Every now
and then the dust container and the filter need to be cleaned to
maintain a high suction power.
1. Push the release button to remove the dust container.
2. Remove the filter guard together with the filter from the
dust container.
3. Turn counterclockwise the filter to seperate the filter and
filter guard.
4. Empty the dust container and filter contents into the a
waste basket.
8.2 CLEAN THE FILTER
NOTE
Allow the filter to dry before you store or picking up debris.
Often clean your filter to maintain peak vac performance.
Clean a dry filter:
• Cleaning should be done outdoors and not in the living
quarters.
• You can use a small brush to clean the dust and debris.
• For thorough cleaning of dry filter with fine dust (no
debris), run water through it as described under "Cleaning
A Wet Filter"
Clean a wet filter:
1. Remove the filter from the machine.
2. Run water through the filter from a hose or spigot.
NOTE
Check the filter for tears or small holes after cleaning. Do
not use a filter with holes or tears in it. Even a small hole
can allow dust to come out of your machine. Replace it
immediately.
9 STORE THE MACHINE
NOTE
Clean the machine before storage.
1. Remove the battery pack.
2. Let the motor cool.
3. Check that there are no loose or damaged components. If
it is necessary, replace the damaged components, tighten
screws and bolts, or speak to a person of an approved
service center.
4. Store the machine in a cool and dry location.
10 TROUBLESHOOTING
Problem Possible cause Solution
The machine
doesn't work.
The switch or mo-
tor is defective.
Speak to service
center.
Dust discharges
from exhaust.
The filter has dam-
age. Replace the filter.
The filter isn't in-
stalled.
Properly reinstall
the filter.
The filter is not
functional.
Clean or replace
the filter.
The filter clogs. Clean or replace
the filter.
Loss of suction
The hose connec-
tion loose.
Tighten the hose
connection.
The filter clogs. Clean or replace
the filter.
The collection
tank is full.
Empty the collec-
tion tank.
The hose has dam-
age. Replace the hose.
Static shock The environment
is dry.
Add moisture to
air (if practical,
use a humidifier).
7
English EN

11 TECHNICAL DATA
Voltage 24 V
Vacuum speed 0 - 22000 RPM
Weight (without battery
pack)
0.9 kg
12 WARRANTY
(The full warranty terms and conditions can be found on
webpage)
The warranty is 4 years on the product, and 2 years on
batteries (consumer/private usage) from the date of purchase.
This warranty covers manufacturing faults. A faulty product
under warranty might be either repaired or replaced. A unit
that has been misused or used in other ways then described in
the owner’s manual might be rejected for warranty. Normal
wear, and wear parts are not considered as warranty. The
original manufacturer warranty is not affected by any
additional warranty offered by a dealer or retailer.
A faulty product must be returned to the point of purchase in
order to claim for warranty, together with the proof of
purchase (receipt).
8
English
EN
This manual suits for next models
1
Table of contents
Other GreenWorks Vacuum Cleaner manuals

GreenWorks
GreenWorks VUG302 User manual

GreenWorks
GreenWorks BVU24211 User manual

GreenWorks
GreenWorks VUF301 User manual

GreenWorks
GreenWorks VUG301 User manual

GreenWorks
GreenWorks VUG403 User manual

GreenWorks
GreenWorks VUG403 User manual

GreenWorks
GreenWorks VUG402 User manual

GreenWorks
GreenWorks GRV-3011 User manual

GreenWorks
GreenWorks WDV40B00 User manual

GreenWorks
GreenWorks VUF401 User manual