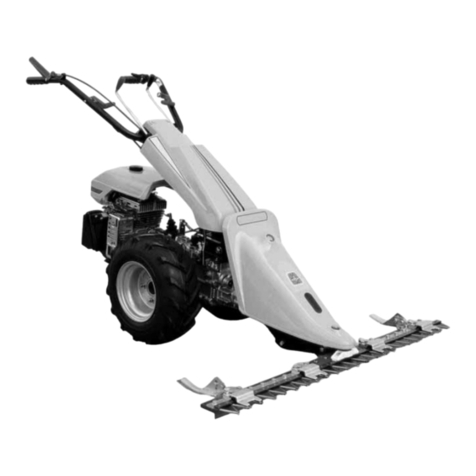
Grillo 2500 User manual

02187
EDIZIONE 2008
2500/3500

GB
Safety rules....................................................................................................................................................... p. 1
Grillo 2500-3500 motor hoe ............................................................................................................................. p. 5
Identification and after-sales service ................................................................................................................ p. 6
Technical data................................................................................................................................................... p. 6
Instructions for use ........................................................................................................................................... p. 7
Putting the machine into service....................................................................................................................... p. 7
Noise levels - vibration levels ........................................................................................................................... p. 10
Description of controls ...................................................................................................................................... p. 49
I
Norme antinfortunistiche................................................................................................................................... p. 1
Motozappa Grillo 2500-3500 ............................................................................................................................ p. 11
Identificazione e assistenza.............................................................................................................................. p. 12
Caratteristiche tecniche .................................................................................................................................... p. 12
Istruzioni per l’uso............................................................................................................................................. p. 13
Messa in opera della macchina ........................................................................................................................ p. 13
Rumorosità - vibrazioni ..................................................................................................................................... p. 16
Descrizione dei comandi................................................................................................................................... p. 49
F
Règles de sécurité générale ............................................................................................................................. p. 1
Motohoue Grillo 2500-3500 .............................................................................................................................. p. 17
Identification et assistance................................................................................................................................ p. 18
Caractéristiques techniques ............................................................................................................................. p. 18
Mode d’emploi .................................................................................................................................................. p. 19
Mise en service de la machine ......................................................................................................................... p. 19
Bruit - vibrations................................................................................................................................................ p. 22
Description des commandes ............................................................................................................................ p. 49
D
Sicherheitsvorschriften ..................................................................................................................................... p. 1
Motorhacke Grillo 2500-3500 ........................................................................................................................... p. 23
Identifikation der Maschine und Kundendienst ................................................................................................. p. 24
Technische Daten ............................................................................................................................................. p. 24
Betriebsanleitung .............................................................................................................................................. p. 25
Inbetriebnahme der Maschine .......................................................................................................................... p. 25
Geräuschemission - Vibrationen....................................................................................................................... p. 28
Beschreibung der Steuerungen ........................................................................................................................ p. 49
E
Normas de seguridad ....................................................................................................................................... p. 1
Motoazada Grillo 2500-3500 ............................................................................................................................ p. 29
Identificación y asistencia ................................................................................................................................. p. 30
Características técnicas.................................................................................................................................... p. 30
Instrucciones de uso......................................................................................................................................... p. 31
Puesta en marcha de la máquina ..................................................................................................................... p. 31
Niveles del ruido - vibración.............................................................................................................................. p. 34
Descripción mandos ......................................................................................................................................... p. 49
P
Normas de precaução contra acidentes ........................................................................................................... p. 1
Enxada mecânica Grillo 2500-3500.................................................................................................................. p. 35
Identificação e assistência................................................................................................................................ p. 36
Características técnicas.................................................................................................................................... p. 36
Instruções para o uso ....................................................................................................................................... p. 37
Activação da máquina ...................................................................................................................................... p. 37
Nível de ruído - nível de vibrações ................................................................................................................... p. 40
Descrição dos comandos ................................................................................................................................. p. 49
GR
1
41
42
42
43
43
46
49
1

2

3

4

5
2500 - 3500 MOTOR HOE
Dear Customer,
Thank you for choosing our motor hoe; we are sure that your new machine’s performance will meet your
requirements in full.
To ensure optimum service and maintenance of its qualities over time, read this manual carefully and
follow its instructions. This will give you the best results and protect your investment.
Please keep this manual, which must always accompany the machine.
CAUTION! Before starting the engine, read this carefully.
The following warnings are very important in ensuring safety!
SAFETY REGULATIONS
Caution is your main weapon in preventing accidents!
We urge you to read the following regulations for use of the machine carefully before starting work.
Improper use of the machine and its equipment may cause damage; to reduce this risk, read the following
precautions carefully.
1) Read the whole of this manual before starting the machine or putting it in motion.
2) Pay special attention to the safety warnings and labels applied around the machine.
3) The rotating tilling implement is extremely dangerous, never place hands or feet under the
implement.
4) Before other people are allowed to use the machine they must first be informed about the safety
regulations and how to use the vehicle.
5) Before starting the engine, make sure that there is no-one nearby, particularly children.
6) Never use the machine when tired and do not drink alcohol
7) Check the ground before starting tilling, ensuring that there are no stones, sticks or large pieces of
scrap which might damage the machine or be flung out by the tilling implement, causing serious
hazards.
8) Before starting work, put on suitable working clothes, gloves, heavy footwear and goggles.
9) Never use the machine on steep slopes; it might tip.
10) Never allow the machine to be used by anyone under 16 years of age.
11) Never reverse with the engine at high throttle.
12) Never operate the levers too quickly with the engine at full throttle.
13) Never keep the engine running indoors; you may inhale poisonous gases.
14) Always switch off the engine before filling up with fuel, keep away from sparks or flames and do not
smoke!
15) Avoid fuel spills and after filling the tank clean all spills before starting the engine.
16) Never tamper with or disactivate the safety devices.
17) Never make any adjustments or do any cleaning with the engine running.
18) Never have anyone check the machine while you are in the driving position with the engine
running.
19) The user is always responsible for injury or damage to third parties.
20) Any improper use causes the guarantee to become null and void and the constructor will decline all
liability.
21) Misshapen or damaged tiller tines must always be replaced and never repaired.
22) Always use original spare parts.
23) Before any work with the machine, check that all the safety systems with which it is equipped are in
perfect working order. Disabling or tampering with them is strictly forbidden.
24) Before starting work, check that all fastening nuts and bolts are perfectly tight.
25) The protective equipment (engine hoods, mudguards, etc.) must be kept in place during work.
26) Never clean the tiller implement with the engine running.
27) Never use the machine with bare feet.

6
IDENTIFICATION AND AFTER-SALES SERVICE
IDENTIFICATION
The motor hoe is fitted with a nameplate on the chassis with the serial number of the machine.
This number must be stated when requesting service or ordering spare parts.
SERVICING
This handbook provides the instructions for using the motor hoe. For a correct basic maintenance contact
your Local Dealer.
SPARE PARTS
Originalspares shouldalwaysbe usedasthese aretheonly oneswhich offersafetyand interchangeability.
Each order should include the machine serial number and the code of the spare part needed.
For engine spares, refer to the information in the specific handbook.
WARRANTY
The warranty is subject to the terms and conditions stated on the card.
As regards the engine, the individual manufacturers’ conditions apply.
RECOMMENDED SPARE PARTS TO BE KEPT ON HAND
No 1 throttle wire
No 1 clutch wire
No 1 throttle lever
No 2 right tiller tines with screws
No 2 left tiller tines with screws
HOW TO ORDER SPARE PARTS
Always state the machine serial number and the code of the spare part needed. Contact your nearest
Grillo service centre. For more information address your enquiries to:
GRILLO S.p.A.
Via Cervese 1701 - 47023 CESENA (FC) ITALY
Tel. 0039 - 0547 - 633.111 / Fax 0039 - 0547 - 632.011
2500 TECHNICAL DATA
ENGINES:
BRIGGS & STRATTON INTEK 5,5
INTERMOTOR LGA226
MINSEL 165
SUBARU EX17
MACHINE:
Clutch: dry, manual control, inverted clutch.
Gearbox: with gears in oil bath; 2 forward speeds.
Travel speeds with 5.1-10 tyres and engine at 3600 rpm.:
I 4.7 Km/h
II 11.1 Km/h
Handlebars: With vertical and horizontal adjustment.
Tiller implement: Standard 65 cm with conversion to 92 cm.
Standard machine dimensions: 115 x 65 x 100 cm.
Weight: with petrol engine: 65 Kg.
Implements and attachments: Plough - Furrower - Ratchet hubs - Wheel extensions - Towed trailer -
Wheels with tyres - Towing bar - Tiller extensions - Ballast weights.
2500
65 kg.
0000
3,7/3600
tipo
serie
massa c.a.
anno
KW/giri minuto
Cod. 03300
000000

7
3500 TECHNICAL DATA
ENGINES:
INTERMOTOR LGA 226
LOMBARDINI 15 LD 225
MINSEL 165
YANMAR L70
SUBARU EX17
MACHINE:
Clutch: dry, manual control, inverted clutch.
Gearbox: with gears in oil bath; 2 forward speeds + 1 reverse gear.
Travel speeds with 5.1-10 tyres and engine at 3600 rpm.:
I 4.7 Km/h
II 11.1 Km/h
Reverse 4.7 Km/h
Handlebars: With vertical and horizontal adjustment.
Tiller implement: Standard 92 cm with conversion to 65 cm.
Standard machine dimensions: 120 x 92 x 100 cm.
Weight with Diesel engine: 86 Kg.
Implements and attachments: Plough - Furrower - Ratchet hubs - Wheel extensions - Towed trailer -
Wheels with tyres - Towing bar - Tiller extensions - Ballast weights.
INSTRUCTIONS FOR USE
PUTTING THE MACHINE INTO SERVICE
1) Check that the machine has not been damaged in transit.
2) Fix the spur (fig. 8).
3) Fix the tines’covers (fig. 12).
4) Fix the engine support foot (when applicable), fig. 4.
5) Fill the engine oil tank (see engine handbook).
6) Check that the oil in the gearbox can be seen through the sight glass (fig. 3).
7) That the air filter (dry version) is clean (fig. 5) and its oil at the right level (fig. 4).
8) Check that clutch wire has a little clearance (fig. 6).
9) Fill the fuel tank using a funnel with a very fine filter to trap any dirt.
10) Make sure that the gear lever is in neutral.
STARTING THE ENGINE
After making the checks referred to above:
Push the throttle lever (3, fig. 2) to the halfway position.
Turn on the fuel tap and close the choke (for petrol engines).
For Diesel engines move the supplementary fuel lever as shown in the engine instructions booklet
Start the engine by pulling the pull starter handle hard (fig. 7).
Once the engine has started (for petrol engines re-open the choke), move the throttle lever (3, fig. 2)
gradually to the minimum setting.
Let the engine warm up for a few minutes before starting work and do not strain the machine too much
during the first 50 working hours, to allow it to run in well.
STARTING WORK
Move the gear lever to the desired position. If the gear does not engage immediately, give a few small
touches on the clutch lever. Accelerate the engine using the throttle lever (3, fig. 2). Press the clutch slowly
until the machine starts moving.
FINISHING WORK
After finishing work, to stop the engine: (for petrol engines) act on the throttle lever, (for diesel engines)
act on the lever placed on the engine itself; place the gear-lever in neutral.
For petrol engines, turn off the fuel tap. Always refer to the engine manual.
86 kg.
0000
000000

8
MAINTENANCE
The motor-cultivator is designed to require very little maintenance. However, in order to keep the machine
at its highest performance the following operations are recommended:
– Check that all screws and nuts are always well tightened, particularly those fixing the tine assemblies
on the shaft and securing the motor, the tines and the rear shoe plate;
– Lubricate the clutch and throttle wires;
– Do not use mineral oil on rubber parts as this will damage them;
– Check that there is always a little play on the clutch wire between the register and the lever;
– Always check the oil level and clean the air filter often.
LUBRICATION
The operations described below must be carried out with the machine horizontal.
N.B.:
Change oil when the machine is hot to aid total drainage of the old oil. Never remove the oil level caps
with the machine running as circulating oil may spill out.
ENGINE OIL:
Follow the directions in the instruction booklet carefully. However it is essential to check the oil level every
4 working hours and change it about every 50 hours.
AIR FILTER:
Check oil level every 8 hours or even more frequently in very dusty environments. Use the same oil as
for the engine for any changes of oil, which should be effected quite frequently, or for top-ups.
GEARBOX OIL:
Check oil level about every 50 working hours and if necessary top up with MP 85 W/90 gearbox oil (= API
GL-5, US Department of the Army MIL-L-2105D, ZF TE-ML 01,05A,07A).
Change the oil once a year (quantity 1.35 Kg). To drain the old oil from the gearbox, undo the screws
on the cover around the tiller shaft (11).
USEFUL HINTS FOR GOOD PERFORMANCE:
1) Never leave the machine in the rain.
2) Do not strain the gear selector if the gears do not engage at once but work the clutch slightly while
engaging it.
3) Never strain the engine too much; in case of excessive smoke from the exhaust pipe it is labouring;
reduce speed.
4) Even the hardest soils can be tilled if the machine has first been run in properly.
5) Never work at full speed.
6) If the machine overheats during the first working day, stop for a few minutes, it needs some rest.
7) Remove any leaves and grass which accumulate on the mesh around the drive pulley.
8) Using the machine without the safety device is absolutely forbidden.
END OF SEASON MAINTENANCE
Wash the machine carefully and change the engine and gearbox oil. Sharpen and grease the tiller tines;
they should be replaced if worn.
If during the working season some pieces have broken or some screws have been lost, now is the time
to put everything right.
Never keep the machine in animal sheds or close to chemical fertilisers, because some parts might rust.

9
IMPLEMENTS
CAUTION!
Before fitting the tiller assemblies, ratchet nubs or wheel extensions on the tiller shaft (5), check that both
the shaft and the implement to be fitted are perfectly clean. After fitting the implement on the shaft, tighten
the fixing screws carefully.
Tillage depth can be regulated by lowering or raising the central shoe plate.
The pointed end of the plate should be facing forward when working in hard, compact soils or backward
when the soil is looser (fig.8).
PLOUGHS
The ploughs manufactured specifically for the motor-cultivator have been carefully designed to obtain
good ploughing without tiring the operator excessively. Two types of plough are available: single furrow
and turn-wrest at 180°. The latter is particularly advisable in jobs requiring work in both directions, such
as earthing-up along lines of vegetables, in vineyards or in orchards. The depth of the furrow obtained
may vary from 10 to 15 cm, depending on the terrain.
The plough must be fitted on an adjustable implement mount (see fig. 9); simply remove the foot support
by taking out the split-pin and pin (fig. 8).
The two tiller implement units also have to be removed by taking out the two fixing screws (fig. 10), after
which the wheel extensions are fitted, fixing them with the same screws, and the tyred wheels, type 5.00
x 10 are mounted.
ADJUSTABLE FURROWER
This implement has been specially designed for sowing and irrigation furrowing (fig. 11).
The position of the two wings can be changed to vary the furrow width from a minimum of 10 cm (4") to
a maximum of 30 cm (11.8"). Depth ranges from 10 cm (4") to 20 cm (8"). In case of particularly hard soils
till well before furrowing. Fitting this implement on the machine is extremely simple; just remove the shoe
plate and fit the furrower (fig. 11).
The two tiller implement units also have to be removed by taking out the two fixing screws (fig. 10), after
which the wheel extensions are fitted, fixing them with the same screws, and the tyred wheels, type 5.00
x 10 are mounted.
RATCHET HUBS
The ratchet hub is a special wheel unit, designed to allow the best performance when the motor-cultivator
is used with a towed trailer, since the ratchets work in the same way as a differential. Fit the ratchets onto
the tiller shaft, fix with the screws provided and then fit the wheels with tyres (fig. 13).
TRAILER
A very useful implement for small farming hauls (fig. 14). Its handiness, small size and quick applicability
to the motor-cultivator are its most outstanding features. The trailer can be attached directly to the
cultivator by means of the towing bar (fig. 15). The wheel extensions or ratchet hubs with tyred wheels
4.00x8 are also necessary. The mounting procedure is as for the ratchet hubs.

10
NOISE LEVELS
The machine’s noise level was measured in accordance with the EN 709 standard by the Institute
of Agricultural Engineering, Bologna University.
The noise levels were measured using a Bruel & Kjaer measuring device, serial number 1178097,
complying with IEC804, IEC651-1I, ANSI S1.4-1983 and a B&K microphone complying with IEC651.
The noise levels were measured in an area free from obstacles over a radius of at least 20 m. and
with the engine at normal operating temperature.
The data given below refer to draft standard CEE PrEN 1553: 1994-annex B.
Ambient pressure 760 mmHg;
Temperature 3°C;
Relative humidity 85%;
Wind speed below 0.5 m/s (and thus the correction constant due to background noise is equal to
zero).
90.1 90.1 89.9 90.1
1) 2) 3) conventional mean
Engine speed 3060 rpm
(noisiest side Left).
2500-3500 MOTOR HOE
Equivalent acoustic pressure level in the driving position [db(A)]
VIBRATION LEVELS
Thevibrations levelswere measuredbythe Instituteof AgriculturalEngineering, BolognaUniversity.
in accordance with the draft standard CEN PrEN 709: 1994 and standard 1033.
The weighted mean hand acceleration values calculated under the ISO standards are shown in
the table below:
Ambient conditions:
Ambient pressure 770 mmKg;
Temperature 11°C;
Relative humidity 92%;
2500-3500 MOTOR HOE
Engine speed:
3600 rpm nominal without load, and 3060 during the test
Forward direction
Transverse direction
Vertical direction
aeq
6,54
1,85
3,16
5,42
a [m/s2]
hw
TIPPING ANGLE

11
MOTOZAPPA 2500 - 3500
NORME ANTINFORTUNISTICHE
La prudenza è l'arma principale nella prevenzione degli incidenti!
La preghiamo vivamente di leggere con attenzione le seguenti avvertenze, prima ancora di iniziare il lavoro.
L'uso improprio della motozappa e il suo equipaggiamento può risultare dannoso; per ridurre queste
possibilità osservare le precauzioni necessarie di seguito riportate:
1) Leggere questo manuale interamente, prima di accendere e mettere in movimento la motozappa.
2) Dare particolare attenzione alle ammonizioni e alle etichette di sicurezza attorno alla macchina.
3) La rotazione della fresa è altamente pericolosa, non mettere mai le mani o i piedi sotto alla fresa.
4) Prima di fare lavorare con la motozappa altre persone bisogna metterle al corrente delle norme di
sicurezza e di come si usa la macchina.
5) Prima di accendere la motozappa verificare che non ci siano persone intorno; specialmente bambini.
6) Non usare la motozappa quando si è affaticati e non bere alcoolici.
7)
Controllare il terreno prima di procedere alla fresatura, che non vi siano sassi, bastoni o corpi estranei,
che potrebbero danneggiare la macchina o essere scagliati lontano, e quindi molto pericolosi.
8) Prima di iniziare il lavoro, indossare indumenti appropriati da lavoro, guanti, scarponi,
occhiali.
9) Non usare la motozappa su forti pendenze, si potrebbe ribaltare.
10) Non fare lavorare ragazzi troppo giovani; è vietato l'uso ai minori di 16 anni.
11) Non fare retromarcia col motore accelerato.
12) È pericoloso azionare le leve bruscamente, col motore a massimo regime.
13) Per evitare il pericolo di esalazioni velenose, non adoperare il motore acceso in un locale chiuso.
14) Spegnere sempre il motore prima di fare rifornimento di combustibile, stare lontano da scintille o
fiamme, non fumare!
15) Evitare fuoriuscite di combustibile e dopo aver riempito il serbatoio pulire ogni fuoriuscita sulla
motozappa prima di avviare il motore.
16) Non manomettere o disattivare i dispositivi di sicurezza.
17) Non fare nessun tipo di regolazione o pulizia col motore in moto.
18) Non fare controllare la macchina da nessuno mentre siete alla guida col motore in moto.
19) L'utilizzatore è sempre responsabile dei danni arrecati a terzi.
20) Ogni utilizzo improprio comporta il decadimento della garanzia ed il declino di ogni responsabilità del
costruttore.
21) Le zappe deformate o danneggiate devono essere sempre sostituite, mai riparate.
22) Usare sempre ricambi originali.
23) Prima di cominciare qualsiasi lavoro con la macchina, verificare che tutti i sistemi antinfortunistici, di
cui essa è dotata, siano perfettamente funzionanti. È severamente vietato escluderli o manometterli.
24) Prima di iniziare il lavoro, controllare che le viti e i dadi di bloccaggio della fresa e delle zappette siano
perfettamente serrati.
25) L'attrezzatura protettiva (cofani, parafanghi, ecc.), va assolutamente mantenuta durante i lavori di
zappatura.
26) Non pulire la fresa con il motore acceso.
27) Non utilizzare la macchina a piedi nudi.
ATTENZIONE! Prima di avviare il motore leggere attentamente.
Le seguenti avvertenze sono importanti per l'incolumità!
Gentile Cliente,
nel ringraziarLa per la fiducia e la preferenza accordata alla nostra motozappa, confidiamo che l'uso di
questa sua nuova macchina risponda pienamente alle sue esigenze.
Per l'impiego ottimale e per la sua manutenzione nel tempo, la preghiamo di leggere attentamente e
seguire scrupolosamente le indicazioni di questo libretto; ciò le consentirà di ottenere i massimi risultati
e salvaguardare la sua spesa.
La preghiamo di conservare questo libretto, che dovrà sempre accompagnare la macchina.

12
IDENTIFICAZIONE E ASSISTENZA
IDENTIFICAZIONE
La motozappa è fornita di una targhetta posta sul telaio con il numero di matricola della macchina.
Questo numero è indispensabile per ogni richiesta di intervento tecnico e per l'ordinazione dei ricambi.
SERVIZIO ASSISTENZA
Questo manuale fornisce le indicazioni per l’uso della motozappa. Per una corretta manutenzione
interpellare il Rivenditore di Zona.
RICAMBI
Si raccomanda di impiegare esclusivamente ricambi originali, gli unici che offrono caratteristiche di
sicurezza e intercambiabilità.
Ogni richiesta deve essere corredata del numero di matricola della macchina e il numero di codice del
pezzo da sostituire.
Per i ricambi del motore, attenersi a quanto indicato nel libretto specifico.
GARANZIA
La garanzia è fornita nei modi e nei limiti indicati nell’apposita cartolina.
Per quanto riguarda il motore, valgono le condizioni previste dai rispettivi Produttori.
RICAMBI CONSIGLIATI DA TENERE IN SCORTA
N. 1 filo acceleratore
N. 1 filo frizione
N. 1 manettino acceleratore
N. 2 zappe destre con viti
N. 2 zappe sinistre con viti
COME ORDINARE I RICAMBI
Indicare sempre il numero di matricola della macchina e il codice del pezzo da sostituire. Rivolgersi ai
nostri centri Grillo presenti in ogni provincia. Per informazioni il nostro indirizzo è:
GRILLO S.p.A.
Via Cervese 1701 - 47023 CESENA (FC)
Tel. 0547 - 633.111 / Fax 0547 - 632.011
CARATTERISTICHE TECNICHE 2500
TIPI MOTORE:
BRIGGS & STRATTON INTEK 5,5
INTERMOTOR LGA226
MINSEL 165
SUBARU EX17
MACCHINA
Frizione: A secco con comando manuale, invertita.
Cambio: A ingranaggi in bagno d'olio 2 marce avanti.
Velocità d'avanzamento con ruote 5.0-10 e motore a 3600 g/min.:
I 4,7 Km/h
II 11,1 Km/h
Stegole: Regolabili in altezza e lateralmente.
Fresa: Standard cm. 65 trasformabili in cm. 92.
Dimensioni macchina standard: cm. 115 x 65 x 100.
Peso con motore a scoppio: Kg. 65.
Attrezzi ed accessori applicabili: Aratro - Assolcatore - Mozzi a cricchetto - Prolunghe ruote -
Rimorchietto trainato - Ruote gomma - Tiro di traino - Allargamenti zappe - Zavorre.
2500
65 kg.
0000
3,7/3600
tipo
serie
massa c.a.
anno
KW/giri minuto
Cod. 03300
000000

13
CARATTERISTICHE TECNICHE 3500
TIPI MOTORE:
INTERMOTOR LGA 226
LOMBARDINI 15 LD 225
MINSEL 165
YANMAR L70
SUBARU EX17
MACCHINA
Frizione: A secco con comando manuale, invertita.
Cambio: A ingranaggi in bagno d'olio 2 marce avanti + 1 retromarcia.
Velocità d'avanzamento con ruote 5.0-10 e motore a 3600 g/min.:
I 4,7 Km/h
II 11,1 Km/h
R.M. 4,7 Km/h
Stegole: Regolabili in altezza e lateralmente.
Fresa: Standard cm. 92 trasformabili in cm. 65.
Dimensioni macchina standard: cm. 120 x 92 x 100.
Peso con motore Diesel: Kg. 86.
Attrezzi ed accessori applicabili: Aratro - Assolcatore - Mozzi a cricchetto - Prolunghe ruote -
Rimorchietto trainato - Ruote gomma - Tiro di traino - Allargamenti zappe - Zavorre.
ISTRUZIONI PER L’USO
MESSA IN OPERA DELLA MACCHINA
1) Verificare l’integrità della macchina che non abbia subito danni durante il trasporto.
2) Montare lo sperone (fig. 8.)
3) Montare i cofani zappe (fig. 12).
4) Montare il piedino motore (ove previsto) fig. 4.
5) Inserire l’olio motore (vedi apposito libretto).
6) Verificare che l’olio cambio sia visibile attraverso l’indicatore livello (fig. 3).
7) Che il filtro aria (vers. a secco) sia ben pulito (fig. 5). Che il filtro dell'aria (vers. a bagno d'olio) sia ben
pulito e l'olio a livello (fig. 4).
8) Controllare che il filo frizione abbia un po’ di gioco (fig. 6).
9) Riempire il serbatoio di carburante con un imbuto munito di filtro molto fine per trattenere eventuali
impurità.
10) Accertarsi che la leva marce sia in posizione “folle”.
AVVIAMENTO DEL MOTORE
Eseguiti i seguenti controlli:
Portare il manettino acceleratore (3, fig. 2) a metà corsa.
Aprire il rubinetto della benzina e chiudere lo starter (per motori a scoppio).
Agire sulla leva supplemento gasolio come indicato sul libretto motore (per motori Diesel).
Tirare energicamente la manopola dell'avviamento autoavvolgente (fig. 7).
Ad avviamento avvenuto, riaprire lo starter (per motori a scoppio) e riportare lentamente il manettino
acceleratore (3, fig. 2) vicino alla posizione di minimo.
Lasciare scaldare il motore per qualche minuto prima di iniziare il lavoro e per favorire un buon rodaggio
non forzare eccessivamente la macchina durante le prime 50 ore di utilizzazione.
AVVIAMENTO DELLA MACCHINA
Portare la leva del cambio nella posizione desiderata. Nel caso la marcia non si innestasse subito dare
dei piccoli colpi di frizione. Accelerare il motore tramite il manettino acceleratore (3, fig. 2). Premere
lentamente la frizione fino a che la macchina si sarà messa in movimento.
86 kg.
0000
000000

14
FINE LAVORO
Terminato il lavoro,
per arrestare il motore: per i motori a benzina agire sul manettino acceleratore, per i
motori diesel agire sulla levetta nel motore; mettere il cambio in folle.
Per motori a scoppio chiudere il rubinetto della benzina. Consultare sempre il libretto istruzioni del motore.
MANUTENZIONE
La motozappa è progettata in modo da richiedere pochissima manutenzione. Pur tuttavia per mantenere
la macchina al massimo del rendimento è opportuno eseguire le seguenti operazioni:
– Controllare che tutte le viti ed i dadi siano sempre ben serrati; in modo particolare i dadi che fissano
i gruppi zappe sull'albero, il motore, le zappe ed il supporto del piedino posteriore;
– oliare i cavi dell'acceleratore e della frizione;
– non usare olio minerale per le parti in gomma perchè si rovinano;
– controllare che il filo frizione abbia sempre un po' di gioco nel tratto fra il registro e la leva;
– controllare sempre i livelli olio e pulire frequentemente il filtro aria.
LUBRIFICAZIONE
Eseguire le seguenti operazioni tenendo la macchina in posizione orizzontale.
NOTE:
La sostituzione olio va effettuata a macchina calda per favorire la fuoriuscita totale dell'olio vecchio. Non
sfilare i tappi livello olio con macchina in moto onde evitare la fuoriuscita dell'olio in circolo.
OLIO MOTORE:
Attenersi scrupolosamente alle norme contenute nel libretto motore. È comunque indispensabile
controllare il livello ogni 4 ore di lavoro e sostituirlo ogni 50 ore circa.
FILTRO ARIA:
Controllare il livello olio ogni 8 ore, ed anche più frequentemente se l'ambiente è molto polveroso. Per
la sostituzione, da effettuarsi con una certa frequenza, o per il ripristino del livello, utilizzare lo stesso olio
del motore.
OLIO CAMBIO:
Controllare il livello ogni 50 ore circa di lavoro e se occorre, aggiungere olio per cambio MP 85 W/90
(= API GL-5, US Department of the Army MIL-L-2105D, ZF TE-ML 01,05A,07A).
Sostituire l'olio una volta all'anno (quantità Kg. 1,350). Per togliere l'olio vecchio dal carter cambio,
allentare le viti situate sul coperchio attorno all'albero zappe (11).
REGOLE UTILI PER UN BUON USO:
1) Non lasciare mai la macchina sotto la pioggia.
2) Non forzare il cambio se la marcia non si inserisce: mentre si innesta la marcia dare dei piccoli colpi
di frizione.
3) Non forzare mai troppo il motore, quando fuma eccessivamente dallo scarico, è sotto sforzo: occorre
rallentare.
4) Si possono zappare anche terreni impossibili; prima però è necessario fare un buon rodaggio alla
macchina.
5) Non lavorare mai a tutto gas.
6) Se nella prima giornata la macchina si surriscalda, bisogna fermarla qualche minuto, ha bisogno di
riposare.
7) Togliere le eventuali foglie ed erbe che si depositano sulla reticella posta attorno alla puleggia del
motore.
8) È assolutamente vietato usare la macchina senza il dispositivo di sicurezza.

15
MANUTENZIONE DI FINE STAGIONE
Lavare la macchina con cura; sostituire l'olio sia nel motore sia nel carter cambio. Affilare le zappe ed
ungerle; se risultano consumate è bene sostituirle.
Se durante la campagna di lavoro qualche parte si è rotta e qualche vite è andata perduta, questo è il
momento di rimettere le cose a posto.
Non tenere mai la macchina nella stalla o vicino a concimi chimici, perchè certe parti potrebbero
arrugginire.
ATTREZZI
ATTENZIONE:
Prima di montare i gruppi zappe, i mozzi a cricchetto o le prolunghe ruote sull'albero zappe (5), verificare
che quest'ultimo e la parte interna dell'accessorio da montare, siano perfettamente puliti. Inserito
l'accessorio sull'albero, stringere con cura le viti di fissaggio.
Si può ottenere una maggiore o minore profondità di zappatura, abbassando o sollevando il piedino posteriore.
Si consiglia, inoltre, di girare la punta del piedino in avanti quando si lavora in terreni duri e compatti; oppure
di girare all'indietro quando invece il terreno non ha una eccessiva consistenza (fig. 8).
ARATRI
Gli aratri studiati per la motozappa sono stati particolarmente messi a punto per ottenere dei buoni lavori
di aratura, senza affaticare eccessivamente l'operatore. Sono disponibili in 2 tipi: monovomere e
voltaorecchioa 180°.Quest'ultimo èparticolarmente indicatoove sidebbano eseguirelavorazioninei due
sensi, come rincalzature in filari, vigneti o frutteti. La profondità del solco ottenibile può variare dai 10 ai
15 cm. a seconda del terreno.
L'aratro va montato su un portattrezzi registrabile (v. fig. 9): smontando semplicemente il supporto del
piedino togliendo la copiglia ed il perno (fig. 8). Occorre inoltre smontare i due gruppi zappe togliendo le
due viti di fissaggio (fig. 10), e montare le prolunghe ruote fissandole con le stesse viti, quindi le ruote
gomma del tipo 5.00 x 10.
ASSOLCATORE REGISTRABILE
L'assolcatore registrabile è un attrezzo particolarmente studiato per eseguire solchi di semina o di
irrigazione (fig. 11).
La possibilità di variare la posizione delle due ali permette la regolazione della larghezza del solco da un
minimo di 10 cm. ad un massimo di 30. La profondità ottenibile può variare da 10 a 20 centimetri.
Nel caso si debba operare in terreni particolarmente duri è opportuno eseguire prima una operazione di
fresatura e quindi procedere al lavoro con l'assolcatore. Il montaggio di questo attrezzo sulla macchina
è semplicissimo, è sufficiente togliere il piedino e montare l'assolcatore (fig. 11).
Per lo smontaggio delle zappe ed il montaggio delle ruote si procede come descritto per gli aratri.
MOZZI A CRICCHETTO
Il mozzo a cricchetto è un attacco ruota particolare, costruito per poter usare, con la massima facilità, la
motozappa con un rimorchietto trainato, in quanto i cricchetti funzionano come un differenziale. I cricchetti si
applicano sull'albero zappe, si fissano con le viti in dotazione e si montano quindi le ruote gomma (fig. 13).
RIMORCHIO
Il rimorchietto per la motozappa è un accessorio molto utile per eseguire piccoli trasporti aziendali (fig. 14).
La sua maneggevolezza, il ridotto ingombro e la rapida applicazione alla motozappa, ne costituiscono
le caratteristiche più salienti. Il rimorchio si applica direttamente alla motozappa mediante il tiro di traino
(fig. 15). Sono necessari inoltre o le prolunghe ruote o i mozzi a cricchetto con le ruote gomma 4.00x8.
Per il montaggio si procede come per i mozzi a cricchetto.

16
RILIEVO DEI LIVELLI DI RUMOROSITÀ
La rumorosità della macchina è stata rilevata secondo la norma EN 709 dall'Istituto di Meccanica
Agraria dell'Università degli Studi di Bologna.
Per il rilievo dei livelli di rumorosità è stato impiegato un misuratore Brüel & Kjær 2231, Ser. No. 1178097,
conforme alle IEC804, IEC651-1I, ANSI S1.4-1983, ed un microfono B&K 4133, conforme alla IEC651.
Il rilievo dei livelli di rumorosità è stato eseguito in area libera da ostacoli per un raggio di almeno
20 m. e con motore alla temperatura di regime.
Per quanto segue ci si riferisce alla proposta CEE PrEN 1553: 1994-annesso B.
Pressione ambiente 760 mmHg;
Temperatura 3°C;
Umidità relativa 85%;
Velocità del vento inferiore a 0.5m/s, (e quindi la costante di correzione dovuta al rumore di fondo
vale 0).
90.1 90.1 89.9 90.1
1) 2) 3) media convenzionale
Regime di rotazione del Motore
3060 giri/min (lato più rumoroso S)
MOTOZAPPA 2500 - 3500
Livello equivalente di pressione acustica nella posizione del pilota [dB (A)]
RILIEVO DEI LIVELLI DI VIBRAZIONE
Il rilievo dei livelli di vibrazione è stato effettuato dall'Istituto di Meccanica Agraria dell'Università
degli Studi di Bologna secondo la proposta CEE PrEN 709; 1994 ed alla norma EN 1033.
I valori dell'accelerazione media ponderata alla mano secondo le norme ISO sono riportati nella
tabella seguente.
Condizioni ambientali:
Pressione ambiente 770 mmHg;
Temperatura 11°C;
Umidità relativa 92%.
Motozappa tipo 2500 - 3500
Velocità di rotazione del motore:
3600 rpm numinali a vuoto, e 3060 rpm durante la prova.
Dir. di avanzamento
Dir. trasversale
Dir. Verticale
aeq
6,54
1,85
3,16
5,42
a [m/s2]
hw
ANGOLO DI RIBALTAMENTO

17
MOTOHOUE 2500 - 3500
Cher Client,
Nous vous remercions de la confiance et de la préférence que vous avez bien voulu accorder à notre
motohoue. Nous sommes certains que l’utilisation de votre nouvelle machine répondra entièrement à vos
exigences.
Pour un emploi optimal et pour son entretien, nous vous demandons de lire attentivement et de suivre
scrupuleusement les indications de cette brochure; cela vous permettra d’obtenir d’excellents résultats
et de sauvegarder votre investissement.
Nous vous prions également de conserver ce Manuel qui doit toujours accompagner la machine.
ATTENTION! Lire attentivement les instructions avant d’activer le moteur.
Les précautions suivantes sont importantes pour votre sécurité.
NORMES POUR LA PREVENTION DES ACCIDENTS.
La prudence est la meilleure arme pour la prévention des accidents!
Nous vous demandons de lire attentivement les mises en garde suivantes avant de commencer le travail.
L’utilisation inadéquate du motoculteur et de son équipement peuvent être dangereux. Pour réduire ces
possibilités de danger, veuillez respecter les précautions suivantes:
1) Lire entièrement ce Manuel avant d’activer et de mettre la machine en mouvement.
2) Suivre avec une attention particulière les mises en garde et les étiquettes de sécurité placées sur la machine.
3) La rotation de la fraise est très dangereuse: ne jamais mettre les mains ou les pieds sous la fraise.
4) Avant de confier votre motoculteur à d’autres personnes, leur signaler soit les normes de sécurité, soit le mode
d’emploi.
5) Avant de placer le motoculteur sous tension, vérifier qu’il n’y ait personne aux alentours, en particulier des
enfants.
6) Ne pas utiliser le motoculteur en cas de fatigue et ne boire aucun alcool.
7) Contrôler le terrain avant d’effectuer le fraisage, afin qu’il n’y ait aucun caillou, bâton ou autre corps qui pourrait
endommager la machine ou être lancé au loin et donc être très dangereux.
8) Avant de commencer le travail, revêtir des vêtements appropriés, des gants, des bottes et des lunettes.
9) Ne pas utiliser le motoculteur sur de fortes pentes: il pourrait capoter.
10) Ne pas faire travailler les enfants trop jeunes: l’usage est interdit aux mineurs de moins de 16 ans.
11) Ne pas faire marche arrière si le moteur est accéléré.
12) Il est dangereux d’actionner les leviers brusquement, avec le moteur à un régime maximal.
13) Pour éviter le danger d’exhalaisons toxiques, ne pas faire tourner le moteur dans un local fermé.
14) Désactiver toujours le moteur avant de faire le plein de combustible; rester loin des étincelles ou des flammes
et ne pas fumer.
15) Eviter les fuites de combustible; après avoir rempli le réservoir, nettoyer soigneusement les fuites sur le
motoculteur avant d’activer le moteur.
16) Ne pas altérer ou désactiver les dispositifs de sécurité.
17) N’effectuer aucun réglage ou nettoyage avec le moteur activé.
18)
Ne faire intervenir aucun opérateur pendant que vous conduisez le motoculteur et que le moteur est activé.
19) L’utilisateur est toujours responsable des dégâts occasionnés aux tiers.
20) Toute utilisation impropre comporte la suspension de la garantie et la suppression de la responsabilité du
Constructeur.
21) Les houes déformées ou endommagées doivent être toujours remplacées et ne jamais être réparées.
22) Utiliser toujours des pièces détachées d’origine.
23) Avant de commencer un travail, de quelque nature que ce soit, avec la machine, vérifier que tous les systèmes
pour la prévention des accidents dont elle est équipée soient parfaitement fiables. Il est sévèrement interdit de
les exclure ou de les modifier.
24) Vérifier, avant de commencer le travail, que les vis et les écrous de blocage de la fraise et des houes soient
parfaitement serrés.
25) L’équipement de protection (capots, pare-boue, etc...) doit être absolument maintenu durant les travaux de
binage.
26) Ne pas nettoyer la fraise lorsque le moteur est activé.
27) Ne pas utiliser la machine avec les pieds nus.

18
IDENTIFICATION ET ASSISTANCE
IDENTIFICATION
Le motoculteur est muni d’une plaque signalétique placée sur le châssis, qui indique le numéro de
matricule de la machine. Ce numéro est indispensable pour toute demande d’intervention technique et
pour commander les pièces détachées.
SERVICE ASSISTANCE
Ce manuel fournit toutes indications utiles sur l’emploi de la motobineuse. Pour un entretien correct de
base contacter le Revendeur responsable de la Zone.
PIECES DETACHEES
Nous conseillons vivement d’utiliser exclusivement des pièces détachées d’origine, les seules qui offrent
des caractéristiques de sécurité et d’interchangeabilité.
Toutes les demandes doivent indiquer le numéro de série de la machine et le numéro de code de la pièce
à remplacer.
Pour les pièces détachées relatives au moteur, respecter les indications contenues dans le livret spécifique.
GARANTIE
La garantie est assurée selon les modes et les limites indiqués sur le coupon correspondant.
En ce qui concerne le moteur, respecter les indications prévues par les Constructeurs respectifs.
PIECES DE RECHANGE QUE NOUS CONSEILLONS D’AVOIR EN RESERVE
N. 1 fil l’accélérateur
N. 1 fil embrayage
N. 1 manette accélérateur
N. 2 houes droites avec vis
N. 2 houes gauches avec vis
COMMENT COMMANDER LES PIECES DETACHEES
Indiquer toujours le numéro de série de la machine et le code de la pièce à remplacer.
Contacter nos Centres Grillo qui se trouvent dans chaque département. Pour toute question voici notre adresse:
GRILLO S.p.A.
Via Cervese 1701 - 47023 CESENA (FC) - Italie
Tel. 0039 - 0547 - 633.111 / Fax 0039 - 0547 - 632.011
CARACTERISTIQUES TECHNIQUES 2500
TYPES MOTEUR:
BRIGGS & STRATTON INTEK 5,5
INTERMOTOR LGA226
MINSEL 165
SUBARU EX17
MACHINE
Embrayage: à sec avec commande manuelle, inversé.
Boîte de vitesses: à engrenages dans un bain d’huile à 2 vitesses AV.
Vitesse d’avancement avec roues 5.0-10 et moteur à 3600 tours/min.:
I 4,7 km/h
II 11,1 km/h
Mancherons: réglables en hauteur et latéralement.
Fraise: standard 65 cm, transformables en 92 cm.
Dimensions de la machine standard: 115 x 65 x 100 cm.
Poids avec moteur à explosion: 65 kg.
Outils et accessoires applicables: charrue, butteur, moyeux à cliquets, rallonges roues, remorque
tractée, roues caoutchoutées, attelage de traction, entretoises d’élargissement pour houes, lests.
2500
65 kg.
0000
3,7/3600
tipo
serie
massa c.a.
anno
KW/giri minuto
Cod. 03300
000000
Other manuals for 2500
1
This manual suits for next models
1
Table of contents
Languages:
Other Grillo Lawn And Garden Equipment manuals

Grillo
Grillo DUMPER 406 User manual

Grillo
Grillo G52 User guide

Grillo
Grillo CLIMBER 780 User manual

Grillo
Grillo DUMPER 507 User manual

Grillo
Grillo GH 9 User manual

Grillo
Grillo G52 User guide

Grillo
Grillo CLIMBER 9.27 User manual

Grillo
Grillo FM13.09 User manual

Grillo
Grillo gf2 User manual

Grillo
Grillo CL62 User manual