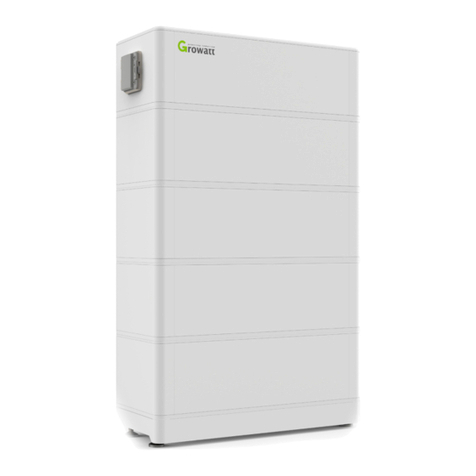
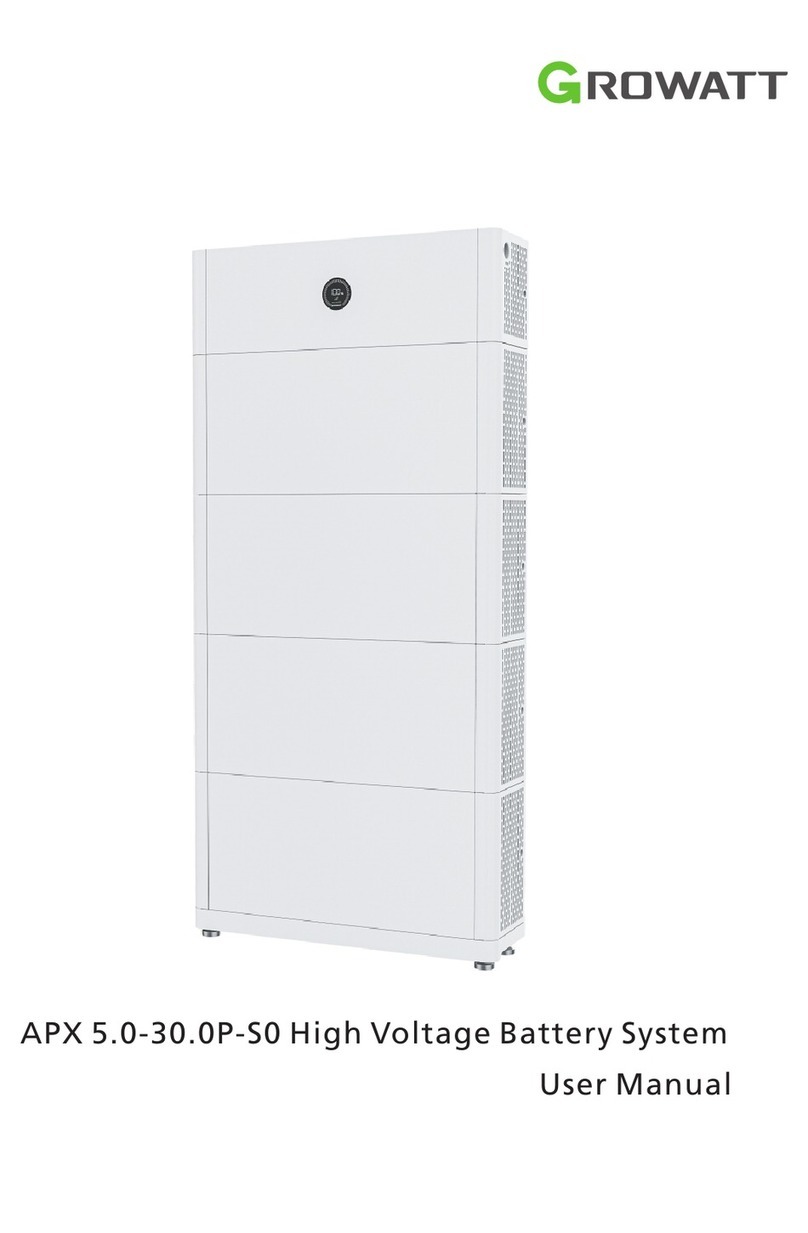
Growatt APX 5.0-30.0P-S1 User manual

Download
Manual
Growatt New Energy
Shenzhen Growatt New Energy Co., Ltd
+86 755 2747 1942
www.ginverter.com
T
E
W
service@ginverter.com
GR-UM-356-A-00
4-13/F, Building A, Sino-German (Europe) Industrial Park,
Hangcheng Ave, Bao’an District, Shenzhen, China
User Manual
APX 5.0-30.0P-S1 High Voltage Battery System

Table of Contents
1 Product Overview
2 Safety
3 Storage and Transportation
2.1 General Safety
2.2 Safety Precautions
2.3 Label Description
2.4 Emergency Responses
4 Installation
5 Power on/off the APX
Battery system 5 1. Power on the APX Battery system
5.2 Power off the APX Battery system
6 1 . Preparation
6.2 Replace a fuse
6.3 Battery Module or Power Module
replacement
6.4 LED indicators
6.5 Troubleshooting
System fault information list and 6.6
troubleshooting suggestions
6.7 Cleaning
1.1 Intended Use
1.2 Appearance
1.3 Working Principle and Function
3 1. Storage Requirements
3.2 Transportation Requirements
4.1 Basic Installation Requirements
4.2 Installation Tools
4.3 Installation Procedures
4.4 Electrical Connection
About this Document
This document introduces the APX 5.0-30.0P-S1 Battery System (short for APX) in terms
of installation, electrical connection, operation, commission, maintenance, and
troubleshooting. Before installing and operating the APX system, ensure that you are
familiar with product features, functions, and safety precautions provided in this
document.
Symbol
Description
result in serious injury or death.
Indicates a potentially hazardous situation, if not avoided, could
6 Maintenance Guide
7 Technical Specifications
7.1 APX 98020-P1 (Power Module)
7.2 APX 5.0P-B1 (Battery Module)
WARNING

Each Battery Module consists of 100Ah LFP battery cells and a DC-DC converter, which
boosts a power source of 51.2V up to 380V. One to six Battery Modules can be connected
in parallel to increase the capacity and power of the energy storage system.
The entire APX 5.0-30.0P-S1 high-voltage energy storage system is composed of a APX
98020-P1 (hereinafter referred to as Power Module) and multiple APX 5.0P-B1 battery
modules (hereinafter referred to as Battery Module, the maximum number of Battery
Module connected in parallel is 6).
The APX battery system powers the loads through the three-phase hybrid inverter MOD
3-10KTL3-XH (Backup version) whenever demanded; when solar becomes available
during daytime, solar energy powers the loads as a priority and the surplus solar power is
stored into the APX battery system.
1 Product Overview
1.1 Intended Use
12
1.2 Appearance
1.2.1 APX 98020-P1(Power Module)
Power Module is composed of Power control units, relay, fuse, DC switch, power supply
and communication terminals. The appearance of the product is shown as below.
No.
Port
Function
1
DC switch
Turn on/off the power connection from Power
Module to hybrid Inverter
2
FUSE
Provide overcurrent protection for a circuit
3
Ground terminal, connect to the hybrid inverter
4
Link-out
APX system parallel communication output port
5
Ground terminal, connect to the Battery Module
6
Link-in
APX system parallel communication input port
7
BAT+
The positive output from APX system to the hybrid
inverter
BAT N
The neutral output from APX system to the hybrid
inverter
BAT-
The negative output from APX system to the hybrid
inverter
8
INV
Port for communication with the hybrid inverter
9
BMU
Communication with the Battery Module
10
Module+
Connect to the positive power terminal of the
Battery Module
11
Module-
Connect to the negative power terminal of the
Battery Module
12
USB
USB port, connect to a USB flash drive to upgrade
firmware
13
Pressure relief valve
Provide protection against excessive pressure
14
Start
Wake up the Battery Module (Press and hold for
over 5 seconds)
Figure 1-1: System diagram of APX High voltage battery system
Figure 1-2: Schematic diagram of power panel
1 2 3 4 5 6 7 8 9 10 11 12 13 14
Fuse
Battery
Inverter
PV Array
AC
Automatic Swich Box
EPS EPS
Load
Load
Meter
Grid
Relay
Fuse
Electrical Grid
AC
Breaker

34
No.
Function
Function description
1
Display SOC
Display current SOC in a progress circle
Display upgrade status
Eight light bars rotate clockwise when the
program is updating
2
Display SOC
Display SOC in percentage
Display upgrade status
When upgrading the program, "UP" is displayed
3
Power Module status indicator
Blinking green indicatesan alarm or the standby
mode;
Steady green during normal operations;
Blinking red due to a fault;
4
Logo
The light is steady on when the APX is on
5
Battery Module status
indicator(Each bar represents
one BM)
Blinking green to generate an alarm;
Steady red due to a fault;
Steady green during normal operations;
Dimensions (unit: mm)
Battery Module consists of LFP battery cells, a DC-DC converter, mechanical parts, the
battery management unit (BMU) as well as power and communication terminals. Product
appearance is shown as below.
Figure 1-4: Dimensions of APX 98020-P1
LED display
Figure1- 3: LED display
1.2.2 APX 5.0P-B1 (Battery Module)
Location
Port
Function
1
Heat sink
DC-DC converter heat sink
2
Ground terminal, connect to the next module
3
Ground terminal, connect to the pervious module
4
Link in
Communicate with the previous module
5
Link out
Communicate with the next module
6
B+
Positive battery cascading terminal B+
7
B-
Negative battery cascading terminal B-
8
USB
USB port, connect to a USB flash drive to upgrade
firmware
9
Stacking guide
component
Module alignment
Figure 1-5: Schematic diagram of the power panel
1 2 3 45
1 2 3 4 5 6 7 8 9
690
295
185

1.3 Working Principle and Function
ŸReport: Report alarms and status data to the hybrid inverter.
The APX 5.0-30.0P-S1 high voltage battery system is composed of a Power Module APX
98020-P1 and multiple Battery Modules APX 5.0P-B1 connected in parallel. It contains
electrochemical batteries, battery control units, power control units, battery
management units, power and signal terminals, and mechanical parts.
A single APX system can connect 1 to 6 Battery Modules in parallel to increase the
capacity and power of the battery system; The APX system communicates with the hybrid
inverter through RS485 communications.
ŸBattery Module balancing: intelligent power distribution, active balancing
The APX distinguishes itself with better charging and discharging performance, higher
charging and discharging efficiency, higher flexibility in capacity expansion, more
accurate status monitoring, longer service life, and less self-discharge loss.
ŸProtection and Alarm: Generate alarms and provide protection in cases of overvoltage,
undervoltage, overcurrent, over-temperature or under-temperature.
ŸParallel connection: Support the parallel connection of one to six Battery Modules.
ŸSystem power-off: 12 minutes after the battery system and hybrid inverter
communication is disconnected.
ŸMonitoring: Monitor the voltage, current and temperature of each battery module and
the battery system.
ŸBattery cell balancing: passive battery balancing.
When installing or using a battery system, observe the safety precautions provided in this
section. For personal safety, the operation personnel must read through this manual and
observe the safety instructions.
2.1 General safety
ŸDamage during the transportation by the customer.
ŸFailure to follow the operation instructions and safety precautions in this document.
ŸUnauthorized modifications or removal of the software package.
The battery system has been designed and tested in accordance with strict rules to meet
international safety certification requirements. Before installing or using the battery
system, please read all safety instructions carefully and observe the rules. Growatt will
not be liable for any consequence of the following circumstances:
ŸImproper installation by unprofessional and unreliable personnel.
ŸDamage caused by improper operations in transportation, storage, installation and
use, or the third party fails to convey the correct information about transportation,
storage, installation and use to end users.
ŸBattery packs fail to be charged for more than six months.
ŸOperation in environments that cannot meet the requirements specified in this
document.
ŸThe product's tamper evident label is removed or any item is missing due to customer's
negligence or intentional damage.
ŸWarranty expiration.
ŸDamage to labels on the chassis or modification on the date of production.
ŸDamage caused by repairing, disassembling, and modifying PACKs without
authorization.
ŸDamage due to force majeure, such as lightning, earthquakes, fire, and storms.
2.2 Safety Precautions
2.2.1 Environment requirements
ØThe battery system must be protected from liquids.
ØPlace the battery in a safe place and ensure that the battery is not accessible to
children and animals.
ØDo not place the battery in a fire, which may cause an explosion.
ØDo not install or use the battery in wet environment with moisture, corrosive gases or
liquids, such as in the bathroom.
ØDo not expose the battery to direct sunlight for extended periods of time.
ØBattery power terminals shall not come in contact with conductive objects such as
wires.
ØDo not expose the battery to temperature above 50°C or heat sources.
Safety 2
Dimensions (unit: mm)
Figure 1-6: Dimensions of APX 5.0P-B1
56
690
295
185
1.3 Working Principle and Function
ŸReport: Report alarms and status data to the hybrid inverter.
The APX 5.0-30.0P-S1 high voltage battery system is composed of a Power Module APX
98020-P1 and multiple Battery Modules APX 5.0P-B1 connected in parallel. It contains
electrochemical batteries, battery control units, power control units, battery
management units, power and signal terminals, and mechanical parts.
A single APX system can connect 1 to 6 Battery Modules in parallel to increase the
capacity and power of the battery system; The APX system communicates with the hybrid
inverter through RS485 communications.
ŸBattery Module balancing: intelligent power distribution, active balancing
The APX distinguishes itself with better charging and discharging performance, higher
charging and discharging efficiency, higher flexibility in capacity expansion, more
accurate status monitoring, longer service life, and less self-discharge loss.
ŸProtection and Alarm: Generate alarms and provide protection in cases of overvoltage,
undervoltage, overcurrent, over-temperature or under-temperature.
ŸParallel connection: Support the parallel connection of one to six Battery Modules.
ŸSystem power-off: 12 minutes after the battery system and hybrid inverter
communication is disconnected.
ŸMonitoring: Monitor the voltage, current and temperature of each battery module and
the battery system.
ŸBattery cell balancing: passive battery balancing.
When installing or using a battery system, observe the safety precautions provided in this
section. For personal safety, the operation personnel must read through this manual and
observe the safety instructions.
2.1 General safety
ŸDamage during the transportation by the customer.
ŸFailure to follow the operation instructions and safety precautions in this document.
ŸUnauthorized modifications or removal of the software package.
The battery system has been designed and tested in accordance with strict rules to meet
international safety certification requirements. Before installing or using the battery
system, please read all safety instructions carefully and observe the rules. Growatt will
not be liable for any consequence of the following circumstances:
ŸImproper installation by unprofessional and unreliable personnel.
ŸDamage caused by improper operations in transportation, storage, installation and
use, or the third party fails to convey the correct information about transportation,
storage, installation and use to end users.
ŸBattery packs fail to be charged for more than six months.
ŸOperation in environments that cannot meet the requirements specified in this
document.
ŸThe product's tamper evident label is removed or any item is missing due to customer's
negligence or intentional damage.
ŸWarranty expiration.
ŸDamage to labels on the chassis or modification on the date of production.
ŸDamage caused by repairing, disassembling, and modifying PACKs without
authorization.
ŸDamage due to force majeure, such as lightning, earthquakes, fire, and storms.
2.2 Safety Precautions
2.2.1 Environment requirements
ØThe battery system must be protected from liquids.
ØPlace the battery in a safe place and ensure that the battery is not accessible to
children and animals.
ØDo not place the battery in a fire, which may cause an explosion.
ØDo not install or use the battery in wet environment with moisture, corrosive gases or
liquids, such as in the bathroom.
ØDo not expose the battery to direct sunlight for extended periods of time.
ØBattery power terminals shall not come in contact with conductive objects such as
wires.
ØDo not expose the battery to temperature above 50°C or heat sources.
Safety 2
Dimensions (unit: mm)
Figure 1-6: Dimensions of APX 5.0P-B1
56
690
295
185

8
7
2.2.2 Operation Precautions
ØWhen storing or handling the batteries, do not stack batteries without package.
ØDo not crush, drop or pierce the battery pack and the high voltage controller.
ØDispose of the batteries according to local safety regulations.
ØStack battery packing cases in compliance with the stacking requirements on the
external package.
ØDo not use damaged, faulty or deformed batteries, which may release flammable
gases that may cause a fire or other safety hazards.
ØThe Pack shall be repaired, replaced or maintained by qualified and well-trained
personnel.
ØEnsure that the PE cable is securely connected.
ØDo not touch the battery system with wet hands.
ØHandle the battery with caution to avoid leakage. The leaked electrolyte is toxic and
hazardous to skin and eyes.
ØDo not disassemble the battery system without authorization.
ØStore and recharge the battery in accordance with this manual.
ØRemove all metal objects such as watches and rings that could cause a short circuit
before installation, replacement and maintenance.
2.3 Label Description
Symbols
Description
Do not dispose of the system with the household waste but in
accordance with the local regulations
Lithium-Ion batteries can be recycled
EU directives.
The system complies with the requirements of the applicable
Be aware of the electric shock
Be aware of the explosive gas
Be aware of the battery leak
Heavy objects. Lift with care
Keep the Pack away from children
Ensure that the positive and negative terminals are correctly
connected
Keep away from open flame or ignition sources
Observe the manual
Figure 2-1: Nameplate
Name:Battery Module
Model:APX 5.0P-B1
Battery Type:Li-ion
Nominal Energy:5kWh
Rated Energy:4.5kWh
Input/Output:330-450V;7.6A;2.5kW
Peak Output Current:12.5A,60s
Protective Class:I
Battery Interface:Isolated
Ingress Protection:IP66
Weight:50kg
Operation Ambient Temperature:-10°C-+50°C
Shenzhen Growatt New Energy Co.,Ltd. Made in China Bao'an
District, Shenzhen, Guangdong P.P. China

910
2.4 Emergency Responses
Manufacturer has taken foreseeable risk scenarios into consideration and designed the
battery system to mitigate the hazards. In case of an emergency, do as below:
Emergency
Description and measures
Leakage
emergency
Inhalation: Evacuate from the contaminated area, and s eek
immediate medical attention.
Skin contact: Wash the affected area with soap and water, and seek
immediate medical attention.
Ingestion: seek immediate medical attention.
Eye contact: Flush your eyes with flowing water for 15 minutes, and
seek immediate medical attention.
ØAvoid contact with leaked liquids or gases. Should you come into
direct contact with the battery electrolyte, do as follows:
Fire emergency
Normally, the battery system won't ignite spontaneously. If a fire
occurs, do not try to extinguish the fire but evacuate people
immediately.
Flood emergency
If the battery system is soaked or submerged in water, do not touch
the batteries to avoid electric shock. Contact Growatt or your
distributor immediately for technical assistance.
Shell damage
The shell damage requires extra attention as it is of high risk. Do not
use batteries with a damaged shell, which may cause safety hazards.
Contact Growatt or a distributer to dispose of them.
X
Figure 2-2: Label
Performance de-rate may be initiated when the temperature is below
0°C
WARNING
Storage and Transportation 3
3.1 Storage Requirements
ŸDo not expose batteries to corrosive environments.
ŸAvoid direct exposure to sunlight and rain.
Ø Do not put batteries upside down or on their side.
Ø Do not store damaged batteries near undamaged ones.
ØThe storage environment requirements are as follows:
ŸInstall the batteries in a dry, clean and well-ventilated place.
ŸRecommended storage temperature: -20°C to 50°C (storage period: one week);
ØPlace the batteries according to the signs on the packing case.
-20°C to 40°C (storage period: 6 months).
ŸRelative humidity: 5% to 95% RH.
ŸAvoid exposure to intense infrared radiation.
ŸKeep the batteries at least two meters away from heat sources (such as a radiator).
3.2 Transportation Requirements
ØEnsure that the original package and label are intact and identifiable.
ØDo not pile up more than four Battery Modules.
ØThere will be a drop in capacity during transportation and storage.
ØThe battery pack shall not be transported with other inflammable, explosive or toxic
materials.
ØTransportation temperature is between-20°C to 40°C, relative humidity: 5%~95%RH.
The battery pack passes the certifications of the UN38.3 (Section 38.3 of the sixth
Revised Edition of the Recommendations on the Transport of Dangerous Goods: Manual
of Tests and Criteria) and SN/T 0370.2-2009 (Part 2: Performance Test of the Rules for the
Inspection of Packaging for Exporting Dangerous Goods). The battery pack belongs to
Class 9 dangerous goods.
ØAvoid direct exposure to sunlight, rain, condensing water caused by temperature
difference and mechanical damages.
If the battery pack is not used for more than six months, carry out a
charging cycle every six months.
Notice

12
11
4 Installation
ØThe batteries should be protected from dust and dirt. Do not expose
batteries to high humidity.
ØOnly qualified and well-trained technicians who fully understand the
whole photovoltaic system, grid network, battery system, working
principle and national/local standards are allowed to perform
operations on the battery;
ØDevice damages caused by failure to comply with storage,
transportation, installation and use requirements specified in Guidance
are not covered under any Warranty.
ØInstallers must use insulating tools and wear safety equipment;
ØDo not install or use the battery near explosive or inflammable
materials.
ØUse the battery in a well-ventilated environment with temperature
ranging from -10°C to 50°C . For outdoor installation, build a sun &
rain shade to avoid direct exposure to sunlight and rain.
ØRead through the Guidance before installation to understand product
information and safety precautions;
4.1 Basic Installation Requirements
ØThe battery system can be installed indoors or outdoors. The angle and space
requirements are as follows:
Figure 4-1: Wall-mounted installation
Note: A maximum of five batteries can be wall-mounted.
Ensure that load capacity of the wall exceeds 280kg.
Figure 4-2: Floor-mounted installation
It's recommended that battery modules are installed in two columns if there are more
than 4 of them.
Note: For floor mounted installation, a maximum of six batteries can be stacked.
Do not place the battery pack upside down.
ØWhen installing outdoors, it is necessary to install sunshades and rain shelters to avoid
direct exposure to sunlight and rain.
Figure 4-3: Sunshade and rain shelter
WARNING
Ground
≥300mm
Ground
Wall
≥300mm≥300mm
≥100mm
≥100mm
Ground
Ground
Wall
≥300mm
90°
90°
≥300mm
≥300mm
≥300mm
≥300mm
90°
Wall Wall
WARNING

13 14
4.2 Installation Tools
Prepare the following tools to install the battery system:
It is recommended to wear the personal protective equipment when operating the
battery system.
4.3 Installation Procedures
4.3.1 Pre-installation Check
ØCheck the quantity of all components according to the package list. If any damage is
found or any component is missing, please contact your distributor.
ØCheck the package before unpack it. If any damage is found, do not unpack the
package and contact your distributor.
4.3.1.1 Check the APX Battery System of different capacities
A B
APX 5.0P-B1 Parallel
extension cable APX 5.0P-B1 Base
APX 98020-P1 APX 5.0P-B1 Wall bracket
C
D E
}
2.5 meters
*8*6
*2
*4
Cascading cable
F
2.5 meters
Figure 4-4: Components of the APX Battery System of different capacities
4.3.1.2 Check the components of the APX 98020-P1
APX 98020-P1 (PM)
M6x12 stainless steel screw *1
Protective rubber ring *4
Anti-tipping plate *2
M6 expansion bolt *2
M4x9 stainless steel screw *3
A B C D E
A
B
C
D
E
A
B
C
D
AB
C
D
Operation Manual *1
Quick installation manual *1
Warranty Card *1
Marking-off template *1
Right trim-cover*1
Left trim-cover*1
Figure 4-5: Components of the APX 98020-P1
Marking-off
template
Warranty Card
Quick installation
manual
Operation Manual
Drill Screw Driver Socket Wrench
Pencil Tap Measure Multimeter
M4-1N·m M6-2N·m
M6
Insulated Glove Safety Goggle Safety Shoes
to PE
}
to Battery Module
to PCS
System cable
}
to PCS
INV BAT.N
INV BAT +
INV BAT -

16
15
4.3.1.3 Check the components of the APX 5.0P-B1
ØEnsure that you have the standard accessories - the Power Module
(APX 98020-P1) and the Battery Module (APX 5.0P-B1) . The APX
battery system consists of a Power Module (APX 98020-P1) and 1 to 6
Battery Modules (APX 5.0P-B1).
ØThe support base or the mounting bracket is optional based on the
installation method.
ØIf you want to install one APX battery system in two lines, you need to
purchase a parallel extension cable separately.
Notice
Parallel cable *1
}
to Battery Module
APX 5.0P-B1( B M)
Anti tipping plate *2
A
M6 expansion bolt *2
B
M4x9 stainless steel screw *3
C
ABC
Trim-cover *2
Warranty card *1
Figure 4-6: Components of the APX 5.0P-B1
4.3.2 Wall-mounted Installation
Figure 4-7: Mounting Hole Dimensions
install the wall bracket
Figure 4-8: Install the mounting bracket
Step 1: Install the mounting bracket.
Level
1
Marker
2
Mark the hole positions for installing the bracket.
Level the bracket using a level.
1
2
3Drill eight holes.
90°
Dia 8.0mm
Deep45~50mm 3
Figure 4-9: Determine the hole positions for installing the bracket
Step 2: Level the mounting holes using a level, and mark the hole positions for installing
the bracket using a marker. Drill 8 holes (alloy drill diameter: 8mm; hole depth:
45mm to 50mm ).
Install the anti-tipping plates on both
sides and tighten the two screws.
Fix the bracket on the wall.
Place the battery module on the bracket.
Figure 4-10: Fix the bracket to the wall
Mounting Hole Dimensions
5kWh
10kWh
Left Right
15kWh
20kWh
643
330
120
245
540
835
1130
1425

17 18
ØIf there are more than four battery modules, please install them in two
columns, and the clearance should be greater than or equal to 300mm.
ØThe number of the battery module in wall-mounted installation
should not exceed four (not including the power module).
Notice
Step 3: Fix the wall bracket on the wall and place the first battery module on the
mounting bracket. Install the anti-tipping plates on both sides and tighten the
two screws. Mark the hole positions for installing the first battery module.
Figure 4-11: The marking-off template and install the expansion bolt
Step 4: Remove the battery module, determine the hole positions to mount the battery
modules from bottom to top using the marking-off template, mark the hole
positions using a marker. Install the M6 expansion bolts.
Figure 4-13: Install the power module
Step 6: Install the power module, raise the battery module handles on both sides, tighten
the two screws that secure the power module and battery module. Install the
connecting pieces on both sides and tighten the two screws, secure the module
on both sides to the wall.
Floor-mounted Installation
Figure 4-14: Mounting Hole Dimensions
The marking-off template ensures that the alignment marks are properly
placed on the wall.
Fix the M6 expansion bolt into the wall.
M6 expansion
bolt
Marking-off
template
Figure 4-12: Install the battery module
Loosen two screws, move up handle on both sides.
Tighten the two screws, fix the battery and the power modules.
Loosen two screws, move up handle on both sides.
Tighten the two screws, fix the two battery modules.
.
Secure the
module on
both sides
to the wall.
Secure the
module on
both sides
to the wall.
Mounting Hole Dimensions
5kWh
Left Right
10kWh
15kWh
20kWh
Unit:mm
643
305
600
895
1190
1485
This manual suits for next models
1
Table of contents
Other Growatt Batteries Pack manuals

Growatt
Growatt ARK 2.5H-A1 User manual

Growatt
Growatt Hope 3.3L-C1 User manual

Growatt
Growatt APX 5.0P-S0-US User manual

Growatt
Growatt SYN 100-XH-30 User manual

Growatt
Growatt ARK 2.5H-A1 User manual

Growatt
Growatt Future-H Series User manual

Growatt
Growatt Hope 5.5L-A1 User manual

Growatt
Growatt INFINITY 1300 User manual

Growatt
Growatt ARK 2.5H-A1 Operating and maintenance instructions

Growatt
Growatt APX 5.0P-B1 User manual