Growatt Future-H Series User manual

Future-H Series Energy Storage System
User Manual(For Battery)
044.SK0013000 V1.0

About this Document
This document describes the installation, electrical connection, operation, commission,
maintenance and troubleshooting of Future-H Series System for battery (hereafter referred to as
ABM 5.5L-A1-H). Before installing and operating ABM 5.5L-A1-H, ensure that you are familiar with
product features, functions, and safety precautions provided in this document.

Table of Contents
1 Product Overview .........................................................................................................................................1
1.1 Product Description ..........................................................................................................................1
1.2 Appearance ....................................................................................................................................... 1
1.2.1 Dimension (unit:mm).............................................................................................................1
1.2.2 Introduction to the battery operation panel ..............................................................................2
1.3 Function Introduction ...................................................................................................................... 3
1.4 Battery software upgrade ............................................................................................................... 4
1.4.1 Upgrade via USB ............................................................................................................................ 4
1.4.2 Through inverter remote upgrade ...............................................................................................5
2 Safety ........................................................................................................................................................... 5
2.1 Application ......................................................................................................................................... 5
2.2 Safety Precautions .......................................................................................................................... 6
2.2. 1 Environment requirements ........................................................................................................ 6
2.2.2 Operation and Precautions ..........................................................................................................6
2.3 Warning Labels ................................................................................................................................. 6
2.4 Emergency Responses ................................................................................................................... 8
3 Storage and Transportation ...................................................................................................................... 9
3.1 Storage Requirements ....................................................................................................................9
3.2 Transportation Requirement ..........................................................................................................9
4 Installation .................................................................................................................................................10
4.1 Installation environment ..............................................................................................................10
4.2 Installation Required Tools .......................................................................................................... 10
4.3 Check ............................................................................................................................................. 11
4.3.1 Pre-installation Check ............................................................................................................... 11
4.4.1 Battery Replacement .................................................................................................................13
4.4.2 Electrical Connection (Please refer to the Future-H Series user manual)................. 13
4.4.3 inverter Communication interface definition ....................................................................... 13
5 Power on and off the Battery ................................................................................................................. 14
5.1 Power On ........................................................................................................................................14
5.2 Power off .......................................................................................................................................14
6 Maintenance Guide ................................................................................................................................. 15
System Failure Information List and Troubleshooting Suggestions ..............................................15
7 Technical Specifications ...........................................................................................................................16
Appendix 1 ............................................................................................................................................. 17
1
1 Product Overview
1.1 Product Description
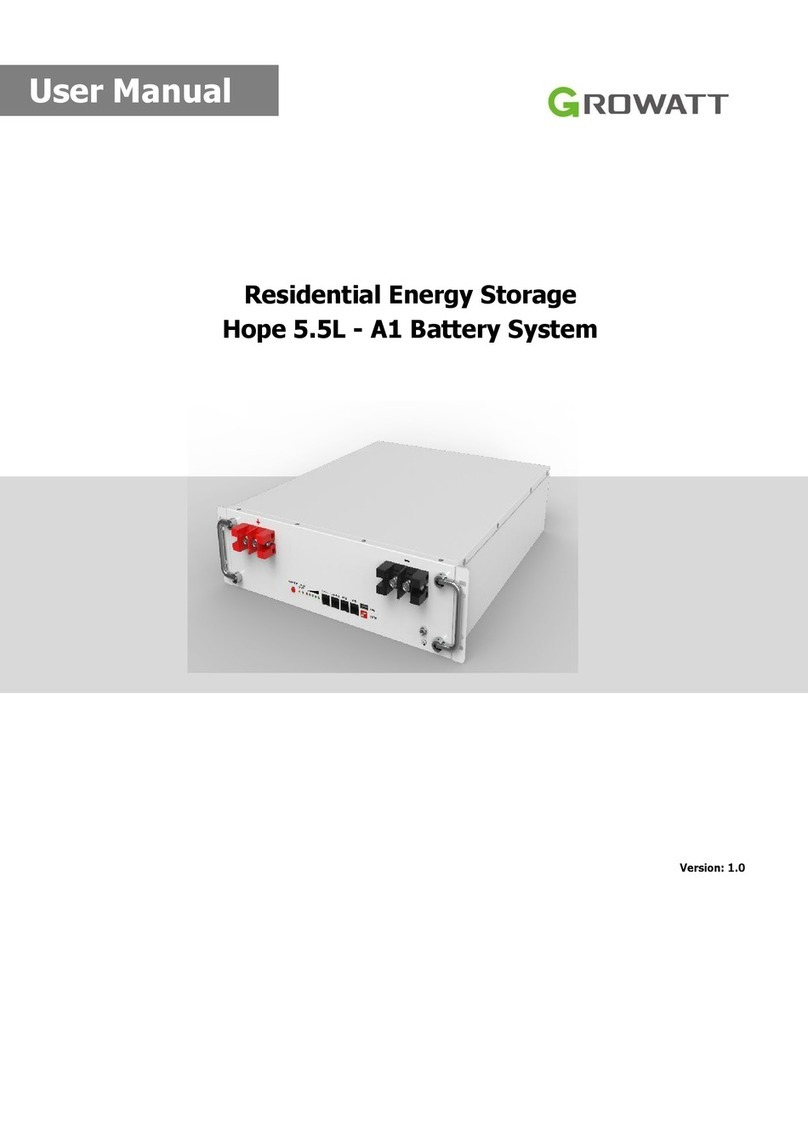
Each ABM 5.5L-A1-H consists of 106Ah cells which form 51.2V voltage battery module and 16
serial connection (1P16S). A Single cluster can connect up to 6 batteries in parallel to reach 30KWh.
In order to meet the needs of customers' household power supply, it is combined with the SIM 6000
ES Plus-H Inverter into a household photovoltaic energy storage system, with protection functions
such as overcharge, overdischarge, overcurrent, overtemperature and short circuit. At the same time,
in order to better serve customers, the company has big data background for easy after-sales
maintenance, but also equipped with APP display function, USB plug U disk upgrade function and
remote upgrade functio.
1.2 Appearance
ABM 5.5L-A1-H consists of battery module (including cell and mechanical parts), battery
management system (BMS) as well as power and communication terminals. Product appearance is
shown as below.
1.2.1 Dimension (unit:mm)
Figure 1:Battery size diagram

2
1.2.2 Introduction to the battery operation panel
Figure 2: Introduction to the battery operation panel
Location
Port
Function
1
GND
Terminal connect to ground
2
LINK-In
Link-in for multi-cluster in parallel communication
3
LINK-Out
Link-out for multi-cluster in parallel communication
4
PCS
inverter CAN communication
5
DO/DI
Relay output/input
(Output is for emergency alarm information, Input is for
clustering and distinguishing)
6
ADDR
Assign addresses for each model (see Table 1-2.1 - Table 1-2.6)
7
USB
USB interface for system upgrade USB interface for system
upgrade
8-9
BAT +/-
Positive and negative power terminals
10
ALM
Display alarm status
11
RUN
Displays the running state
12
SOC
Battery capacity display
13
ON/OFF
Power on / off button

3
Table 1 Battery address setting method, as described in the table:
address
#1
#2
#3
#4
1
ON
OFF
OFF
OFF
Battery1
2
OFF
ON
OFF
OFF
Battery2
3
ON
ON
OFF
OFF
Battery3
4
OFF
OFF
ON
OFF
Battery4
5
ON
OFF
ON
OFF
Battery5
6
OFF
ON
ON
OFF
Battery6
7
ON
ON
ON
OFF
Battery7
8
OFF
OFF
OFF
ON
Battery8
9
ON
OFF
OFF
ON
Battery9
10
OFF
ON
OFF
ON
Battery10
11
ON
ON
OFF
ON
Battery11
12
OFF
OFF
ON
ON
Battery12
Note:If use Future-H Series system,the Battery1 is the top one, as the picture below.

4
1.3 Function Introduction
Function
Description
APP Display and
Upgrade
Display BMS Information and Upgrade
CAN Communication
2 Circuits, with Isolation, one for Battery Parallel Communication, one for
the Inverter Communication
Battery Parallel
Support max 12pcs of batteries in parallel, but max 6pcs of batteries for
Future-H Series solar system.
SOC Count
Dynamic SOC Estimation for Battery Packs
SOP Count
Evaluation of Maximum Battery Output or Maximum Input Capacity at
the Next Moment Based on Different Temperatures, Voltages and SOC .
Running Alarm
Status Display
Indication by 2 LEDs, Green: System Operation Status, Red: Fault Status;
Power off
1、Button Shutdown, 2、No Communication Shutdown, 3、Battery Low
Voltage Shutdown 4、When Used in Parallel, it Can Be "One Key
Shutdown"
Power on
1、Key On, 2、Charge On, 3、Activate Signal on, 4、When Used in
Parallel Can be "One Key turn-On"
Balanced
Management
Improve the Consistency of the Voltage of Each Single Cell, and Protect
the Battery.
Voltage Detection
Detection of Single Cell Voltage (14-16 strings) or Total Voltage (2-
Circuits)
Current Detection
Battery Charging Current, Discharging Current Detection
Temperature
Detection
8 Circuits, 6 Circuits for Battery Temperature Detection, 2 Circuits for
MOS Tube Temperature Detection
Protective Function
With battery over-charge protection, over-discharge protection, battery
over-voltage protection, high temperature over-high protection, low
temperature protection, short-circuit protection and hardware failure
protection function, etc.. And every fault alarm, protection and action is
recorded, which is convenient for after-sales to view and analyze the
problem
Pre-charge Control
Low-current Charging of Low-voltage Batteries
Preamp Control
Pre-charge the Inverter Capacitor
Interface Mode
Same port
1.4 Battery software upgrade
1.4.1 Upgrade via USB
Copy the upgrade file into the U disk;
Battery off, access U disk;
Start the battery and successfully enter the upgrade state, the ALM and RUM two leds will blink
for 3 seconds at the same time;
The battery LED light flashes in the mode of running horse light, indicating that the upgrade is
completed.
Note: Choose the USB upgrade mode, there must be no other files in the U disk, otherwise the
upgrade will not be possible or the upgrade error.

5
1.4.2 Through inverter remote upgrade
Through our inverter, connect to WiFi for remote upgrade;
The LED light that displays the SOC continuously flashes at 500ms during the upgrade process;
The host will upgrade the slave machine in turn after the upgrade is completed;
The device in the slave upgrade displays the SOC LED light flashing continuously at 500ms;
The LED displays normally after the upgrade.
Note: Inverter remote upgrade mode can only upgrade the battery host.
2 Safety
Safety information contains in this section must be observed at all times when working on or with
batteries. For safety, installers have responsibility to familiarize themselves with this manual and
all warnings before installation.
2.1 Application
Please read the product manual and the warning signs on the surface of the battery box carefully
before using the battery. Improper use of the battery may cause damage to the battery by
overheating, and we will not be responsible for any accidents caused by not operating according to
the specifications.
Keep the batteries away from heat sources, high voltage places and long periods of sunlight
exposure;
Batteries must not be thrown into water or fire;
Do not reverse the positive and negative terminals of the battery;
Do not use metal to short the positive and negative terminals of the battery
Avoid excessive physical shocks and impacts to the battery, do not hit, drop or step on the
battery;
It is strictly forbidden to disassemble or assemble the battery privately without the permission
and guidance of the manufacturer;
Cannot mix with other batteries of different manufacturers, types and models;
Do not use or store in high temperature environments, as this may cause the battery to heat up,
catch fire or have a reduced service life;
Charge the battery promptly (within 15 days) after it runs out of charge;
Please use the matching or recommended professional lithium battery charger;
Stop using the battery if it has abnormal conditions such as odor, discoloration, noise, liquid
leakage, or serious deformation;
If electrolyte leaks into the skin or eyes, flush with water and seek immediate medical attention;
Please place the battery out of the reach of pets and children, and prohibit children from
touching the battery;
Below 0℃, due to the low temperature performance of the battery, please reduce the power to
use, a battery pack with a load of 2.5KW or less.

6
2.2 Safety Precautions
2.2. 1 Environment requirements
Do not expose the battery to temperature above 55℃or heat sources.
Do not install or use the battery in wet locations, moisture , corrosive gases or liquids, such as
bathroom.
Do not expose the battery to direct sunlight for extended periods of time.
Place battery in safe place away from children and animals.
Battery power terminals shall not touch conductive objects such as wires.
Do not dispose the batteries in fire, which may cause an explosion.
The PACK shall not come in contact with liquids.
The PACK can only be installed indoors. Regarding indoor installation, please do not install it in
the bedroom, living room, kitchen, etc.
2.2.2 Operation and Precautions
Do not touch the PACK with wet hands.
Do not disassemble the PACK without permission
Do not crush, drop or puncture the PACK and battery.
Dispose the batteries according to local safety regulations.
Store and recharge battery in accordance with this manual.
Ensure the connection of ground wire reliable. Ensure the connection of ground wire reliable.
Remove all metal objects such as watches and rings that could cause a short-circuit before
installation, replacement and maintenance.
The Pack shall be repaired, replaced or maintained by skilled personal that has been recognized.
When storing or handling batteries ,do not stack batteries without package.
Do not broke the battery, the released electrolyte may be toxic and is harmful to skin and eyes.
Packaged batteries should not be stacked more than specified number stipulated on the packing
case.
Do not use damaged, failed or deformed batteries, which may lead to high temperature or even
dangerous accidents. Continued operation of damaged battery may result in electrical shock, fire
or even worse.
2.3 Warning Labels
Symbols
Description
Do not dispose in trash
Lithium ion battery can be recycled
Certification in European union area
Electric shock hazard

7
Explosive gas
May leak corrosive electrolyte
Heavy enough to cause severe injury
Keep the Pack away from children
Make sure the battery polarity well connected
Do not expose to fire
Operate as the Manual
Figure 4 : Nameplate

8
2.4 Emergency Responses
Manufacturer takes foreseeable risk scenarios into consideration and is designed to reduce
hazards and dangers. However, if the following situation occurs, do as below:
Situation
Occurs
Description and Action
Leakage
1. Avoid touch of leaking liquid or gas. If you touch the leaking electrolyte,
do as below immediately.
2. Inhalation: Evacuate the contaminated area, and seek medical Help.
3. Eye contact: Rinse eyes with flowing water for 15 minutes, and seek
medical help.
4. Skin contact: Rinse contacted area thoroughly with soap and water, and
seek medical help.
5. Ingestion: Vomiting, and seek medical help.
Fire
If the BATTERY is on fire, try to extinguish the fire with fire sand and evacuate
people due to the situation
Wet Packs
If BATTERY is flooded or submerged, do not access it. Contact
Growatt or distributor for technical assistance immediately.
Damaged
PACKS
Damaged batteries are dangerous and must be handled with special attention.
They are no longer suitable for use and may cause danger to people. If the
BATTERY damaged, stop use it and
contact the Growatt or distributor.

9
3 Storage and Transportation
3.1 Storage Requirements
Place the BATTERY follow the identification on the packing case during storage.
Do not put the BATTERY upside down or sidelong.
The defective PACK needs to be separated from other batteries.
The storage environment requirements are as follows:
1) Install the BATTERY in a dry and clean place with proper ventilation
2) The storage temperature for a short week is between -20℃ to 55℃
3) If you store the PACK over a long period of six months, the storage temperature is
between-10°C to 40°C, relative humidity: 10%~90%RH.
4) Place the BATTERY away from corrosive and organic substances (including gas
exposure).
5) Free from direct exposure to sunlight and rain
6) At least two meters away from heat sources (such as a radiator) , free from exposure to
intensive infrared radiation.
If the BATTERY has not been used for more than six months, it needs to be charged, The
charging procedure is as follows:
7) Identify the PACK that needs charging;
8) Refer to quick installation guidance, complete the installation and wire connection.
Ensure BATTERY in off status during all the steps.
9) Activating the inverter, activating the battery and starting charging;
10) When the RUN_LED is always on and the SOC LED is flashing to indicate that it is in
normal charging;
11) When the 5 SOC LED lights are always on, it indicates a full charge.
3.2 Transportation Requirement
PACK has been certified in UN38.3 (Section 38.3 of the sixth Revised Edition of the
Recommendations on the Transport of Dangerous Goods: Manual of Tests and Criteria) and SN/T
0370.2-2009 (Part 2: Performance Test of the Rules for the Inspection of Packaging for Exporting
Dangerous Goods). PACK is classified as category 9 dangerous goods.
The BATTERY shall not be transported with other inflammable, explosive or toxic
substances .Ensure the original Package and label complete and recognizable.
Prohibit direct exposure to sunlight, rain, condensing water caused by temperature difference
and mechanical damages
There will be a drop in capacity during transportation and storage.
Transportation temperature is between -10°C to 40°C, relative humidity: 10%~90%RH

10
4 Installation
Ensure to read the Guidance before installation in order to understand product information and
safety cautions;
Operators should be well trained technicians and fully understand the whole photovoltaic system,
grid
network, working principle and national regional standards;
Installers must use insulating tools and wear safety equipment;
Device damages caused by failure to comply with storage, transportation, installation and use
requirements specified in Guidance are not covered by Warranty.
The BATTERY can only be installed indoors. Regarding indoor installation, please do not install it
in the
bedroom, living room, kitchen, etc.
Different types of batteries are not recommended to be mixed and used in parallel
The battery system cannot be installed, dismantled, and maintained when it has been powered
on.
4.1 Installation environment
The ambient temperature for the installation of the battery system shall be above 0℃, below
40℃, and
the humidity shall between 10% and 95%.
Fig 5: Installation environment requirements
4.2 Installation Required Tools
The following tools are required to install the BATTERY:
5mm Allen key
Screw Driver
Wrench

11
Tap Measure
Multi-meter
It is recommended to wear the following safety gear when dealing with the BATTERY.
4.3 Check
4.3.1 Pre-installation Check
Check the package
Check the BATTERY package before open it. If any abnormality is
detected, do not open the Package and contact your distributor.
Check the power
Check and confirm the BATTERY is powered off before
installation.
Check deliverable
Check the quantity of all parts inside according to the package list. If
there is any part missing or damaged, please contact your distributor.
Insulated Glove
Safety Goggle
Safety Shoes

12
4.3.2 Check Packing List
ABM 5.5L-A1-H Battery Pack
Item No
Product Name
Quantity
schematic drawing
1
ABM 5.5L-A1-H Battery Pack
1 pc
2
User Manuals
1 pc
3
copper connector
2 pcs
4
Communication cable
1 pc
5
Shorting Cap
1 pc

13
4.4 Installation
4.4.1 Battery Replacement
1) Please install indoors and ensure the level of the ground.
2) The batteries must be installed on ABM Battery Base , and up to 6 batteries can be stacked
horizontally. Make sure the batteries are installed in the correct orientation. Please refer to
the diagram below.
4.4.2 Electrical Connection (Please refer to the Future-H Series user manual)
4.4.3 inverter Communication interface definition
Item
Crystal head picture
Serial no.
Definition
PCS
1
RS485_B
2
RS 485_A
3
GND_COM
4
CAN_H
5
CAN_L
6
GND_COM
7
8

14
5 Power on and off the Battery
The installation and use of batteries involve much specialized knowledge. Therefore, technicians
should be given appropriate technical training and obtain operational certificates in compliance
with local laws and regulations. Please ensure technicians have obtained training certificate
before operation.
Please stand on dry insulating objects and do not wear conductive material such as watches and
necklace during operation. Insulated tools should be used.
Do not contact any positions with potential difference.
Prohibition sign should be hung on the battery: " Non - professionals, do not touch".
If any abnormalities occur during the startup phase, power off the BATTERY immediately. After
problem confirmed, proceed again.
Make sure the inverter is turned off before checking the BATTERY.
5.1 Power On
When multiple batteries are connected in parallel or multiple clusters of batteries are connected in
parallel, press one of the battery power buttons and all the batteries connected in parallel can be
turned on.
Power on the PACK by pressing power button(t>1S)
Serial
Procedures
Acceptation criteria
1
Connect the battery
and inverter
Make sure the wiring harnesses are well
connected
2
Press POWER button for one
second. Observe the LED
indication on panel.
1.If both RUN/ALM and SOC lights turn on
normally, PACK is powered on successfully.
2.If ALM light turns red, there is a failure and
should solve it before power on again.
Power on the BATTERY by inverter
1
Connect the battery and
inverter
Make sure the wiring harnesses are well
connected
2
Power on the inverter to
charge the battery
1. If both RUN/ALM and SOC lights turn
on normally, BATETRY powers on successfully.
2. If ALM light turns red, there is a
failure and should solve it before power on
again.
5.2 Power off
Press the power button for 3 seconds and then release, the battery enters the shutdown state
and all LEDs turn off. If in the case of multiple batteries connected in parallel, press the power button
of any one of the batteries for 3 seconds and then release it to turn off the all batteries.

15
6 Maintenance Guide
System Failure Information List and Troubleshooting Suggestions
Error Indication
Error description
Error cause
Suggested actions
(ALM Light
Flickers)
Discharge under
voltage protection
Single cell voltage
below the threshold for
under-voltage
protection.
There is over discharge risk. User should
stop discharging and arrange recharge
Charge over
voltage protection
Single cell voltage
exceeding threshold for
protection threshold
1. There is no safety threat;
2. User should stop charging. Idle battery
and it will turn to normal status.
External CAN
Communication
failure
Communication loss
between inverter and
battery
1. There is no safety threat and user
should stop using battery.
2. Check if inverter and battery
communication terminal is well
connected.
3. If inverter and PACK cannot
communicate when the
communication wire is confirmed well
connected, user should contact
installer to repair battery.
Interior CAN
Communication
failure
Communication loss
between two parallel
Check CAN connection between two
batteries, CAN connection between Link-in
and Link-out;
Parallel connection
failure protection
Communication failure
between two parallel
connected battery
Check CAN connection between two
batteries, CAN connection between Battery
and Inverter;
(ALM light on)
Discharge short
circuit
External short circuit of
battery
There is safety risk and user should stop
using battery, User should contact installer
to repair inverter and battery
Pre-charge short
circuit
Pre-charge
overtime circuit
Parallel failure
The pack type is
different
There is safety risk and user should stop
using battery, User should contact installer
to use the same battery in Parallel.
Main circuit fault
BMS main power
circuit failure
There is safety risk and user should stop
using battery. User should contact installer
to repair battery
MOS control failure
Turn off MOS
tube,there is still
current
There is safety risk and user should stop
using battery. User should contact installer
to repair battery

16
7 Technical Specifications
Functional parameters of ABM 5.5L-A1-H Energy Storage System are as shown below:
No.
Items
Specification
1
Battery Module
ABM 5.5L-A1-H 106
2
Nominal Voltage
51.2V
3
Rated Capacity/Energy
106Ah/5.5kWh
4
Operating Voltage
40 – 58.4V
5
Max. charging current(25℃)
100A
6
Max. discharging current(25℃)
100A
7
Peak discharge current
250A 150ms
8
Battery Type
Cobalt Free Lithium Iron Phosphate (LFP)
9
Charging operating temperature range
0℃~55℃
10
Discharge operating temperature
range
-20℃ ~55℃
11
Storage conditions
Temperature: -20°C ~ +50°C
-10℃~40℃
Humidity:10%~90%RH
Within six months after initial charge
12
Cooling
Natural cooling
13
Dimension (W/D/H)
630*440*150mm
14
Weight
47±1kg
15
Installation
Floor standing installation
16
Ingress protection
IP 20
17
BATTERY safety certification
CE(EMC)/UN38.3/MSDS/ROHS
18
Communication port
CAN/RS485
19
Number of batteries in parallel
Max.12 BATTERY
20
Warranty
5 Years

17
Appendix 1
LED indicator
Status
Items
RUN
ALM
Charge and
discharge MOS
Open circuit
( t=1s)
Closed circuit
Alarm
Total voltage under voltage
(t=1s)
Status
Items
SOC indicator
LED1
LED2
LED3
LED4
LED5
Charge
SOC
0%
(t=500ms)
(t=500ms)
(t=500ms)
(t=500ms)
(t=500ms)
1%-19%
(t=500ms)
(t=500ms)
(t=500ms)
(t=500ms)
20%-
39%
(t=500ms)
(t=500ms)
(t=500ms)
40%-
59%
(t=500ms)
(t=500ms)
60%-
79%
(t=500ms)
80%-
100%
Discharge
SOC
100%-
80%
79%-
60%
59%-
40%
39%-
20%
19%-1%
0%
(t=500ms)
Idle
100%-
80%
79%-
60%
59%-
40%
39%-
20%
19%-1%
0%
(t=500ms)
Other manuals for Future-H Series
1
This manual suits for next models
1
Table of contents
Other Growatt Batteries Pack manuals

Growatt
Growatt APX 5.0P-B1 User manual

Growatt
Growatt Hope 5.5L-A1 User manual

Growatt
Growatt APX 5.0P-S0-US User manual

Growatt
Growatt SYN 100-XH-30 User manual

Growatt
Growatt ARK 2.5H-A1 User manual

Growatt
Growatt Hope 3.3L-C1 User manual

Growatt
Growatt ARK 2.5H-A1 User manual

Growatt
Growatt WIT 28-55K-HU-US L2 User manual

Growatt
Growatt APX 5.0-30.0P-S1 User manual

Growatt
Growatt APX 5.0-30.0P-S0 User manual