manuals.online logo
Brands
  1. Home
  2. •
  3. Brands
  4. •
  5. Gutta
  6. •
  7. Outdoor Furnishing
  8. •
  9. Gutta 4295301 User manual

Gutta 4295301 User manual

1
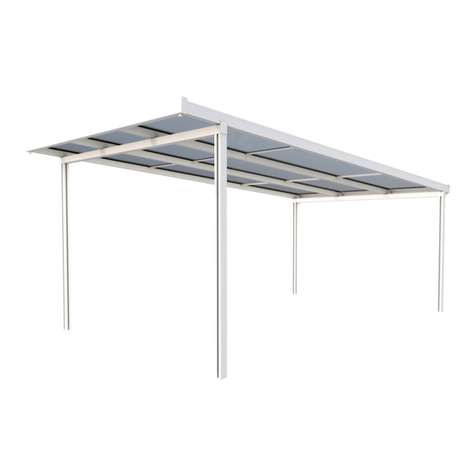
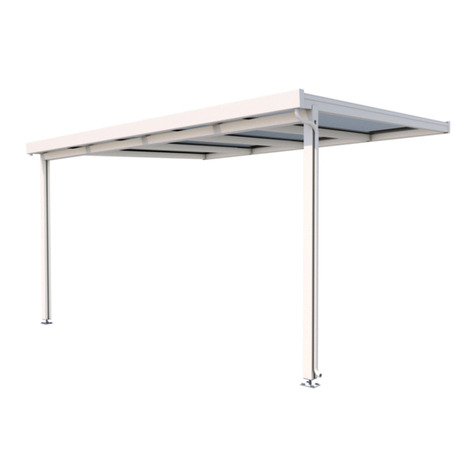
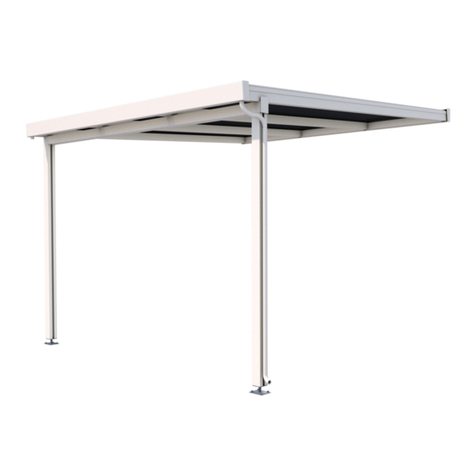
Premium Terrassendach 9x3 m bis 10x5 m
Art.-Nr. 4295301-4295371
4295515-4295585
4295731-4295799
Montageanleitung
Assembly instructions
Instructions de montage
D
GB
F
Terrassendach 9m Breite
Terrassendach 10m Breite
1
2
Voraussetzungen | Montagehinweise | Pflegeinformationen
• Beachten Sie die örtlichen Bauvorschriften sowie die Schneelastzonen in ihrer Region
• Sortieren Sie die Teile vor der Montage und prüfen Sie die Inhaltsliste gemäß Montageanleitung
• Zur Montage des Terrassendach-Bausatzes werden mindestens 2 Personen benötigt
• Befolgen Sie die Anweisungen und Montageschritte in der Montageanleitung
• Die Hohlkammerplatten dürfen nicht ohne quergelegte Laufbretter (über mind. 2 Sparren) begangen werden
• Punktbelastungen sind unbedingt zu vermeiden
• Entfernen Sie regelmäßig den Schnee vom Dach
• Schneelast: Modelle mit 3-4 m Dachtiefe: 150 kg/m² und Modelle mit 5 m Dachtiefe: 100 kg/m²
• Enthaltenes Befestigungsmaterial ist nur für festes Mauerwerk. Bei Dämmung, Hohlblöcken etc. muss separates
Befestigungsmaterial verwendet werden.
• Halten Sie die Dachrinne frei von Laub, Schmutz und Schnee
• Der Terrassendach-Bausatz muss auf einem ebenen, festen Untergrund (z. Beton, Betonplatten) montiert werden.
Fundamentmaße: Länge 40cm x Breite 40cm x Tiefe 80cm
• Reinigen Sie die Paneelen mit Wasser und einem milden Reinigungsmittel, verwenden Sie keine Scheuermittel,
Aceton oder lösungshaltige Mittel!
• Defekte oder verbogene Pfosten oder Träger sind sofort auszutauschen
• Das Wandanschlussprofil muss in folgender Höhe angebracht werden (gemessen an der
Profiloberkante)
3m Tiefe: 240cm = 7° - 300cm = 20°
4m Tiefe: 240cm = 5° - 340cm = 20°
5m Tiefe: 245cm = 5° - 375cm = 20°
• Da der Querträger um max. 60cm Richtung Hauswand versetzt werden kann, ergibt sich daraus eine höhere
Dachneigung (Gefälle)
Farb- und Größenabweichungen etc. innerhalb der üblichen Toleranzen vorbehalten. Unsere Empfehlungen befreien
nicht von der Verpflichtung, das Produkt eigenverantwortlich zu überprüfen. Im Zweifelsfalle bitten wir eine Fachbera-
tung in Anspruch zu nehmen. Technische Änderungen vorbehalten.
Das Premium Terrassendach wurde gem. der EN 1090 entwickelt und hergestellt. Es darf nur für Überdachungen einer
Terrasse mit entsprechender Befestigung für die jeweilige Hauswand und für nicht gewerbliche Anwendung genutzt
werden. Jede andere als die hier beschriebene bestimmungsgemäße Verwendung gilt als zweckwidrige Verwendung.
Der Hersteller haftet nicht für eventuelle Schäden oder Folgeschäden, die durch zweckwidrige, falsche oder unsach-
gemäße Verwendung entstehen.
13, 17, 19
4 und 5 17
TX 25
2
3
Requirements | Assembly instructions | Care information
• Observe the local building regulations and the snow load zones in your region.
• Before the assembly sort the parts and check the contents list according to the assembly instructions.
• At least 2 persons are required to assemble the terrace roof.
• Follow the instructions and installation steps in the assembly instructions.
• The Twin-Wall Sheets do not walk on transverse running boards (at least 2 rafters).
• Point loads must be avoided absolutely
• Regularly remove snow from the roof
• Snow load: models with 3-4 m roof depth: 150 kg/m² and models with 5 m roof depth: 100 kg/m²
• Included fixing material is only for solid masonry. Separate fixing materials must be used for insulation, hollow
blocks, etc.
• Keep the gutter free of leaves, dirt and snow.
• The terrace roof must be installed on a flat, solid surface (for example concrete, concrete slabs). Foundation di-
mensions: length 40cm x width 40cm x depth 80cm
• Clean the Twin-Wall Sheets with water and a mild detergent and do not use abrasives, acetone or solvents!
• Defective or bent posts or beams must be replaced immediately.
• The wall connection profile must be installed at the following height (measured at the upper edge of the
profile)
3m depth: 240cm = 7° - 300cm = 20°
4m depth: 240cm = 5° - 340cm = 20°
5m depth: 245cm = 5° - 375cm = 20°
• As the cross beam can be moved by max. 60cm towards the house wall, this results in a higher roof pitch (slope).
Colour and size deviations etc. within the usual tolerances reserved. Our recommendations do not release the custo-
mer from the obligation to check the product on his own responsibility. In case of doubt, please consult a specialist.
Technical modifications reserved.
The Premium Terrace Roof has been developed and manufactured according to EN 1090. It may only be used for
roofing over a terrace with appropriate fastening for the respective house wall and for non-commercial use. Any use
other than the intended use described here is considered improper use. The manufacturer is not liable for any damage
or consequential damage resulting from improper, incorrect or inappropriate use.
13, 17, 19
4 und 5 17
TX 25
3
4
Prérequis | Instructions de montage | Conseils d‘entretien
• Respecter les règlementations du batiment ainsi que les zones de contrainte de neige de votre région
• Trier les pièces avant l´assemblage et vérifier le contenu de la liste des pièces conformément au mode d´emploi
• Le montage du module de toit de terrasse nécessite la présence de 2 personnes
• Suivre les instructions et les étapes d´assemblage conformément à la notice de montage
• Ne pas marcher sur les plaques alvéolaires avant d´avoir posé des planches transversales reposant sur au moins
2 chevrons
• Les charges ponctuelles sont à éviter absolument
• Retirer régulièrement la neige du toit
• Charge maximale supportée: 150 kg/m2 pour le modèle avec une profondeur de 3-4 m.
100 kg/m2 pour le modèle avec une profondeur de 5 m
• Le matériel de fixation inclus n‘est destiné qu‘à la maçonnerie massive. Des matériaux de fixation séparés doivent
être utilisés pour l‘isolation, les blocs creux, etc.
• Garder la gouttière exempte de feuilles, saletés et neige
• Le toit de terrasse doit etre assemblé sur une surface plane et solide (ex. Béton, dalles de béton). Dimensions de
la fondation : longueur 40cm x largeur 40cm x profondeur 80cm
• Nettoyer les plaques alvéolaires avec de l´eau et un savon doux, ne pas utiliser de produits abrasifs, d´ acetone ou
solvants!
• Des poteaux ou poutres défectueux ou courbés sont à remplacer immédiatement
• Le profilé de raccordement mural doit être installé à la hauteur suivante (mesurée au bord supérieur du
profilé)
3m profondeur : 240cm = 7° - 300cm = 20°
4m profondeur : 240cm = 5° - 340cm = 20°
5m profondeur : 245cm = 5° - 375cm = 20°
• Puisque la traverse peut etre déplacée de maximum 60 cm en direction du mur de la maison, il en résulte une plus
haute inclinaison de la toiture (pente descendante)
Les écarts de couleur et de dimension dans les tolérances habituelles sont réputés dans la norme d´acceptation. Nos
recommandations ne vous dispensent pas d´inspecter le produit sous votre propre responsabilité . En cas de doute,
nous conseillons de faire appel à un professionnel. Sous réserve de modifications techniques.
Le Premium Terrace Roof a été développé et fabriqué conformément à la norme EN 1090. Il ne peut être utilisé que
pour la couverture d‘une terrasse avec une fixation appropriée pour le mur de la maison concernée et pour un usage
non commercial. Toute utilisation autre que l‘usage prévu décrit ici est considérée comme une utilisation abusive. Le
fabricant n‘est pas responsable des dommages ou des dommages consécutifs résultant d‘une utilisation incorrecte
ou inappropriée.
13, 17, 19
4 und 5 17
TX 25
4
5
A
Z.1
Z.2
Z.3
Z.4
Z.6
Z.8
Z.9
Z.10
Z.11
Z.12
Z.14
Z.15
Z.16
Z.17
Z.18
Z.19
Z.20
B
G
F
E
D
C
H
I
L
K
J
MN
O P
5
6
Anzahl | Number | Numéro
Nr. Bezeichnung Designation Désignation 9x3 9x4 9x5 10x3 10x4 10x5
AHohlkammerplatte 980 x 3000 - 5000 mm Twinwall sheet 980 x 3000 - 5000 mm Plaque alvéolaire 980 x 3000 - 5000 mm 9x 9x 9x 10x 10x 10x
BWandanschluss inkl. vormontierter Lagerprofile Wall connection incl. pre-assembled bearing profiles Raccordement mural, profilés préassemblés inclus 2x 2x 2x 2x 2x 2x
CVorderer Querträger / Pfette Front cross beam / purlin Poutre avant / panne 3x 3x 3x 3x 3x 3x
DRegenrinne Rain gutter Gouttière 2x 2x 2x 2x 2x 2x
EQuerstrebe 30x30x948 mm Cross brace 30x30x948 mm Traverse 30x30x948 mm 18x 18x 27x 20x 20x 30x
FSparren Rand links und rechts (teilvormontiert) Rafter Edge left and right (partly pre- assembled) Chevron latéral droit et gauche (partiellement préassemblé) 2x 2x 2x 2x 2x 2x
GSparren Mitte (teilvormontiert) Rafter middle (partly pre- assembled) Chevron médian (partiellement préassemblé) 8x 8x 8x 9x 9x 9x
HAlu Deckel Alu Cap Recouvrement aluentre plaques 10x 10x 10x 11x 11x 11x
IPfosten vormontiert mit Standfuß Pre-assembled post with stand Poteau préassemblé avec empiètement 4x 4x 4x 4x 4x 4x
JDeckel Vorderer Querträger / Pfette Cap of front cross beam / purlin Fermeture de la poutre avant / panne 2x 2x 2x 2x 2x 2x
KDeckel Wandanschluss Cap wall connection Fermeture latérale de raccordement mural 2x 2x 2x 2x 2x 2x
LDeckel Regenrinne Cap rain gutter Fermeture latérale de gouttière 2x 2x 2x 2x 2x 2x
MLagerprofil Storage profil 10x 10x 10x 11x 11x 11x
NAbdeckung Wandanschluss Cover of wall connection Profilé de recouvrement des raccordements muraux 9x 9x 9x 10x 10x 10x
OU-Profil für Hohlkammerplatten U-Profil for Twinwall sheets Profilé de fermeture pour plaque alvéolaire 18x 18x 18x 20x 20x 20x
PRegenablauf Rain drainage Ecoulement d’eau pluviale 2x 2x 2x 2x 2x 2x
Z.1 Abdeckkappe SW 19 Cover cap SW 19 Cover cap SW 19 4x 4x 4x 4x 4x 4x
Z.2 10,5 VZ DIN 125 10,5 VZ DIN 125 10,5 VZ DIN 125 36x 36x 36x 38x 38x 38x
Z.3 Dübel 12 mm Dübel 12 mm Dübel 12 mm 36x 36x 36x 38x 38x 38x
Z.4 10x80 VZ DIN 571 10x80 VZ DIN 571 10x80 VZ DIN 571 36x 36x 36x 38x 38x 38x
Z.6 M12 DIN 127 B VZ M12 DIN 127 B VZ M12 DIN 127 B VZ 20x 20x 20x 22x 22x 22x
Z.8 M12x140 DIN 931 8.8 M12x140 DIN 931 8.8 M12x140 DIN 931 8.8 4x 4x 4x 4x 4x 4x
Z.9 M12x200 DIN 931 8.8 M12x200 DIN 931 8.8 M12x200 DIN 931 8.8 16x 16x 16x 18x 18x 18x
Z.10 M6 DIN 439 M6 DIN 439 M6 DIN 439 20x 20x 20x 22x 22x 22x
Z.11 M6x10 ISO 7380-2 10.9 M6x10 ISO 7380-2 10.9 M6x10 ISO 7380-2 10.9 20x 20x 20x 22x 22x 22x
Z.12 M8 DIN 934 VZ M8 DIN 934 VZ M8 DIN 934 VZ 20x 20x 20x 22x 22x 22x
Z.14 M8x40 ISO 7380-2 10.9 M8x40 ISO 7380-2 10.9 M8x40 ISO 7380-2 10.9 16x 16x 16x 16x 16x 16x
Z.16 M8 DIN 1661 A2 M8 DIN 1661 A2 M8 DIN 1661 A2 20x 20x 20x 22x 22x 22x
Z.17 Kantenverschlußband mit Membrane Edge closing tape with membrane Adhésif de fermeture avec membrane 1x 1x 1x 1x 1x 1x
Z.18 Kantenverschlußband ohne Membrane (optional) Edge closing tape without membrane (optional) Adhésif de fermeture sans membrane(option) 1x 1x 1x 1x 1x 1x
Z.19 4,8x13 ISO 14585 A2 TX C 4,8x13 ISO 14585 A2 TX C 4,8x13 ISO 14585 A2 TX C 27x 27x 27x 30x 30x 30x
Z.19 A 4,8x25 ISO 14585 4,8x25 ISO 14585 4,8x25 ISO 14585 24x 24x 24x 24x 24x 24x
Z.20 Edelstahlschraube 6,3x32 inkl. Membrandichtung Stainless steel screw 6,3x32 incl. membrane seal Vis inox6,3x32 avec joint 80x 90x 100x 88x 99x 110x
6
7
Anzahl | Number | Numéro
Nr. Bezeichnung Designation Désignation 9x3 9x4 9x5 10x3 10x4 10x5
AHohlkammerplatte 980 x 3000 - 5000 mm Twinwall sheet 980 x 3000 - 5000 mm Plaque alvéolaire 980 x 3000 - 5000 mm 9x 9x 9x 10x 10x 10x
BWandanschluss inkl. vormontierter Lagerprofile Wall connection incl. pre-assembled bearing profiles Raccordement mural, profilés préassemblés inclus 2x 2x 2x 2x 2x 2x
CVorderer Querträger / Pfette Front cross beam / purlin Poutre avant / panne 3x 3x 3x 3x 3x 3x
DRegenrinne Rain gutter Gouttière 2x 2x 2x 2x 2x 2x
EQuerstrebe 30x30x948 mm Cross brace 30x30x948 mm Traverse 30x30x948 mm 18x 18x 27x 20x 20x 30x
FSparren Rand links und rechts (teilvormontiert) Rafter Edge left and right (partly pre- assembled) Chevron latéral droit et gauche (partiellement préassemblé) 2x 2x 2x 2x 2x 2x
GSparren Mitte (teilvormontiert) Rafter middle (partly pre- assembled) Chevron médian (partiellement préassemblé) 8x 8x 8x 9x 9x 9x
HAlu Deckel Alu Cap Recouvrement aluentre plaques 10x 10x 10x 11x 11x 11x
IPfosten vormontiert mit Standfuß Pre-assembled post with stand Poteau préassemblé avec empiètement 4x 4x 4x 4x 4x 4x
JDeckel Vorderer Querträger / Pfette Cap of front cross beam / purlin Fermeture de la poutre avant / panne 2x 2x 2x 2x 2x 2x
KDeckel Wandanschluss Cap wall connection Fermeture latérale de raccordement mural 2x 2x 2x 2x 2x 2x
LDeckel Regenrinne Cap rain gutter Fermeture latérale de gouttière 2x 2x 2x 2x 2x 2x
MLagerprofil Storage profil 10x 10x 10x 11x 11x 11x
NAbdeckung Wandanschluss Cover of wall connection Profilé de recouvrement des raccordements muraux 9x 9x 9x 10x 10x 10x
OU-Profil für Hohlkammerplatten U-Profil for Twinwall sheets Profilé de fermeture pour plaque alvéolaire 18x 18x 18x 20x 20x 20x
PRegenablauf Rain drainage Ecoulement d’eau pluviale 2x 2x 2x 2x 2x 2x
Z.1 Abdeckkappe SW 19 Cover cap SW 19 Cover cap SW 19 4x 4x 4x 4x 4x 4x
Z.2 10,5 VZ DIN 125 10,5 VZ DIN 125 10,5 VZ DIN 125 36x 36x 36x 38x 38x 38x
Z.3 Dübel 12 mm Dübel 12 mm Dübel 12 mm 36x 36x 36x 38x 38x 38x
Z.4 10x80 VZ DIN 571 10x80 VZ DIN 571 10x80 VZ DIN 571 36x 36x 36x 38x 38x 38x
Z.6 M12 DIN 127 B VZ M12 DIN 127 B VZ M12 DIN 127 B VZ 20x 20x 20x 22x 22x 22x
Z.8 M12x140 DIN 931 8.8 M12x140 DIN 931 8.8 M12x140 DIN 931 8.8 4x 4x 4x 4x 4x 4x
Z.9 M12x200 DIN 931 8.8 M12x200 DIN 931 8.8 M12x200 DIN 931 8.8 16x 16x 16x 18x 18x 18x
Z.10 M6 DIN 439 M6 DIN 439 M6 DIN 439 20x 20x 20x 22x 22x 22x
Z.11 M6x10 ISO 7380-2 10.9 M6x10 ISO 7380-2 10.9 M6x10 ISO 7380-2 10.9 20x 20x 20x 22x 22x 22x
Z.12 M8 DIN 934 VZ M8 DIN 934 VZ M8 DIN 934 VZ 20x 20x 20x 22x 22x 22x
Z.14 M8x40 ISO 7380-2 10.9 M8x40 ISO 7380-2 10.9 M8x40 ISO 7380-2 10.9 16x 16x 16x 16x 16x 16x
Z.16 M8 DIN 1661 A2 M8 DIN 1661 A2 M8 DIN 1661 A2 20x 20x 20x 22x 22x 22x
Z.17 Kantenverschlußband mit Membrane Edge closing tape with membrane Adhésif de fermeture avec membrane 1x 1x 1x 1x 1x 1x
Z.18 Kantenverschlußband ohne Membrane (optional) Edge closing tape without membrane (optional) Adhésif de fermeture sans membrane(option) 1x 1x 1x 1x 1x 1x
Z.19 4,8x13 ISO 14585 A2 TX C 4,8x13 ISO 14585 A2 TX C 4,8x13 ISO 14585 A2 TX C 27x 27x 27x 30x 30x 30x
Z.19 A 4,8x25 ISO 14585 4,8x25 ISO 14585 4,8x25 ISO 14585 24x 24x 24x 24x 24x 24x
Z.20 Edelstahlschraube 6,3x32 inkl. Membrandichtung Stainless steel screw 6,3x32 incl. membrane seal Vis inox6,3x32 avec joint 80x 90x 100x 88x 99x 110x
7
8
1.
B
2x
Z4
20 / 22 x
Z2
20 / 22 x
Z3
20 / 22 x
1008 mm
2.
48mm
Z.14
16x
C
3x
I
4x
.. 10 m
1008 mm 1008 mm 1008 mm 1008 mm 1008 mm 1008 mm 1008 mm 1008 mm
8
9
3.
F
2x
M
2x
Z.10
4x
Z.11
4x
Abstand | Distance | Distance
min. 100 mm
max. 600 mm
1x links | left | á gauche
1x rechts | right | correctes
3a.
G
8 / 9 x
M
8 / 9 x
Z.10
16 / 18 x
Z.11
16 / 18 x
Abstand | Distance | Distance
min. 100 mm
max. 600 mm
9
10
4.
F
1x
links | left | á gauche
J
1x
K
1x
Z.6
2x
Z.8
2x
Z.12
2x
3b.
F
2x
Z.14
9m 10m
3m 18 20
4m 36 40
5m 36 40
Nur bei 4m und 5m Tiefe
Only for 4m and 5m depth
Seulement à 4m - 5m de profondeur
G
8 / 9 x
Z.15
9m 10m
3m 18 20
4m 36 40
5m 36 40
bereits vormontiertbereits vormontiert
already pre-assembledalready pre-assembled
déjà préassemblédéjà préassemblé
10
11
5.
Z.6
2x
Z.9
2x
Z.12
2x
G
1x
Nur bei 4m + 5m Tiefe
Only for 4m + 5m depth
Seulement à 4m + 5m de profondeur
E
3m = 1x
4m + 5m = 2x
6.
Z.6
2x
Z.9
2x
Z.12
2x
G
1 x
Nur bei 4m + 5m Tiefe
Only for 4m + 5m depth
Seulement à 4m + 5m de profondeur
E
3m = 1x
4m + 5m = 2x
11
12
7.
Z.6
2x
Z.9
2x
Z.12
2x
G
1 x
Nur bei 4m + 5m Tiefe
Only for 4m + 5m depth
Seulement à 4m + 5m de profondeur
E
3m = 1x
4m + 5m = 2x
8.
Z.6
2x
Z.9
2x
Z.12
2x
G
1x
Nur bei 4m + 5m Tiefe
Only for 4m + 5m depth
Seulement à 4m + 5m de profondeur
E
3m = 1x
4m + 5m = 2x
12
13
9.
Z.6
2x
Z.9
2x
Z.12
2x
G
1 x
Nur bei 4m + 5m Tiefe
Only for 4m + 5m depth
Seulement à 4m + 5m de profondeur
E
3m = 1x
4m + 5m = 2x
10.
Z.6
2x
Z.9
2x
Z.12
2x
G
1x
Nur bei 4m + 5m Tiefe
Only for 4m + 5m depth
Seulement à 4m + 5m de profondeur
E
3m = 1x
4m + 5m = 2x
13
14
10m + 1 x Sparren G
10m + 1 x rafter G
10m + 1 x chevron G
+ siehe Tabelle
+ see table
+ voir tableau
11.
Z.6
2x
Z.9
2x
Z.12
2x
G
1x
Nur bei 4m + 5m Tiefe
Only for 4m + 5m depth
Seulement à 4m + 5m de profondeur
E
3m = 1x
4m + 5m = 2x
12.
Z.6
2x
Z.9
2x
Z.12
2x
G
1x
Nur bei 4m + 5m Tiefe
Only for 4m + 5m depth
Seulement à 4m + 5m de profondeur
E
3m = 1x
4m + 5m = 2x
14
15
13.
F
1x links | left | á
gauche
J
1x
K
1x
Z.6
2x
Z.8
2x
Z.12
2x
E3m = 1x
4m = 2x
Nur bei 4m Tiefe
Only for 4m depth
Seulement à 4m de profondeur
14.
Z.19 16x
15
16
15.
N
9 / 10 x
Z.19
27 / 30 x
16.
Z.2
16x
Z.3
16x
Z.4
16x
16
17
17.
D
1 / 2 x
Z.16
20 / 22 x
17
18
18.
A
9 / 10 x
O
18 / 20 x
Z.17 Z.18
(Nur bei Acrylplatten im Lieferumfang
enthalten /
Only for acrylic sheets in the Included in
delivery /
Uniquement pour les plaques acryliques
de la gamme Inclus dans la livraison)
Stecken Sie nun die Alu-U-Abschlussprofile an den Stirn-
seiten auf. Achten Sie darauf, dass die gekennzeichnete
Schutzfolie oben ist. UV-Schutz bei einseitig geschützten
Platten! Die Tropfnase des Profils zeigt nach unten.
Now attach the aluminium U end profiles to the end faces.
Make sure that the marked protective foil is on top. UV
protection for panels protected on one side! The drip nose
of the profile points downwards.
Fixez maintenant les profilés d‘extrémité en U en alumi-
nium sur les faces frontales. Veillez à ce que le film de
protection marqué se trouve sur le dessus. Protection
UV pour les panneaux protégés d‘un seul côté ! Le nez
d‘égouttement du profilé est dirigé vers le bas.
Zum Schutz vor eindringendem Staub und Schmutz kle-
ben Sie die Stirnseiten der Platten mit dem Kantenver-
schlussband ab. Schlagen Sie dazu die Schutzfolie
nur so weit wie nötig um.
To protect against dust and dirt, tape the front sides of
the panels with the edge sealing tape. To do this, beat the
protective film
only as far as necessary.
Pour protéger contre la poussière et la saleté, collez les
faces avant des panneaux avec la bande d‘étanchéité de
bord. Pour ce faire, battre le film protecteur.
que dans la mesure où c‘est nécessaire.
Unsere Empfehlung!
Polycarbonatplatten: Traufe und First mit Membranband.
Acrylplatten: Band mit Membran an der Traufe und Band
ohne Membran am First.
Our recommendation!
Polycarbonate sheets: eaves and ridge with membrane
tape. Acrylic panels: Band with membrane at the eaves
and band without membrane at the ridge.
Notre recommandation !
Feuilles de polycarbonate : avant-toit et faîte avec bande
de membrane. Panneaux en acrylique : Bande avec mem-
brane à l‘avant-toit et bande sans membrane au faîte.
18
19
19.
H
1x
Z.20
3m = 7x
4m = 10x
5m = 12x
Legen Sie die erste Platte auf und richten Sie sie korrekt aus – beachten Sie auch hier die korrekte Ausrichtung der
Schutzfolien. Profiloberteil alle 40 cm mittig vorbohren (Ø7 mm), die erste Bohrung erfolgt nach 6cm. Anschließend
auflegen und mit dem Unterteil verschrauben.
Place the first panel on top and align it correctly - also make sure that the protective foils are aligned correctly. Pre-drill
the upper part of the profile in the middle every 40 cm (Ø7 mm), the first hole is drilled after 6 cm. Then place it on the
surface and screw it to the lower part.
Placez le premier panneau sur le dessus et alignez-le correctement - veillez également à ce que les films de protection
soient correctement alignés. Pré-percer la partie supérieure du profilé au milieu tous les 40 cm (Ø7 mm), le premier trou
est percé après 6 cm. Posez-le ensuite et vissez-le sur la partie inférieure.
A
1x
19
20
20.
H
10 / 11 x
Z.20 A
10 / 11x
2. Platte / Plate 3. Platte / Plate
4. Platte / Plate 5. Platte / Plate
6. Platte / Plate 7. Platte / Plate
20

This manual suits for next models

5

Other Gutta Outdoor Furnishing manuals

Gutta BS Plus 160 User manual

Gutta

Gutta BS Plus 160 User manual

Gutta BS 160 User manual

Gutta

Gutta BS 160 User manual

Gutta BS Plus 160 User manual

Gutta

Gutta BS Plus 160 User manual

Gutta 7500015 User manual

Gutta

Gutta 7500015 User manual

Gutta 4295003 User manual

Gutta

Gutta 4295003 User manual

Gutta BS Plus 160 User manual

Gutta

Gutta BS Plus 160 User manual

Gutta Timber 160 User manual

Gutta

Gutta Timber 160 User manual

Gutta BS 160 User manual

Gutta

Gutta BS 160 User manual

Gutta 4295021 User manual

Gutta

Gutta 4295021 User manual

Gutta BS Timber-Line 160 User manual

Gutta

Gutta BS Timber-Line 160 User manual

Gutta 4295003 User manual

Gutta

Gutta 4295003 User manual

Gutta Premium Carport 4296203 User manual

Gutta

Gutta Premium Carport 4296203 User manual

Gutta 7500803 User manual

Gutta

Gutta 7500803 User manual

Gutta BS 160 User manual

Gutta

Gutta BS 160 User manual

Gutta 7500015 User manual

Gutta

Gutta 7500015 User manual

Gutta 7500703 User manual

Gutta

Gutta 7500703 User manual

Popular Outdoor Furnishing manuals by other brands

Courtyard Creations RUS426K-WM Assembly instructions

Courtyard Creations

Courtyard Creations RUS426K-WM Assembly instructions

Suncast BMEO1000 Oasis Assembly instructions

Suncast

Suncast BMEO1000 Oasis Assembly instructions

Solaris JYSP3650-2 manual

Solaris

Solaris JYSP3650-2 manual

Deponti Manual Pinela 3x4 User manual & assembly instructions

Deponti

Deponti Manual Pinela 3x4 User manual & assembly instructions

BOERPLAY PB Picnic Set model 314 manual

BOERPLAY

BOERPLAY PB Picnic Set model 314 manual

PATIOJOY HW70797 manual

PATIOJOY

PATIOJOY HW70797 manual

Deck Superstore Rough-Sawn Pergola System installation guide

Deck Superstore

Deck Superstore Rough-Sawn Pergola System installation guide

Costway HW63212 user manual

Costway

Costway HW63212 user manual

Garden Treasures BURKSTON LAZY SUSAN LS-01 Assembly instructions

Garden Treasures

Garden Treasures BURKSTON LAZY SUSAN LS-01 Assembly instructions

Costway HW68237-13 user manual

Costway

Costway HW68237-13 user manual

BICA SET RIALTO Assembly instructions

BICA

BICA SET RIALTO Assembly instructions

Outsunny 84C-221 Assembly & instruction manual

Outsunny

Outsunny 84C-221 Assembly & instruction manual

Verano Tumba V642 manual

Verano

Verano Tumba V642 manual

Dunster House H4-GS3X4PRG installation manual

Dunster House

Dunster House H4-GS3X4PRG installation manual

MAISONS DU MONDE IONNA 209998 manual

MAISONS DU MONDE

MAISONS DU MONDE IONNA 209998 manual

MONDAWE 8MO1220140 Assembly instruction

MONDAWE

MONDAWE 8MO1220140 Assembly instruction

Wisteria Lane KX-016GR instruction manual

Wisteria Lane

Wisteria Lane KX-016GR instruction manual

Schaffner ST. MORITZ KLAPPBAR Assembly instructions

Schaffner

Schaffner ST. MORITZ KLAPPBAR Assembly instructions

manuals.online logo
manuals.online logoBrands
  • About & Mission
  • Contact us
  • Privacy Policy
  • Terms and Conditions

Copyright 2025 Manuals.Online. All Rights Reserved.