manuals.online logo
Brands
  1. Home
  2. •
  3. Brands
  4. •
  5. GWINNER
  6. •
  7. Indoor Furnishing
  8. •
  9. GWINNER MEDIA CONCEPT SP67 User manual

GWINNER MEDIA CONCEPT SP67 User manual

1MEDIA CONCEPT INSTALLATION – ROWS WITH SUPPORTING SELECTIONS
FROM R5750 ONWARDS
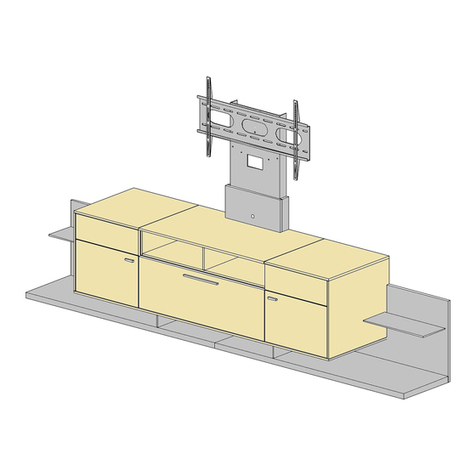
IMAGE 1 Example walls SP12, SP67 and SK121
SP12 SK121
SP67
IMAGE 2, tting the feet, aligning the supporting section panel.
Note the safety catch for
2-incr. carcase.
Tighten
screw no. 3.
SP12
+/- Push six levelling gliders
into the intended holes
Align the lower supporting section panel
INSTALLATION ROWS WITH SUPPORTING SELECTIONS
MEDIA CONCEPT
PLEASE NOTE!
CAUTION! Follow the specications carefully when tting wall units.
Secure all elements that may tip with the anti-tip mechanisms supplied.
Qualied specialist personnel
2x2x2x
2MEDIA CONCEPT INSTALLATION – ROWS WITH SUPPORTING SELECTIONS
IMAGE 3, connecting the lower supporting-section corner
IMAGE 4, tting the supporting section‘s rear panel
IMAGE 5, tting the lower rear panel (RWU)
Fit the Cobra glass-shelf
supports using 3.5x17 Liko
screws
Six dia. 8x50
wooden dowels
Connect the supporting
section panel to the
supporting section side
panel from below using
two Seko Spax 5x 80
screws
Connect the rear panel to the
supporting section panel and side
panel at a right angle.
Adjust the rear panel in
the groove
Screw the bottom rear panel
to the supporting section
panel using eight Liko Spax
4x 50 screws
3MEDIA CONCEPT INSTALLATION – ROWS WITH SUPPORTING SELECTIONS
IMAGE 6, tting the cover panels and glass clamp ttings
IMAGE 7, pre-assembling the rear-panel cover panel and cabling
Secure the 13-mm cover
panels at the marked
points from the inside.
Use 4x27 mm counter-
sunk screws and cover
caps
Secure the cable with a
selfadhesive cable clip
„LN195“ light, only if
requested by the
customer (pre-
assembled at the factory)
Fit four glass clamp fittings
at the marked points using
3x15 Liko screws
Screw the bottom rear panel to
the supporting section panel using
three Liko Spax 4x 50 screws
Then position the
multi-way socket on the
cupboard so that the plug
is accessible from the
top of the cable duct
Position the customer‘s multi-way socket in the TV niche before assembling the cupboard
4MEDIA CONCEPT INSTALLATION – ROWS WITH SUPPORTING SELECTIONS
Adjusting the wall units
Tighten the screw no. 3,
safety catch.
Fit the 308 x 139 x 8 mm
glass sides with a buffer and
remove the assembly aid
Top element
5.5x70 cylinder-head screw
+ 8 mm wall plug
+ WP5L/WP5R wall uprights
IMAGE 8, aligning the plinth + drilling the 198-cm top element
IMAGE 9, hanging and aligning the 2R-198-cm top element
The wall plugs supplied are suitable for the following sub-surfaces:
Concrete, solid brick, ventilating brick, hollow concrete blocks.
If there is a different subsurface, select an appropriate fixing material.
Align the assembly
aid ush with the front edge
of the plinth panel
IMAGE 11, securing the upper supporting section panel & glass shelf
IMAGE 12, aligning the plinth + drilling the 3R-198-cm top element
5MEDIA CONCEPT INSTALLATION – ROWS WITH SUPPORTING SELECTIONS
Align the assembly
aid ush with the front edge
of the plinth panel
IMAGE 10, pre-assembling the upper supporting section panel
SP121
Fit the glass sides
308 x 139 x 8 mm with buffer
„LN195“ light, only if
requested by the
customer (pre-assembled
at the factory)
Two Rastex screw-
in dowels
Fit four glass clamp fittings
at the marked points using
3x15 Liko screws
Tighten the fittings
by turning them
Upper supporting section panel
Slide in the glass
intermediate shelf
The wall plugs supplied are suitable for the following sub-surfaces:
Concrete, solid brick, ventilating brick, hollow concrete blocks.
If there is a different subsurface, select an appropriate fixing material.
5.5x70 cylinder-head
screw
+ 8 mm wall plug
+ WP5L/WP5R
wall uprights
Secure the
cable with a
selfadhesive
cable clip
6MEDIA CONCEPT INSTALLATION – ROWS WITH SUPPORTING SELECTIONS
Adjusting the wall units
Tighten the screw no. 3,
safety catch.
5.5x70 cylinder-head screw
+ 8 mm wall plug
Drill dowels 8mm and
screw in wall hooks
Combi MC968K with supporting selection SK121
IMAGE 13, hanging and aligning the 198-cm top element
IMAGE 14, Wall unit + drilling wall panel
Fit the 308 x 139 x 8 mm
glass sides with a buffer and
remove the assembly aid
Top element
7MEDIA CONCEPT INSTALLATION – ROWS WITH SUPPORTING SELECTIONS
+/-
IMAGE 16, tting the cover panels and levelling gliders
IMAGE 15, (Supporting section + UTB3 complete)
IMAGE 17, Rear panel attachment RWA
SP67
Secure the 13-mm cover panels at
the marked points from the inside.
Use 4x27 mm countersunk screws
and cover caps
Push 5 levelling gliders
into the intended holes
Screw the bottom rear
panel to the lower part
using 7x Liko-Spax 4x 50
Rear panel attachment RWA
Customer‘s multiway
socket
8MEDIA CONCEPT INSTALLATION – ROWS WITH SUPPORTING SELECTIONS
IMAGE 18
IMAGE 19
Two Rastex screw-
in dowels
2x
Fit the Cobra glass-shelf supports
using 3.5x17 Liko screws
Six dia. 8x50
wooden dowels Connect the supporting section
panel to the supporting section side
panel from below using two Seko
Spax 5x 80 screws
Connect the rear panel to the supporting
section panel and side panel at a right!
Adjust the rear
anel in the groove
Secure the cable with a
selfadhesive cable clip
2
1
Fit the glass sides
308 x 139 x 8 mm
with buffer
Fit four glass clamp fittings at the marked
points using 3x15 Liko screws
„LN228“ light, only if requested by the
customer (preassembled at the factroy)
9MEDIA CONCEPT INSTALLATION – ROWS WITH SUPPORTING SELECTIONS
IMAGE 20
The wall plugs supplied are suitable for the following sub-surfaces:
Concrete, solid brick, ventilating brick, hollow concrete blocks.
If there is a different subsurface, select an appropriate fixing material.
Tighten the fittings
by turning them
Upper supporting section panel
Slide in the glass
intermediate shelf
IMAGE 21, drilling the wall units and wall panels Combi MC917 with supporting selection SP67
5.5x70 cylinder-head screw
+ 8 mm wall plug
Drill the 8-mm wall plug
and screw in the wall hook
Caution:
Take other
installation heights
and widths from
the measurements
system provided.
10 MEDIA CONCEPT INSTALLATION – ROWS WITH SUPPORTING SELECTIONS
IMAGE 22
5.5x70 cylinder-head screw
+ 8-mm wall plug
+ Wall rails WP5L/ WP5R
Drilling dimensions top cabinets
for supporting sections, height 2R+ 3R,
width -165cm, 198cm, -230cm;
The wall plugs supplied are suitable for the following sub-surfaces:
Concrete, solid brick, ventilating brick, hollow concrete blocks.
If there is a different subsurface, select an appropriate fixing material.

This manual suits for next models

2

Other GWINNER Indoor Furnishing manuals
GWINNER TREVISO User manual

GWINNER

GWINNER TREVISO User manual

GWINNER MEDIA CONCEPT MC969K User manual

GWINNER

GWINNER MEDIA CONCEPT MC969K User manual

GWINNER CALEA CE1003 User manual

GWINNER

GWINNER CALEA CE1003 User manual

GWINNER MISANO R5516 User manual

GWINNER

GWINNER MISANO R5516 User manual

GWINNER MEDIA CONCEPT User manual

GWINNER

GWINNER MEDIA CONCEPT User manual

GWINNER CALEA User manual

GWINNER

GWINNER CALEA User manual

GWINNER MISANO User manual

GWINNER

GWINNER MISANO User manual

GWINNER ATENA Configuration guide

GWINNER

GWINNER ATENA Configuration guide
GWINNER FELINO Instruction Manual

GWINNER

GWINNER FELINO Instruction Manual
Popular Indoor Furnishing manuals by other brands

Heart of House Wiltshire 2388287 Assembly instructions

Heart of House

Heart of House Wiltshire 2388287 Assembly instructions

Rockler Blum GRP2283 1 instructions

Rockler

Rockler Blum GRP2283 1 instructions

ICW MD ARM Installation instruction

ICW

ICW MD ARM Installation instruction

Emmezeta LUNA SHELF Assembling Instruction

Emmezeta

Emmezeta LUNA SHELF Assembling Instruction

ofichairs Slim quick start guide

ofichairs

ofichairs Slim quick start guide

GUIDO MARIA KRETSCHMER HOME&LIVING Como 476344 manual

GUIDO MARIA KRETSCHMER HOME&LIVING

GUIDO MARIA KRETSCHMER HOME&LIVING Como 476344 manual

HAIOOU HO-SR001 Assembly instruction

HAIOOU

HAIOOU HO-SR001 Assembly instruction

Bonaldo Moglie e Marito Double Bed Assembly instructions

Bonaldo

Bonaldo Moglie e Marito Double Bed Assembly instructions

Dauphin Syncro-Automatic @Just magic2 Series owner's manual

Dauphin

Dauphin Syncro-Automatic @Just magic2 Series owner's manual

Songmics VASAGLE LET54 manual

Songmics

Songmics VASAGLE LET54 manual

Home Decorators Collection DP18019-P Use and care guide

Home Decorators Collection

Home Decorators Collection DP18019-P Use and care guide

RST Milo Motion OP-PECLB2M-MILO Assembly instructions

RST

RST Milo Motion OP-PECLB2M-MILO Assembly instructions

Bensons for Beds PENELOPE STK770625 Assembly instructions

Bensons for Beds

Bensons for Beds PENELOPE STK770625 Assembly instructions

Naomi Kids Low Loft Bed - 3 Drawer Chest Assembly instructions

Naomi Kids

Naomi Kids Low Loft Bed - 3 Drawer Chest Assembly instructions

Argos New Penton 245/7864 Assembly instructions

Argos

Argos New Penton 245/7864 Assembly instructions

Seconique Panama Console Table Assembly instructions

Seconique

Seconique Panama Console Table Assembly instructions

Costway HY10189 manual

Costway

Costway HY10189 manual

Office Star Products SPACE 63-58612 operating instructions

Office Star Products

Office Star Products SPACE 63-58612 operating instructions

manuals.online logo
manuals.online logoBrands
  • About & Mission
  • Contact us
  • Privacy Policy
  • Terms and Conditions

Copyright 2025 Manuals.Online. All Rights Reserved.