manuals.online logo
Brands
  1. Home
  2. •
  3. Brands
  4. •
  5. GWINNER
  6. •
  7. Indoor Furnishing
  8. •
  9. GWINNER MEDIA CONCEPT User manual

GWINNER MEDIA CONCEPT User manual

1MEDIA CONCEPT INSTALLATION ROWS WITH PANEL PLINTH
AB R4625
IMAGE 1 example walls PS3 3-incr. and PS2 2-incr.
IMAGE 2, connecting the plinth panel to the wall panel.
+/-
Push six levelling gliders
into the intended holes
Fit two black KU pads
to the wall panel
(Assembly aid)
Four 4x70
countersunk
screws
Soundklappe
ohne Griff "Push"
PS3
INSTALLATION ROWS WITH PANEL PLINTH
MEDIA CONCEPT
Note the safety catch for
2-incr. & 3-incr. carcase
Tighten no. 3
Example with TV Example without TV
PLEASE NOTE!
CAUTION! Follow the specications carefully when tting wall units.
Secure all elements that may tip with the anti-tip mechanisms supplied.
Qualied specialist personnel
2MEDIA CONCEPT INSTALLATION ROWS WITH PANEL PLINTH
IMAGE 3, aligning the plinth panels
IMAGE 4, connecting the plinth panels
IMAGE 5, tting the cover panels and glass clamp ttings
Align each plinth panel
before connecting them.
Secure the 200x 100x 2 mm
connecting piece using eight
4 x 25 mm plate screws where
indicated.
Secure the 13-mm cover
panels at the marked points
from the inside.
Use 4x27 mm countersunk
Secure cable with a self-
adhesive fasten cable clip
Fit four glass clamp fittings
at the marked points using
3x15 Liko screws
„LN195“ light, only if
requested by the customer
(preassembled at the
factroy)
3MEDIA CONCEPT INSTALLATION ROWS WITH PANEL PLINTH
IMAGE 6, tting the TV pedestal
IMAGE 7, aligning the plinth & drilling the 3-incr. top element
The wall plugs supplied are suitable for the following sub-surfaces:
Concrete, solid brick, ventilating brick, hollow concrete blocks.
If there is a different subsurface, select an appropriate fixing material.
5.5x70 cylinder-head screw
+ 8 mm wall plug
+ WP5L/WP5R
Align the assembly aid flush
with the front edge of the plinth
3x spacer sleeve aluminium 84 x 15 mm
+ 3x countersunk screw 5 x120 mm
fix to the floor from behind!
Base for sleeve fastening
pre-drilled.
TV column from above
with 5x countersunk
screw 4 x 27 mm
Multiple socket from
the customer into the
TV niche
4MEDIA CONCEPT INSTALLATION ROWS WITH PANEL PLINTH
IMAGE 8, hanging and aligning the top element
IMAGE 9, securing the glass shelf to the wall panel
Top element
Glass shelf
Wall panel
5x120 countersunk screw
+ 8 mm wall plug
For TV pedestals
with swivel
xings, secure
the pedestal to
the wall.
Adjusting the wall units
Tighten the screw no. 3,
safety catch.
Fit the 368 x 139 x 8 mm
glass sides with a
buffer and remove the
assembly aid
+/-
1Slide the glass shelf
SW5
Securely x the
glass shelf in place
and adjust the Inclination
2
5MEDIA CONCEPT INSTALLATION ROWS WITH PANEL PLINTH
IMAGE 10, tting the TV bracket
IMAGE 12, Saligning the plinth & drilling the 2-incr. top element
IMAGE 11, tting the TV slot
Secure the TV wall bracket
to the TV pedestal using
four Ruko M8x12 mm bolts
Stopper for
TV slot
(preassembled)
Secure the TV pedestal
cladding using
magnets (IR repeater
for TV devices only if
requested by the
customer)
TV slot can be moved
forward by approx. 11 cm
(cable niche for TV devices)
If ordered, insert the wireless
„KLG“ charging device into the
milled TV slot and secure
The wall plugs supplied are suitable for the following sub-surfaces:
Concrete, solid brick, ventilating brick, hollow concrete blocks.
If there is a different subsurface, select an appropriate fixing material.
5.5x70 cylinderhead screw
+ 8 mm wall plug
+ WP5L/WP5R wall
uprights
Align the assembly aid
flush with the front edge
of the plinth panel
PS2
+/-
6MEDIA CONCEPT INSTALLATION ROWS WITH PANEL PLINTH
Adjusting the wall units
Tighten the screw no. 3,
safety catch.
Fit the 368 x 139 x 8 mm
glass sides with a buffer and
remove the assembly aid
IMAGE 13, hanging and aligning the top element
IMAGE 14, (completed installation)
Removable cable cover
with brush seal
Push ttings
fitted to the cupboard,
adjustable using the
magnetic locking system
Push the cover to open
Top element
Top element

Other GWINNER Indoor Furnishing manuals

GWINNER FELINO Instruction Manual

GWINNER

GWINNER FELINO Instruction Manual
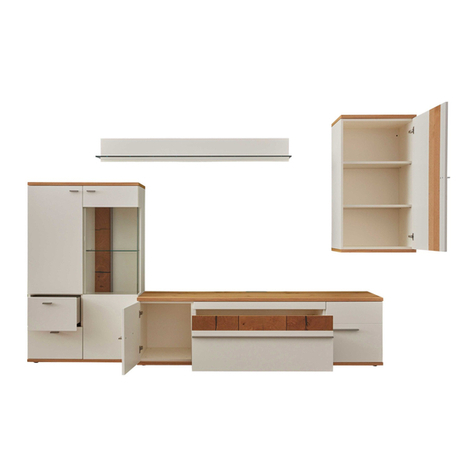
GWINNER MEDIA CONCEPT MC969K User manual

GWINNER

GWINNER MEDIA CONCEPT MC969K User manual

GWINNER TREVISO User manual

GWINNER

GWINNER TREVISO User manual

GWINNER CALEA User manual

GWINNER

GWINNER CALEA User manual

GWINNER MEDIA CONCEPT SP67 User manual

GWINNER

GWINNER MEDIA CONCEPT SP67 User manual

GWINNER CALEA CE1003 User manual

GWINNER

GWINNER CALEA CE1003 User manual

GWINNER MISANO User manual

GWINNER

GWINNER MISANO User manual

GWINNER MISANO R5516 User manual

GWINNER

GWINNER MISANO R5516 User manual

GWINNER ATENA Configuration guide

GWINNER

GWINNER ATENA Configuration guide
Popular Indoor Furnishing manuals by other brands

Regency LWMS3015 Assembly instructions

Regency

Regency LWMS3015 Assembly instructions

Furniture of America CM7751C Assembly instructions

Furniture of America

Furniture of America CM7751C Assembly instructions

Safavieh Furniture Estella CNS5731 manual

Safavieh Furniture

Safavieh Furniture Estella CNS5731 manual

PLACES OF STYLE Ovalfuss Assembly instruction

PLACES OF STYLE

PLACES OF STYLE Ovalfuss Assembly instruction

Trasman 1138 Bo1 Assembly manual

Trasman

Trasman 1138 Bo1 Assembly manual

Costway JV10856 manual

Costway

Costway JV10856 manual

moss DESIGN Caisson Credenza Assembly instructions

moss DESIGN

moss DESIGN Caisson Credenza Assembly instructions

Aquaglide FULL DECK 15.0 owner's manual

Aquaglide

Aquaglide FULL DECK 15.0 owner's manual

AREBOS AR-HE-SW30 user manual

AREBOS

AREBOS AR-HE-SW30 user manual

Till-Hilft Fulda 87005.330 Assembly instructions

Till-Hilft

Till-Hilft Fulda 87005.330 Assembly instructions

Twoey Outside 2010 quick start guide

Twoey Outside

Twoey Outside 2010 quick start guide

Hettich Easys 200 operating instructions

Hettich

Hettich Easys 200 operating instructions

The bedboss RELAX 404 Series owner's manual

The bedboss

The bedboss RELAX 404 Series owner's manual

Oeseder Möbelindustrie Bern 991 720 Assembly instructions

Oeseder Möbelindustrie

Oeseder Möbelindustrie Bern 991 720 Assembly instructions

Costway HW68469 user manual

Costway

Costway HW68469 user manual

Next ALIX A27743 Assembly instructions

Next

Next ALIX A27743 Assembly instructions

BROSA Hans Assembly guide

BROSA

BROSA Hans Assembly guide

Prodigg MINIKA PBA015T-FUR installation manual

Prodigg

Prodigg MINIKA PBA015T-FUR installation manual

manuals.online logo
manuals.online logoBrands
  • About & Mission
  • Contact us
  • Privacy Policy
  • Terms and Conditions

Copyright 2025 Manuals.Online. All Rights Reserved.