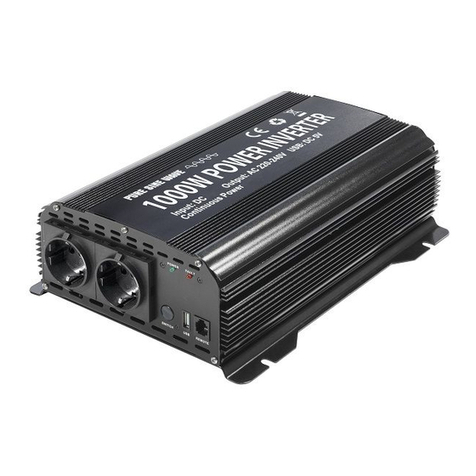
GYS PSW8300 User manual

1
PSW8300 – PSW8600 – PSW81500
ENGLISH FRANÇAIS
MANUAL USER
P
5-7 NOTICE
D’UTILISATION
P
8-10
ESPAÑOL DEUTSCH
MANUAL DE INSTRUCCION
P
11-13
BEDIENUNGSANLEITUNG
P
14-16
V2 – 04/06/2013
Visuels non contractuels
Images not contractual
Fotos sin valor contractual
Abbildungen ähnlich riginal

2
F
EATURE AND APPLICATION
/
C
ARACTERISTIQUES ET APPLICATIONS
/
C
ARACTERISTICAS Y
APLICACIONES
/
P
RODUKTBESCHREIBUNG UND
A
NWENDUNG
EN
•Pure sine wave output
•High efficiency and portable
•Intelligent switch with digital display to show the input voltage and loading
•Intelligent to control the fan
•Advanced microprocessor design
•With under voltage/ over voltage/ over load / short circuit / overheat protection function
FR
•Courant pur sinus offrant un signal électrique régulier
•Appareil mobile de hautes performances
•Piloté par microprocesseur
•Affichage digital
•Refroidissement par ventilateur
•Multi protections : sous-tension / surtension / surcharge / surchauffe / court-circuit
ES
•Corriente onda sinusoidal ofreciendo un señal eléctrico regular
•Aparato móvil de altas prestaciones
•Pilotado por microprocesador
•Fijación digital
•Enfriamiento por ventilador
•Varias protecciones : bajo tensión / sobretensión / sobrecarga / sobrecalentamiento / cortocircuito
DE
•perfekte Sinusausgangsspannung
•Hocheffizient und transportabel
•Display mit Eingangsspannungs- und Leistungsanzeige
•Temperatur- und lastgeregelter Lüfter
•Fortgeschrittenes Mikroprozessordesign
•Tiefentladeschutz / Überspannungsschutz / Überlastungsschutz / Temperaturüberwachung /
Kurzschlussfes

3
Function introduction / description des fonctions / Descripción de las funciones / unktionsbeschreibung
1、Front panel picture / face avant / Adelantara / Frontseite
1
EN - Power LED/Green: When the inverter connect with electricity the light will on
FR - Voyant vert : Indique que le convertisseur est connecté à une source électrique
ES - Señal verde : Indica que el convertidor está conectado a una fuente eléctrica
DE - Power LED/Grün: leuchtet bei Anschluss an Spannungsquelle
2
EN - Digital display: Automatic change the display with input voltage and loading
FR - Affichage digital : Affichage du courant d’entrée et de charge
ES - Fijación digital : Fijación de la corriente de entrada y de carga
DE - Digitales Display: zeigt abwechselnd Versorgungsspannung und -strom
3
EN - Fault LED/Red: If problem happens the red light will on
FR - Voyant rouge : Indique un défaut
ES - Señal rojo : Indica un defecto
DE - Fault LED/Rot: zeigt Fehlfunktion oder Bedienungsfehler an
4
EN - USB output:utput DC 5V - 500mA
FR - Sortie USB:DC 5V - 500mA
ES - Salida USB:DC 5V - 500mA
DE - USB-Anschluss::utput DC 5V / 500mA
5
EN - Power switch: Start and stop the inverter
FR - Bouton N/ FF
ES - botón N/ FF
DE - Ein/Ausschalter: schaltet den Konverter ein und aus
6
EN - AC output:European socket, output AC 230V +/- 10%,50Hz +/- 1%
FR - Prise de courant européenne AC 230V +/- 10%,50Hz +/- 1%
ES - Enchufe de corriente europeo AC 230V +/- 10%,50Hz +/- 1%
DE - AC-Anschluss:CEE 7/7 konforme Steckdose, AC 230V +/- 10%,50Hz +/- 1%

4
2. Back panel picture / face arrière / Trasera / Rückseite
1
EN - Heat dissipation fans: Intelligent control, only start when the load reach 30% of the related load or the internal
temperature reach 60degree(300W and 600W inverter have only one fan)
FR - Ventilation : Refroidissement automatique par ventilateurs (les modèles 300W et 600W ne disposent que d’un
ventilateur)
ES - Ventilación : Enfriamiento automático por ventiladores (los modelos 300W y 600W no disponen que de un
ventilador)
DE - Kühlgebläse: automatisch gesteuert – startet bei 30% der maximalen Leistung oder bei Temperaturen von 60°
C oder mehr((die 300W und 600W Wechselrichter besitzen nur einen Ventilator)
2
EN - “+” red terminal:Connect this terminal with positive polar of the battery or other power supply use the red cable
FR - Borne rouge “ + ”:Connecteur pour câble rouge (borne positive de la batterie)
ES - Borne rojo “ + ”:Conector para cable rojo (borne positiva de la batería)
DE - “+” rote Klemme: Verbinden Sie diese Klemme mit dem Pluspol der Batterie oder einer anderen
Spannungsquelle, benutzen Sie das rote Kabel
3
EN - “-” black terminal : Connect this terminal with the negative polar of the battery or other power supply use the
black cable
FR - Borne noire “ - ”:Connecteur pour câble noir (borne négative de la batterie)
ES - Borne negra “ - ”:Conector para cable negra (borne negativa de la batería)
DE - “-” schwarze Klemme: Verbinden Sie diese Klemme mit dem Minuspol der Batterie oder einer anderen
Spannungsquelle, benutzen Sie das schwarze Kabel
4
EN - Earthing device: To connect the ground, use the yellow cable
FR - Terre : Pour connecter le produit à la terre (utiliser le câble jaune)
ES - Tierra : Para conectar el producto a la tierra (utilizar el cable amarillo)
DE - Erdungsklemme: Benutzen Sie das gelbe Kabel zum Erden des Wechselrichters
Both pictures just for reference may have a little difference from the real products
Visuels indicatifs et non contractuels
Visuales indicativos y no contractuales
Beide Abbildungen sind nur Beispiele, je nach Produkt sind Variationen möglich
②
④
③①

5
1.
D
ESCRIPTION
A pure sine wave inverter converter changes the DC electricity to AC electricity. It has been widely used in cars,
steamboats, mobile officing post and telecommunications, public security, emergency and other field.
This power inverter has adopted the international lead circuit design, with the advantage of small size, light, stable,
and high conversion efficiency. It has five kind of protect function such as: input under voltage protection, input over
voltage protection, overload protection, over temperature protection, output short circuit protection. Please read this
carefully before using. This manual applies to 300W .600W and 1500W series of products.
2.
I
NSTRUCTION
Application:
•Electric power tool series:
::
:Electric Saw, Drilling machine, lapping machine, sandblast machine, stamping
machina, grass eliminator, air compressor
•Office equipment: Computer, printer, displayer, duplicator, scanistor, facsimile apparatus
•Household appliances: Dust collector, fan, fluorescent lamp, filament lamp, sewing machine
•Kitchen series: Microwave oven, refrigerator, freezer, coffe machine, blender, ice machine, hot oven
•Commercial installation series: Metal halogen light, hight voltage sodium lam, watercraft, cars, solar
energy and wind power generation.
•Electric Field series: TV, radio ,game player ,VCR ,power amplifier ;monitoring equipment , servicer,
satellite communication equipments
NOTE: While using please follow the related power of the inverter, do not over load. It is better to keep the
inverter work at 85% of its related power.
USB instruction:
::
:
•USB is only for charging , do not have date exchange function
•Before charging please check carefully if the charging current of the appliance is under the inverters
current, if it is exceed the charging current of the inverter please do not use, or it may destroy the USB port.
•Some appliance must charging use certain charger; please use the certain charger to charging.
About use extended cable:
•We do not recommend use extended cable between the inverter and the battery; because it will case lost
of DC electricity and affects the effect of the inverter.
•If really need use extended we suggest you use high quality cable to reduce the loss of electricity.
Heat dissipation
•To save energy, the fan will not work unless the under two situations:
oThe fan will work when the load is exceed 30% of the related power of the inverter;
oWhen the inside temperature of the inverter exceed 60 degree the fan will work.
3.
I
NSTALLATION AND WORKING ENVIROMENT
While installing the follow situation are needed:
•Dry: Do not put the inverters in rain, fog, frosty, water and greasy dirt oil are forbidden put on inverters.
•Temperature: Please control the temperature between 5 – 35 °C
•Safety: Do not put the inverters beside, explosive, inflammable and fuel oil engine.
•Ventilate: At lease keep10cm space for ventilate, and do not jam the air-vent.
•Dust: Do not put the inverter in dust and too much dust will destroy the inverter.
6
4.
C
ONNECTING
1. Check if the inverter is in off status. Connect the cable.
2. Ensure the battery voltage and the inverter input voltage matching. 12V inverter can only work with 12V
battery and 24v inverter can only work with 24v battery, if mixed will destroy the inverter.
3. Connect the positive terminal with the positive polar to the battery and the negative with the negative polar
and please keep the inverter in off status, that’s very important for the inverter.
Warning: Keep the connecting fixed or will be very dangerous.
Checking the connection again before the next step
4. Warning: Do not inversed connected it may destroy the inverter.
5. Press the on button, the green light on and the digital display start work. If the inverter alarms please stop
the inverter and check!
5.
F
OR SAFETY
Please read carefully before using:
•Please do not operate the inverter while your hand is wet, Keep it from the touch of children.
•The temperature of the shell will be high after longtime working, so do not touch it in case scalded;
•Do not put metal into the inverter in case not to electric shock.
•Because inverter is easy to emerge arc, do not put the inverters in rain, fog, frosty, water and greasy dirt oil
are forbidden put on inverters.
•While connecting with battery, if the battery acidic material touches the skin please wash use water at once,
if the acidic material go into the eye please go to the hospital.
•Please do not put metal on the battery, this will cause short circuit then destroy the inverter and the battery.
•When insert the socket of the appliance to the AC outlet of the inverter please keep you hand away from
the metal pin, to avoid electric shock.
•Please do not put any AC electric to the AC outlet of the inverter, this will destroy the inverter and may
cause electric shock.
•Do not disassembly products, maintain need professional.
6.
P
ROTECTION AND STATE INSTRUCTION
P
ROTECTION
F
UNCTION
S
TATE DESCRIPTION
R
ECOVER METHOD
G
REEN
LED R
ED
LED
ALARM
AC
OUTPUT
Input under voltage
protection on on No alarm No When the voltage of the battery lower
or higher than normal one the red light
on, green light of , the inverter stop
work
Input over voltage
protection on on No alarm No
Over load protection on on No alarm No
Reduce load, make it work under the
related load of the inverter, the inverter
will restart work ,green light on, red
light off.
Over heat protection on on Alarm as
ding… No
The internal temperature of the inverter
return to the normal and the inverter
will restart work, green light on ,red
light off
Output short circuit
protection off off
Input under voltage
alarm on off Alarm as
ding… yes
When the voltage of the battery returns
to the normal one, the red light
off ,green light on, the inverter restart
work

7.
W
ASTE DISPOSE
Please do not discard the products when it is useless, otherwise it will case pollution to the environment.
8.
S
PECIFICATION
PSW8300 PSW8600 PSW81500
Input voltage DC 12V (DC 11-15V)
Output voltage AC 230V +/- 10%
Output frequency 50Hz +/- 1%
USBoutput DC 5V,500mA
Continuous power 300W 600W 1500W
Peak power 600W 1200W 3000W
Digital display Input voltage / load
Output wave Pure sine wave
Distortion rate < 3%
Effiency >85%
No load current <0.45A
Input under voltage alarm DC 10.2 – 10.8V
Input under voltage shut down DC 9.2 – 9.8V
Input over voltage shut down DC 15 – 16V
Over load shut down 360W – 390W 720W – 780W 1800W – 1950W
Fuse 20A x 2 25A x 3 30A x 6
Working temperature 5 – 35 °C
Heat dissipation method fan
Cable Red ,black and yellow cable
7

8
1.
D
ESCRIPTION
Un convertisseur inverter pur sinus est un appareil qui transforme le courant continu 12V en un courant alternatif
de 230V. Ce type de produit peut être utilisé pour diverses applications type véhicules, structures et appareils
mobiles de télécommunications, de sécurité publique ou d'urgence.
De taille réduite, léger et stable, ce produit bénéficie d’une efficacité de conversion optimale. Il est équipé de 5
protections : protection de sous ou surtension en entrée, protection de surcharge, protection de surchauffe,
protection de court-circuit en sortie.
Merci de lire attentivement la notice avant tout utilisation. Ce manuel s'applique aux modèles 300W, 600W et
1500W.
2.
I
NSTRUCTION
Application:
•Outils électriques - ex : Scie électrique, perceuse, ponceuse, compresseur
•Equipement de bureau - ex : Ordinateur, imprimante, écran, télécopieur, scanneur, lampe
•Appareils électroménagers – ex : Aspirateur, ventilateur, machine à coudre, micro-onde, réfrigérateur,
congélateur, machine à café, mixeur, machine à glaçons.
•Installations commerciales - ex : Utilitaires, voitures, installation à énergie solaire, éolienne ou
embarcations diverses type marine
•Divers appareils électriques : TV, radio, console de jeux, amplificateur, équipement de surveillance ou de
télécommunication
REMARQUE: Bien vérifier la puissance maximale du convertisseur. Il est conseillé d’utiliser le produit à 85%
de sa puissance maximale.
Instructions pour le port USB:
•Le port USB sert uniquement à alimenter un appareil compatible, en aucuns cas il ne sert à échanger des
données.
•Ne pas brancher d’appareil n’excédant 500mA, cela risquerait d’endommager le port USB.
•Respecter les recommandations du constructeur lorsque l’appareil nécessite un chargeur spécifique.
Instruction pour rallonge :
•Nous déconseillons l’usage de rallonge entre la batterie et le convertisseur qui pourrait diminuer les
performances de l’appareil.
•Si vous devez impérativement utiliser une rallonge, nous conseillons d’utiliser des câbles de haute qualité
pour réduire les risques de pertes électriques.
Ventilation
•Pour économiser de l’énergie, le ventilateur fonctionne sous deux conditions :
oPour toute charge au-delà de 30% de la capacité totale du convertisseur
oQuand la température interne du produit dépasse les 60°C
3.
I
NSTALLATION ET ENVIRONNEMENT D
’
UTILISATION
Au moment de l’installation, bien vérifier les points suivants :
•Milieu sec : Ne pas exposer l’appareil à l’humidité ou à proximité de liquides.
•Température : Utiliser le produit entre 5 et 35°C
•Sécurité : Ne pas utiliser le produit à proximité de liquides inflammables.
•Ventilation : Veiller à ne pas obstruer les aérations et laisser au moins 10 cm devant les ventilateurs.
•Poussière : Ne pas mettre le produit dans des endroits poussiéreux qui pourraient détériorer l’électronique
interne au produit.

4.
C
ONNEXION
1. Assurez-vous que le produit est compatible avec votre batterie : un modèle 12V fonctionne uniquement
avec une batterie 12V, un modèle 24V fonctionne uniquement avec une batterie 24V.
2. Bien vérifier que le produit n’est pas sous-tension (bouton OFF) puis lui connecter les câbles.
3. Connectez le câble positif à la borne positive de la batterie et la câble négatif à la borne négative de la
batterie.
PRECAUTIONS :
oBien contrôler la tenue des connections
oNe pas inverser la polarité des connections au risque d’endommager le convertisseur
4. Mettre le produit sous-tension (Bouton ON), la lumière verte et l’écran s’allument. Si l’alarme se déclenche,
éteignez le produit (bouton OFF) et vérifiez les connexions et l’environnement d’utilisation.
5.
S
ECURITE
A lire impérativement avant utilisation :
•Ne pas manipuler l’appareil avec les mains humides et ne pas laisser l’appareil à la portée d’enfants pour éviter
le risque de blessure ou de choc électrique.
•La température de la carrosserie peut être élevée suite à une longue utilisation, il est nécessaire de laisser
refroidir le produit avant de le manipuler.
•Ne pas insérer d’objets en métal dans le produit pour éviter les chocs électriques.
•Ne pas exposer le convertisseur à l‘humidité ou à proximité de liquides.
•Lors du branchement sur la batterie, ne pas utiliser un outil en métal qui pourrait causer des courts-circuits et
endommager le produit.
•Eviter tout contact avec l’acide de la batterie et au besoin nettoyer à l’eau claire. En cas de contact avec les yeux,
consultez un médecin.
•Si un dysfonctionnement se présente, débrancher immédiatement le convertisseur.
•Veiller à ce que l’aération soit suffisante et que les entrées et sorties d’air de l’appareil ne soient pas obstruées.
•Ne pas démonter ou modifier le produit.
6.
I
NSTRUCTION CONCERNANT LES PROTECTIONS
P
ROTECTIONS
E
TAT
E
XPLICATION
LED
VERTE
LED
ROUGE
ALARME
C
OURANT DE
SORTIE
AC
Sous ou surtension
de batterie OUI OUI PAS
D’ALARME NON
La tension de la batterie est inférieure ou
supérieur à la plage d’utilisation du
convertisseur. Recharger la batterie et/ou
attendre le redémarrage du produit.
Surcharge OUI OUI PAS
D’ALARME NON La puissance demandée par l’appareil
branché au convertisseur est trop
importante, il faut réduire la charge.
Surchauffe OUI OUI OUI NON La température interne du produit est trop
importante, il est nécessaire de laisser le
produit refroidir.
Court-circuit prise
230V NON NON
Produit en
fonctionnement OUI NON OUI OUI
Lorsque la tension de la batterie retourne à
la normale, que la charge demandée est
dans la plage d’utilisation du produit et que
sa température est optimale, la lumière
rouge s’éteint et l’alarme indique que le
produit peut être de nouveau utilisé
7.
R
ECYCLAGE
Produit faisant l'objet d'une collecte sélective. Ne pas jeter dans une poubelle domestique.
9

10
8.
S
PECIFICITES
PSW8300 PSW8600 PSW81500
Courant d’entrée DC 12V (DC 11-15V)
Courant de sortie AC 230V +/- 10%
Fréquence de sortie 50Hz +/- 1%
Port USB DC 5V,500mA
Puissance continue 300W 600W 1500W
Puissance maximale (pic) 600W 1200W 3000W
Ecran digital Courant de sortie / charge
Signal électrique Pur sinus
Taux de distorsion < 3%
Rendement >85%
Seuil minimal de charge <0.45A
Seuil d’alarme de sous-tension DC 10.2 – 10.8V
Seuil de coupure de sous-tension DC 9.2 – 9.8V
Seuil de coupure de surtension DC 15 – 16V
Seuil de coupure de surcharge 360W – 390W 720W – 780W 1800W – 1950W
Fusible 20A x 2 25A x 3 30A x 6
Température d’utilisation 5 – 35 °C
Dissipation de la chaleur Ventilateur
Câbles Pinces rouge et noire / câble jaune de terre

11
1.
D
ESCRIPCION
Un convertidor inverter onda sinusoidal está un aparato que transforma la corriente continua 12V en una corriente
alternativa de 230V. Este tipo de producto puede ser utilizado para varias aplicaciones tipo vehículos, estructuras y
aparatos móviles de telecomunicaciones, de seguridad pública o de emergencia.
De tamaño reducido, ligero y estable, este producto beneficia de una eficacidad de conversión optímale. Está
equipado de 5 protecciones: protección de bajo o sobre tensión en entrada, protección de sobrecarga, protección
de recalentamiento, protección de cortocircuito en salida.
Gracias por leer atentamente la noticia antes de toda utilización. Este manual se aplica a los modelos 300 W,
600W, 1200 W y 1500 W.
2.
I
NSTRUCCION
Aplicación:
•Herramientas eléctricas - ex : Sierra eléctrica, taladradora, pulidora, compresor
•Equipo de despacho - ex : Ordenador, impresora, pantalla, fax, escáner, lámpara
•Aparatos electrodomésticos – ex : Aspirador, ventilador, maquina a coser, microondas, frigorífico,
congelador, maquina a café, mezclador, maquina a cubito de hielo.
•Instalaciones comerciales - ex : Utilitarios, coches, instalación a energía solar, motor de viento o varias
embarcaciones tipo marino
•Varios aparatos eléctricos : TV, radio, consola de juego, amplificador, equipo de vigilancia o de
telecomunicación
OBSERVACION: Comprobar la potencia máxima del convertidor. Es aconsejado de utilizar el producto hasta
85% de su potencia máxima.
Instrucciones para el puerto USB:
•El puerto USB sirve únicamente a alimentar un aparato compatible, en ningún caso sirve a cambiar los
datos.
•No conectar aparatos excediendo 500mA, podría deteriorar el puerto USB.
•Respetar las recomendaciones del constructor cuando el aparato necesita un cargador específico.
Instrucción para alargador :
•Desaconsejamos la utilización de un alargador entre la batería y el convertidor que podría disminuir las
prestaciones del aparato.
•Si deben imperativamente utilizar un alargador, les aconsejamos de utilizar cables de alta cualidad para
reducir los riesgos de perdidas eléctricas.
Ventilación
•Para ahorrar energía, el ventilador funciona bajo dos condiciones :
oPara toda carga adelante de 30% de la capacidad totales del convertidor
oCuando la temperatura interna del producto adelanta los 60°C
3.
I
NSTALACION Y AMBIANTE DE USO
Al instalar, comprobar correctamente los puntos siguientes :
•Ambiente seco : No exponer el aparato a la humedad o a proximidad de líquidos.
•Temperatura : Utilizar el producto entre 5 y 35°C
•Seguridad : No utilizar el producto a proximidad de líquidos inflamables.
•Ventilación : Velar a no obstruir las aeraciones y dejar al menos 10 cm adelante de los ventiladores.
•Polvo : No poner el producto en lugares polvorientos que podrían deteriorar el electrónico interno al
producto.

12
4.
C
ONEXIÓN
1. Asegurarse que el producto sea compatible con su batería : un modelo 12V funciona únicamente con una
batería 12V, un modelo 24V funciona únicamente con una batería 24V.
2. Comprobar que el producto no sea bajo tensión (botón OFF) pues conectarle los cables.
3. Conectar el cable positivo al borne positivo de la batería y el cable negativo al borne negativo de la
batería.
PRECAUCIONES :
oComprobar la adherencia de las conexiones
oNo invertir la polaridad de las conexiones al riesgo de deteriorar el convertidor
4. Poner el producto en bajo tensión (Botón ON), el diodo verde y la pantalla se encienden. Si la alarma se
activa, apagar el producto (botón OFF) y comprobar las conexiones y el ambiente de utilización.
5.
S
EGURIDAD
A leer imperativo antes de su utilización :
•No manipular el aparato con las manos humedades y no dejar el aparato al alcance de los niños para evitar el
riesgo de quemadura o de choque eléctrico.
•La temperatura de la carrocería puede ser elevada después de una larga utilización, es necesario de dejar
enfriar el producto antes de manipularle.
•No insertar objetos en metal en el producto para evitar los choques eléctricos.
•No exponer el convertidor a la humedad o a proximidad de líquidos.
•Durante la conexión sobre la batería, no utilizar una herramienta en metal que podría causar cortocircuitos y
deteriorar el producto.
•Evitar todo contacto con el acido de la batería y si es necesario limpiar con agua pura. En caso de contacto con
los ojos, consultar un medico.
•Si una disfunción se presenta, desconectar inmediatamente el convertidor.
•Velar a tener una aeración suficiente y que las entradas y salidas de aire del aparato no sean obstruidas.
•No desmontar o modificar el producto.
6.
I
NSTRUCCIÓN REFERENTE A LAS PROTECCIONES
PROTECCIONES
ESTADO
EXPLICACION
LED
VERDE LED
ROJO ALARMA CORRIENTE
DE
SALIDA
AC
Subtensión o
sobretensión de
batería SI SI NO ALARMA NO
La tensión de la batería está inferior o
superior al área de utilización del
convertidor. Recargar la batería y/o
esperar el arranque del producto.
Sobrecarga SI SI NO ALARMA NO La potencia demanda para el aparato
conectado al convertidor está demasiado
importante, hay que reducir la carga.
Recalentamiento SI SI SI NO La temperatura interna del producto está
demasiada importante, es necesario
dejarlo enfriar.
Cortocircuito enchufe
230V NO NO
Producto en marcha SI NO SI SI
Cuando la tensión de la batería vuelva a la
normal, que la carga pedida está en la
área de utilización del producto y que su
temperatura está optímale, la luz roja se
apaga y la alarma indica que el producto
puede ser de nuevo utilizado.
7.
R
ECICLAJE
Producto que está incluido en la colecta selectiva. No tirar en una basura doméstica.

13
8.
E
SPECIFICIDADES
PSW8300 PSW8600 PSW81500
Corriente de entrada DC 12V (DC 11-15V)
Corriente de salida AC 230V +/- 10%
Frecuencia de salida 50Hz +/- 1%
Puerto USB DC 5V,500mA
Potencia continua 300W 600W 1500W
Potencia máxima (pic) 600W 1200W 3000W
Pantalla digital Corriente de salida / carga
Señal eléctrico onda sinusoidal
Índice de distorsión < 3%
Rendimiento >85%
Límite mínima de carga <0.45A
Límite de alarma de bajo tensión DC 10.2 – 10.8V
Límite de corte de bajo tensión DC 9.2 – 9.8V
Límite de corte de sobretensión DC 15 – 16V
Límite de corte de sobrecarga 360W – 390W 720W – 780W 1800W – 1950W
Fusible 20A x 2 25A x 3 30A x 6
Temperatura de utilización 5 – 35 °C
Disipación de calor Ventilador
Cables Pinzas roja y negra / cable amarillo de tierra

14
1.
B
ESCHREIBUNG
Der reine Sinuswechselrichter wandelt Gleichspannung (DC) in eine netzkonforme, sinusförmige
Wechselspannung (AC) wie aus der Steckdose. Eingesetzt werden kann das Gerät in Kraftfahrzeugen, Booten, im
Mobile Office, in der Telekommunikation, zur Notstromversorgung und vielen anderen Einsatzbereichen.
Der Wechselrichter entspricht durch seine schmale Bauform, geringes Gewicht, Robustheit und hohe Effektivität
internationalen Maßstäben. Er beinhaltet fünf verschiedene Schutzeinrichtungen: Tiefentladeschutz und
Überspannungsschutz auf der Gleichspannungsseite, Überlastungsschutz, Temperaturüberwachung und
Kurzschlussschutz der Wechselspannungsseite.
Bitte lesen Sie diese Anleitung sorgfältig vor dem Einsatz des Sinuswechselrichters durch. Die Anleitung gilt für die
300W .600W, 1200W und 1500W-Ausführungen der Produktserie.
2
2.
A
NLEITUNG
:
::
:
Anwendungsbereiche:
•Elektrisches Werkzeug: elektrische Säge, Bohrmaschine, Rasenmäher, Kompressor, Stanzmaschine,
Sandstrahler
•Bürogeräte: Computer, Drucker, Monitore, Kopierer, Scanner, Faxgeräte
•Haushaltsgeräte: Staubsauger, Ventilatoren, Leuchtstofflampen, Glühlampen, Nähmaschinen
•Küchengeräte: Mikrowelle, Kühlschrank, Gefrierschrank, Kaffeemaschine, Mixer, Eismaschinen
•Industrielle Ausrüstungen: Halogenleuchten, Natriumdampflampen, Wasserfahrzeuge, PKW,
Solarenergie- und Windkraftanlagen.
•Unterhaltungselektronik: TV, Radio, Spielkonsolen ,VCR, Stereoanlagen, Musikinstrumente,
Satellitenreceiver
Hinweis:Bitte beachten Sie die maximale Leistungsabgabe des Wechselrichters und vermeiden Sie
Überlastungen. Bei 85% der angegebenen Leistung betreiben Sie das Gerät im optimalen Lastbereich.
USB-Anschluss:
::
:
•Der USB-Anschluss dient auschliesslich zum Laden geeigneter Geräte, andere Funktionen werden nicht
unterstützt.
•Beachten Sie den maximalen Ladestrom ihres Gerätes. Liegt dieser oberhalb des maximalen Stroms des
USB-Anschluss, kann dieser beschädigt warden.
•Bei Geräten mit speziellem Ladegerät benutzen Sie bitte ausschließlich dieses.
Einsatz von Verlängerungskabel:
•Wir raten vom Gebrauch von Verlängerungskabeln zwischen dem Wechselrichter und einer Batterie auf
Grund des möglichen Spannungsabfalls ab, da dieser die Leistung des Wechselrichters beeinflussen kann.
•Ist der Einsatz von Verlängerungskabeln unvermeidbar, benutzen Sie bitte niederohmige Qualitätskabel.
Temperaturregelung
•Zur Energieeinsparung, starten die Lüfter nur in zwei Fällen:
oWenn die Leistung über 30% der Maximalleistung steigt;
oWenn die Innentemperatur des Wechslerichters über 60°C steigt.

15
3.
I
NBETRIEBNAHME UND ARBEITSUMGEBUNG
Zur Inbetriebnahme sind folgende Bedingungen nötig:
•Trockenheit: Der Wechselrichter darf nicht bei Regen, Nebel, Frost, feuchter oder fettiger Umgebung
benutzt werden.
•Temperatur: Betreiben Sie den Wechselrichter zwischen 5°C und 35°C。
•Sicherheit: Benutzen Sie den Wechselrichter nicht in explosions- oder feuergefährdeter Umgebung und
nicht in der Nähe von Treibstofftanks.
•Belüftung: Um den Wechselrichter müssen zur Belüftung mindestens 10cm frei bleiben, blockieren Sie
niemals die Ventilatoren.
•Staub: Schützen Sie das Gerät vor Staub. Zu viel Staub zerstört den Wechselrichter.
4.
A
NSCHLUSS
1. Kontrollieren Sie, ob der Wechselrichter ausgeschaltet ist.
2. Kontrollieren Sie, ob Batteriespannung und Eingangsspannung des Wechselrichters übereinstimmen. 12V
Wechselrichter dürfen nur an 12V Batterien angeschlosen werden und 24V Wechselrichter nur an 24V
Batterien, bei Verwechselung kann der Wechselrichter zerstört werden.
3. Verbinden Sie die „+“ Klemme mit dem Pluspol der Batterie und die „–″
″″
″Klemme mit dem negativen Pol.
Achten Sie darauf, dass der Wechselrichter während des Anschliessens ausgeschaltet bleibt.
ACHTUNG :
oKontrollieren Sie, ob alle Klemmverbindungen sorgfältig befestigt sind, durch gelöste
Verbindungen können elektrische Schläge entstehen. Kontrollieren Sie die Verbindungen erneut,
bevor Sie mit der Inbetriebnahme fortfahren.
oVertauschte Anschlüsse können den Wechselrichter zerstören.
4. Drücken Sie den Ein/Ausschalter, die grüne LED leuchtet und die Anzeige funktioniert. Erscheint eine
Warnung, schalten Sie den Wechselrichter wieder aus und kontrollieren Sie die Anschlüsse!
5.
S
ICHERHEITSHINWEIS
Bitte lesen Sie diese Hinweise vor Gebrauch sorgfältig durch:
•Benutzen Sie den Wechselrichter nicht mit nassen Händen, halten Sie das Gerät von Kindern fern.
•Die Außenhülle des Gerätes erwärmt sich bei längerem Gebrauch stark. Seien Sie daher vorsichtig beim
Berühren.
•Führen Sie keine metallischen Gegenstände in das Gerät ein, es besteht die Gefahr eines elektrischen
Schlags.
•Schützen Sie das Gerät vor Regen, Nebel, Frost, Wasser und Öl, ansonsten besteht die Gefahr eines
elektrischen Schlags.
•Sollte ihre Haut oder Kleidung in Kontakt mit Batteriesäure geraten, spülen Sie diese mit Wasser sorgfältig
ab. Bei Augenkontakt spülen Sie diese mit klarem Wasser sorgfältig aus und konsultieren Sie umgehend
einen Arzt.
•Legen Sie keine metallischen Gegenstände auf den Wechselrichter. Diese können zu Kurzschlüssen
führen und den Wechselrichter und die Batterie zerstören.
•Achten Sie beim Anschluss des Verbrauchers darauf nicht die Steckerkontakte zu berühren, um einen
elektrischen Schlag zu vermeiden.
•Schließen Sie den Wechselrichter niemals an das 230V Wechselspannungsnetz an, dabei wir der
Wechselrichter zerstört und es besteht die Gefahr eines elektrischen Schlages.
•Wartung und Reparatur darf nur durch eine Fachkraft ausgeführt werden.

16
6.
S
CHUTZFUNKTION UND STATUS ANZEIGE
S
CHUTZFUNKTION
S
TATUS ANZEIGEDESCRIPTION
A
BHILFE
G
RÜNE
LED R
OTE
LED
ALARM
AC
AUSGANG
Eingangsunterspannungsschutz An An Aus Nein Batteriespannung zu tief oder zu
hoch – rote LED an, grüne LED
an , Wechselrichter läuft nicht
Eingangsüberspannungsschutz An An Aus Nein
Überlastschutz An An Aus Nein
Reduzieren Sie die Last, betreiben
Sie das Gerät innerhalb der
Leistungsgrenze, der
Wechselrichter startet wieder,
grüne LED an, rote LED aus.
Temperaturschutz An An An Nein Nach dem Abkühlen startet der
Wechselrichter wieder, grüne LED
an ,rote LED aus
Kurszschlusschutz Aus Aus
Eingangsunterspannungsalarm An Aus An Ja Wechselrichter funktioniert erst
wieder bei Normspannung, die rote
LED aus, grüne LED an
7.
U
MWELTSCHUTZ
Bitte werfen Sie das Gerät nicht in den Hausmüll, wenn es defekt ist, es muss getrennt entsorgt werden.
8.
G
ERÄTEDATEN
PSW8300 PSW8600 PSW81500
Eingangsspannung DC 12V (DC 11-15V)
Ausgangsspannung AC 230V +/- 10%
Ausgangsfrequenz 50Hz +/- 1%
USB-Anschluss DC 5V,500mA
Gleichmäßige Dauerausgangsleistung 300W 600W 1500W
Maximale Ausgangsleistung 600W 1200W 3000W
Anzeige Eingangsspannung / Leistung
Ausgangswellenform Reine Sinuswelle
Klirrfaktor < 3%
Wirkungsgrad >85%
Leerlaufstrom <0.45A
Eingangsunterspannungsalarm DC 10.2 – 10.8V
Eingangsunterspannungsabschaltung DC 9.2 – 9.8V
EIngangsüberspannungsabschaltung DC 15 – 16V
Überlastungsabschaltung 360W – 390W 720W – 780W 1800W – 1950W
Sicherung 20A x 2 25A x 3 30A x 6
Arbeitstemperaturbereich 5 – 35 °C
Kühlungsart Temperatur- und lastgesteuerterLüfter
Anschlusskabel Rot, schwarz und gelbes Kabel
This manual suits for next models
2
Table of contents
Languages:
Other GYS Inverter manuals

GYS
GYS Gyspot BP.LC-S7-230V User manual

GYS
GYS CUTTER 21 User manual

GYS
GYS MSW 82000 User manual

GYS
GYS Gysflash 70-24 HF User manual

GYS
GYS PSW 601 W User manual

GYS
GYS PSW 6042U User manual

GYS
GYS PSW 6042U User manual

GYS
GYS PSW 600 W User manual

GYS
GYS GySpot GY 019652 User manual

GYS
GYS GYSFLASH 30.12 HF User manual

GYS
GYS CUTTER 21 User manual

GYS
GYS CONVERGYS 150 User manual

GYS
GYS Greenline Inverter 5000 User manual

GYS
GYS Cutter Inverter 25K User manual

GYS
GYS GYSpot EVOLUTION PTI-s7 -400V User manual

GYS
GYS INVERTER 3200 User manual

GYS
GYS Gysflash 70-24 HF User manual

GYS
GYS GYSMI 80P User manual

GYS
GYS MAGYS 400-4 User manual

GYS
GYS PTI.G User manual