Press the button
(10 times).
Press the button once.
Press the button
(20 times).
Press the button once.
Press the button once.
The power save function
works immediately after
the soldering iron is
placed on the iron holder.
When 10 minutes have elapsed since
the soldering iron was placed on the
iron holder, the temperature drops to
200°C/400°F automatically and the
station enters the power save mode.
When 30 minutes have elapsed since
the soldering iron was placed on the
iron holder, power to the heater will
be automatically shut off (auto power
shutoff).
2 Power save setting
Set the time from the placement of the soldering iron on
the iron holder to the activation of the sleep function.
●
When the auto-power shutoff function is activated and power to the heater is shut off, the buzzer sounds three times.
●
When the display shows , and to begin soldering, cycle the power switch OFF, then ON.
●
When the sleep function is activated, the temperature
of the tip begins to drop.
●
When the display shows , pressing any button
the power will be turned on again.
NOTE:
When not using the power save function, do
not connect the iron holder and the soldering
station with the connecting cable.
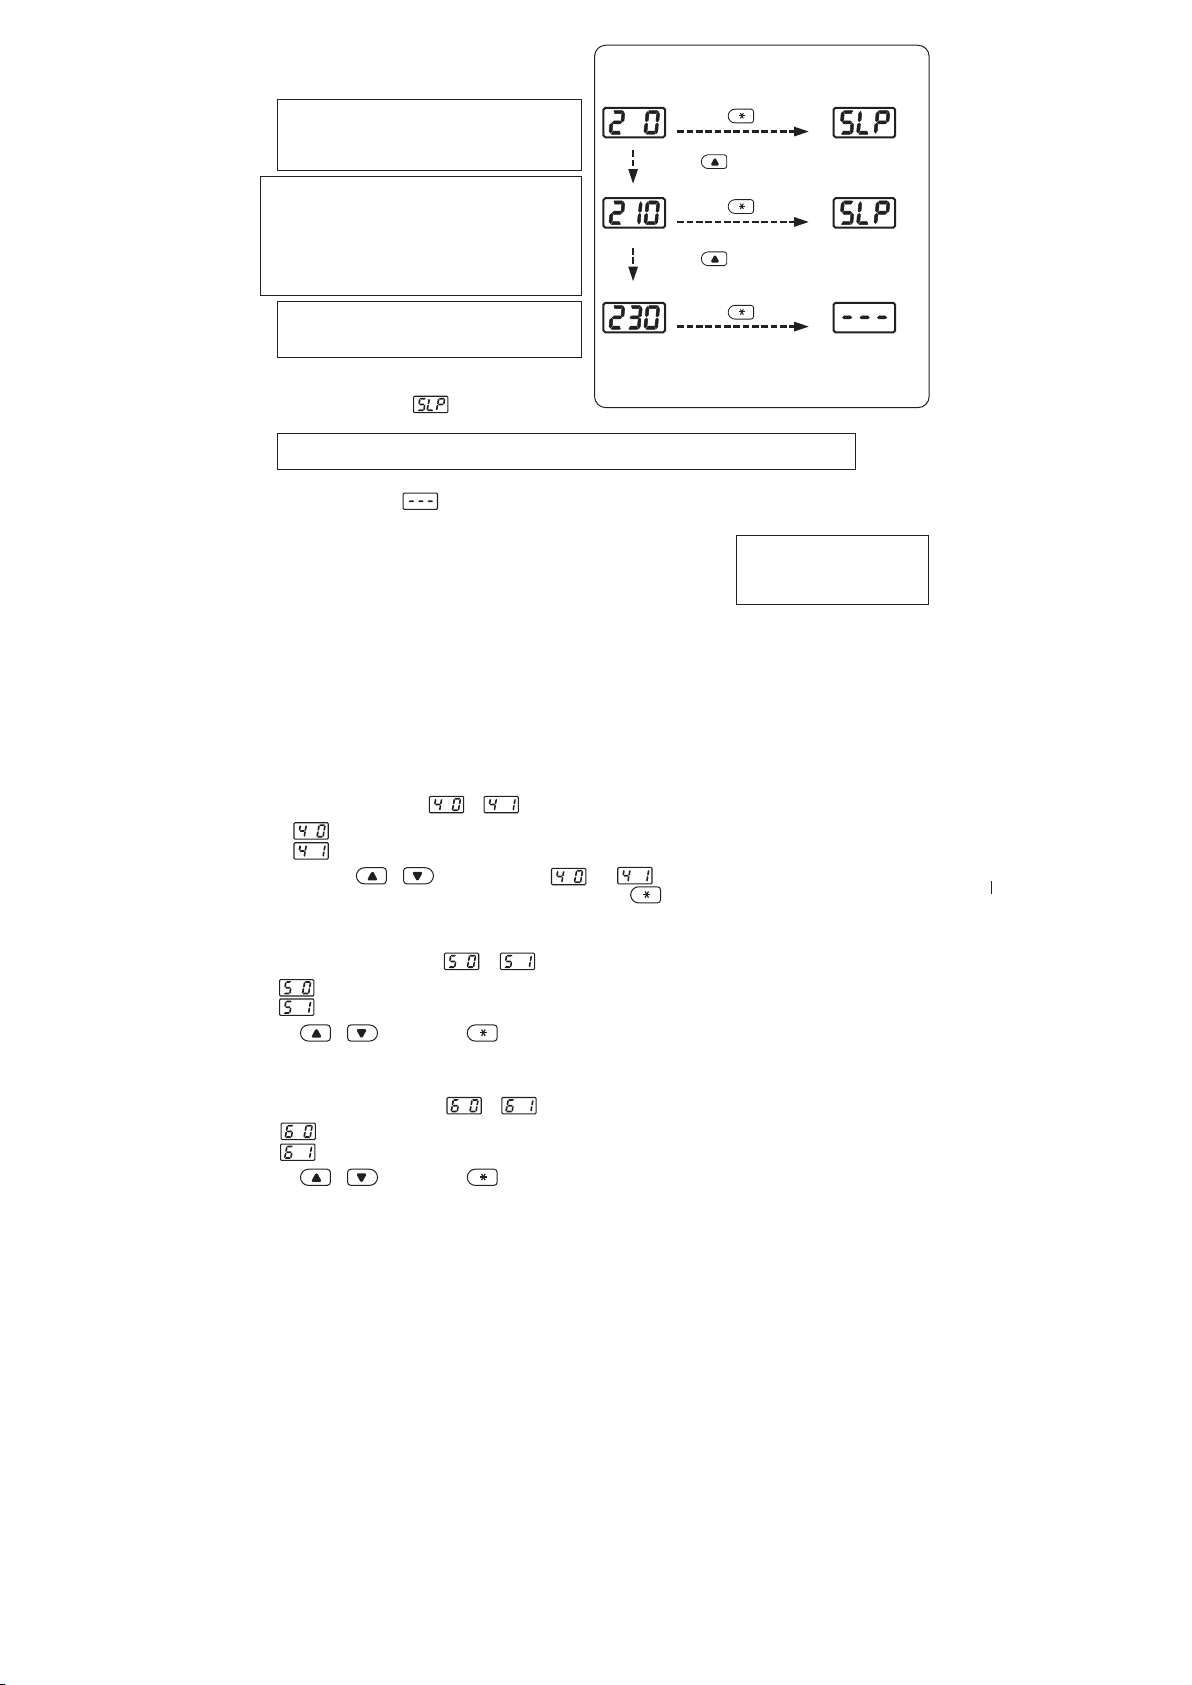
Power save example:
2 0 Sleep (immediately after the soldering iron
is placed on the iron holder)
210 Sleep (10 minutes after the soldering iron is
placed on the iron holder)
230 Auto-power shutoff (30 minutes after the
soldering iron is placed on the iron holder)
NOTE:
The power save time can be set in steps of
one minute (30 minutes max.)
NOTE:
The sleep function does not work in case the setting temperature is less than 300°C/570°F.
When the station enters the parameter input mode,
the procedure is as follows.
3 Resetting the low temperature alarm tolerance setting
The unique function alerts the operator when the sensed temperature drops below
a set limit. Should this occur, an error message will be displayed, and the buzzer
will sound continuously. When the temperature returns within the allowable range,
the buzzer will stop.
1.
When the station enters low-temperature alarm tolerance setting mode, the hundreds digit begins flashing. Enter and store
the value in the same manner as described in “Changing the temperature setting.”
2.
If you enter a value exceeding the allowable range shown to the left, you will be brought back to entering a value in the
hundreds digit. If this occurs, reenter a correct value.
3.
Once the value is stored, the system will automatically sequence to resetting the supervisor/operator control setting mode.
Example:
When the setting temperature is 350°C and the low temperature alarm tolerance is 100°C, buzzer will sound when the
tip temperature will drop over 250°C.
Range of allowable low
temperature alarm tolerance
for ℃: 30 - 150℃
for ℉: 50 - 300℉
4. Resetting the supervisor/operator control setteing
To change the supervisor/operator control settings, the procedure is as follows.
●The display will show or when this mode is entered.
: No offset value can be entered without inserting the card.
: An offset value can be entered without inserting the card.
Pressing the or button will change and .
When the desired setting is displayed, select by pressing button.
5. Buzzer setting (C-E sound, S-E sound)
● In the buzzer sound setteing mode, which sets whether to sound the buzzer when a sensor error or
soldering iron error occurs, or is displayed.
: The buzzer does not sound.
: The buzzer sound
Select or and press the button.
6. Buzzer setting (Set temperature alert)
● In the buzzer sound setteing mode, which sets whether to sound the buzzer when a sensor error or
soldering iron error occurs, or is displayed.
: The buzzer does not sound.
: The buzzer sound
Select or and press the button.
The system will exit the parameter setting mode and begin heater control.
It is now ready for normal operation.