4
•Charging steps 5–6: Absorption
Gently charges the battery to its full capacity with a
decreasing charging current.
•Charging step 7: Trickle charge 1
In this step, merely aminimal, constant charging current is used
to keep the battery at 100% capacity.Ifmorecurrent is needed
to maintain the capacity,the charger switches to Step 8.
•Charging step 8: Pulse charging
The battery is constantly monitored and is continually
brought to fullcapacity with apulsed charging current. This
cycle can be used for storage of the battery or for avehicle
that is left standing for alonger time period. The charger can
remain continuously connected during this time.
5.3 Memory/reset function
The charger automatically stores the last charging mode
(charging programme and charging step) when it is discon-
nected from the battery or the power cable is removed.
If the stored charging mode is not compatible with adifferent
connected battery,the charger is automatically reset and
remains in Standby mode.
5.4 Charging in low ambient temperatures
The charger is suitable for charging in low temperatures (-20°C
–5°C); for this purpose, it has aprogramme addition (T)for
the 6-Vand the 12-Vcharging programme (voltage increase
compared with the standardcharging programme).
5.5 Battery recovery (Recover 12 V)
Deeply discharged and aged 12-Vbatteries can be recovered
using the Recover mode, providing they arenot too used/aged.
6. Getting started and operation
Warning
Beforegetting started, check all cables and kink protection/
insulating rubber for damages. Do not put the product into
operation if these components aredamaged!
Note –Polarity of the contact tongs
•Red (= positive (+)) must be connected to the positive
pole (+) of the battery.
•Black (= negative (-)) must be connected to the negative
pole (-) of the battery.
6.1 Connection
•Connect the charger’scontact tongs to the battery
connections, observing correct polarity.Begin with the
positive (+) pole.
•Connect the charger’spower cable to an approved
power socket. The electrical socket must always be easily
accessible.
•The symbol (G) will ash if the battery is connected with
polarity reversed. Damage to the battery or charger is
prevented through the integrated protection against reverse
polarity.
•The battery’sterminal voltage is automatically detected
and shown in the display’snumerical block (E).
•After charging, disconnect the charger from the power
supply and from the battery (that is, in reversed order) unless
the battery is to be used for trickle charging. Begin with the
power cable and the negative (-) pole.
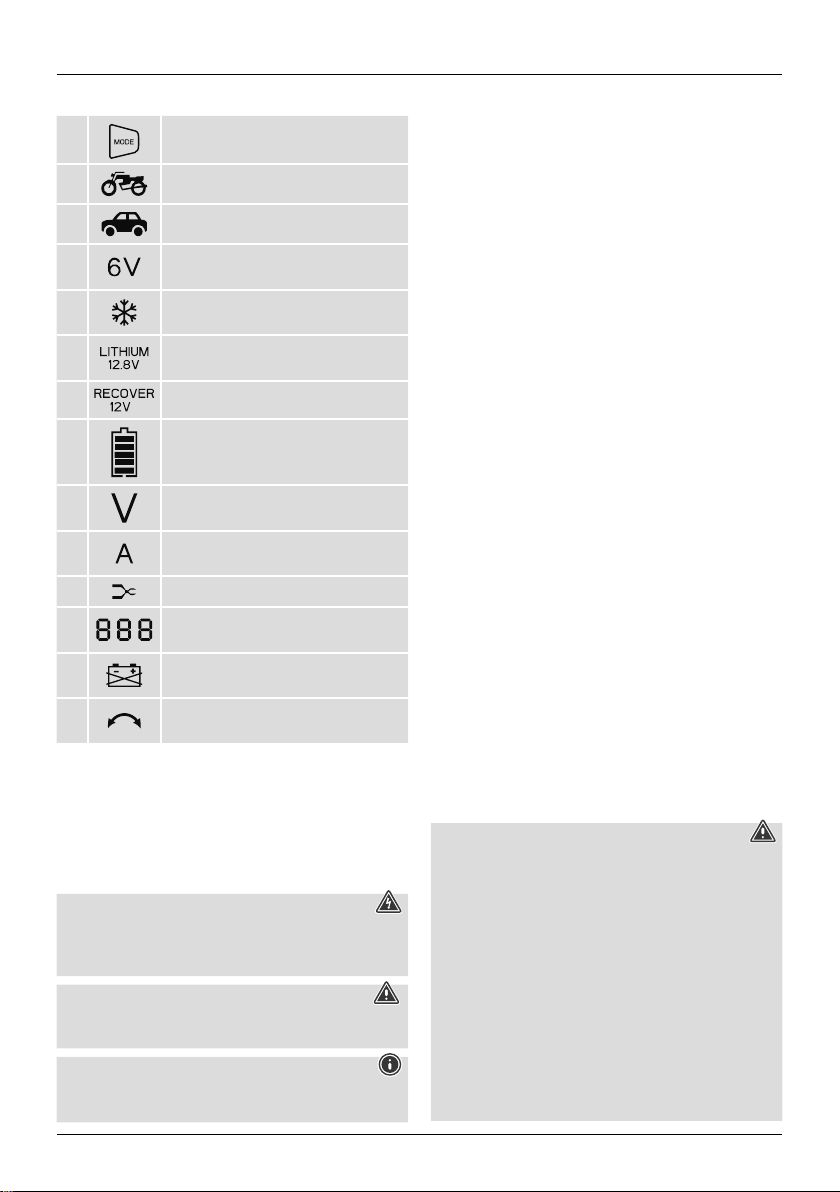
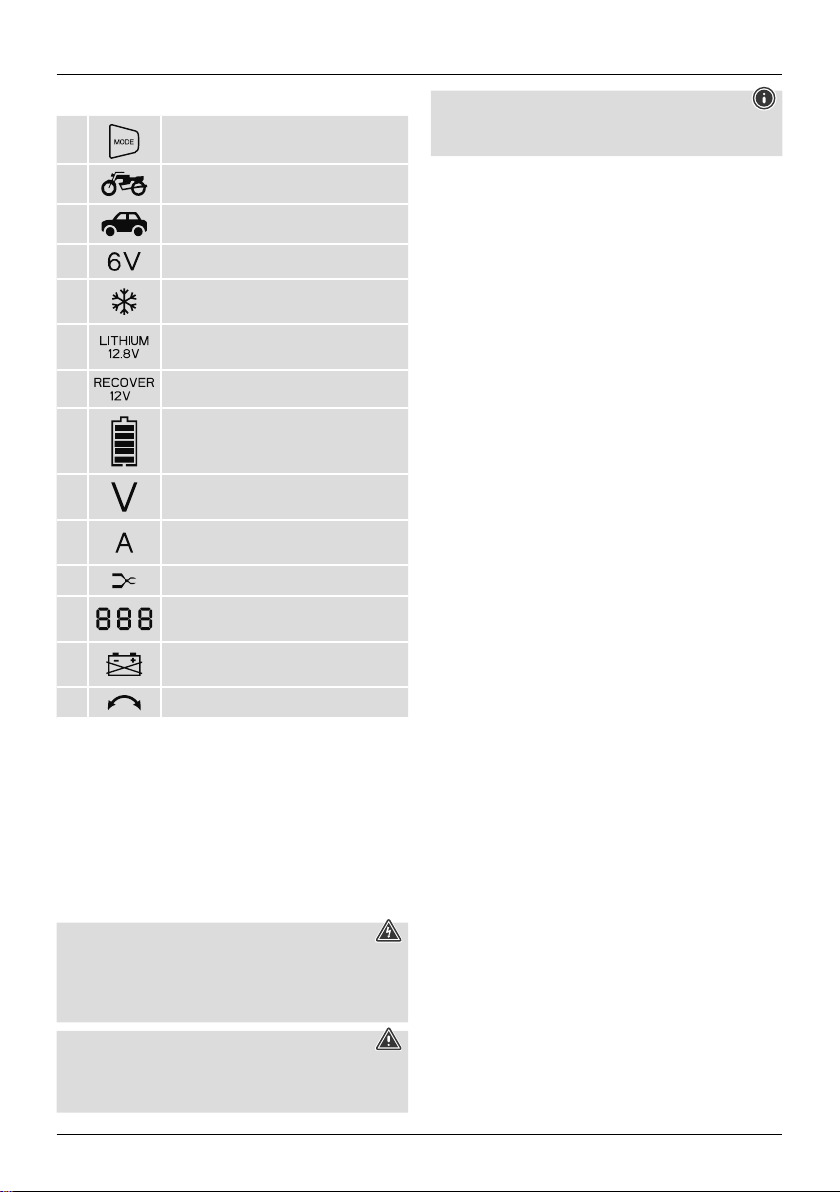
6.2 Charging status indicator
The battery charging status indicator (A) gives information on
the current charging status of the battery:
•1bar (20%), 2bars (40%), 3bars (60%), 4bars (80%), 5
bars (90%)
•Aashing battery bar during charging indicates that the
respective capacity is not yet reached.
•The battery is charged to 100% if the charging status indica-
tor shows all ve bars and none of the bars ash.
6.3 Charge 12 volt
•If 12 volt has been automatically detected as the charging
voltage, repeatedly press the MODE selection button (1) to
switch between the various charging programmes and select
the required one.
•Youcan switch between the charging programmes in the
following order:
Standby,„ “, „
T
“, „ “, „
T
“.
The order then starts from the beginning again.
•Select the charging programme that is suitable for the
battery size and the ambient temperature(for adescription
of the programmes, see table under Point 4).
•Once acharging programme has been selected, charging
will start automatically.
6.4 Charge 6volt
•If 6volt has been automatically detected as the charging
voltage, repeatedly press the MODE selection button (1) to
switch between the various charging programmes and select
the required one.
•Youcan switch between the charging modes in the following
order: Standby,„6V“, „6V T“.
The order then starts from the beginning again.
•Select the charging programme that is suitable for the
ambient temperature(for adescription of the programmes,
see table under Point 4).
•Once acharging programme has been selected, charging
will start automatically.
6.5 Selecting the Lithium 12.8 VorRecover 12 Vspecial
programme
•Repeatedly press and hold the MODE selection button (1)
for approximately 3seconds to select one of the special
programmes, namely Lithium 12.8 VorRecover 12 V.
•Youcan switch between them in the following order:
Standby,„Lithium 12,8V“, „Recover 12V“.
The order then starts from the beginning again.