Hama WFC-970 User manual

RUS
F
GB
D
PL
CZ
I
Bedienungsanleitung
Operating Instructions
Mode d‘emploi
Руководство по эксплуатации
Istruzioni per l‘uso
Instrukcja obsługi
Návod k použití
“
WFC-970
”
Weather Forecast Centre
Wettervorhersage-Center
00
123131

dBedienungsanleitung
2
VOR BEGINN BITTE UNBEDINGT LESEN
Ihre neue Wetterstation unterscheidet sich von
herkömmlichen Wetterstationen, die lediglich die
vorherrschenden Wetterbedingungen messen. Die Angaben
dieser Wetterstation beruhen dagegen auf den Daten von
METEOTIME, die täglich von hochqualifizierten Meteorologen
mit den modernsten Instrumenten erstellt werden.
Die Wetterstation wurde so entworfen, dass sie das
kodierte METEOTIME-Signal empfangen kann, mit dem die
Wetterangaben übermittelt werden. Die Daten werden über
den Funkzeitsignalsender DCF77 (in Deutschland) gesendet.
Daher handelt sich bei der Wetterstation zugleich um eine
Funkuhr mit allen bekannten Vorteilen wie etwa der exakten
Zeitangabe und dem automatischen Wechsel von Winter- auf
Sommerzeit.
Sie können Wettervorhersagen für 60 meteorologische
Regionen in Europa bis zu 4 Tage im Voraus empfangen sowie
eine 2-Tage-Vorhersage für weitere 30 Regionen.
WIE ERREICHE ICH EINEN GUTEN EMPFANG?
Ähnlich wie bei Handynetzen oder beim Fernseh- und
Radioempfang kann es sein, dass auch Wetterstationen
nicht immer und überall Empfang haben. Beachten Sie daher
unbedingt die folgenden Hinweise, damit Ihr Gerät einwandfrei
arbeitet.
Ein geeigneter Standort ist für die Wetterstation außerordent-
lich wichtig. Aus diesem Grund ist die Wetterstation mit einer
innovativen Testfunktion (TEST-Taste) ausgestattet, mit der Sie
die Qualität des Empfangs in Ihrer Umgebung prüfen können,
um das Gerät am geeignetsten Standort aufzustellen.
Um die Qualität des Empfangs festzustellen, testen Sie die
Wetterstation entsprechend den Angaben im Handbuch.
Schalten Sie dazu alle möglichen Störquellen, die sich in dem
Raum befinden, in dem Sie das Gerät aufstellen wollen
(z. B. den Fernseher), ein. Stellen Sie dann die Wetterstation
an den gewünschten Ort, und richten Sie sie wie gewünscht
aus. Halten Sie dabei einen Mindestabstand von einem Meter
zu potenziellen Störquellen ein.
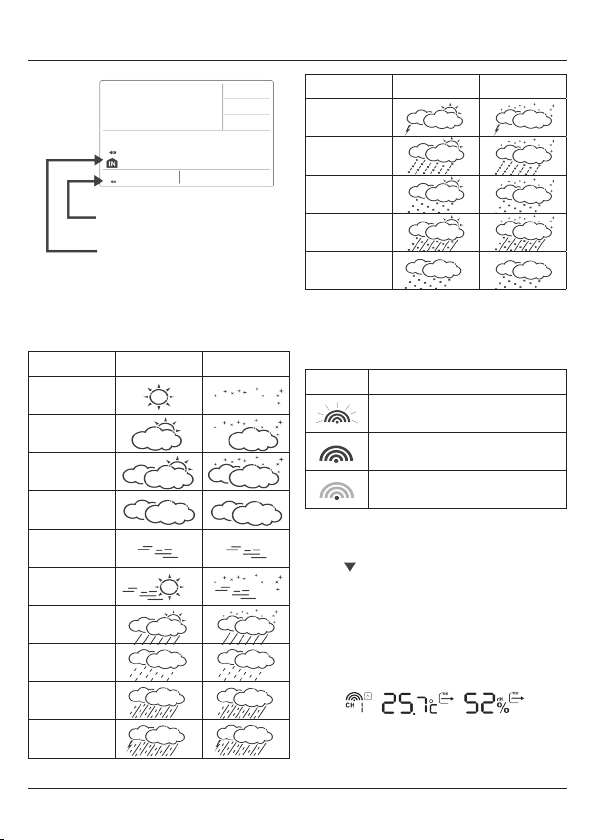
Beobachten Sie das Symbol GUTER EMPFANG oder
SCHLECHTER EMPFANG auf dem Bildschirm. Wenn Sie den
geeigneten Standort für guten Empfang gefunden haben, las-
sen Sie die Meteotime-Wetterstation dort stehen, damit die
erforderlichen Daten über das Funksignal empfangen werden
können. Innerhalb weniger Minuten werden Zeit und Datum
angezeigt. Der Empfang sehr großer Datenmengen (Vorher-
sage für alle Regionen und Tage) erfordert jedoch deutlich
mehr Zeit. Um sämtliche Daten zu empfangen, sind bis zu 24
Stunden ab der ersten Inbetriebnahme erforderlich.
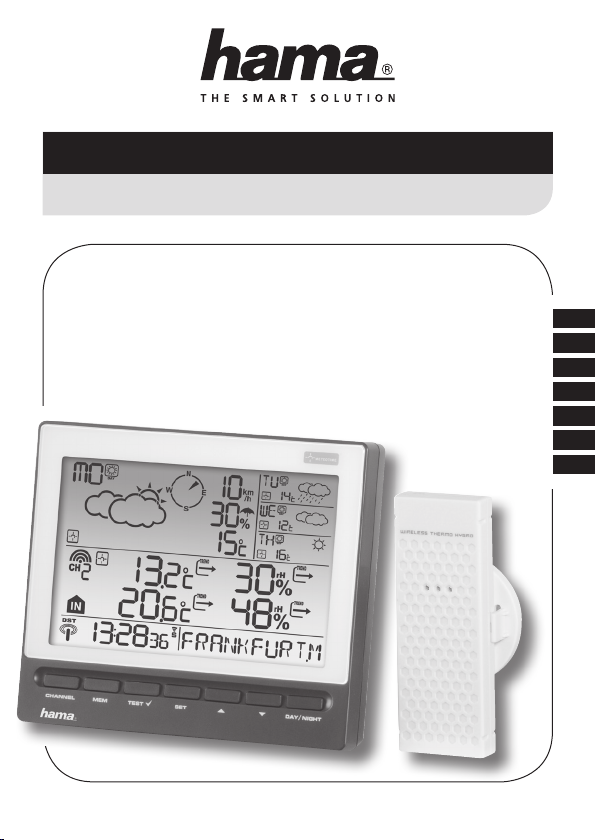
MERKMALE
Der Packungsinhalt umfasst das Basisgerät, also die
Wetterstation, und einen Remote-Außen-Thermo-Hygrometer-
Sensor.
Diese Wetterstation ist mit einem Thermo-Hygrometer-Sensor
ausgestattet, der die Raumtemperatur und -luftfeuchtigkeit
misst, sowie mit einem kabellosen Außen-Thermo-Hygrome-
ter-Sensor, der die Außentemperatur und -luftfeuchtigkeit
misst.
Hauptmerkmale:
• Wetterstatus für heute und die kommenden drei Tage für
470 Orte
• Niederschlagswahrscheinlichkeit für heute
• Windgeschwindigkeit und Windrichtung für heute
• Kabelloses Thermo-Hygrometer für außen mit 433 Mhz
und drei Kanälen (Sensor für Kanal 1 ist im Lieferumfang
enthalten, für Kanal 2 und 3 werden zusätzliche Sensoren
benötigt)
• Raum-Thermo-Hygrometer
• Speicher für Höchst- und Tiefstwerte der Temperatur und
Luftfeuchtigkeit
• Tendenz von Temperatur und Luftfeuchtigkeit
(NACH OBEN/EBEN/NACH UNTEN)
• Temperatureinheit nur in Grad Celsius
• Regionale Tag- und Nachttemperaturangaben
• Abkürzungen in 7 Sprachen (Englisch/Spanisch/
Französisch/Italienisch/Niederländisch/Schwedisch/
Deutsch)
• Wetterwarnungen
• Auswahl und Anzeige der Wetterangaben für bis zu 5 Orte
• Individuelle Anpassung eines Ortsnamens
• Uhr und Kalender funkgesteuert (nur 24-Stundenformat)
• Einstellbare Zeitzonen
• 2 Weckzeiten (Wecksignal an Werktagen/Einmaliges
Wecksignal, Wecksignal ertönt für 2 Minuten)
• Vorzeitiges Wecksignal (programmierbar) für
Außensensor – nur für Kanal 1
• Batterietiefstandsanzeige für Basisgerät und kabellosen
Sensor
• Stromversorgung über 2 x AA-Batterien für das Basisgerät
und 2 x AAA-Batterien für den Außensensor
EINFÜHRUNG
Auf dem LCD-Display der Wetterstation wird Folgendes
angezeigt:
• Infofenster mit Wetterangaben für heute
• Temperatur und Luftfeuchtigkeit innen und außen
• Wetterangaben für morgen, übermorgen und den folgenden
Tag
• Infofenster mit Zeit und Datum, Weckzeit, Orten und
Wetterwarnungen

3
1. Wetterangaben für heute, inklusive Windgeschwindigkeit,
Windrichtung und der Regen-/Schnee-/
Hagel-Wahrscheinlichkeit, Tag- & Nachttemperatur,
Tag- & Nachtwetterstatus
2. Wettervorhersage für morgen, übermorgen und den
folgenden Tag, inklusive Tag- & Nachttemperatur, Tag- &
Nachtwetterstatus
3. Temperatur und Luftfeuchtigkeit innen und außen
4. Infofenster
Das Basisgerät verfügt über 7 Tasten:
SET (EINSTELLEN)
• Ausgewählter Ort DATUM Wecksignal an
Werktagen „OFF W-ALM” Einmaliges Wecksignal
„OFF S-ALM” Vorzeitiges Wecksignal „OFF P-ALM”
• [SET] 3 Sekunden lang gedrückt halten, um (1) Land, (2)
Zeitzone, (3) Sprache auszuwählen oder (4) in den Modus
zur Ortsanzeige zu wechseln
DAY/NIGHT (TAG/NACHT)
• Wetterwarnungen Tag/Nacht Wetterstatusanzeige
• Wetterwarnungen nacheinander lesen
• Wert während des Einstellens erhöhen
• Weckalarm einschalten
• Taste 3 Sekunden lang gedrückt halten, um eine Suche
nach dem DCF-Funksignal zu erzwingen
• Zu den Wetterdaten des nächsten Tages wechseln
• Wert während des Einstellens vermindern
• Auswahl eines der Orte aus der Vorauswahl
• Weckalarm deaktivieren
• Taste 3 Sekunden lang gedrückt halten, um eine Suche
nach dem Funksignal des Außensensors zu erzwingen
MEM (SPEICHER)
• Gespeicherte Höchst- und Tiefstwerte für Temperartur und
Luftfeuchtigkeit anzeigen
• Taste 3 Sekunden lang gedrückt halten, um alle
gespeicherten Höchst- und Tiefstwerte zu löschen
TEST
• Standort mit gutem Empfang für das Gerät finden
• Ort zur Liste der bevorzugten Orte hinzufügen
ODER
Ort aus der Liste der bevorzugten Orte entfernen
• Heimatort bearbeiten
CHANNEL (KANAL)
• Außentemperatur und Luftfeuchtigkeit für Kanäle 1, 2 und
3 anzeigen
• Taste 3 Sekunden gedrückt halten, um in den automa-
tischen Durchlaufmodus zu wechseln
INBETRIEBNAHME
• Legen Sie zuerst zwei AAA-Batterien in den Außensensor
ein, dann zwei AA-Batterien in das Basisgerät.
• Das Basisgerät sucht automatisch nach dem Funkzeitsignal
und nach dem Meteotime-Wettersignal.
• Zeit und Datum werden innerhalb weniger Minuten
angezeigt. Der Empfang der sehr großen Datenmengen
mit der Vorhersage für alle Regionen und Tage erfordert
jedoch bis zu 24 Stunden ab der Erstbetriebnahme bis zum
Empfang sämtlicher Daten.
• Nach dem erfolgreichen Empfang das Zeit- und
Datumssignals wird auf dem Display SELECT COUNTRY
(LAND WÄHLEN) und dann FRANKFURT als Standardort für
das Infofenster angezeigt. Informationen zum Ändern von
Land und Ort erhalten Sie weiter unten.
Basisgerät
1
2
3
4
Remote-Thermo-Hygrometer

4
• Wenn das Gerät das Meteotime-Signal erfolgreich
empfangen hat, wird das Meteotime Symbol in der
zweiten Zeile des Displays angezeigt. Andernfalls wird das
Meteotime Symbol leer angezeigt.
1. bedeutet, dass die Wetterangaben für heute erfolg-
reich empfangen werden. Andernfalls wird folgendes
Symbol angezeigt.
2. bedeutet, dass die Wetterangaben für übermorgen
erfolgreich empfangen werden. Andernfalls wird folgendes
Symbol angezeigt.
3. bedeutet, dass die Wetterangaben für morgen
erfolgreich empfangen werden. Andernfalls wird folgendes
Symbol angezeigt.
4 bedeutet, dass das Meteotime-Wettersignal
empfangen werden kann. Andernfalls wird folgendes
Symbol angezeigt.
5. bedeutet, dass die Wetterangaben für drei Tage nach
heute erfolgreich empfangen werden. Andernfalls wird
folgendes Symbol angezeigt.
Falls das Meteotime-Symbol zu wechselt, bedeutet dies,
dass potenzielle Störquellen vorhanden sind. Störquellen
können elektrische Geräte wie Fernseher, Computer,
Haushaltsgeräte usw. sein. Auch Beton- und Metallbauteile
und elektrische Anlagen im Gebäude können zu Störungen
führen. Auch sehr weit vom Funksender entfernte Wohnorte
haben möglicherweise unzureichenden Empfang.
Mit der TEST-Funktion können Sie nach einem besseren
Standort suchen.
• Drücken Sie TEST. Im Infofenster wird SCAN angezeigt.
• Nehmen Sie das Gerät in die Hand, um einen geeigneten
Standort zu suchen.
• blinkt: Der Test wird durchgeführt, und der Empfang des
Meteotime-Signals ist gut. Es handelt sich hierbei um einen
geeigneten Standort. blinkt: Der Test wird durchgeführt,
und der Empfang des Meteotime-Signals ist schlecht. Sie
müssen weiter nach einem besseren Standort suchen.
• Der TEST dauert etwa eine Minute. Durch Drücken der
Taste TEST können Sie den Test jederzeit neu starten bzw.
beenden.
• SCAN A: Die Signalstärke wird als Wert von 0
(sehr schlecht) bis 9 (sehr gut) angezeigt.
• Nach dem Einlegen der Batterien sucht die Wetterstation
nach dem Funkzeitsignal sowie nach dem Meteotime-
Signal. Nach dem erfolgreichen Empfang das Meteotime-
Signals wird auf dem Display im Infofenster der Standardort
angezeigt.
• Durch drücken von [SET] könne Sie zwischen der Anzeige
von Ort, Datum, Wecksignal an Werktagen, einmaliges
Wecksignal und vorzeitigem Wecksignal wechseln.
LAND UND ORTE WÄHLEN
• Halten Sie die Taste [SET] 3 Sekunden lang gedrückt.
wird im Infofenster angezeigt. Drücken Sie
dann die Taste [ ] oder [ ], um das Land auszuwählen.
Beispiel: Wenn im Infofenster angezeigt wird,
bedeutet dies, dass Sie „Deutschland” ausgewählt haben.
• Drücken Sie [SET], um das Land zu bestätigen. Nach der
Auswahl von „Deutschland” wird im Infofenster
angezeigt.
• Drücken Sie dann [ ] oder [ ], um den Ort auszuwählen.
Der Ortsname wird im Infofenster angezeigt. Beispiel:
bedeutet „Frankfurt am Main”
Drücken Sie jetzt [SET], um die Einstellung zu bestätigen.
Ab sofort wird der ausgewählte Ort im Infofenster angezeigt.
FAVORITEN AKTIVIEREN
Nachdem Sie den Ort wie oben beschrieben festgelegt haben,
können Sie weitere Orte für den einfachen Zugriff auswählen.
Anstatt die Einstellung mit [SET] zu beenden, fahren Sie wie
folgt fort:
• Wenn „Frankfurt am Main” einer Ihrer bevorzugten Orte
ist, drücken Sie zur Bestätigung [TEST ]. Ein wird über
dem ausgewählten Ort angezeigt, und dieser wird in Ihrer
persönlichen Liste ausgewählter Orte gespeichert.
1 2
3
54

5
• Sie können jetzt mit [ ] oder [ ] weitere Orte in
demselben Land auswählen, und die Auswahl mit [TEST ]
bestätigen.
• Wenn Sie Orte aus verschiedenen Ländern auswählen
möchten, müssen Sie die Einstellung über [SET] verlassen
und wie oben beschrieben erneut aufrufen, um das Land zu
ändern.
Sie können bis zu FÜNF Orte als Favoriten auswählen. Wenn
Sie versuchen, weitere Orte hinzuzufügen, wird im
Infofenster angezeigt.
Nachdem Sie alle Einstellungen vorgenommen haben,
drücken Sie [SET], um die Einstellungen zu bestätigen und den
Einstellungsmodus zu verlassen.
HINWEIS:
Wenn Sie nach dem ersten Einlegen der Batterien die
Ortauswahl überspringen, ist als Ort standardmäßig „Frankfurt
am Main” eingestellt.
FAVORITEN ANZEIGEN
Wenn Sie mehr als einen Ort als Favorit ausgewählt haben,
z. B. Frankfurt am Main, Paris und Stockholm, können Sie
mit durch die Orte blättern, wenn im Infofenster der CITY
NAME (ORTSNAME) angezeigt wird (Drücken Sie SET, bis der
Ortsname angezeigt wird).
EINEN ORT AUS DER LISTE DER FAVORITEN ENTFERNEN
• Halten Sie die Taste [SET] 3 Sekunden lang gedrückt.
wird im Infofenster angezeigt. Drücken Sie
dann die Taste [ ] oder [ ], um das Land auszuwählen.
• Drücken Sie [SET], um das Land zu bestätigen.
• Wechseln Sie dann mit [ ] oder [ ] zu Ihrem ausge-
wählten Ort mit dem .
• Drücken Sie [TEST ], um das zu entfernen. Der Ort
wurde aus den Favoriten entfernt.
• Wiederholen Sie den Vorgang, wenn Sie weitere Orte aus
der Liste entfernen möchten.
• Sie können jetzt auch mit [ ] oder [ ] einen weiteren
bevorzugten Ort auswählen.
Nachdem Sie alle Änderungen vorgenommen haben, drücken
Sie [SET], um das Menü zu verlassen. wird im
Infofenster angezeigt. Nach 4 Sekunden wechselt das Gerät in
den Modus Ort-Datum-Zeit.
EINEN ORTSNAMEN INDIVIDUELL ANPASSEN
• Halten Sie [SET] 3 Sekunden lang gedrückt. Im Infofenster
wird angezeigt. Drücken Sie dann die Taste
[ ] oder [ ], um das Land auszuwählen. Sie haben
als Land beispielsweise Deutschland ausgewählt und
wird angezeigt.
• Drücken Sie die Taste [SET], um das Land zu bestätigen,
und im Infofenster wird angezeigt.
• Mit den Tasten [ ] oder [ ] wählen Sie nun den Ort. Der
Name des gewählten Ortes wird angezeigt, beispielsweise
für „Frankfurt am Main“. Sie möchten nun
einen weiteren Ort in derselben Region wie Frankfurt am
Main hinzufügen.
• Drücken Sie die Taste MEM. Auf der ersten Position des
Infofensters blinkt ein Cursor.
Dann gelten folgende Eingabebefehle:
** Der Ort, den Sie für die Eingabe Ihrer eigenen
Beschreibung ausgewählt haben, bleibt weiterhin unter
seinem eigenen Namen vorhanden.
• Drücken Sie [SET], um die Eingabe zu bestätigen und das
Menü zu verlassen.
ZEITZONE UND SPRACHE EINSTELLEN
• Halten Sie [SET] 3 Sekunden lang gedrückt.
wird im Infofenster angezeigt.
• Drücken Sie [SET] erneut. wird im
Infofenster angezeigt. Drücken Sie [ ] oder [ ], um die
Zeitzone einzustellen.
Taste Funktion
[ ] oder [ ]
Einen Buchstaben auswählen
[SET]
(1) Den gewählten Buchstaben
bestätigen und zur nächsten
Position springen ODER
(2) Wenn Sie noch keinen Buchsta-
ben ausgewählt haben (wenn
also nur der Cursor an der letzten
Position blinkt): bestätigen Sie
die Eingabe mit dieser Taste
und Ihr ausgewählter Ort wird
sofort auch in den Speicher
übernommen.
[TEST ]
Eine Position zurück im
Dateneingabevorgang

6
• Drücken Sie erneut [SET]. Die Sprache wird im Infofenster angezeigt. Drücken Sie dann die Taste [ ] oder [ ], um die ge-
wünschte Sprache einzustellen. Insgesamt stehen sieben Sprachen zur Auswahl: Deutsch, Englisch, Spanisch, Französisch,
Italienisch, Niederländisch, Schwedisch.
• Drücken Sie erneut die Taste [SET]. Im Infofenster wird angezeigt. Nach 4 Sekunden wechselt das Gerät in den
Modus Ort-Datum-Zeit.
HINWEIS: Wenn im Einstellungsmodus 60 Sekunden lang keine Eingabe erfolgt, wird der Einstellungsmodus automatisch wieder
verlassen. Im Infofenster wird Ort/Datum & Weckzeit angezeigt.
ZU DEN WETTERDATEN FÜR DEN NÄCHSTEN TAG WECHSELN
Durch Drücken von UP [ ] wechselt die Anzeige jeweils von heute zu morgen, übermorgen und den folgenden Tag.
Wetterangaben für heute
Wetterangaben für morgen
Wetterangaben für übermorgen
Wetterangaben für den folgenden Tag
UP [ ]

7
ZWISCHEN WETTERANGABEN FÜR TAG UND NACHT
WECHSELN
Das Gerät kann automatisch zwischen den Wetterangaben für
TAG und NACHT umschalten. Durch Drücken der Taste [DAY/
NIGHT] können Sie für 10 Sekunden zum Wetter für den TAG
wechseln, wenn gerade das Wetter für die NACHT angezeigt
wird, und umgekehrt.
WETTERWARNUNGEN
Das Meteotime-Wettersignal umfasst Wetterwarnungen
wie etwa für böige Winde, Eisregen, schweren Schneefall,
Gewitter, starke UV-Strahlung, dichten Nebel, Bise, Mistral
usw. für heute und die kommenden drei Tage. Das Symbol für
eine Wetterwarnung wird angezeigt, falls es während
des Tages zu kritischem Wetter kommen kann, über das Sie
informiert sein müssen.
Manchmal kommt es zu mehr als einer Wetterwarnung in
den 4 Tagen der Vorhersage. Drücken Sie die Taste [DAY/
NIGHT], um die Wetterwarnungen nacheinander zu lesen.
Das Symbol für den jeweiligen Tag blinkt, während Sie die
entsprechenden Informationen lesen.
• Drücken Sie SET, um zur Anzeige von ORT DATUM
WECKSIGNAL AN WERKTAGEN EINMALIGES
WECKSIGNAL VORZEITIGES WECKSIGNAL zurückzu-
kehren. Wenn Sie die Wetterangaben im Infofenster lesen
möchten, drücken Sie [DAY/NIGHT], um die Wetterangaben
für TAG NACHT sowie die Wetterwarnungen
anzuzeigen.
Wenn keine Taste gedrückt wird, wird im Display zu den
Wetterwarnungen umgeschaltet, damit Sie immer über alle
wichtigen Wetterdetails informiert sind.
BATTERIETIEFSTANDSANZEIGE
Kurz bevor die Batterien ausgetauscht werden müssen, wird
das Symbol für niedrigen Batteriestand (siehe Abbildung)
neben der Wettervorhersage für das Basisgerät oder neben
der Außentemperatur für den Außensensor angezeigt.
TAG/NACHT
Wetter
Wetter
Wetter
Tag Nacht
Wetterstatus

8
Wetterstatus
Insgesamt können 15 verschieden Wetterzustände für
tagsüber und 15 verschiedene Wetterzustände für nachts
angezeigt werden.
STATUS DES AUSSENSENSORS
Das Funkwellensymbol über dem Symbol des gerade aktiven
Kanals gibt die Empfangsstärke des zugehörigen
Außensensors an:
NACH AUSSENSENSOR SUCHEN
• Die Suche nach Funksignalen der Außensensors kann am
Basisgerät manuell gestartet werden. Halten Sie dazu die
Taste [ ] gedrückt.
AUSSENTEMPERATUR UND -LUFTFEUCHTE (KANAL)
ANZEIGEN
Statische Anzeige:
• Drücken Sie die Taste [CHANNEL], um die Messwerte von
verschiedenen Außensensoren abzurufen. Jeder Außen-
sensor ist dabei einem Kanal zugewiesen (1, 2 oder 3).
Batterietiefstandsanzeige des Basisgeräts.
Batterietiefstandsanzeige des Außensensors.
Bedeutung Tag Nacht
Hitzegewitter
Schneeregen
Schneeschauer
Graupel
Schnee
Bedeutung Tag Nacht
Sonnig
(nachts klar)
Leicht bewölkt
Vorwiegend
bewölkt
Bedeckt
Stratus-Wolken
Nebel
Schauer
Leichter Regen
Starker Regen
Gewitterfront
Symbol Status
Es wird nach Signalen vom Außensensor
gesucht.
Signal des entsprechenden
Außensensors erfolgreich gefunden
Seit mehr als 1 Stunde keine Signale
empfangen

9
Kanal-Auto-Scan-Anzeige:
• Halten Sie zur Aktivierung eines automatischen Scans
aller Kanäle [CHANNEL] so lange gedrückt, bis das Symbol
angezeigt wird. Die Messwerte der einzelnen Kanälen
werden nacheinander für jeweils 5 Sekunden angezeigt.
HINWEIS:
Die Auto-Scan-Funktion kann nur aktiv sein, wenn es mehr
als einen Außensensor gibt und diese verschiedenen Kanälen
zugewiesen sind.
HÖCHST- UND TIEFSTTEMPERATUREN
• Die Höchst- und Tiefstwerte der gemessenen Innen- und
Außentemperaturen sowie der Luftfeuchtigkeit werden
automatisch im Speicher des Basisgeräts abgespeichert.
Drücken Sie zum Anzeigen der Werte [MEM]. Die entspre-
chenden Kennzeichen [MAX] oder [MIN] werden angezeigt.
• Um den Speicher zu löschen, halten Sie [MEM] 3 Sekunden
lang gedrückt. Daraufhin werden die Höchst- und
Tiefstwerte gelöscht.
WECKFUNKTION
Wecksignal an Werktagen:
• Dies ist ein sich wiederholendes Wecksignal, das täglich
von Montan bis Freitag zu einer festgelegten Uhrzeit
ausgelöst wird.
Einmaliges Wecksignal:
• Dies ist ein einmaliges Wecksignal, das nur einmal zu einer
festgelegten Uhrzeit ausgelöst wird.
WECKZEIT EINSTELLEN
• Drücken Sie [SET], um zwischen Wecksignal an
Werktagen, einmaligem Wecksignal und vorzeitigem
Wecksignal zu wechseln. Falls die Weckfunktion
ausgestellt ist, wird „OFF W-ALM” angezeigt.
• Halten Sie [SET] 3 Sekunden lang gedrückt, bis die
Stundenziffern blinken.
• Stellen Sie die Stunden über die Tasten UP [ ] und
DOWN [ ] ein.
• Drücken Sie [SET], um die Eingabe zu bestätigen. Die
Minutenziffern blinken.
• Stellen Sie die Minuten über die Tasten UP [ ] und
DOWN [ ]ein
• Drücken Sie [SET], um die Einstellung zu verlassen. Die
entsprechenden Wecksymbole und werden aktiviert.
WECKSIGNAL AUSSCHALTEN
• Wenn das Wecksignal ertönt, blinken die entsprechenden
Wecksymbole und . Drücken Sie UP [ ] oder
DOWN [ ], um das Wecksignal zu beenden.
Um die Weckfunktion zu deaktivieren, drücken Sie UP [ ]
oder DOWN [ ], damit für die Weckzeit “OFF W-ALM”
angezeigt wird.
Wenn keine Taste gedrückt wird, ertönt das Wecksignal für 2
Minuten und wird dann automatisch beendet.
VORZEITIGES WECKEN BEI FROSTWARNUNG (PRE-ALM)
EINSTELLEN
• Wenn das Wecksignal an Werktagen (W) bzw. das
einmalige Wecksignal (S) aktiv ist, kann das vorzeitige
Wecken bei Frostwarnung (Pre-ALM) programmiert
werden.
• Halten Sie [SET] 3 Sekunden gedrückt, um in den
Einstellungsmodus für das vorzeitige Wecken bei Frostwar-
nung (Pre-ALM) zu wechseln und „PRE-ALM” anzuzeigen.
• Die Zahl 15 blinkt. Das bedeutet, dass das Wecksignal bei
Aktivierung 15 Minuten früher als beim normalen Wecksi-
gnal an Werktagen oder einmaligen Wecksignal ertönt.
• Wählen Sie das gewünschte Intervall (15 bis 90 Minuten)
für das vorzeitige Wecken bei Frostwarnung in Schritten
von 15 Minuten. Verwenden Sie dazu die Tasten UP [ ]
oder DOWN [ ] .
• Drücken Sie [SET], um die Einstellung zu bestätigen und
den Modus für das Einstellen von Weckzeiten zu verlassen.
TECHNISCHE DATEN ZUR MESSUNG DER TEMPERATUR UND
LUFTFEUCHTIGKEIT INNEN UND AUSSEN
Temperaturschritte: 0,1 °C
Temperaturmessbereich (Basisgerät): -5 °C bis 50 °C
Temperaturmessbereich (Außengerät): -40 °C bis 70 °C
Temperaturgenauigkeit: +/- 1 °C
Feuchtigkeitsmessbereich: 1 % bis 99 % relative Luftfeuchtigkeit
Messschritte Luftfeuchtigkeit: 1%
Genauigkeit Luftfeuchtigkeit: +/- 5 %
(innerhalb von 25 % – 80 % bei 25 °C)
Übertragungsfrequenz: 433 MHz
Übertragungsbereich: bis zu 30 m (freies Gelände)
Stromversorgung Basisgerät durch 2 x AA-Batterien.
Stromversorgung Außen-Thermo-Hygrometer durch
2 x AAA-Batterien.
12. Konformitätserklärung
Hiermit erklärt die Hama GmbH & Co KG, dass der
Funkanlagentyp [00123131] der Richtlinie 2014/53/EU
entspricht. Der vollständige Text der EU-Konformi-
tätserklärung ist unter der folgenden Internetadresse verfügbar:
www.hama.com->00123131-> Downloads.
Frequenzband/
Frequenzbänder 433MHz
Abgestrahlte maximale Sende-
leistung 0,021mW

10
gOperating Instruction
MUST READ BEFORE GETTING STARTED
Your Weather Station is different to traditional weather sta-
tions which measure the prevailing conditions only, the data
of this weather station is based on the METEOTIME which is
worked out on a daily basis by highly professional meteorolo-
gists using state-of-art instruments.
The Weather Station is engineered in such a way that it is
able to receive the coded METEOTIME signal containing
the weather information. The information is broadcasted
via the stations for radio-controlled clocks DCF77 (located
in Germany). For this reason, your Weather Station is also a
radio-controlled clock with all the known advantages, such
as always showing the exact time, and automatic change to
daylight saving the time in winter and in summer.
You are able to receive weather forecast for 60 meteorological
regions within Europe for up to 4 days in advance, and offer a
2-day-advance forecasts for an additional 30 regions.
WHAT DOES IT TAKE TO GET GOOD RECEPTION?
Similar to wireless signals like the mobile phone network or
Radio/TV broadcasts, it is possible that the Weather Stations
do not receive signals all the time and everywhere. The
following are some tips you should follow by all means to make
sure that your device works properly:
The location for Weather Station is very important. For this
reason we have equipped all of them with an innovation test
function (the TEST button) which enables you test the quality
of reception in your environment and to place the device
where the best conditions prevail.
Try your reception by testing your Weather Station as stated
in the manual. To do this, in the room you want to install the
device, please turn on all the potential sources of interference
(for example a TV set). Then put the Weather Station in the
place and direction you want it to be, but always at least in
one meter from the potential source of interference.
Watch the symbol GOOD RECEPTION or BAD RECEPTION on
the display. Once you have found the right location for GOOD
RECEPTION, you may leave the Weather Station there, it
will collect its data by radio controlled signal. Within a few
minutes time and the date will appear. However, the transfer
of the very large amount of data (forecast for all regions and
days) will take much longer. To completely receive all data
will take up to 24 hours from the time of the initial setup.
FEATURES
This package comes with a main unit which is Weather Stati-
on, and a remote outdoor Thermo-hygrometer sensor.
This Weather Station has equipped the thermo-hygrometer
sensor to measure the indoor temperature and humidity, and
also has a wireless outdoor thermo-hygrometer sensor to
measure the outdoor temperature and humidity.
Key Features:
• Weather Status for today and coming three days for
470 cities
• Precipitation Probability for Today
• Wind speed and Wind Direction for Today
• 3 channel outdoor 433MHz wireless Thermo-hygrometer
(channel 1 sensor is included, additional sensors are
required for channels 2 and 3)
• Indoor Thermo-hygrometer
• Maximum and minimum memories of temperature and
humidity readings
• Temperature and humidity trends (UP/FLAT/DOWN)
• Temperature unit in degree C only
• Regional Day-time temperature and Night-time
Temperature information
• 7-languages abbreviation (English / Espanol / Francais /
Italiano / Dutch / Swedish / Deutsch)
• Critical Weather Alert
• Maximum of 5 cities weather information can be selected
and displayed
• Personalized a place name / city
• Radio-controlled clock and calendar (24 hour format only)
• Time-zone setting
• Dual alarm (weekday alarm / single alarm, Alarm sound for
2 minutes)
• Pre-alarm (programmable) for outdoor sensor – Channel 1
only
• Battery low indicator for main unit and wireless sensor
• Powered by 2x AA batteries for main unit, and 2x AAA
batteries for the outdoor sensor
INTRODUCTION
The Meteotime Weather Station LCD display shows:
• Today Weather Information Window
• In/Outdoor Temperature & Humidity
• Tomorrow, one-day-after, and two-day-after weather
information
• Information window which shows Time & Date, Alarm Time,
Cities and critical weather information description.

11
1. Today Weather Information including Wind Speed, Wind
Direction and the probability of Rain/Snow/Hail, Day &
Night Temperature, Day & Night Weather Status.
2. Tomorrow, One-Day-After and Two-Day-After Weather
Information including Day & Night Temperature, Day &
Night Weather Status.
3. In/Outdoor Temperature/Humidity
4. Information Window.
There are total 7 buttons on the Main unit, namely:
SET
• selected city DATE Weekday alarm “OFF
W-ALM” single alarm “OFF S-ALM” Pre-alarm
“OFF P-ALM”
• Press and HOLD [SET] for 3 seconds to select your (1) coun-
try, (2) time zone, (3) language, (4) exit to city display mode
DAY/NIGHT
• Critical weather information day/night weather status
change
• Read critical weather information one by one
• increasing the value during setting
• turn ON the alarm
• Press and hold for 3 seconds to enforce a radio controlled
clock DCF signal search
• switch to next day´s weather information
• decreasing the value during setting
• Chose one of the pre-selected cities
• Turn OFF the alarm
• Press and hold or 3 seconds to enforce a wireless RF signal
search from remote sensor
MEM
• display the maximum and minimum measured temperature
and humidity readings in record
• Press and hold for 3 second to clear all the max. and min.
record
TEST
• Find the place for the device which has a good reception
• add the city into the list of your desired cities
OR
Remove the city out of the list of desired Cities
• edit your home town
CHANNEL
• switch to rear outdoor temperature and humidity readings
of channels 1, 2 and 3
• press and hold for 3 seconds to enter into the auto-circula-
tion display mode
GETTING START
• Insert 2pcs AAA batteries for remote sensor, and then
insert 2pcs AA batteries for the main unit.
• The main unit will automatically scan for the radio-control-
led clock signal and the Meteotime Weather signal
• The time and date will appear in a few minutes. Since there
is a large amount of Weather information for all regions and
days, the unit needs about 24 hours from the time of the
initial setup to complete the reception of all data.
• After the time and the date signal is being received
successfully, the display shows SELECT COUNTRY and then
“FRANKFURT” as default city in the information window. To
change the country and the city please see the information
below.
Main Unit
1
2
3
4
Remote Thermo-Hygrometer

12
• If the unit is able to receive the Meteotime signal success-
fully, the Meteotime icon is appeared in the second row
of display. Otherwise, the Meteotime will be .
1. means it successfully receive today`s weather
information. Otherwise, it will be .
2. means it successfully receive weather information of
one-day-after. Otherwise, it will be .
3. means it successfully receive tomorrow weather
information. Otherwise, it will be .
4. means it is able to receive the Meotime weather signal.
Otherwise, it will be .
5. means it successfully receive weather information of
two-day-after. Otherwise, it will be .
In the event the Meteotime icon change to , that means
there are potential sources of interference on the unit. The
sources of interference may come from the electronics
equipment such as TV-set, computers, household machines
etc. It may also be due to lots of concrete, metal parts and
electrical equipment in the building. It may also be due to
your living area if it is very far away from the Radio-controlled
clock tower.
You are able to use the TEST function to look for a better
location
• Press TEST button, SCAN is shown in the Information
window
• pick the unit to find a good location.
• flashing: the test is running and the Meteotime signal
reception is good. You are able to leave the device in this
position. flashing: the test is running and the Meteotime
signal reception is poor. You need to keep on looking for a
better location.
• The test lasted for around 1 minute. You can restart the test
with the [TEST] key at any time, and also discontinue the
test by press the TEST key.
• SCAN A: the signal strength will be represented from 0
(very bad) to 9 (very good).
• After inserting the batteries, the weather station searches
for the radio controlled time signal as well as the Meteo-
Time signal. After it has successfully received the Meteo-
Time signal, the display shows in the information window
the default city .
• You are able to press [SET] to switch from the display of the
city to date, weekday alarm, single alarm and pre-alarm.
SELCET THE COUNTRY AND THE CITIES
• Press and hold [SET] for 3 seconds, in the information
window is shown, and then press [ ] or
[ ] to select the country. For example: If you see in the
information window , that means you have
selected “Germany”.
• Press [SET] to confirm the country. Assuming you have
selected Germany, then the information window will show
.
• Then, press [ ] or [ ] to select the city, and the city
name will be shown in the information window. Example:
means the city of “Frankfurt am Main”
Press now [SET] to accept the setting. From now on, the
selected city will now be shown in the information window.
ACTIVATE FAFOURITES
Once you have set your city as described above, you may
select more cities for easy access. Instead of terminating the
setting with the key [SET], you continue as follows:
• If “Frankfurt am Main” is your selection as one of your
favorite cities, then press [TEST ] to confirm. A will be
shown on top of your selected city, and it will be stored into
your personal memory list.
• Now you may press [ ] or [ ] to select more cities in the
same country, and then press [TEST ] to confirm.
1 2
3
54

13
• If you wish to select cities from different countries, you
have to exit the setting with [SET] and re-enter it again as
described above in order to change the country
You may select maximum FIVE cities as favorites. If you
want to add more cities, then will show in the
information window.
When all settings are done, press [SET] to confirm and exit
the setting mode.
REMARK:
If, after inserting the batteries the first time, you are skipping
the city selection, the product will select by default “Frankfurt
am Main” as your selected city.
DISPLAY OF FAVOURITES
If you have selected more than one city as favorite, as an
example Frankfurt am Main, Paris and Stockholm, then you
are able to scroll through these cities by pressing when the
Information window shows the CITY NAME (Press SET until it
displays the City name).
REMOVE A CITY FROM THE LIST OF FAVOURITES
• Press and hold [SET] for 3 seconds, is shown
in the information window, then press [ ] or [ ] to
select the country.
• Press [SET] key to confirm the country
• Then press [ ] or [ ] to go to your selected city with the
• Press [TEST ] to remove the . now this city is removed
from the favorites
• Repeat this if you wish to remove more cities from your list
• Now you may also press [ ] or [ ] to select another
favorite city.
Once you have made all your changes, press [SET] to quit.
will be shown in the information window. After 4
seconds, it will go to the City-Date-Time Mode.
PERSONALIZED A PLACE NAME
• Press and hold [SET]) for 3 second. In the information
window, is shown, and then press or
key to select the country. Let´s said you have selected the
counry Germany which is represented in .
• Press [SET] key to confirm the country (let´s said we select
Germany right now), and then the information window will
show .
• Then press [ ] or [ ] key to select the city, and the city
name will be shown in the information window such as
means the city “Frankfurt am Main”, and
you would like to enter a new city which is near the region
of Frankfurt am Main.
• Press the MEM key; a cursor flashes on the first position of
the information window.
The following input commands then apply:
** The place that you have selected to enter your own
description will still exist under its own name.
• Press [SET] key to confirm and exit
SET THE TIME ZONE and LANGUAGE
• Press and hold [SET] for 3 second, is shown in
the information window.
• Press [SET] again, the is shown in the
information window, press [ ] or [ ] key to adjust the
time zone.
• Press [SET] again, then the language will be shown in the
information window, press [ ] or [ ] key to select your
desired language. There are total seven language for
selection, namely German, English, Spanish, French,
Italiano, Dutch, Swedish.
• Press [SET] again and will be shown at the
information window. After 4 seconds, it will change to the
City-Date-Time Mode.
REMARK:
If you do not have any selection into the setup mode up to
60 seconds, it will automatically exit the setup mode. The
information window will show City / Date & Alarm.
Key Funtion
[ ] or [ ]
Selection of a letter
[SET]
(1) Accept the selected letter and
jumps to the next position. OR
(2) If you have not entered any
letter (in other words, if only
the cursor is flashing at the last
position, confirm the entry with
this key and your place will also
be included in the memory with
immediate effect
[TEST ]
One position back in the data entry
process

14
SWITCH TO NEXT DAY´S WEATHER INFORMATION
For each press of the UP [ ] button, the user can switch and view the weather information from today to tomorrow,
one-day-after and two-day-after.
SWITCH DAY WEATHER INFORMATION – NIGHT WEATHER INFORMATION
The device is able to automatically switch to DAY-WEATHER and NIGHT-WEATHER respectively. The user can press the (DAY/
NIGHT) button to see the DAY-Weather (for 10-second period) if currently show the NIGHT-WEATHER, or vice verse.
Today`s weather information:
Tomorrow`s weather information:
One-day-after`s weather information:
Two-day-after`s weather information:
UP [ ]

15
CRITICAL WEATHER INFORMATION
Meteotime Weather signal contains the critical weather
information such as Gust, Frozen Rain, Heavy Snow, Thunder,
Strong UV, Dense Fog, Bise, Mistral, etc. for today and coming
three days. A critical weather alert signal will be turned
on in case that day has critical weather that the user must
know.
Sometimes there are more than one critical weather
information in the 4-days. Press (DAY/NIGHT( key to read the
critical weather information one by one. The special icon of
the day will be flashed when you read the information.
• Press [SET] key to go back to the display of CITY
DATE WEEKDAY ALARM SINGLE ALARM
PRE-ALARM. If you would like to read the weather
information in the information window, then press
[DAY(NIGHT] key to display DAY NIGHT weather
information and also the critical weather information.
If no key is pressed, the critical weather information will be
toggle to display, so as to make sure you are aware of the
critical weather details.
LOW BATTERY INDICATION
When it is time to replace batteries, the respective
low-battery indicator (see graphics) will appear next to the
weather forecast for the display unit or next to the outdoor
temperature for the outside sensor.
Day/Night
Weather
Weather
Weather
Day Night
Weather status

16
Weather Status
There are total 15 weather status for Day and 15 weather
status for Night.
REMOTE SENSOR STATUS
The wave icon above the current channel icon shows the
connection status of the corresponding remote sensor:
SEARCH FOR REMOTE SENSOR
• The main unit can be manually activated to search for
the signals from remote sensors by pressing and holding
DOWN [ ] button.
VIEWING REMOTE (CHANNEL) TEMPERATURE AND
HUMIDITY
Static Display:
• Press [CHANNEL] keys to select measurements from
different remote sensors, each is mode to a unique channel
1, 2, or 3
Low-battery indicator icon for main unit
Low-battery indicator icon for outdoor-
transmitter
Significance Day Night
Heat Storms
Sleet Showers
Snow Showers
Sleet
Snow
Significance Day Night
Sun
(Clear at night)
Light Cloudy
Mostly Cloudy
Overcast
Stratus Clouds
Fog
Showers
Light Rain
Heavy Rain
Frontal Storms
Icon Status
Searching for the signals from the remote
sensor
Corresponding remote sensor signal
received successfully
No signals received for over 1 hour

17
Channel Auto-Scan Display:
• Press to enable an automatic scan of all channels, press
and [CHANNEL], until the icon is displayed. The
measurements from each remote channel will be
alternately displayed with a 5 seconds viewing.
NOTE: the channel auto-scan feature can be active only if
there are more than one remote sensors operating and are set
to different channels.
MAXIMUM AND MINIMUM TEMPERATURES
• The maximum and minimum record indoor and outdoor
temperatures and humidity will be automatically stored in
the memory of the main unit. To display them, press [MEM]
button and the respective indicators, [MAX] or [MIN] will
be displayed.
• To clear the memory, hold [MEM]button for 3 seconds.
The maximum and minimum temperature records will be
erased.
ALARM FEATURE
Weekday Alarm:
• This is a repeat alarm that will activate daily from Monday
to Friday at a set time.
Single Alarm:
• This is a single alarm that will activate once at a set time
HOW TO SET ALARM
• Press [SET] to toggle between weekday, single alarm time
or pre-alarm. If the alarm is disarmed, the time will be
displayed as “OFF W-ALM”
• Hold [SET] for 3 seconds, the hour digits will blink
• Enter the hour by using UP [ ] or DOWN [ ] button
• Press [SET]) to confirm, the minute digits will blink
• Enter the hour by using UP [ ] or DOWN [ ] button
• Press [SET] to exit and the respective alarm icons and
will be activated.
HOW TO STOP ALARM
• When alarm is on, the respective alarm icons and
will be flashing. Press UP [ ] or DOWN [ ] button to
stop the alarm immediately.
• To turn off the alarm press UP [ ] or DOWN [ ] button to
change the alarm time display as “OFF W-ALM”
• If no button is pressed, the alarm will be sounded for 2
minutes and then deactivated automatically.
SETTING THE ICE WARNING ALARM (PRE-ALM)
• If weekday (W) or Single day (S) alarm is set, the ice
warning alarm (Pre-ALM) can be programmed.
• Press and hold [SET] button for 3 seconds once to enter
into the ice warning alarm setting mode on “PRE-ALM”
display mode
• The number 15 will flash, meaning that if selected, the
alarm will sound 15 minutes earlier than the weekday or
single alarm.
• select the desired ice warning alarm interval in 15 minutes
increments between 15 and 90 minutes, using UP [ ] or
DOWN [ ] buttons
• Press [SET] button to confirm and exit from the alarm
setting mode.
SPECIFICATION ON IN/OUTDOOR TEMPERATURE AND
HUMIDITY MEASUREMENT
Temperature Resolution: 0.1 degree °C
Temperature operating range (main unit) -5 degree °C to +50
degree °C
Temperature operating range (sensor unit) -40 degree °C to +70
degree °C
Temperature accuracy +/- 1 degree °C
Humidity Display Range r.H. 1% to 99%
Humidity resolution 1%
Humidity accuracy +/- 5% (within 25% - 80% at 25°C)
RF Transmission frequency 433MHz
RF transmission range maximum 30 meters (open area)
Main unit is powered by AA batteries x 2pcs.
Outdoor thermo-hygrometer is powered by AAA batteries x 2pcs.
12. Declaration of Conformity
Hereby, Hama GmbH & Co KG declares that the radio
equipment type [123131] is in compliance with
Directive 2014/53/EU. The full text of the EU
declaration of conformity is available at the following internet
address: www.hama.com->123131-> Downloads.
Frequency band(s) 433MHz
Maximum radio-frequency power
transmitted 0,021mW

fMode d‘emploi
18
À LIRE AVANT LA PREMIÈRE UTILISATION
Votre station Meteotime diffère des stations traditionnelles
mesurant uniquement les conditions météorologiques actuelles ;
les données de cette station-ci sont basées sur METEOTIME, un
système élaboré chaque jour par des météorologistes professi-
onnels utilisant des instruments à la pointe du progrès.
Cette station a été conçue de telle sorte qu‘elle puisse recevoir
le signal METEOTIME encodé contenant toutes les informations
météorologiques nécessaires. Ces informations sont diffusées
via les stations destinées aux horloges radio pilotées DCF77
(implantées en Allemagne). Votre station est donc une horloge
radio pilotée comprenant tous les avantages de cette technique,
tels que l‘heure exacte en permanence ou le changement
automatique de l‘heure d‘été et d‘hiver.
Ce système vous permet de recevoir les prévisions
météorologiques pour 60 régions européennes sur 4 jours et, en
plus, les prévisions pour 30 régions supplémentaires sur 2 jours.
COMMENT ASSURER UNE EXCELLENTE RÉCEPTION ?
Comme pour les appareils recevant des signaux sans fil
(téléphones portables, réseaux de radio ou de TV), il est
possible que votre station ne reçoive pas les signaux en
permanence et en toute situation. Les conseils d‘utilisation
suivants vous aideront à garantir le parfait fonctionnement de
votre unité :
Le positionnement de votre station est très important. C‘est la
raison pour laquelle nous l‘avons équipée d‘une fonctionnalité
de test innovante (la touche TEST) vous permettant de tester la
qualité de réception de votre environnement ainsi que de trouver
le meilleur emplacement pour votre station.
Utilisez les indications du manuel d‘utilisation afin de tester la
réception de votre station Meteotime. Commencez par mettre
toutes les sources d‘interférences potentielles sous tension
(téléviseurs, etc.) dans la pièce dans laquelle vous envisagez
d‘utiliser l‘unité. Placez la station Meteotime à l‘endroit et dans
la direction envisagés, néanmoins à un mètre au minimum d‘une
source d‘interférences potentielle.
Observez l‘icône BONNE RECEPTION ou MAUVAISE RECEPTION
(GOOD RECEPTION or BAD RECEPTION) affichée à l‘écran. Votre
station Meteotime commence à recevoir les données du signal
radio piloté dès qu‘elle capte correctement le signal (BONNE
RECEPTION / GOOD RECEPTION). Les données apparaissent à
l‘écran au bout de quelques minutes. La réception de grandes
quantités de données (prévisions pour toutes les régions et
tous les jours) prendra toutefois beaucoup plus de temps.. Il
est possible que l‘unité prenne jusqu‘à 24 heures à compter de
l‘installation pour recevoir l‘intégralité des données.
CARACTÉRISTIQUES
L‘emballage de votre station météo contient l‘unité (la station
Meteotime) et un capteur thermohygrométrique extérieur.
La station est équipée d‘un capteur thermohygrométrique
servant à mesurer la température et l‘humidité intérieures ainsi
que d‘un capteur thermohygrométrique sans fil pour mesurer la
température et l‘humidité extérieures.
Caractéristiques clés :
• Conditions météorologiques pour le jour actuel et les trois
jours suivants pour 470 villes
• Probabilité de précipitations pour le jour actuel
• Vitesse et direction du vent pour le jour actuel
• 3 canaux extérieurs 433 Mhz pour le capteur
thermohygrométrique sans fil (le capteur du canal 1 est
fourni, des capteurs supplémentaires sont nécessaires pour
les canaux 2 et 3)
• Capteur thermohygrométrique intérieur
• Enregistrement des températures maxi / mini et du taux
d’humidité
• Tendance de température et de l‘hygrométrie (UP/FLAT/
DOWN - HAUSSE/STABLE/BAISSE)
• Affichage de la température en degrés C uniquement
• Température pendant la journée et la nuit pour la région
concernée
• Affichage des abréviatons en 7 langues (anglais, espagnol,
français, italien, néerlandais, suédois, allemand)
• Alarme de conditions météorologiques critiques
• Sélection et affichage des informations météorologiques pour
5 villes au maximum.
• Personnalisation du nom d‘un endroit / d‘une ville
• Horloge et calendrier radio pilotés (format 24 h uniquement)
• Réglage du fuseau horaire
• Alarme double (jours ouvrables / alarme unique, sonnerie
d‘alarme pendant 2 minutes)
• Pré-alarme (programmable) pour le capteur extérieur – canal
1 uniquement
• Icône d‘indication de pile faible pour l‘unité principale et le
capteur sans fil
• Alimentation de l‘unité principale à l‘aide de 2 piles LR6/AA et
2 piles LR6/AA pour le capteur extérieur
INTRODUCTION
L‘écran LCD de la station Meteotime présente :
• Fenêtre d‘informations météorologiques pour le jour actuel
• Température intérieure/extérieure & hygrométrie
• Informations météorologiques pour le lendemain, le surlende-
main et le sur-surlendemain
• Fenêtre d‘informations pour l‘heure et la date, l‘heure
d‘alarme et les conditions météorologiques critiques

19
1. Informations météorologiques pour le jour actuel comprenant
la vitesse du vent, la direction du vent, la probabilité de
pluie/neige/grêle, la température jour et nuit, les conditions
météorologiques jour et nuit.
2. Informations météorologiques pour le lendemain, le surlende-
main et le sur-surlendemain comprenant la température jour
et nuit et les conditions météorologiques jour et nuit
3. Température/hygrométrie intérieure/extérieure
4. Informations météorologiques
L‘unité principale dispose de 7 touches :
SET
• ville sélectionnée DATE alarme jours ouvrables «
OFF W-ALM » alarme unique « OFF S-ALM »
pré-alarme « OFF P-ALM »
• Appuyez sur la touche [SET] pendant 3 secondes afin de
sélectionner votre pays (1), votre fuseau horaire (2), votre
langue (3) et retourner au mode d‘affichage de la ville (4)
DAY/NIGHT (JOUR/NUIT)
• Conditions météorologiques critiques variations des
conditions météorologiques jour/nuit
• Consultation des informations de conditions
météorologiques critiques l‘une après l‘autre
• pour augmenter la valeur pendant le réglage
• pour activer l‘alarme
• appuyez sur la touche pendant 3 secondes afin de lancer la
recherche du signal DCF77
• commutation vers les informations météorologiques pour le
lendemain
• pour diminuer la valeur pendant le réglage
• sélection d‘une des villes prédéfinies
• pour éteindre l‘alarme
• appuyez sur la touche pendant 3 secondes afin de lancer
la recherche d‘un signal RF sans fil provenant du capteur à
distance
MEM
• affichage de la température et de l‘hygrométrie maximales/
minimales en mémoire
• appuyez sur cette touche pendant 3 secondes afin d‘effacer
tous les enregistrements des valeurs maximales/minimales
en mémoire
TEST
• recherche du meilleur emplacement (réception) pour
l‘appareil
• ajout d‘une ville à la liste de vos villes favorites
OU
suppression d‘une ville de la liste de vos villes favorites
• édition de votre ville
CANAL
• commutation vers les indications de température et
d‘hygrométrie extérieures provenant des canaux 1, 2 et 3
• appuyez sur cette touche pendant 3 secondes afin de
sélectionner le mode d‘affichage auto-circulation
PREMIERS PAS
• Insérez deux piles LR03/AAA dans le capteur à distance, puis
deux piles LR6/AA dans l‘unité principale.
• L‘unité principale recherche automatiquement le signal pour
l‘horloge radio pilotée et le signal Meteotime.
• L‘heure et la date apparaissent à l‘écran au bout de quelques
minutes. En raison de l‘importance des informations
météorologiques pour les différentes régions et les différents
jours, l‘unité principale prend environ 24 heures (à partir de
l‘initialisation) pour recevoir toutes les données.
• « SELECT COUNTRY » (« SÉLECTION DU PAYS »), puis «
FRANKFURT », comme ville par défaut, apparaissent à l‘écran
après réception de l‘heure et de la date. Veuillez consulter les
indications ci-dessous afin de changer le pays et la ville.
Unité principale
1
2
3
4
Capteur thermohygrométrique à
distance

20
• L‘icône Meteotime apparaît dans la deuxième ligne de
l‘écran dans le cas où l‘unité est capable de recevoir cor-
rectement le signal Meteotime. Dans le cas contraire, l‘icône
apparaît à la place.
1. signale une réception correcte des informations
météorologiques pour le jour actuel. apparaît dans le cas
contraire.
2. signale une réception correcte des informations mété-
orologiques pour le surlendemain. apparaît dans le cas
contraire.
3. signale une réception correcte des informations
météorologiques pour le lendemain. apparaît dans le cas
contraire.
4. signale la capacité à recevoir le signal Meteotime.
apparaît dans le cas contraire.
5. signale une réception correcte des informations
météorologiques pour le sur-surlendemain. apparaît dans
le cas contraire.
Une source d‘interférences affecte la réception du signal en cas
d‘apparition de l‘icône . Les interférences sont provoquées
par certains équipements électriques comme les téléviseurs,
les ordinateurs, les appareils électroménagers, etc. ou par
des bâtiments comprenant de nombreuses cloisons en béton,
des éléments métalliques ou des équipements électriques.
L‘éloignement de votre domicile de la station d‘émission est
également susceptible d‘affecter la réception du signal.
Vous pouvez utiliser la fonction TEST afin d‘améliorer la fonction
de recherche
• Appuyez sur la touche TEST ; SCAN apparaît dans la fenêtre
d‘informations.
• Placez l‘unité dans un endroit approprié.
• clignote : le test a démarré et la réception du signal Me-
teotime est bonne. Vous pouvez laisser l‘unité à cet endroit.
clignote : le test a démarré et la réception du signal
Meteotime est mauvaise. Vous devez rechercher un meilleur
emplacement.
• Le test dure environ 1 minute. Vous pouvez redémarrer le
test, à tout moment, à l‘aide de la touche (TEST) ou encore
interrompre le test à l‘aide de cette même touche.
• SCAN A : la force du signal est représentée de 0 (très mauvai-
se) à 9 (très bonne).
• La station météo recherche le signal pour l‘horloge radio
pilotée et le signal Meteotime dès que vous insérez les piles.
L‘écran affiche la fenêtre d‘informations et la ville par défaut
« » après que l‘unité a correctement reçu le
signal Meteotime.
• Appuyez sur la touche [SET] afin de commuter l‘affichage de
la ville vers l‘affichage de la date, de l‘alarme jours ouvrables,
de l‘alarme unique ou de la pré-alarme.
SÉLECTION DU PAYS ET DES VILLES
• Appuyez sur la touche [SET] pendant 3 secondes ;
« » apparaît dans la fenêtre d‘informations ;
appuyez sur la touche [ ] ou [ ] afin de sélectionner
votre pays. Exemple : apparaît dans la fenêtre
d‘informations si vous sélectionnez « Allemagne ».
• Appuyez sur la touche [SET] afin de confirmer votre
sélection. apparaît dans la fenêtre d‘informations si
vous avez sélectionné « Allemagne ».
• Utilisez la touche [ ] ou [ ] afin de sélectionner la ville ;
le nom de la ville apparaît dans la fenêtre d‘informations.
Exemple : signifie « Francfort sur le Main ».
Appuyez sur la touche [SET] afin de confirmer votre sélection.
Le nom de la ville sélectionnée apparaîtra dans la fenêtre
d‘informations.
ACTIVATION DES FAVORIS
Vous pouvez sélectionner d‘autres villes (afin de vous en faciliter
l‘accès) après avoir sélectionné votre ville par défaut. Dans
ce cas, continuez votre sélection à l‘aide de la touche [SET]
comme suit :
• Appuyez sur la touche [TEST ] afin de confirmer votre
sélection si vous décidez de conserver « Francfort sur le Main
» comme une de vos villes favorites. Le signe apparaît
au-dessus de la ville sélectionnée qui sera mémorisée dans
votre liste personnelle.
1 2
3
54
This manual suits for next models
1
Table of contents
Languages:
Other Hama Weather Station manuals

Hama
Hama EWS-120 User manual

Hama
Hama EWS-Trio User manual

Hama
Hama EWS-3200 User manual

Hama
Hama EWS-420 User manual

Hama
Hama Color Edge 00136294 User manual

Hama
Hama EWS-280 User manual

Hama
Hama TH-130 User manual

Hama
Hama EWS-180 User manual

Hama
Hama EWS-2050 User manual

Hama
Hama 00092659 EWS-165 User manual
Popular Weather Station manuals by other brands

SOMFY
SOMFY Soliris io 1W 230V instructions

Bresser
Bresser WSX3001000000 instruction manual

MOB
MOB MO7959 user manual

La Crosse Technology
La Crosse Technology Wireless Weather Station instruction manual

Davis Instruments
Davis Instruments Rain Collector II installation manual

Oregon Scientific
Oregon Scientific BAR208HGX user manual