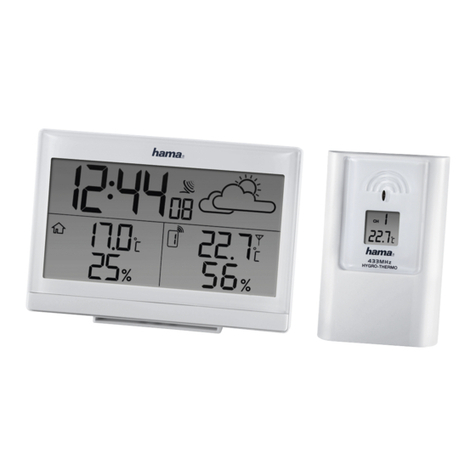
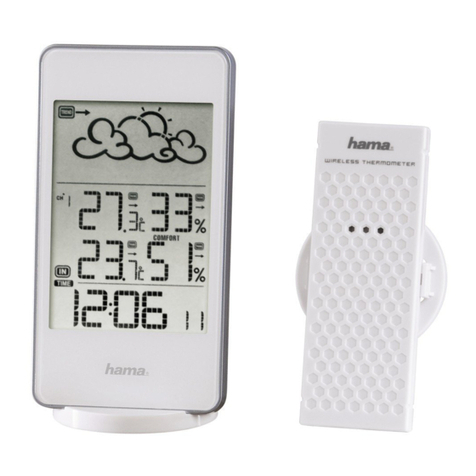
Hama 00176596 User manual

00176596
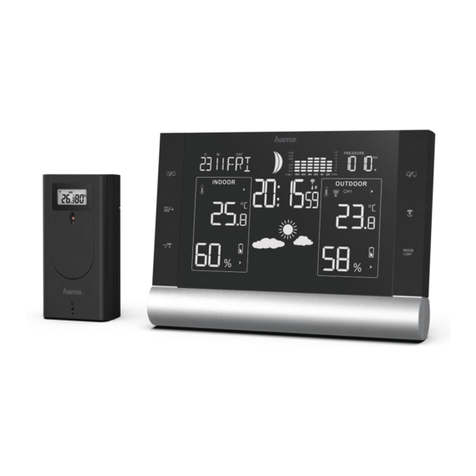
WIFI WEATHER STATION
with Outdoor Sensor
GOperating Instructions DBedienungsanleitung
TEMPERA TUR E
HUMiDIT Y
TEMPERA TURE
HUMiDIT Y
PRESSUR E
FORECAST

GOperating Instructions
Thank you for choosing a Hama product.
Take your time and read the following instructions and information completely. Please keep these instructions in
a safe place for future reference. If you sell the device, please pass these operating instructions on to the new
owner.
1. Explanation of warning symbols and notes
Risk of electric shock
This symbol indicates a risk of electric shock from touching uninsulated product parts that may carry
hazardous voltage.
Warning
This symbol is used to indicate safety instructions or to draw your attention to specic hazards and risks.
Note
This symbol is used to indicate additional information or important notes.
2. Safety instructions
•The product is intended for private, non-commercial use only.
•Use the product only for the intended purpose.
•Protect the product from dirt, moisture and overheating and use it in dry rooms only.
•The product is intended only for use inside buildings.
•Only use the article under moderate climatic conditions.
•As with all electrical products, this device should be kept out of the reach of children.
•Do not operate the product outside the power limits given in the specications.
•Do not use the product in areas in which electronic products are not permitted.
•Do not use the product in a damp environment and avoid splashing water.
•Do not drop the product and do not expose it to any major shocks.
•Do not modify the product in any way. Doing so voids the warranty.
•Keep the packaging material out of the reach of children due to the risk of suffocation.
•Dispose of packaging material immediately in accordance with the locally applicable regulations.
•Route all cables so there is no risk of tripping.
•Do not bend or crush the cable.
•Always pull directly on the plug when disconnecting the cable, never on the cable itself.
•Do not use the product in the immediate vicinity of heaters, other heat sources or in direct sunlight.
•Do not place the product near interference elds, metal frames, computers, TVs, etc. Electronic devices and
window frames can negatively affect the product’s functionality.
Risk of electric shock
•Do not open the device or continue to operate it if it becomes damaged.
•Do not use the product if the
AC adapter, the adapter cable or the mains cable are damaged.
•Do not attempt to service or repair the product yourself. Leave any and all service work to qualied experts.

3. Package contents
1x weather station with power supply unit
1x quick start guide
1x outdoor sensor
4. Controls and displays
4.1 Weather station controls
TEMPERATURE
HUMiDITY
TEMPERATURE
HUMiDITY
PRESSURE
FORECAST
Weather station front
1Weather forecast
2Air pressure
3Outdoor temperature
4Indoor temperature
5Ambient humidity outdoors
6Ambient humidity
7Time / calendar
8Phase of the moon
9WiFi LED
TEMPERATURE
HUMiDITY
TEMPERATURE
HUMiDITY
PRESSURE
FORECAST
1
9
2
3 4
5 6
7 8
1 2 3 4
5
6
7
Weather station back
1[MODE] button
2[UP/ WiFi] button
3[DOWN] button
4[MEM] button
5Battery compartment
6Setup frame
7Power supply unit socket

4.2 Outdoor sensor controls
Outdoor sensor
1LCD display - Temperature
2LCD display - Humidity
3Indicator light
4°C/°F button
5TX button
6Channel selection
7Battery compartment
1
2
4
5
6
7
3

5. Getting started
5.1 Inserting / changing the batteries
Warning - Batteries
•When inserting batteries, note the correct polarity
(+ and - markings) and insert the batteries
accordingly. Failure to do so could result in the
batteries leaking or exploding.
•Only use batteries (or rechargeable batteries) that
match the specied type.
•Before you insert the batteries, clean the battery
contacts and the polarity contacts.
•Do not allow children to change batteries without
supervision.
•Do not mix old and new batteries, or batteries of
different types or from different manufacturers.
•Remove the batteries from products that are not
being used for an extended period (unless these
are being kept ready for an emergency).
•Do not short-circuit batteries.
•Do not charge batteries.
•Do not burn batteries.
•Keep batteries out of the reach of children.
•Never open, damage or swallow batteries or allow
them to enter the environment. They can contain
toxic, environmentally harmful heavy metals.
•Remove spent batteries from the product and
dispose of them without delay.
•Avoid storing, charging and using in extreme
temperatures and at extremely low atmospheric
pressures (such as at high altitudes).
•Remove the battery cover on the back of the outdoor sensor and on the weather station.
•Remove the spent batteries and dispose of them if required. Insert two new type AA batteries into the weather
station and the outdoor sensor. Take care to ensure the correct polarity as shown in the diagram in the battery
compartment.
•In the outdoor sensor's battery compartment, press the channel selector switch to set the correct channel.
Using the Down button on the weather station, select the same channel you have selected on your outdoor
sensor.
•The channel connection display for the top left outdoor sensor in the "Outdoor" section of the weather station
now ashes for around 3 minutes until the weather station adopts the measurement data from the outdoor
sensor.
•Close the battery compartment by reattaching the covers to the rear of the weather station and the rear of the
sensor.

5.2 Installing the app
•Download the "Hama Smart Home (Solution)" app using the QR code and install it.
Warning
•Only operate the product from an approved socket that is connected to the public power supply. The socket
must be installed close to the product and must be easily accessible.
•Disconnect the product from the power supply using the On/Off switch – if this is not available, unplug the
power cord from the socket.
•If using a multi-socket power strip, make sure that the total power consumption of all connected devices
does not exceed the power strip's maximum throughput rating.
•If you will not be using the product for a prolonged period, disconnect it from mains power.
https://de.hama.com/
smarthome#smart-solution

5.3 Integrating devices into the Hama Smart Home (Solution) app
•Ensure that the weather station is connected to the power supply and that the WiFi symbol below the time
display is ashing.
•When the weather station is switched on for the rst time, the Pairing indicator appears below the time
display. If this is not the case, press and hold the WiFi button for approx. 5 seconds.
•Open the app and select "My home" at the bottom left-hand edge of the screen.
•Then tap the "+" at the top right-hand edge of the screen and select the category "Weather station".
•Now select your WiFi network and enter your password.
•Check the box in the "Next step" and click NEXT. Your device is now connected.
•Once pairing is complete, the APP automatically returns to the product's main screen. The weather
station now automatically updates the network time, reports the air pressure, the indoor temperature
and humidity and temperature and ambient humidity of the outdoor channel.
In the nal step, you can assign a name to the weather station.
•Click on "Done" to complete the process.
Note
A detailed description of the
Hama Smart Home (Solution) App
and its full scope of functions can be found in our App Guide at:
www.hama.com ðArticle Number ðDownloads ðApp Operating Instructions
1
Mein Zu-
hause
Gerät hinzufügen
Erfolgreich hinzugefügt
Erledigt
2
3

If the previously described method for integrating the fan does not work, there is the option of
connecting the device via access point (AP mode).
•In the rst step, the WiFi indicator below the time must ash slowly. If this is not the case, press and
hold the WiFi button for approx. 5 seconds.
•If the pairing process fails, you can try it again a few times. If this does not work, press the "WIFI UP"
button once. The display changes to "02 AP and WIFI".
•"AP" ashes on the display and the WiFi indicator ashes once every 3 seconds.
•Now proceed in the same way as described before. Before you tick "Next step", select AP mode in the
top right-hand corner.
•The following screen appears:
•Now tick the next step, click Next and select "Connect now" on the next screen. In the WLAN network
overview, select the network with the name SmartLife_XXXX.
•You can ignore any error message that you are currently not connected to the Internet and then return
to the Hama Smart Home (Solution). Your weather station is now connected.
1
2
3

•The weather station may display the previously collected data in the app. Click the graph icon at the bottom
left to call up the interface for collected data.
•To change the weather station's basic settings, click the gearwheel symbol at the bottom right.
Main interface Progress display Setting mask
6. Data transfer of the outdoor sensor
•If the base station successfully receives signals from the wireless sensor, the temperature and ambient
humidity are shown in the OUTDOOR column on the base station.
•Press the "Down" button to ensure that your weather station is showing the same radio channel as the one
set on you outdoor sensor.
•If the base station was unable to receive any transmissions from the outdoor sensor ("--" on the display), press
and hold the DOWN button for approx. 3 seconds to receive the data again. The outdoor temperature shows
an animation of the HF antenna symbol. The base station receives the radio signal from the outdoor sensor
again.

6.1 Extended usage options with scenarios
Scenarios and automated sequences that can be created in the app allow various combination options and
usage options for these products, depending on the SmartHome products in your home.
Programming is always carried out via the app (see Section 4 of the App Guide) and will be offered / suggested
to you on an individual basis.
Standard usage option
IN
25°C
OUT
12°C
Extended usage option
25°C
23°C-10°C

7. Weather station settings
7.1 Manual time setting
•Press the "MODE" button to toggle between the time / seconds and time / weekday displays.
•Press and hold the "MODE" button for around 2 seconds. The 12/24-hour mode display starts to ash. Use
the WiFi/Up button or DOWN button to select the required mode.
•Press "MODE" to conrm the previous setting. The time zone starts to ash. Now press the WiFi/UP button
and the DOWN button to set the correct time zone.
•Press "MODE" to conrm the previous setting. The hour display starts to ash. Now press the WiFi/UP button
and the Down button to set the correct hour.
•Press "MODE" to conrm the previous setting. The minute display starts to ash. Use the WiFi/UP and Down
button to set the correct minute.
•Press the "MODE" button to conrm the previous setting. The display for the "Month and date" icon starts to
ash. Press the WiFi UP and DOWN button again to set the date display to month / day or day / month.
•Press the "MODE" button to conrm the setting. The year display 2016 starts to ash. Press the WiFi-Up and
DOWN button to set the correct year.
•Press the "MODE" button to conrm the previous setting. The month display starts to ash. Now use the WiFi
Up and "DOWN" button to set the correct month.
•Press the "MODE" button to conrm the setting. The date display starts to ash. Now select the WiFi UP and
Down button to set the correct date.
•Select the "MODE" button to conrm the setting. The language selection for the weekday indicator starts to
ash. Now use the WiFi UP and DOWN button to select the language for displaying the weekday.
•Press the "MODE" button to conrm the setting. The temperature display, which is shown in °C by default,
now starts to ash. Now select WiFi UP and the Down button to set the temperature in °C or °F.
•Press "MODE" to conrm your setting. The default air pressure value mb / hPA starts to the ash. You can now
use the WiFi UP and DOWN button to set the pressure unit to mb/hPa, hPA, inHg or mmHg.
•Press "MODE" to conrm this setting and to end the setting process. Return back to time mode.
Note
•If no buttons are pressed within 20 seconds, the clock automatically switches from setting mode to normal
mode.
•The weekdays can be displayed in 7 different languages: English, German, Italian, French, Spanish, Dutch
and Danish.

7.2 Phases of the moon
•The weather station has a display that automatically shows the current phase of the moon.
7.3 Display of temperature / ambient humidity / air pressure and temperature /
ambient humidity trend
•The current indoor temperature / ambient humidity / air pressure and the temperature / ambient humidity
trend (indoors) are shown on the LCD display.
•Following successful connection to the outdoor sensor, the weather station can display the outdoor
temperature / ambient humidity and the temperature / humidity trend (outdoors).
The following displays may appear:
The temperature / ambient humidity is rising.
The temperature / ambient humidity is remaining constant.
The temperature / ambient humidity is falling.
7.4 Maximum / minimum temperature / relative humidity:
•Press the "MEM" button to toggle between the maximum and minimum temperature and humidity data for
indoors and outdoors:
•Once to display the maximum values for temperature and ambient humidity.
•Twice to display the minimum values for temperature and ambient humidity.
•Three times to return to the current values for temperature and ambient humidity.
•Press and hold the MEM button for around 2 seconds to reset the maximum and minimum temperature and
ambient humidity. This resets all recorded minimum and maximum data to the values shown currently.
Note
•If the temperature value is below the range that the weather station is able to display, "LL.L" appears.
•If the temperature is above the range that the station is able to display, "HH.H" appears.
•If the battery symbol appears, the batteries should be replaced as soon as possible.
7.5 Frost indicator
If the outdoor temperature is between 1°C and 3°C (or 33.8°F and 37.4°F), the frost symbol ashes in the form
of a snowake.

7.6 The weather forecast
•The weather station calculates a weather forecast for the next approximately 12 hours on the basis of the
barometric pressure trend. Of course, this forecast cannot be compared with professional weather services
which use satellites and high-performance computers. It does however provide an approximate indicator of
the weather developments. Please take the weather forecast from your local weather forecasting service into
account along with that of your weather station. If there are differences between the information from the
weather station and the local weather forecast, please use the advice from the local weather forecast service
as your guide.
The weather station uses the following symbols
The weather station can show the air pressure trend.
You will see the following symbols on the display:
The air pressure is rising.
The air pressure is remaining constant
The air pressure is falling.
7.7 Backlight
•Press the WiFi/UP button to adjust the brightness of the backlight in four stages.
•If you disconnect the product's power supply unit, the device is automatically operated in battery mode.
Pressing any button allows you to switch on the weather station's backlight for 8 seconds.
Warning
If used without a power supply unit, the WiFi connection is disconnected automatically.

7.8 A summary of the weather station functions
•Perpetual calendar until 2099
•Days of the week can be set by the user in 7 languages:
English, German, Italian, French, Spanish, Dutch and Danish
•Time in optional 12/24-hour format
•Phase of the moon indicator
•Air pressure
Air pressure measuring ranges:
600hPa /mb to 1100hPa/ mb
17.72inHg to 32.50inHg
450.1mmHg to 825.2mmHg
•Air pressure is alternatively specied in hPa/mb, inHg or mmHg
•Measuring range for ambient humidity: 20% rH to 95%rH
•Indoor temperature
Temperature measuring ranges: -20 ° C to 60 ° C, 4°F to 140 °F
•Temperature can be displayed in °C or °F
•Minimum / maximum display for ambient humidity and temperature
•The weather forecast works according to the change in air pressure
•Power supply unit: 5.0 V, 1.2 A
•Batteries: 2 x type AA, optional

8. Technical data
Power supply unit 5.0 V, 1.2 A
Batteries 2 x type AA, optional
Wireless outdoor sensor
Measuring ranges for outdoor
temperature -40°C (-40°F) to 70°C (158°F)
Measuring range for ambient humidity 20% rH to 95% rH
Frequency of data transmission 433 MHz
Radio range max. 60 m outdoors
Batteries 2 x type AA
Protection class IPX4

9. Care and maintenance
Note
Disconnect the device from the mains before cleaning and during prolonged periods of non-use.
Only clean this product using a lint-free, slightly damp cloth and do not use any harsh cleaners.
10. Warranty disclaimer
Hama GmbH & Co KG assumes no liability and provides no warranty for damage resulting from improper
installation/mounting, improper use of the product or from failure to observe the operating instructions and/or
safety notes.
11. Service and support
Please contact Hama Product Consulting if you have any questions about this product.
Hotline: +49 9091 502-0 (German/English)
Further support information can be found here: www.hama.com
12. Disposal instructions
Note on environmental protection:
Following the implementation of European Directives 2012/19/EU and 2006/66/EU into the national
legal systems, the following applies:
Electrical and electronic devices as well as batteries must not be disposed of with household waste.
Consumers are obliged by law to return electrical and electronic devices as well as batteries to the
designated public collection points or to the point of sale at the end of their service life. Detailed information
on this topic is dened in the national laws of the respective country. This presence of the above symbol on
the product, operating instructions or package indicates that the product is subject to these regulations. By
recycling, reusing the materials or other forms of utilising old devices/batteries, you are making an important
contribution to protecting our environment.
13. Declaration of conformity
Hama GmbH & Co KG hereby declares that the radio equipment type [00176596] is in compliance
with Directive 2014/53/EU. The full text of the EU declaration of conformity is available at the
following Internet address:
www.hama.com ->00176596 -> Downloads.
Frequency band(s) 2.4 GHz
Maximum radio-frequency power transmitted < 100mW

DBedienungsanleitung
Vielen Dank, dass Sie sich für ein Hama Produkt entschieden haben!
Nehmen Sie sich Zeit und lesen Sie die folgenden Anweisungen und Hinweise zunächst ganz durch. Bewahren
Sie diese Bedienungsanleitung anschließend an einem sicheren Ort auf, um bei Bedarf darin nachschlagen
zu können. Sollten Sie das Gerät veräußern, geben Sie diese Bedienungsanleitung an den neuen Eigentümer
weiter.
1. Erklärung von Warnsymbolen und Hinweisen
Gefahr eines elektrischen Schlages
Dieses Symbol weist auf eine Berührungsgefahr mit nicht isolierten Teilen des Produktes hin, die
möglicherweise eine gefährliche Spannung von solcher Höhe führen, dass die Gefahr eines elektrischen
Schlags besteht.
Warnung
Wird verwendet, um Sicherheitshinweise zu kennzeichnen oder um Aufmerksamkeit auf besondere Gefahren
und Risiken zu lenken.
Hinweis
Wird verwendet, um zusätzlich Informationen oder wichtige Hinweise zu kennzeichnen.
2. Sicherheitshinweise
•Das Produkt ist für den privaten, nicht-gewerblichen Haushaltsgebrauch vorgesehen.
•Verwenden Sie das Produkt ausschließlich für den dazu vorgesehenen Zweck.
•Schützen Sie das Produkt vor Schmutz, Feuchtigkeit und Überhitzung und verwenden Sie es nur in trockenen
Räumen.
•Das Produkt ist nur für den Gebrauch innerhalb von Gebäuden vorgesehen.
•Verwenden Sie den Artikel nur unter moderaten klimatischen Bedingungen.
•Dieses Produkt gehört, wie alle elektrischen Produkte, nicht in Kinderhände!
•Betreiben Sie das Produkt nicht außerhalb seiner in den technischen Daten angegebenen Leistungsgrenzen.
•Benutzen Sie das Produkt nicht in Bereichen, in denen elektronische Produkte nicht erlaubt sind.
•Verwenden Sie das Produkt nicht in einer feuchten Umgebung und vermeiden Sie Spritzwasser.
•Lassen Sie das Produkt nicht fallen und setzen Sie es keinen heftigen Erschütterungen aus.
•Nehmen Sie keine Veränderungen am Produkt vor. Dadurch verlieren Sie jegliche Gewährleistungsansprüche.
•Halten Sie Kinder unbedingt von dem Verpackungsmaterial fern, es besteht Erstickungsgefahr.
•Entsorgen Sie das Verpackungsmaterial sofort gemäß den örtlich gültigen Entsorgungsvorschriften.
•Verlegen Sie alle Kabel so, dass sie keine Stolpergefahr darstellen.
•Knicken und quetschen Sie das Kabel nicht.
•Ziehen Sie zum Entfernen des Kabels direkt am Stecker und niemals am Kabel.
•Betreiben Sie das Produkt nicht in unmittelbarer Nähe der Heizung, anderer Hitzequellen oder in direkter
Sonneneinstrahlung.
•Positionieren Sie das Produkt nicht in der Nähe von Störfeldern, Metallrahmen, Computern, Fernsehern, etc.
Elektronische Geräte sowie Fensterrahmen beeinträchtigen die Funktion des Produktes negativ.
Gefahr eines elektrischen Schlages
•Öffnen Sie das Produkt nicht und betreiben Sie es bei Beschädigungen nicht weiter.
•Verwenden Sie das Produkt nicht, wenn der
AC-Adapter, das Adapterkabel oder die Netzleitung beschädigt sind.
•Versuchen Sie nicht, das Produkt selbst zu warten oder zu reparieren. Überlassen Sie jegliche
Wartungsarbeit dem zuständigen Fachpersonal.

3. Packungsinhalt
1x Wetterstation mit Netzteil
1x Schnellstartanleitung
1x Outdoor Sensor
4. Bedienungselemente und Anzeigen
4.1 Bedienungselemente Wetterstation
Linkto App
TEMPERATURE
HUMiDITY
TEMPERATURE
HUMiDITY
PRESSURE
FORECAST
Wetterstation Vorderseite
1Wettervorhersage
2Luftdruck
3Außentemperatur
4Innentemperatur
5Luftfreuchtigkeit im Freien
6Raumluftfeuchtigkeit
7Zeit/Kalender
8Mondphase
9WiFi-LED
TEMPERATURE
HUMiDITY
TEMPERATURE
HUMiDITY
PRESSURE
FORECAST
1
9
2
3 4
5 6
7 8
1 2 3 4
5
6
7
Wetterstation Rückseite
1[MODE]-Taste
2[UP/ WiFi]-Taste
3[DOWN]-Taste
4[MEM]-Taste
5Batteriefach
6Aufstellrahmen
7Netzteilbuchse

4.2 Bedienungselemente Außensensor
Außensensor
1LCD Anzeige - Temperatur
2LCD Anzeige - Feuchtigkeit
3Signallicht
4°C/°F Taste
5TX-Taste
6Kanalauswahl
7Battieriefach
1
2
4
5
6
7
3

5. Inbetriebnahme
5.1 Batterien einlegen/wechseln
Warnung – Batterien
•Beachten Sie unbedingt die korrekte Polarität
(Beschriftung + und -) der Batterien und legen
Sie diese entsprechend ein. Bei Nichtbeachtung
besteht die Gefahr des Auslaufens oder einer
Explosion der Batterien.
•Verwenden Sie ausschließlich Akkus (oder
Batterien), die dem angegebenen Typ entsprechen.
•Reinigen Sie vor dem Einlegen der Batterien die
Batteriekontakte und die Gegenkontakte.
•Gestatten Sie Kindern nicht ohne Aufsicht das
Wechseln von Batterien.
•Mischen Sie alte und neue Batterien nicht, sowie
Batterien unterschiedlichen Typs oder Herstellers.
•Entfernen Sie Batterien aus Produkten, die längere
Zeit nicht benutzt werden (außer diese werden für
einen Notfall bereit gehalten).
•Schließen Sie die Batterien nicht kurz.
•Laden Sie Batterien nicht.
•Werfen Sie Batterien nicht ins Feuer.
•Bewahren Sie Batterien außerhalb der Reichweite
von Kindern auf.
•Batterien nie öffnen, beschädigen, verschlucken
oder in die Umwelt gelangen lassen. Sie können
giftige und umweltschädliche Schwermetalle
enthalten.
•Entfernen und entsorgen Sie verbrauchte Batterien
unverzüglich aus dem Produkt.
•Vermeiden Sie Lagerung, Laden und Benutzung
bei extremen Temperaturen und extrem niedrigem
Luftdruck (wie z.B. in großen Höhen).
•Nehmen Sie die Batterieabdeckung auf der Rückseite des Außensensors und die der Wettersation ab.
•Entnehmen und entsorgen Sie ggf. die verbrauchten Batterien. Legen Sie jeweils zwei neue Batterien vom Typ
AA in die Wetterstation und in den Außensensor ein. Achten Sie dabei auf korrekte Polarität entsprechend der
Zeichnung im Batteriefach.
•Drücken Sie im Batteriefach des Außensensors den Kanalwahlschalter, um den richtigen Kanal einzustellen.
Mit der Down-Taste auf der Wetterstation wählen Sie dann den gleichen Kanal aus, den Sie auch auf Ihrem
Outdoorsensor ausgewählt haben.
•Die Kanalverbindungsanzeige für den Außensensor links oben im Bereich der Wetterstation "Outdoor" blinkt
jetzt für ca. 3 Minuten bis die Wetterstation die Messdaten des Außensensors übernimmt.
•Schließen Sie das Batteriefach, indem Sie die Abdeckungen wieder auf der Rückseite der Wettersation und auf
der Rückseite des Sensors anbringen.
Table of contents
Languages:
Other Hama Weather Station manuals
Popular Weather Station manuals by other brands

Auriol
Auriol Z29962A operating instructions

Auriol
Auriol 4-LD3091 manual

METER
METER ATMOS 41 user manual

Davis Instruments
Davis Instruments Wireless Leaf & Soil Moisture/Temperature... installation manual

Bresser
Bresser WTW 5in1 manual

La Crosse Technology
La Crosse Technology WS-2510 operating instructions