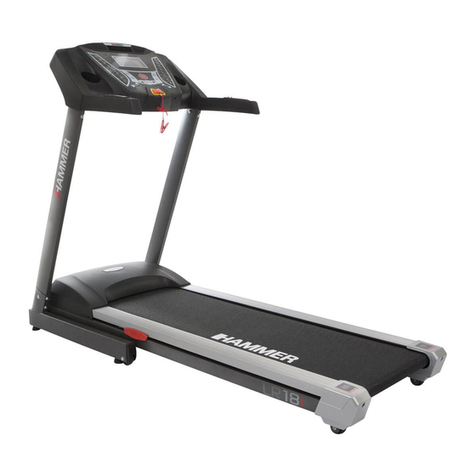
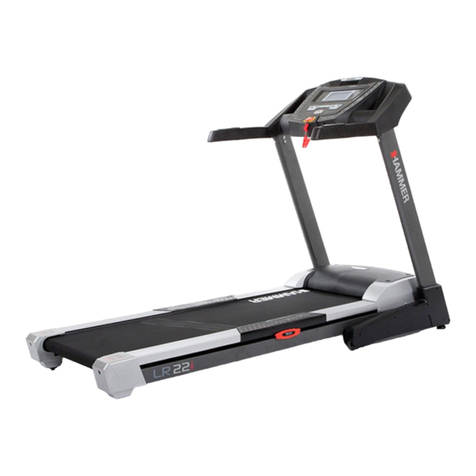
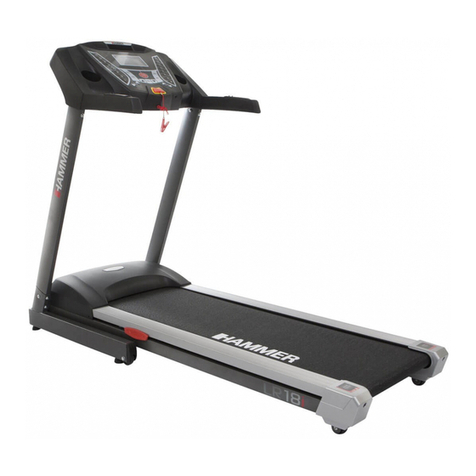
Hammer LR 18i User manual


1. Turvallisuusohjeet
2. Yleistä
2.1 Pakkaus
2.2 Kierrättäminen
3. Kasaaminen
3.1 Osat
3.2 Kasaukset vaiheet
3.3 Laitteen asennus
3.3.1 Laitteen asennus tarkemmin
3.3.2 Virran syöttö
3.3.3 Maton nostaminen
3.3.4 Maton laskeminen
3.3.5 Laitteen siirtäminen
3.3.6 Varastointi
4. Valmistelut
4.1 Virransyöttö
4.2 Turvaremmi
4.3 Maton käynnistäminen
4.4 Hätäkatkaisu
5. Ohjainyksikkö
5.1 Ohjainyksikön toiminnot
5.2 Ohjainyksikkö toiminnassa
5.2.1 Pika-aloitus
5.2.2 Esiasennettu ohjelma
5.2.3 HRC-tila
5.2.4 Käyttäjän luoma ohjelma
5.2.4.1 Ohjelman luonti
5.2.5 Rasvaprosentin mittaus
6. Ylläpito ja huolto
6.1 Ylläpito
6.2 Maton keskittäminen
6.3 Maton kiristäminen
6.4 Maton voitelu
7. Harjoitusopas
7.1 Harjoittelun tiheys
7.2 Harjoittelun intesiteetti
7.3 Sykkeeseen perustuva harjoittelu
7.4 Harjoittelun rajat
7.5 Harjoittelun kesto
8. Räjäytyskuva
9. Osalista
1. Safety instructions 02
2. General 03
2.1 Packaging 03
2.2 Disposal 03
3. Assembly 04
3.1 Check list 04
3.2 Assembly steps 05
3.3 Setting up the item 07
3.3.1 Setting up in detail 07
3.3.2 Power supply 07
3.3.3 Folding up 07
3.3.4 Unfolding of the treadmill 07
3.3.5 Moving of the treadmill 08
3.3.6 Storing 08
4. Starting procedure 08
4.1 Power supply 08
4.2 Safety-key 08
4.3 Tread on and o 08
4.4 Tread o in emergency case 08
5. Computer 09
5.1 Computer keys 09
5.2 Computer operation 10
5.2.1 Quick-Start 10
5.2.2 Program control mode 10
5.2.3 HRC-program 13
5.2.4 Customize-program 14
5.2.4.1 Activating a customize program 14
5.2.5 Bodyfat measurment 14
6. Care and Maintenance 15
6.1 Care 15
6.2 Centering the running belt 15
6.3 Tighten the belt 16
6.4 Lubricate the running belt 16
7. Training manual 17
7.1 Training frequency 17
7.2 Training intensity 17
7.3 Heartrate orientated training 17
7.4 Training control 18
7.5 Training duration 19
8. Explosion drawing 21
9. Parts list 22
Sisällysluettelo Index Sivu/Page
01

IMPORTANT!
l The treadmill is produced according to DIN EN 957-1/6
classHB.
l Max. user weight is 130kg.
l The treadmill should be used only for its intended purpose.
l Any other use of the item is prohibited and maybe danger-
ous. The importer cannot be held liable for damage or inju-
ry caused by improper use of the equipment.
l The treadmill has been produced according to the latest
safety standards.
To prevent injury and / or accident, please read and
follow these simple rules:
1. Do not allow children to play on or near the equipment.
seldnahdna,stun,swercsllatahtkcehcylralugeR.2
are tightly secured.
3. Promptly replace all defective parts and do not use the
equipment until it is repaired. Watch for any material
fatigue.
4. Avoid high temperatures, moisture and splashing water.
5. Carefully read through the operating instructions before
starting the equipment.
6. The equipment requires su cient free space in all
directions, at the rear side, min. 2m and the width like
the treadmill is having!
7. Set up the equipment on a solid and surface.
8. Do not exercise immediately before or after meals.
9. Before starting any ss training, let yourself
examined by a physician.
10. The safety level of the machine can be ensured only if you
regularly inspect parts subject to wear. These are
indicated by an * in the parts list. Levers and other
adjusting mechanisms of the equipment must not obstruct
the range of movement during training.
11. Training equipment must never be used as toys.
12. Do not step on the housing but only on the steps
provided for this purpose.
13. Do not wear loose clothing; wear suitable training
gear such as a training suit, for example.
14. Wear shoes and never exercise barefoot.
15. Make certain that other persons are not in the area of
the treadmill, because other persons may be injured by
the moving parts.
16. It is not allowed to place the item in rooms with high
humidity (bathroom) or on the balcony.
17. Please check that the item is grounded during exercise. If
the ground is not perfect, a mailfunction of the computer
can cause an electrical shock!
18. Repairs are only allowed to be done by an electrician.
19. Pay attention to enough distance between the power cable
and the treadmill to hot sources.
20. Set up the treadmill in such a way, that you are able to see
other persons, who are appraoching..
1. Safety instructions
02
TÄRKEÄÄ TIETOA LAITTEESTA!
l
l Käyttäjän maksimipaino on 130 kg.
l Laitetta tulee käyttää ainoastaan sille suunnitellussa
käyttötarkoituksessa
l Muu kuin käyttötarkoituksen mukainen käyttöon kielletty
sillä se saattaa aiheuttaa vaaratilanteen. Maahantuoja
ei ota vastuuta vahingoista, jotka ovat aiheutuneet
laitteen väärinkäytöstä.
l Laite on suunniteltu uusimpien turvallisuus-
standardien mukaisesti.
Välttääksesi loukkaantumiset ja vaaratilanteet lue ja noudata
seuraavia ohjeita:
1. Lasten ei tulisi leikkiä laitteella tai laitteen läheisyydessä
2. Tarkista säännöllisesti pulttien, muttereiden, kädensijojen
ja polkimien kiinnitys.
3. Tarvittaessa huolla ja vaihda vaurioituneet osat.
Tarkista mahdolliset kulumat osissa.
4. Vältä korkeita lämpötiloja ja kosteutta
5. Lue käyttöohjeet tarkasti ennen laitteen käyttöönottoa
6. Laite vaatii ympärilleen riittävästi vapaata tilaa
(1,5m suuntaansa).
7. Sijoita laite tukevalle ja tasaiselle alustalle.
8. Älä harjoittele heti ruokailun jälkeen
9. Tarkastuta terveydentilasi lääkärissä ennen harjoittelua
10. Laitteen turvallinen käyttö vaatii kuluvien osien kunnon
tarkastelua käytön mukaan. Nämä osat on merkitty
osaluettelossa *-symbolilla. Säätömekanismien
ei tulisi rajoittaa liikkuvuutta harjoituksen aikana.
11. Laitetta ei koskaan tule käyttää leikkikaluna.
12. Älä astu kotelon päälle, vaan ainoastaan astumista varten
tarkoitetuille alustoille.
13. Harjoittellessa pukeudu tarkoituksenmukaisesti.
14. Käytä harjoitellessa aina kenkiä.
15. Pidä huoli, että muut henkilöt eivät ole laitteen läheisyydessä
harjoitellessasi.
16. Älä säilytä laitetta tiloissa, jossa on korkea kosteusarvo,
esimerkiksi kylpyhuoneessa, parvekkeella tai ulkotiloissa.
1. Turvallisuusohjeet
Laite on valmistettu DIN EN 957-1/6 class HC
säädöksen mukaisesti.
17. Tarkista että laite on maadoitettu. Mikäli laite on
väärällä alustalla, oikosulku saattaa aiheuttaa sähköiskun.
18. Korjauksia laitteelle saa tehdä ainoastaan sähköalan
ammattilainen.
19. Kiinnitä huomiota että laitteen tai virtajohdon lähellä
ei ole lämmönlähteitä.
20. Aseta laite niin, että näet lähestyvät ihmiset.


Laitteen turvalliseen asentamiseen ja kokoamiseen
tarvitaan kaksi henkilöä. Älä koskaan laita sormiasi
rungon ja moottorin suojan väliin!
3.1 Osat
In order to make assembly of the treadmill as easy as possib -
le for you, we have preassembled the most important parts.
Before you assemble the equipment, please read these instruc -
tions carefully and then continue step by step as described.
Contents of packaging
l Unpack all individual parts and place them on the oor.
l Make certain that you have adequate room for movement
(at least 2m) on all sides during assembly.
l Before assembling, please make sure, that the treadmill is
having room temperature.
To have a secure assembly, the treadmill has
to be assembled by two persons. Put your n -
gers never between the mainframe and the
motor cover!
3.1 Check list
3. Assembly
04
(D2) Screwdriver
(S=5)
1pc
(D1) Wrench
1pc
(A1) M8X40 Bolt
2pcs (C1) 8Flat washer
16pcs
φ
(A2) M8X16 Bolt
14pcs
(D3)
1pc
Wrench
(S=6) (D4)
1pc
Wrench
(S=4) (D5) Lubricant bottle
1pc
(C8) 8Spring washer
6pcs
φ
Jotta laitteen kasaaminen olisi mahdollisimman helppoa
olemme esiasentaneet laitteen tärkeimmät osat.
Ennen laitteen käyttöönottoa, lue huolellisesti käyttöohjeet
ja etene kasaamisessa ohjeiden mukaisesti.
Pakkauksen sisältö
l Pura pakkaus ja aseta irto-osat helposti saataville
l Aseta laitteen runko lattiaa suojaavalle alustalle,
koska kasaamaton laite saattaa vahingoittaa lattiaa
l Varmista, että ympärillä on riittävästi tilaa
laitteen kasaamista varten. (2 m suuntaansa).
3. Kasaaminen
l Tarkista, että laite on huoneenlämpöinen.


06
Vaihe / Step 3
4
A2
C1
5
10
49
C8
Huomio: älä vahingoita kaapeleita asennuksen aikana Attention: do not damage the cables during assembly.

07
3.3 Laitteen asennus
lÄlä käytä laitetta ulkotiloissa.
lÄlä sijoita laitetta vesilähteiden äärelle tai
huoneisiin, jossa on korkea kosteusarvo.
lPidä huoli ettei virtajohto ole kulkuväylällä.
lMikäli laite on sijoitettu lattiamaton päälle, tarkista
että laitteen matto mahtuu pyörimään. Tarvittaessa
käytä suoja-alustaa.
lPidä huoli, että laitteen takana on 2x1m turva-alue.
lOn normaalia, että pitkän harjoituksen jälkeen saatat löytää
muovipölyä tai jälkiä. Halutessai voit laittaa suoja-alustan
suojaamaan lattiaa epäpuhtauksista.
3.3.1 Laitteen asennus tarkemmin
Laite tulee kasata tasaiselle alustalle.
3.3.2 Virtajohto
Kiinnitä huomiota, että liitä virtajohtoa jakorasiaan,
johon on liitetty muita elektronisia laitteita.
3.3.3 Maton nostaminen
Maton nostaminen on helppoa, jousimekanismin vuoksi.
Tarkista, että matto on vaakatasossa (incline 0%) ennen
kuin nostat maton. Nosta mattoa reunoista, kunnes
lukitusäänen ja matto on lukittu.
3.3.4 Maton laskeminen
Laskeaksesi maton, avaa lukitusmekanismi ja saata matto
käsilläsi lattia tasoon. Laitteen jousimekanismi
avustaa sinua, mutta laite tulisi silti saattaa alas.
3.3 Setting up the item
lDon´t use it outside.
lDon´t set up the item very close to water sources or in a
room with high humidity.
lMake sure, that the power cord doesn´t lay, where you are
walking
lIf the treadmill is placed on a carpet, please check, that
there is enough space between the carpet and the running
belt. If not, please use a protection mat.
lPay attention to the safety area at the rear side of the
treadmill of 2x1m.
lYou can nd rubber abrasion during longer exercise. It is not
a defect, it is a normal scoring. To avoid any impurity, you
can put a protection mat under the running area.
3.3.1 Setting up in detail
The ground has to be even in the area, where you will set
up the item.
3.3.2 Power supply
Pay attention, that the treadmill will not be plugged in a multi
socket, if there are already TV and other entertainment
items plugged in.
3.3.3 Folding up
The folding up goes easily, because of the assistance of the
compression spring system. Make sure, that the running
surface is at (incline 0%) before you fold up the item. Move
the running area up, by holding the frame at the rear side,
till you can hear a „Clack“ and the position of the running
area is secured.
3.3.4 Unfolding of the treadmill
To unfold the treadmill, press the unlock system with your
foot at the folding mechanismus and guide the running
area downwards. Pay attention, that the compression
spring system will support you, but please don´t unhand
the running deck!

08
3.3.5 Laitteen siirtäminen
Siirtääksesi juoksumaton, seuraa näitä ohjeita:
- Kallistuskulman (incline) tulee olla 0%.
- Sammuta laite.
- Irroita virtajohto pistorasiasta.
- Nosta matto ylös.
- Kallista laitetta siirtopyörille ja siirrä laite
haluttuun paikkaan.
3.3.6 Varastointi
Huomioitavaa:
- Laitteen tulee olla pois päältä.
- Irroita virtajohto.
- Irroita turvakytkin ja laita se lasten ulottumattomiin.
4.1 Virransyöttö
Kytke laite päälle katkaisimesta.
4.2 Turvakytkin.
Tarkista että turvakytkin on paikoillaan, muussa tapauksessa
laite ei käynnist. Harjoittelu ilman turvakytkimen kiinnistä
itseensä on kiellettyä, koska tässä tapauksessa laite
ei sammu kaatumistilanteessa. Sammuttaaksesi laitteen
turvallisesti, käytä START-STOP painiketta. Mikäli
turvakytkin irtoaa ja laite ei ole vaakatasossa, täytyy
nostokulma (incline) nollata. Nosto kulma täytyy olla
vaakatasossa kun painat START-STOP -painiketta.
4.3 Laitteelle nouseminen ja laskeutuminen
Käytä käsitukia noustessasi laitteelle ja pois laitteesta.
Juostessasi rintamasuunta tulee olla ohjainyksikköä
päin. Jos haluat keskeyttää harjoituksen, paina
START-STOP-nappia ja odota kunnes laite
on kokonaan pysähtynyt.
4.4 Laskeutuminen hätätilanteessa
Hätätapauksessa seuraa näitä ohjeita:
- Irroita hätäkatkaisin
- Ota kiinni molemmista käsikahvoista
- Nouse laitteen sivuille, maton ulkopuolelle kunnes
laite on kokonaan pysähtynyt.
Paina STOP painiketta.
3.3.5 Moving of the treadmill
To move the treadmill to another place, follow up the
following instruction, please:
- Incline angle has to be 0%.
- Switch o the item.
- Unplug the power cord of the socket.
- Fold up the item.
- Cant the treadmill to your side, till your can roll it
easily on the integrated rollers to the new place.
3.3.6 Storing
Pay attention for storing.
- Switch o the item.
- Unplug the main cord.
- Remove the emergency key and put it at an
unapproachable location for kids.
4.1 Power supply
Switch on the power switch.
4.2 Safety-key
Check if the safety-key is placed. If the safety-key is not
placed correctly, the treadmill cannot be started. An
exercise without xing the cord is not allowed, because the
treadmill will not stop, if you fall down. To stop the treadmill
safely, use the START-STOP--button, please. If you pull the
safety key and the incline of the tradmill is not 0%, you have
to reset the incline
ehtgnisserpyb,yekycnegremeehtnognittupretfa,orezot
START-STOP-button. If you didn´t set the incline to 0%, the
treadmill cannot be started.
4.3 Tread on and o the treadmill
Please use the handrails for treading on and o the
treadmill. During your exercise, please look in the direction
of the computer. If you would like to stop the exercise, press
the START-STOP--button and wait till the treadmill come to
a complete stop.
4.4 Tread o in emergency case
In an emergency case follow up the following procedure:
- Pull out the emergency key
- Grab both handles
- Jump onto the side rails and wait till the running belt
come to a complete stop.
- Press the STOP button.
4. Valmistelut 4. Starting procedure


10
5.2 Ohjainyksikkö toiminnassa
5.2.1 Pika-aloitus
Käynnistä laite.
Aseta turvakytkin ohjainyksikköön. Laite piippaa ja
PULSE/CAL näyttöön ilmesyy 0. SPEED/DISTANCE näyttöön
ilmestyy 0. Ja sykesymboli alkaa vilkkua.
Paina START/STOP käynnistääksei laitteen. Laite
käynnistyy nopeudella 1.0km/h ja incile 0%.
Harjoituksen aikana paina SPEED nostaaksesi
tai laskeaksi nopeutta. Paina INCLINE nostaaksesi tai
laskeaksesi kallistuskulmaa. Voit myös tehdä tämän
pikanäppäimillä.
Harjoituksen aikana paina START-STOP mikäli haluat
pysäyttää maton. Tässä tapauksessa maton kaikki arvot
lopettavat laskemisen. Paina START-STOP ja harjotuksesi
alkaa nollasta.
5.2.2 Esiasennettu ohjelma
Paina PROGRAM-painiketta aloitusruudussa ja
paina nuolinäppäimiä valitaksesi ohjelman P1-P19.
Vahvistaaksesi valinnan, paina ENTER.
Aika näytetään ruudusta. Pystyt muuttamaan näkymään
painamalla INCLINE tai SPEED -painikkeita.
Paina ENTER ja START-STOP aloittaaksesi harjoituksen.
P1: Perus 5000m ohjelma. Laite pysähtyy kun olet saavuttanut
5000m.
Varoitus: Laitteen antama sykearvo ei välttämättä oikea.
Liiallinen harjoittelu voi johtaa loukkaantumiseen tai
hengen vaarantumiseen. Mikäli tunnet itsesi huonovointiseksi,
päätä harjoittelu välittömästi.
5.2 Computer operation
5.2.1 Quick Start
Turn on the treadmill.
Put the safety key in the recess of the console. The beeper
will sound and the PULSE/CAL window will display 0, the
SPEED/DISTANCE window will display 0 and in the big windon
heartsymbol is blinking.
Press START_STOP to start the treadmill and it will start at
SPEED = 1.0 km/h, INCLINE = 0%.
During work out, press SPEED to increase or decrease the
speed, or press INCLINE to increase or decrease the incline. You
can also do it with the Quick-buttons.
During work out, press START-STOP once, the treadmill will stop
running. Time window will display "STOP". At this time, all the
values on the computer will stop counting. Press START-STOP
again, and your exercise will start from zero.
5.2.2 Program control mode
Press the PROGRAM-button in the starting position and use
the Program-arrow buttons to select your program P1-P19.
To conrm your choice, press the ENTER-button.
A preset time will be shown in the dispaly, which can be
changed by pressing the INCLINE or the SPEED -buttons.
If everythingnis nalized, press the ENTER-button and nally the
START-STOP button to start your exercise.
P1: Standard 5000m Programm. The treadmill will stop, after
your have nished the 5000m. This program is mainly for
jogging.
WARNING: Systems with heartrate control can be
incorrect. Too much exercise could injure your body or
can cause dead. If you feel light theaded or weak, stop
your exercise immediately!


13
5.2.3 HRC-tila
Laitteessa on neljä HRC-ohjelmaa.
HRC1: 65% maksimisykkkeestä
HRC2. 75% maksimisykkeestä
HRC3: 90% maksimisykkeestä
HRC4: Voit asettaa halutun arvon.
Valitse P19 aiempien ohjeiden mukaisesti. Näyttöön ilmestyy
HRC.
Paina ENTER vahvistaaksesi valinnan. Nyt voit säätää ikäsi
SPEED tai INCLINE painikkeilla. Paina ENTER vahvistaaksesi
valintasi.
Painammalla SPEED tai INCLINE PAINIKKEITA voit säätää
halutessasi harjoituksen aikaa (10-99min). Voit jättää tämän
väliin painamalla ENTER.
Painamalla SPEED ja INCLINE voit valita yhden neljästä
HRC-ohjelmasta. Pääikkunassa esitetään
prosenttiyksikkö tai IND. Paina ENTER vahvistaaksei valintasi.
Mikäli valitset HRC 1-3, voit tarkistaa arvoja
painamalla ENTER tai aloittaa ohjelman painamalla START.
Mikäli valitset HRC4 valinnan, laite pyytää sinua syöttämään
maksimisykkeen harjoitusta varten (50-220) painamalla
SPEED tai INCLINE. Paina ENTER tarkistaaksesi arvoja.
Tai paina START aloittaaksesi ohjelman.
Ensimmäisellä minuutilla voit säätää nopeutta itse, mutta
oletusarvo on 3km/h.
Harjoituksen aikana ohjainyksikkö säätelee
nopeutta ja kallistuskulmaa.
Huomio: Mikäli laite menettää yhteyden
sykkeen mittaukseen matto hidastuu tasaisesti.
5.2.3 HRC programs
There are four HRC-programs
HRC1: 65% of the max. heartrate
HRC2. 75% of the max. heartrate
HRC3: 90% of the max. heartrate
HRC4: You can set your personal max heartrate.
Select P19 like above mentioned. the display shows HRC.
Press ENTER to conrm the HRC program. Now you are able to
set your age by pressing the SPEED or INCLINE buttons. Press
ENTER to conrm your setting.
By pressing the SPEED or INCLINE-buttons, you can set the
exercise time (10-99min), if wanted. If not, press ENTER, and
the time will count up.
By pressing the SPEED or INCLINE-buttons, you can select one
of the four HRC programs. In the big window, the percentage
or IND will be shown. Press ENTER to conrm your selection. If
you choose HRC1-3, you can revise the already set values by
pressing ENTER or start your exercise by pressing START.
Have you choosen HRC4, for individual target setting, than you
need to set your max exercise heartrate limit (50-220bpm) by
pressing the SPEED or INCLINE-buttons. Press ENTER to revise
your already set datas or press START to start your
exercise.
In the rst minute, you can adjust the speed by yourself, but the
preset speed is 3km/h. The speed, which is set at the end of
this rst minute, is the starting speed for the HRC program.
During your exercise, the computer is controlling the speed
and incline, according to your heartrate.
Attention: In the case, that the heartrate signal is lost, the
treadmill will reduce the speed step by step!

14
5.2.4 Käyttäjän luoma ohjelma
Käynnistä laite.
Paina USER-SET.
Paina PROGRAM-nuolinäppäimiä valitaksesi ohjelman.
Paina ENTER ja valitse haluamasi aika.
Oletus aika 16min on oletuksena.
Kun olet valinnut harjoituksesi paina ENTER
ja LCD näyttö vilkkuu.
Painamalla INCLINE-painikkeita, kallistuskulmaa voi säätää.
Painamalla SPEED-painikkeita, nopeutta voi säätää.
Paina Enter siirtyäksesi eteenpäin.
Vahvistettuasi valinnat painamalla ENTER, laite piippaa kahdesti.
Tallentaaksesi proilin, paina USER-SET-painiketta uudelleen.
Kaikki tiedot näytetään näytössä.
Jos haluat siirtyä asetuksista takaisin harjoitukseen, paina
START-STOP -painiketta.
5.2.4.1 Ohjelman luonti
Paina CUSTOM, näyttöön ilmestyy Program 1.Paina CUSTOM
toistuvasti, jolloin näyttöön ilmestii 2-5. Paina CUSTOM
edetäksesi.
Mikäli ohjelma on on luotu näyttöön ilmestyy ohjelman
tiedot.
Paina START/STOP aloittaaksesi ohjelman.
5.2.5 Rasvaprosentin mittaus
Ensimmäisellä kerralla laitteessa on esitettynä perusarvot,
jatkossa syötetyt arvot.
Aktivoi laite.
Paina BODYFAT-painiketta.
Valitse sukupuolesi Program-painikkeilla.
Paina ENTER-vahvistaaksesi valinnat.
5.2.4 Customize Program
Turn on the treadmill.
Press USER-SET
Press the Program arrow-buttons to select a program.
Press ENTER and select the time which you want to use for
your exercise. a preset time of 16 minutes is already preset.
If you have selected your exercise time press ENTER and the
matrix of the rst section in the LCD display is blinking.
By pressing the INCLINE -buttons, the incline can be changed
or by pressing the SPEED -buttons the speed for each
section can be adjusted.. If you have set the data, press the
ENTER-button and the next section will be activated, up to
section 16.
If you conrm the last section by pressing the ENTER-button,
the computer will beep twice.
To save the prole, press the USER-SET- button again. All set
data will be shown in the display.
If you are in the setting mode and want to go back into the
exercise mode, press the START-STOP-button.
5.2.4.1 Activating a customize program
Press “CUSTOM” under ready status, the LCD will show
Program 1. Press “CUSTOM” continuously, the LCD will show
2-5. If press “CUSTOM” again, it will go back to ready status.
If the custom program is set, the LCD will show the data of the
program.
Press “START/STOP” to operate program.
5.2.5 Bodyfat measurment
For the rst measurment, there are basic values set. If you mae
a remeasurment, the last set datas will be used.
Activate the treadmill.
Press the BODYFAT-button.
Select by pressing the Program-buttons your gender. If you
select it, press ENTER and the next section will be activated.
Select by pressing the Program-buttons your bodyweight. If you
select it, press ENTER and the next section will be activated.
Select by pressing the Program-buttons your bodyheight. If you
select it, press ENTER and the next section will be activated.
Valitse painosi Program-painikkeilla.
Paina ENTER-vahvistaaksesi valinnat.
Valitse pituutesi Program-painikkeilla.
Paina ENTER-vahvistaaksesi valinnat.

15
6.1 Ylläpito
l Puhdistaaksei juoksumaton, käytä pölynimuria tai -
kosteaa rättiä. Älä käytä liuottimia tai puhdistusaineita.
l Pidä huoli, ettei kosteus pääse laitteen sisälle.
l Osat jotka saattavat altistua hikoilulle tulee pyyhkiä
ainoastaan kostealla rätillä.
6.2 Maton keskittäminen
Harjoituksen aikana toinen jalka saattaa astua matolle
voimakkaammin kuin toinen ja matto siirtyy keskeltä.
Normaalisti matto keskittyy automaattisesti,
pitkän harjoituksen aikana matto saattaa siirtyä.
Tässä tapauksessa seuraa näitä ohjeita:
- Älä käytä löysiä vaatteita huoltotyön aikana
jotka saattavat jäädä laitteen väliin.
- Laitteen taka-osassa on kaksi kuusiokoloruuvia
maton keskittämistä varten.
- Käännä kuusiokoloruuvia maksimissa 1/4 matka
per vaihe.
- Venytä toista puolta ja vapauta toinen puoli
- Maton nopeus tulee olla 6km/h, mutta pidä huoli
ettei kukaan juokse matolla.
Kun olet päättänyt keskittämisen, kävele matolla
noin viisi minuuttia 6km/h vauhdilla. Mikäli matto
ei ole keskellä, keskitä se uudelleen. Älä pakota
mattoa siirtäessäsi sitä, sillä se saattaa lyhentää
maton käyttöikää.
Mikäli reuna vasemmalla puolella on liian suuri
- Käännä vasenta ruuvia 1/4 myötäpäivään.
- Käännä oikeaa ruuvia1/4 vastapäivään.
6.1 Care
l For cleaning the running belt use a vacuum cleaner. If
the belt is really dirty, please use a wet cloth. Do not use
any cleanser.
l When cleaning, use only a moist cloth and avoid harsh
cleaning agents. Ensure that no moisture comes
into the computer.
l Components that come into contact with perspiration,
need cleaning only with a damp cloth.
6.2 Centering the running belt
During the exercise, one foot is pushing the running belt
stronger than the other. According to that, the belt will be
moved out of the centre. Normlly the belt will be centred
automatically, but during longer exercise, it can be, that
the belt is o the centre.In this case, please follow up
the following instruction. At the rear end of the running
deck, there are 2pcs of allen screws, which will be used
for centering the belt. Don´t use any loose clothes during
centering.
- Please turn the allen screw not more than ¼ turn for
each step.
- Stretch one side and release the other side.
- the speed of the belt has to be 6km/h, but make
sure, that nobody is running on the belt.
If you nish the centering, walk on the treadmill for about 5
minutes, with the speed of 6km/h. If the running belt is still
not in centre, please centre the belt again. Pay attention,
that you don´t force the belt too much, a shorter life will
be caused.
If the gap on the left side is too big, please
- turn the left screw a ¼ turn clockwise (tighten it)
- turn the right screw a ¼ turn anticlockwise (loose it)
If the gap on the right side is too big, please
- turn the left screw a ¼ turn anticlockwise (loose it)
- turn the right screw a ¼ turn clockwise (tighten it)
6. Ylläpito ja huolto 6. Care and Maintenance
Select by pressing the Program-buttons your age. If you select
it, press ENTER and the bodyfat measurment will start.
If the measurment is nished, the bodyfat value or „--------“ for a
failed mesurement will be shown in the display.
For the measurement both palms need to be placed
on the handpulsesensors!
Valitse ikäsi Program-painikkeilla.
Paina ENTER-vahvistaaksesi valinnat ja
rasvaprosentin mittaus alkaa.
Mittauksen jälkeen arvo ilmestyy näyttöön. Mikäli
mittaus epäonnistuu --- --- ilmestyy näyttöön.
Mittauksen aikana molemmat kädet tulee asettaa
käsipulssisensoreille.
Mikäli reuna oikealla puolella on liian suuri
- Käännä vasenta ruuvia 1/4 vastapäivään.
- Käännä oikeaa ruuvia1/4 myötäpäivään.


7. Training manual
-
-
-
-
Training with the treadmill is an ideal movement training for
strengthening important muscle groups and the cardio-circu-
latory system.
General notes for Training
l Never train immediately after a meal.
l If possible, orientate training to pulse rate.
l Do muscle warm-up before starting training by loose-
ning
or stretching exercises.
l When nishing training, please
reduce speed. Never abruptly end training.
7.1 Training frequency
To improve physical tness and to enhance condition
over the long term, we recommend training at least
three times a week. This is the average training frequen -
cy for an adult in order to obtain long-term condition
success or high fat burning. As your tness level incre -
ases, you can also train daily. It is particularly important
to train at regular intervals.
7.2 Training intensity
Carefully structure your training. Training intensity should
be increased gradually, so that no fatigue phenomena of
the musculature or the locomotion system occurs.
7.3 Heart rate orientated training
For your personal pulse zone it is recommended that
an aerobic training range will be chosen. Performance
increases in the endurance range are principal -
ly achieved by long training units in the aerobic range.
Find this zone in the target pulse diagram or orientate yourself on
the pulse programs. You should complete 80% of your training
time in this aerobic range (up to 75% of your maximum pulse).
Inthe remaining 20%of the time,you can incorporateloadpeaks,
inordertoshiftyouraerobicthresholdupwards.Withtheresulting
trainingsuccessyoucanlater producehigherperformanceatthe
same pulse; this means an improvement in your physical shape.
If you already have some experience in pulse-controlled training,
you can match your desired pulse zone to your special training
plan or tness status.
17
7. Harjoiteopas
Laitteella harjoittelu mahdollistaa kokonaisvaltaisen
kunnon kohottamisen ja tärkeiden lihasryhmien
vahvistamisen.
Yleisiä huomioita harjoittelusta.
l Älä harjoittele heti ruokailun jälkeen
l Jos mahdollista, mukauta harjoitus pulssin mukaan
l Tee veryttelyä/venyttelyä ennen harjoituksen
aloittamista.
l Lopettaessasi harjoituksen vähennä vauhtia
hiljalleen. Älä koskaan lopeta harjoitetta
äkillisesti.
l Venyttele harjoituksen jälkeen.
7.1 Harjoittelun tiheys
Kohottaaksesi fyysistä kuntoasi suosittelemme harjoittelua
vähintään kolme kertaa viikossa. Tämä on keskimääräinen
harjoitustiheys aikuselle, jolla saavutetaan tuloksia kunnon-
kohotuksessa tai rasvanpoltossa.
7.2 Harjoittelun intesiteetti
Valmistele harjoituksesi huolellisesti. Aloita harjoittelu
rauhallisesti, jotta vältyt loukkaantumisilta ja sopeudut
harjoitteluun.
RPM
Kestävyysharjoittelun kannalta on suositeltua
valita pienempi vastus ja harjoitella suuremmalla
kierrosmäärällä. Varmista, että RPM on yli 80, mutta ei yli 100..
7.3Sykkeeseen pohjautuva harjoittelu
Löytääksesi henkilökohtaisen sykealueen suosittelemme,
että harjoittelet aerobisella sykealueella.
Apunasi voit käyttää ohjekirjan sykediagramia tai
laitteen tarjoamia sykkeeseen pohjautuvia harjoitteita.
Suosittelemme että 80% harjoitteesta
tehtäisiin aerobisella alueella. Voit mukauttaa harjoitteita
kuntotasosi kasvaessa ja saavuttaa parempia tuloksia
samalla syketasolla. Mikäli sinulla on aiempaa kokemusta
sykkeeseen perustuvasta harjoittelusta, voit käyttää sitä
apunasi suunnitellessasi harjoitusta.

-
-
-
Note:
Because there are persons who have „high“ and „low“ pulses,
the individual optimum pulse zones (aerobic zone, anaerobic
zone) may dier from those of the general public (target pulse
diagram).
In these cases, training must be congured according to indi-
vidual experience. If beginners are confronted with this pheno-
menon, it is important that a physician will be consulted before
starting training, in order to check health capacity for training.
7.4 Training control
Both medically and in terms of training physiology, pulse-con-
trolled training makes most sense and is orientated on the
individual maximum pulse.
This rule applies both to beginners, ambitious recreational ath-
letes and to pros. Depending on the goal of training and perfor-
mance status, training is done at a specic intensity of individual
maximum pulse (expressed in percentage points).
In order to eectively congure cardio circulatory training
according to sport-medical aspects, we recommend a training
pulse rate of 70% - 85% of maximum pulse. Please refer to the
following target pulse diagram.
Measure your pulse rate at the following points in time:
1. Before training = resting pulse
2. 10 minutes after starting training = training / working pulse
3. One minute after training = recovery pulse
l Duringtherstweeks,it isrecommendedthattrainingwill
be done at a pulse rate at the lower limit of the training
pulse zone (approximately 70 %) or lower.
l During the next 2 - 4 months, intensify training stepwise
until you reach the upper end of the training pulse zone
(approximately 85 %), but without overexerting yourself.
l If you are in good training condition, disperse easier
units in the lower aerobic range here and there in the
training program so that you regenerate sucient-
ly. „Good“ training always means training intelligently,
which includes regeneration at the right time. Otherwise
overtraining results and your form degenerates.
l Every loading training unit in the upper pulse range of
individual performance should always be followed in
subsequent training by a regenerative training unit in the
lower pulse range (up to 75 % of the maximum pulse).
18
Huomautus:
Yksilöllisten erojen vuoksi sykealueet voivat vaihdella.
Tämän vuoksi suosittelemme, että määrittelet harjoittelun
myös oman kokemuksesi mukaisesti.
7.4 Harjoittelun rajat
Terveyden, hyvinvoinnin ja tehokkaan harjoittelun kannalta
suosittelemme harjoittelun mukauttamista sykkeen mukaan.
Suosittelemme pulssin pitämistä 70% - 85% tasolla
maksimisykkeestä.
Mittaa sykkeesi harjoituksen seuraavissa vaiheissa.
1. Ennen harjoitusta
2.10minuuttia harjoituksen aloittamisesta
3. Minuutti harjoituksen lopettamisen jälkeen
l Ensimmäisten harjoitteluviikkojen aikana
on suositeltavaa rajoittaa harjoittelun sykeraja
70% tasolle maksimisykkeestä.
l Seuraavien 2-4 kuukauden aikana, voit tehostaa
harjoittelua, kunnes saavutat noin 85% tason
maksimisykkeestä, kuitenkaan rasittamatta liikaa
itseäsi.
l Jokaista harjoitetta ylemmällä pulssialueella tulisi
seurata palauttava harjoite alemmalla pulssi-
alueella (korkeintaan 75% tasolla maksimi-
sykkeestä).
Tämä sääntö pätee niin aloittelijoihin, kuin myös
kokeneimpiin kuntoilijoihin.

When condition has improved, higher intensity of training is
required for the pulse rate to reach the „training zone“; that
means, the organism is capable of higher performance.
Calculation of the training / working pulse:
220 pulse beats per minute minus age = personal, maximum
heart rate (100 %).
Training pulse
Lower limit: (220 - age) x 0.70
Upper limit: (220 - age) x 0.85
7.5 Training duration
Every training unit should ideally consist of a warm-up phase,
a training phase, and a cool-down phase in order to prevent
injuries.
Warm-up:
5 to 10 minutes of slow running.
Training:
15 to 40 minutes of intensive or not overtaxing training at the
intensity mentioned above.
Cool-down:
5 to 10 minutes of slow running.
Stop training immediately if you feel unwell or if any signs of
overexertion occur.
Alterations of metabolic activity during training:
l In the rst 10 minutes of endurance performance our
bodies consume the sugars stored in our muscles
Glycogen.
l After about 10 minutes fat is burned in addition.
l After 30 - 40 minutes fat metabolism is activated, then
the body‘s fat is the main source of energy.
19
Kun kuntosi kohoaa, suosittelemme myös tehostamaan
harjoittelua, jotta saavutat oikean sykealueen. Voit myös
tuloksen avulla.
Harjoittelusykkeen laskeminen :
220 syketasosta vähennetään oma ikä, jolloin saadaan
arvio omasta maksimisykkeestä (100%).
Harjoittelusyke
Alaraja: (220-ikä)x 0,70
Yläraja: (220-ikä) x0,85
7.5 Harjoittelun kesto
Jokaisen harjoituskerran tulisi sisältää lämmittelyvaihe,
harjoitteluvaihe, sekä palauttava vaihe loukkaantumisten
välttämiseksi.
Lämmittely:
5-10 minuuttia matalatempoista harjoittelua
Harjoittelu:
15-40 minuuttia intensiivistä harjoittelua yllä mainittujen
syketasojen mukaisesti.
Palauttava:
5-10 minuuttia matalatempoista harjoittelua. Lopeta harjoittelu
välittömästi mikäli tunnet itsesi huonovointiseksi.
Aineenvaihduntaharjoittelun aikana:
l Ensimmäisten 10 minuutin aikana harjoittelusta
kehomme kuluttaa lihaksiin varastoitunutta sokeria
l Noin 10 minuuttin harjoittelun jälkeen rasva alkaa
palaa.
l 30-40 minuutin harjoittelun jälkeen rasvanpoltto on
kehon pääenergian lähde.
Other manuals for LR 18i
2
Table of contents
Other Hammer Treadmill manuals

Hammer
Hammer Walkrunner RPE User manual

Hammer
Hammer Q.VADIS 3.0 User manual

Hammer
Hammer Q.VADIS 5.0 User manual

Hammer
Hammer Walkrunner RPX User manual

Hammer
Hammer RACE RUNNER 200M User manual

Hammer
Hammer Laufband LR 18i User manual

Hammer
Hammer Cleverfold TM7 User manual

Hammer
Hammer LR 16i User manual

Hammer
Hammer WALKRUNNER CSR User manual

Hammer
Hammer LR 22i User manual