manuals.online logo
Brands
  1. Home
  2. •
  3. Brands
  4. •
  5. HASE
  6. •
  7. Indoor Fireplace
  8. •
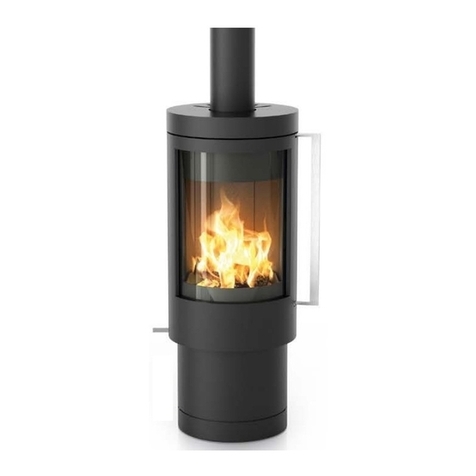
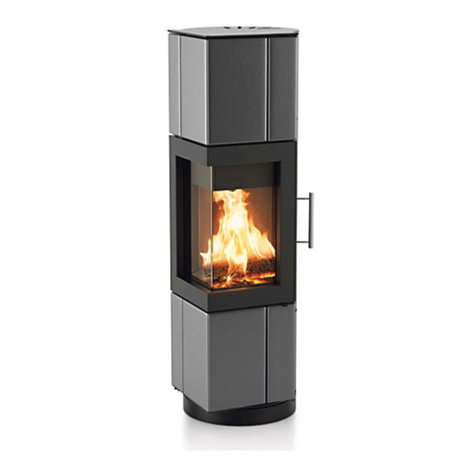
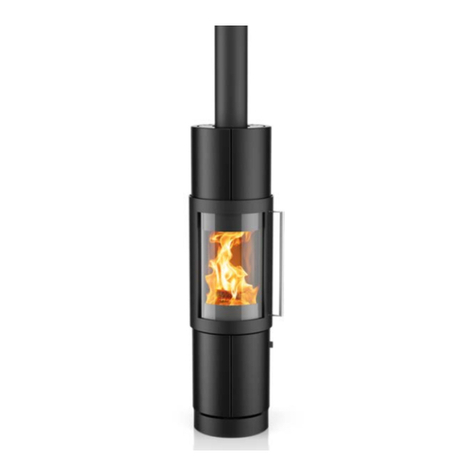
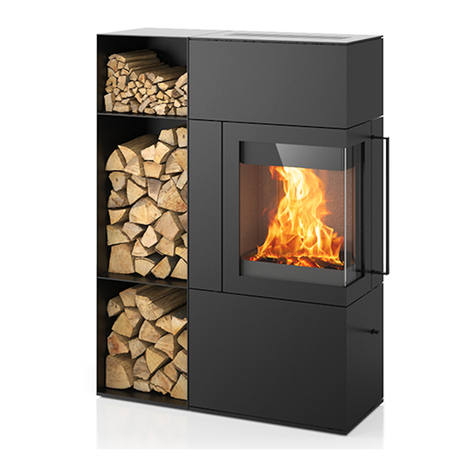
  9. HASE COMO User manual

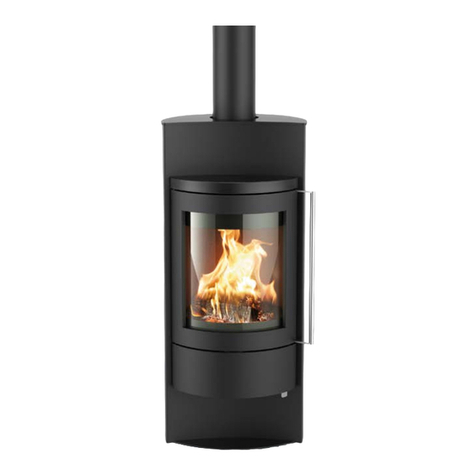
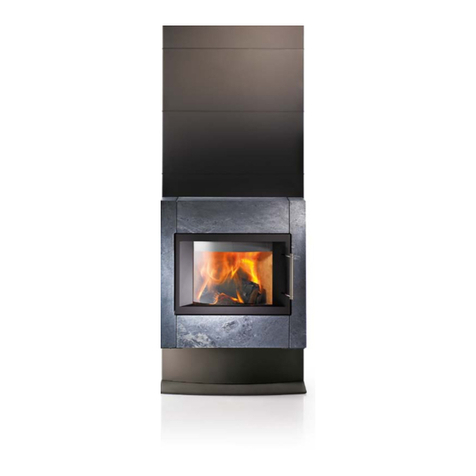
HASE COMO User manual

COMO
MONTAGE- UND WARTUNGSANLEITUNG
Notice de montage et d’entretien
Istruzioni di montaggio e manutenzione
Installation and Maintenance Instructions
Montage- en onderhoudshandleiding
Návod na montáž a údržbu krbových kamen
Instrukcja montażu i konserwacji
Návod na montáž a údržbu krbovej piecky
2
Inhalt
1. Stückliste 5
2. Montagen der Justierfüße 6
3. Anschluss HASE Luftsystem unten (optional) 6
4. Anschluss HASE Luftsystem hinten (optional) 9
5. Specksteinmontage 10
6. Keramikmontage 14
7. Ausbau der Thermosteine (Einbau in umgekehrter Reihenfolge) 19
8. Wechsel der Türdichtung 20
9. Reinigung 21
10. Nachfetten 23
11. Technisches Datenblatt 26
Inhoud
1. Stuklijst 5
2. Montage van de justeervoetjes 6
3. HASE ventilatiesysteem beneden (optioneel) 6
4. HASE ventilatiesysteem achteraan (optioneel) 9
5. Montage van de speksteen 10
6. Montage van de keramische tegels 14
7. Demonteren van de thermo stenen (montage in omgekeerde volgorde) 19
8. Vervangen van de deurdichting 20
9. Reiniging 21
10. Smeren 23
11. Technische gegevens 26
Sommaire
1. Liste des pièces 5
2. Montage des pieds de réglage 6
3. Système d‘air HASE - Raccordement en bas (en option) 6
4. Système d‘air HASE - Raccordement arriere (en option) 9
5. Montage de la pierre ollaire 10
6. Montage de la céramique 14
7. Démontage des pierres thermiques (montage en sens inverse) 19
8. Remplacement du joint de la porte 20
9. Nettoyage 21
10. Regraisser 23
11. Fiche technique 26
Indice
1. Elenco dei componenti 5
2. Montaggio dei piedini di regolazione 6
3. Raccordo aria di combustione posteriore (opzionale) 6
4. Raccordo aria di combustione a basso (opzionale) 9
5. Montaggio della pietra ollare 10
6. Montaggio della maiolica 14
7. Smontaggio delle pietre termiche
(il montaggio si effettua seguendo l‘ordine inverso) 19
8. Sostituzione della guarnizione della sportello 20
9. Pulizia 21
10. Procedere all‘ingrassaggio 23
11. Scheda tecnica 26
Content
1. Parts List 5
2. Mounting the Levelling Feet 6
3. Installation of the HASE air system below (optional) 6
4 Rear installation of the HASE air system (optional) 9
5. Soapstone Installation 10
6. Ceramic Installation 14
7. Dismounting the Heat-resisting Stones (Reverse the process to mount them) 19
8. Replacing the Door Seal 20
9. Cleaning 21
10. Regrease 23
11. Technical data sheet 26
Obsah
1. Seznam jednotlivých částí 5
2. Montáž nastavitelných nožek 6
3. Připojení vzduchového systému HASE zespodu (volitelná výbava) 6
4. Připojení vzduchového systému HASE zezadu (volitelná výbava) 9
5. Montáž mastek 10
6. Montáž keramika 14
7. Demontáž tvarovek topeniště (montáž v opačném pořadí) 19
8. Výměna těsnění dvířek topeniště 20
9. Čištění 21
10. Promazání 23
11. Technický datový list 26
CZNL
GBI
F
D
R8_09/22
Treść
1. Wykaz części 5
2. Montaż nóżek regulacyjnych 6
3. Podłączanie systemu powietrznego HASE od dołu (opcjonalnie) 6
4. Podłączanie systemu powietrznego HASE z tyłu (opcjonalnie) 9
5. Montaż steatytu 10
6. Montaż ceramiki 14
7. Demontaż bloczków akumulacyjnych (montaż w odwrotnej kolejności) 19
8. Wymiana uszczelki drzwiczek 20
9. Czyszczenie 21
10. Smarowanie 23
11. Karta danych technicznych 26
Obsah
1. Zoznam jednotlivých dielov 5
2. Montáž nastaviteľných nožičiek 6
3. Pripojenie na vzduchový systém HASE dole (voliteľná výbava) 6
4 Pripojenie na vzduchový systém HASE vzadu (voliteľná výbava) 9
5. Montáž mastenec 10
6. Montáž keramika 14
7. Demontáž akumulačných platní (montáž v opačnom poradí) 19
8. Výmena tesnenia na dvierkach ohniska 20
9. Čistenie 21
10. Premazanie 23
11. Technické údaje 26
SK
PL
3
4 / 5 10
Benötigtes Werkzeug und Personen
Outil nécessaire et personnes
Attrezzi necessari e di persone
Require d tools and people
Benodigd gereedschap en mensen
Potřebné nástroje a pomocníci
Potrzebne narzędzia i osoby
Potrebné nástrojea pomocníci
·
Benötigte Zeit
Nécessaire le temps
Tempo necessari
Required time
Benodigd tijd
Potřebný čas
Wymagany czas
Potrebný čas 1–1,5 h
4
Symbolerklärung
Signification des symboles
Spiegazione dei simboli
Symbol explanation
Verklaring van de symbolen
Symboly
Symbolika
Symboly
fest anziehen
serrer fort
avvitare saldamente
tigthen firmly
stevig vastdraaien
pevně utáhnout
mocno dokręcić
pevne zatiahnite
leicht anziehen
serrer légèrement
avvitare delicatamente
tigthen gently
lichtjes vastdraaien
mírně utáhnout
lekko dokręcić
jemne zatiahnite
Augenmaß
à vue d’œil
a occhio
by eye
op gevoel
míra od oka
na oko
od oka
ausrichten oben und unten
ajuster en haut et en bas
allineare in alto e in basso
align top and bottom
boven en beneden uitlijnen
vyrovnat nahoře a dole
wyrównać u góry i na dole
vyrovnať hore a dole
ausrichten seitlich
ajuster sur le côté
allineare lateralmente
align laterally
zijdelings uitlijnen
vyrovnat na straně
wyrównać z boku
vyrovnať bočne
ausrichten gesamt
ajuster en entier
allineare completamente
align generally
compleet uitlijnen
vyrovnat celkově
całkowite wyrównanie
vyrovnať celkovo
entsorgen
évacuer
eliminare
disposing
vervreemden
disponovat
dysponować
disponovať
nach Maß
sur mesure
su misura
made to measure
op maat
podle míry
na miarę
presne
WARNUNG!
Dieses Symbol warnt vor einer möglicherweise ge-
fährlichen Situation. Das Nichtbeachten dieser War-
nung kann schwere Verletzungen zur Folge haben
oder sogar zum Tode führen.
ATTENTION!
Ce symbole signale une situation potentiellement
dangereuse. Le non-respect de cet avertissement
peut entraîner de graves blessures, voire même
provoquer la mort.
AVVERTENZA!
Questo simbolo avverte sulla possibilità che si veri-
fichi una situazione pericolosa. Il mancato rispetto
di questa avvertenza può avere come conseguenza
lesioni gravi o addirittura mortali.
WARNING!
This symbol alerts you to a potentially hazardous
situation. Non-compliance with this warning can
cause severe injuries, or even death.
WAARSCHUWING!
Dit symbool dient als waarschuwing voor een moge-
lijk gevaarlijke situatie. Indien u deze waarschuwing
niet in acht neemt, kunt u zware verwondingen oplo-
pen met zelfs de dood tot gevolg.
VORSICHT!
Dieses Zeichen weist auf eine möglicherweise ge-
fährliche Situation hin. Nichtbeachtung kann Sach-
schäden oder Verletzungen von Personen zur Folge
haben.
PRECAUTION!
Ce symbole signale une situation potentiellement
dangereuse. Le non-respect peut ent-raîner des
dommages matériels ou corporels.
ATTENZIONE!
Questo segnale indica la possibilità che si verifichi
una situazione pericolosa. Il mancato rispetto può
avere come conseguenza danni alle cose o alle
persone.
CAUTION!
This symbol alerts you to a potentially hazardous
situation. Non-compliance can cause damage to
property or injuries to persons.
OPGELET!
Dit teken wijst op een mogelijk gevaarlijke situatie.
Indien u dit niet in acht neemt, kunt u materiële of
fysieke schade oplopen.
VAROVÁNÍ!
Tento symbol upozorňuje na nebezpečnou situaci. V
případě neuposlechnutí hrozí těžké poranění nebo
smrt!
OSTRZEŻENIE!
Ten symbol ostrzega przed możliwą sytuacją
niebezpieczną. Nieprzestrzeganie tego ostrzeżenia
może być przyczyną poważnych zranień albo nawet
prowadzić do śmierci.
VAROVANIE!
Tento symbol upozorňuje na možnú nebezpečnú si-
tuáciu. V prípade nerešpektovanie tohto varovania
hrozí ťažké poranenie alebo dokonca smrť!
POZOR!
Tento symbol upozorňuje na nebezpečnou situaci.
V případě neuposlechnutí hrozí škoda na majetku
nebo poranění osob
OSTROŻNIE!
Ten znak wskazuje na możliwą niebezpieczną
sytuację. Nieprzestrzeganie może spowodować sz-
kody rzeczowe albo zranienie osób.
POZOR!
Tento symbol upozorňuje na možnú nebezpečnú si-
tuáciu. Nerešpektovanie môže viesť ku škodám na
majetku alebo k poraneniu osôb!
HINWEIS!
Hier finden Sie zusätzliche Anwendungstipps und
nützliche Informationen.
REMARQUE!
Vous trouverez ici des conseils d‘utilisation complé-
mentaires et des informations utiles.
CONSIGLIO!
Qui troverete ulteriori consigli sull‘utilizzo e informa-
zioni utili.
NOTE!
Provides additional tips about using the stove as
well as useful information.
TIP!
Hier vindt u bijkomende tips voor gebruik en nuttige
informatie terug..
UPOZORNĚNÍ!
Zde naleznete další pokyny a užitečné informace.
WSKAZÓWKA!
Tutaj znajdą Państwo dodatkowe wskazówki i infor-
macje użytkowe.
UPOZORNENIE!
Tu nájdete ďalšie typy na používanie a užitočné
informácie.
5
T11 4x T12 2x
1x 1x 1x S01 2X T01 4x T02 4x T03 4x
T04 24x T05 2x T06 4x T07 6x T08 2x T09 2x T10 2x
1. Stückliste
Liste des pièces
Elenco dei componenti
Parts List
Stuklijst
Seznam jednotlivých částí
Wykaz części
Zoznam jednotlivých dielov
S1
S3
S4
S6
S7
S5
S8
S2
S3
S4
S1
S3
S4
S2
S3
S4
K1
K2 K2
K3 K3
K5
K6
K4
K7
K1
Keramik / Céramique / Maiolica / Ceramic /
Keramiek / Keramika / Ceramika / Keramika
Speckstein / Pierre ollaire / Pietra ollare / Soapstone /
Speksteen / Mastek / Steatyt / Mastenec
1 2
6
2. Montagen der Justierfüße
Montage des pieds de réglage
Montaggio dei piedini di regolazione
Mounting the Levelling Feet
Montage van de justeervoetjes
Montáž nastavitelných nožek
Montaż nóżek regulacyjnych
Montáž nastaviteľných nožičiek
3 4
5 6
3. Anschluss HASE Luftsystem unten (optional)
Système d‘air HASE - Raccordement en bas (en option)
Raccordo aria di combustione posteriore (opzionale)
Installation of the HASE air system below (optional)
HASE-ventilatiesysteem beneden (optioneel)
Připojení vzduchového systému HASE zespodu (volitelná výbava)
Podłączanie systemu powietrznego HASE od dołu (opcjonalnie)
Pripojenie na vzduchový systém HASE dole (voliteľná výbava)
T01 4x
7
7 8
9
8
Überprüfen Sie, ob die Tragfähigkeit der Aufstellfläche ausreicht. Gegebenenfalls kann die Tragfähigkeit durch Verwendung einer Bodenplatte zur Lastverteilung erhöht werden.
Prüfen Sie bei raumluftabhängiger Betriebsweise, ob der Raum, in dem der Kaminofen (zusätzliche Feuerstätten) aufgestellt werden soll, ausreichend mit Verbrennungsluft
versorgt wird. Bei gut abgedichteten Fenstern und Türen besteht die Möglichkeit, dass die Zufuhr von Verbrennungsluft nicht ausreichend gewährleistet ist. Dies kann das
Zugverhalten des Kaminofens und des Schornsteins beeinträchtigen.
Sind zusätzliche Eintrittsöffnungen für Verbrennungsluft erforderlich, dürfen diese nicht verschlossen werden.
Der Kaminofen ist nur zur freien Aufstellung bestimmt. Einbauten in Nischen oder Verkleidungen um den Kaminofen sind nicht zulässig.
D
HINWEIS!/REMARQUE!/CONSIGLIO!/NOTE!/TIP!/UPOZORNĚNÍ!/WSKAZÓWKA!/UPOZORNENIE!
FVérifiez si la portance du sol sur le lieu d’installation est suffisante. Le cas échéant, elle peut être augmentée à l’aide d’une plaque permettant de répartir la charge.
En cas de fonctionnement sans prise d’air extérieure, vérifiez que la pièce dans laquelle le poêle-cheminée (cheminées supplémentaires) doit être installé est suffisamment
alimentée en air de combustion. Lorsque les portes et fenêtres sont bien isolées, il arrive que l’apport d’air frais ne soit pas suffisant, ce qui risque de nuire au tirage du poêle et
du conduit de fumée.
Si des ouvertures supplémentaires sont nécessaires pour faire entrer de l’air de combustion, veillez à ne pas les obstruer.
Le poêle à bois est destiné uniquement à un montage dégagé. Une installation dans une niche ou la présence de revêtements près du poêle ne sont pas autorisés.
Verificare se la portata della superficie di appoggio è sufficiente. Se necessario, si potrà aumentare la portata della superficie utilizzando una piastra per ottimizzare la distribu-
zione del carico.
Con approvvigionamento d’aria dipendente dall’aria ambientale, controllare se il locale dove si desidera montare la stufa a legna (stufe aggiuntive) viene alimentato in modo
sufficiente da aria per la combustione. Se le porte e le finestre sono isolate molto bene potrebbe verificarsi che l’alimentazione di aria per la combustione non venga garantita in
una quantità sufficiente. Ciò potrebbe pregiudicare il tiraggio della stufa a legna e del comignolo.
Se sono necessarie ulteriori aperture di presa d’aria, esse non dovranno essere chiuse.
La stufa a legna deve essere posizionata solo in spazi liberi. L’installazione in nicchie o la presenza di abbigliamento nelle vicinanze della stufa a legna non sono consentite.
I
Check to make sure that the load bearing capacity
of the installation surface is sufficient for the dimensions and weight of the stove. If necessary, using a floorplate to distribute the load can increase the load bearing capacity.
If the stove (additional fireplaces) will be operated as a room air dependent stove, please ensure that the room it will be installed in has a sufficient supply of combustion air. If
the windows and doors are tightly sealed, the necessary supply of fresh air may not be ensured, which can interfere with the draught capability of the stove and chimney.
If additional combustion air inlet openings are required, they are not permitted to be closed or blocked.
The stove is only intended to be installed free-standing. Do not place in alcoves or cover the stove.
GB
Controleer of het vlak waarop de kachel staat opgesteld, het toestel ook kan dragen. Eventueel kan de draagkracht worden verhoogd door gebruik te maken van een bodemplaat
om het gewicht te verdelen.
Controleer bij niet-autonoom gebruik of de ruimte waarin u de Kachel (extra kachels) wilt opstellen, voldoende verbrandingslucht krijgt. Wanneer ramen en deuren goed dicht
zijn, bestaat het gevaar dat de toevoer niet gewaarborgd is. De trek van de kachel en van de schoorsteen kan daardoor verminderen.
Indien er bijkomende inlaatopeningen voor de verbrandingslucht nodig zijn, mogen die niet worden afgesloten.
De open sfeerhaard is alleen bestemd voor het plaatsen in de ruimte. Inbouwen in nissen of bekledingen rondom de sfeerhaard zijn niet toegestaan.
NL
Zkontrolujteplochu,nakterouchcetekrbovákamnaumístit–plochamusíbýtdostatečněnosná.Vpřípaděpotřebymůžetenosnostzvýšitspomocídesky,kterábudeváhu
kamenrovnoměrněpřenášet.
Krbovákamna(přídavnákrbovákamna)potřebujíkespalovánívelkémnožstvívzduchu.Jsou-likamnaumístěnavmístnostisdobřeutěsněnýmioknyidveřmi,hrozínebezpečí
nedostatkuvzduchu.Kamnanebokomínpakmohoumítnedostatečnýtah.
Případnédalšíotvorypropřívodspalovacíhovzduchunesmíbýtnikdyuzavřeny!
Krbovákamnajsouurčenajenkinstalacivevolnémprostoru.Nenípovolenoinstalovatkamnadovýklenkůnebojeobkládatjinýmmateriálem.
CZ
Proszęsprawdzić,czynośnośćpowierzchni,naktórejustawionymabyćpiecjestwystarczająca.Ewentualniemożnazwiększyćnośnośćpoprzezzastosowaniepłytypodłogowej
wcelurozłożeniaciężaru.
Wprzypadkuzaopatrzeniapaleniskawpowietrzezpomieszczeniaproszęsprawdzić,czypomieszczenie,wktórymustawionybędziepiec(dodatkowepiece)kominkowybędzie
wystarczającozaopatrzonewpowietrze.Przydobrzeuszczelnionychoknachidrzwiachistniejemożliwość,żepaleniskoniebędziezaopatrywanewpowietrzedospalaniaw
wystarczającejilości.Możetoprowadzićdopogorszeniawłasnościciągupiecaikomina.
Jeśliwymaganesądodatkoweotworydladopływupowietrza,toniewolnoichzamykać.
Pieckominkowyprzeznaczonyjestdoeksploatacjiwstanieniezabudowanym.Montażwniszach,albozabudowawokółpiecakominkowego,sąniedozwolone.
PL
Skontrolujte,čijedostačujúcanosnosťplochy,kdemábyťumiestenákrbovápiecka.Vprípadepotrebymôžetenosnosťzvýšiťpomocoupodlahovejplatnenarovnomerné
rozloženiezaťaženia.
Krbová piecka (prídavné kachle) potrebuje pre spaľovanie veľké množstvo vzduchu. Ak je piecka umiestnená v miestnosti s dobre utesnenými oknami a dverami, hrozí
nebezpečenstvo,žeprívodvzduchunebudedostatočnezaistený.Pieckaalebokomínmôžumaťvtakomprípadenedostatočnýťah.
Aksúpotrebnéďalšieotvorypreprívodvzduchunahorenie,nesmúbyťnikdyuzavreté!
Krbovápieckajeurčenálennavoľnestojacuinštaláciu.Zabudovaniedovýklenkovvstenealeboobstavbaokolokrbovejpieckyniesúpovolené.
SK
9
10
12
11
13
4. Anschluss HASE Luftsystem hinten (optional)
Système d‘air HASE - Raccordement arriere (en option)
Raccordo aria di combustione a basso (opzionale)
Rear installation of the HASE air system (optional)
HASE-ventilatiesysteem achteraan (optioneel)
Připojení vzduchového systému HASE zezadu (volitelná výbava)
Podłączanie systemu powietrznego HASE z tyłu (opcjonalnie)
Pripojenie na vzduchový systém HASE vzadu (voliteľná výbava)
10
17
16
5. Specksteinmontage
Montage de la pierre ollaire
Montaggio della pietra ollare
Soapstone Installation
Montage van de speksteen
Montáž mastek
Montaż steatytu
Montáž mastenec
14 15
1
2
S1
S3
S4
S6
S7
S5
S8
S2
S3
S4
S1
S3
S4
S2
S3
S4
Speckstein / Pierre ollaire / Pietra ollare / Soapstone /
Speksteen / Mastek / Steatyt / Mastenec
11
13 mm
18 19
20 21
22 23
S2 S1
S1 S2
1
2
S3
S3
S4
S4
T04 24x
13 mm
T06 4x T11 4x T07 4x
12
S2
S3
S4
S1
S3
S4
24 25
===
=
S5
S5
26 27
S5
1
2
2
28 29
S5
=
=
=
25 mm
T02 4x
T07 2x T08 2x T09 2x T10 2x
T12 2x
13
30 31
S8
32
34
33
35
=
20 mm
S7
T03 4xS01 4x T05 2x
T05
T05
S01
S01
14
S6
6. Keramikmontage
Montage de la céramique
Montaggio della maiolica
Ceramic Installation
Montage van de keramische tegels
Montáž keramika
Montaż ceramiki
Montáž keramika
36 37
K1
K2 K2
K3 K3
K5
K6
K4
K7
K1
Keramik / Céramique / Maiolica / Ceramic /
Keramiek / Keramika / Ceramika / Keramika
38 39
15
40 41
42 43
44 45
K1
K1
1
2
K2
K3
13 mm
T04 12x
T06 4x T11 4x
16
K1
K2
K3
46 47
===
K4
K4
48 49
50 51
K4
K4
1
2
2
=
=
=
25 mm
T03 4x
T07 2x T08 2x T09 2x T10 2x
T12 2x
17
54 55
K7
52 53
=
K6
56 57
38 mm
K5
T03 4x
18
58
HINWEIS!/REMARQUE!/CONSIGLIO!/NOTE!/TIP!/UPOZORNĚNÍ!/WSKAZÓWKA!/UPOZORNENIE!
Bitte lassen Sie Ersatzteile nur von Ihrem HASE Fachhändler einbauen. Sie vermeiden dadurch Schäden an Ihrem Kaminofen durch unsachgemäßen Einbau.
Veuillez faire installer les pièces détachées uniquement par votre revendeur HASE. Vous éviterez ainsi de détériorer votre poêle à la suite d‘un montage non conforme.
Vi preghiamo di far montare i pezzi di ricambio dal vostro rivenditore specializzato HASE. Eviterete così di danneggiare la vostra stufa a causa di un montaggio non conforme.
Please only let a HASE specialised dealer install spare parts. This way you can prevent damages to your fireplace due to improper installation.
Laat de reserveonderdelen alstublieft alleen door uw HASE-specialist inbouwen. Hierdoor vermijdt u schade aan uw kachel, die veroorzaakt wordt door onvakkundige inbouw.
Náhradní díly smí vyměňovat jen autorizovaný servis HASE - vyloučíte tak poškození kamen v důsledku neodbornch zásahů.
Części zamienne powinny być montowane wyłącznie przez wykwalifi kowany personel przedstawiciela fi rmy HASE. Pozwoli to uniknąć uszkodzenia pieca kominkowego na skutek
nieprawidłowego montażu.
Náhradné diely môže vymieňať len autorizovaný servis HASE. Predídete tak poškodeniu piecky v dôsledku neodborného zásahu.
CZ
NL
GB
I
F
D
SK
PL
19
7. Ausbau der Thermosteine (Einbau in umgekehrter Reihenfolge)
Démontage des pierres thermiques (montage en sens inverse)
Smontaggio delle refrattari (il montaggio si effettua seguendo l‘ordine inverso)
Dismounting the Heat-resisting stones (reverse the process to mount them)
Demonteren van de thermo stenen (montage in omgekeerde volgorde)
Demontáž tvarovek topeniště (montáž v opačném pořadí)
Demontaż bloczków akumulacyjnych (montaż w odwrotnej kolejności)
Demontáž akumulačných platní (montáž v opačnom poradí)
A
B
B
CD
C
D
A
A
59 60 61
62 63 64
1
1
11
1
2
22
2
33
2
20
8. Wechsel der Türdichtung
Remplacement du joint de la porte
Sostituzione della guarnizione della sportello
Replacing the Door Seal
Vervangen van de deurdichting
Výměna těsnění dvířek topeniště
Wymiana uszczelki drzwiczek
Výmena tesnenia na dvierkach ohniska
65 66
68
67
69 70

Other manuals for COMO

4

Other HASE Indoor Fireplace manuals

HASE LUNO User manual

HASE

HASE LUNO User manual

HASE LHASA IQ User manual

HASE

HASE LHASA IQ User manual

HASE VALENCIA User manual

HASE

HASE VALENCIA User manual

HASE LUNO User manual

HASE

HASE LUNO User manual

HASE SENDAI PRO User manual

HASE

HASE SENDAI PRO User manual

HASE Luno B.13 User manual

HASE

HASE Luno B.13 User manual

HASE Modena User manual

HASE

HASE Modena User manual

HASE VALENCIA User manual

HASE

HASE VALENCIA User manual

HASE PADUA 160 User manual

HASE

HASE PADUA 160 User manual

HASE Delhi 114 User manual

HASE

HASE Delhi 114 User manual

HASE Sendai 110 User manual

HASE

HASE Sendai 110 User manual

HASE delhi User manual

HASE

HASE delhi User manual

HASE OSAKA User manual

HASE

HASE OSAKA User manual

HASE Lagos User manual

HASE

HASE Lagos User manual

HASE PADUA 160 User manual

HASE

HASE PADUA 160 User manual

HASE MERIDA - User manual

HASE

HASE MERIDA - User manual

HASE Cartago User manual

HASE

HASE Cartago User manual

HASE Delhi 114 User manual

HASE

HASE Delhi 114 User manual

HASE delhi User manual

HASE

HASE delhi User manual

HASE Valencia B.12 User manual

HASE

HASE Valencia B.12 User manual

HASE Elvas User manual

HASE

HASE Elvas User manual

Popular Indoor Fireplace manuals by other brands

Desa (V)KC42NE SERIE OWNER'S OPERATION AND INSTALLATION MANUAL

Desa

Desa (V)KC42NE SERIE OWNER'S OPERATION AND INSTALLATION MANUAL

Pacific energy Pacific VISTA Installation and operating instructions

Pacific energy

Pacific energy Pacific VISTA Installation and operating instructions

Hegwein ZA0 Series operating manual

Hegwein

Hegwein ZA0 Series operating manual

EcoSmart Fire 450S Clearances and installation manual

EcoSmart Fire

EcoSmart Fire 450S Clearances and installation manual

Travis Industries 1250 Insert owner's manual

Travis Industries

Travis Industries 1250 Insert owner's manual

Regency Fireplace Products CI2700 Owners & installation manual

Regency Fireplace Products

Regency Fireplace Products CI2700 Owners & installation manual

Ecoflam Multicalor 600.1 manual

Ecoflam

Ecoflam Multicalor 600.1 manual

Coaster 991047 Assembly instructions

Coaster

Coaster 991047 Assembly instructions

TJ FLAMA User and installation manual

TJ

TJ FLAMA User and installation manual

CHAD-O-CHEF VFDG 700 Installation & operating instruction manual

CHAD-O-CHEF

CHAD-O-CHEF VFDG 700 Installation & operating instruction manual

mFi MASON-LITE MFP39VF instructions

mFi

mFi MASON-LITE MFP39VF instructions

Mendota AA-11-02470 Installation and operating instructions

Mendota

Mendota AA-11-02470 Installation and operating instructions

Avalon Olympic 1190 owner's manual

Avalon

Avalon Olympic 1190 owner's manual

Burley 513 operating instructions

Burley

Burley 513 operating instructions

SEI FA1137256 Assembly

SEI

SEI FA1137256 Assembly

Flavel Misermatic FRCM1G Installation and maintenance instructions

Flavel

Flavel Misermatic FRCM1G Installation and maintenance instructions

Lennox FIRESTAR MERIT GC3 Installation and operation

Lennox

Lennox FIRESTAR MERIT GC3 Installation and operation

SEI FA1009259 Assembly

SEI

SEI FA1009259 Assembly

manuals.online logo
manuals.online logoBrands
  • About & Mission
  • Contact us
  • Privacy Policy
  • Terms and Conditions

Copyright 2025 Manuals.Online. All Rights Reserved.