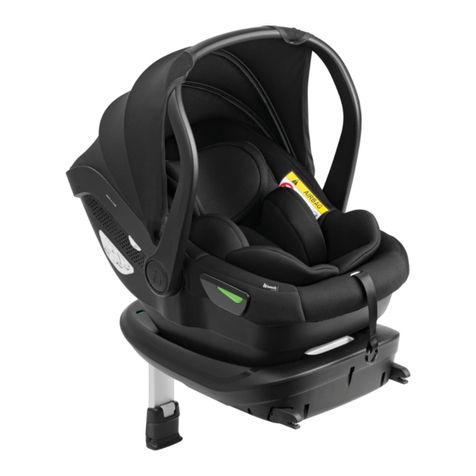
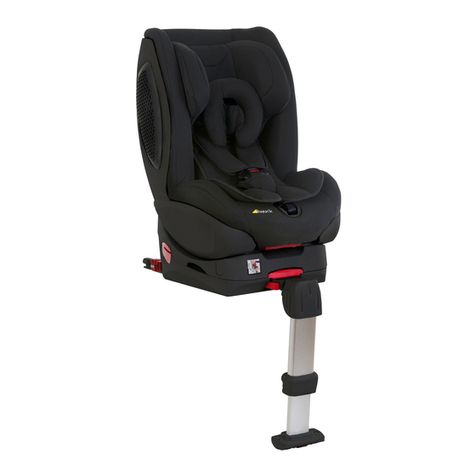
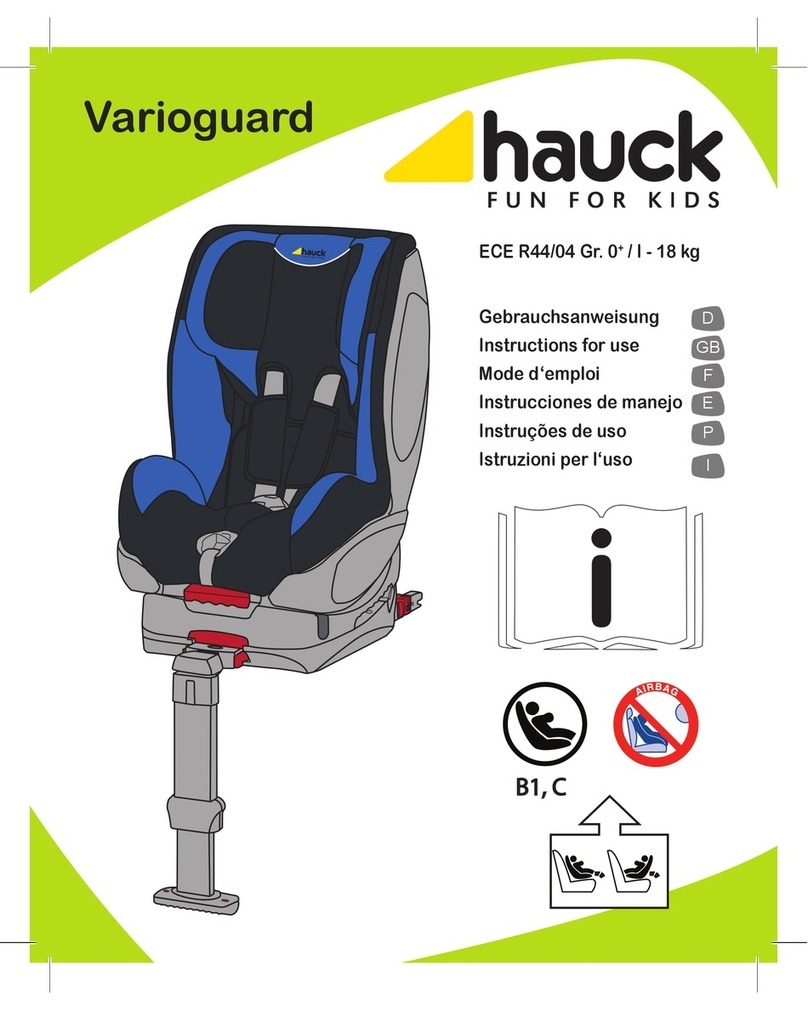
Hauck Varioguard User manual

Varioguard
i
B1, C
ECE R44/04 Gr. 0+/ I - 18 kg
Instruction

2
GB
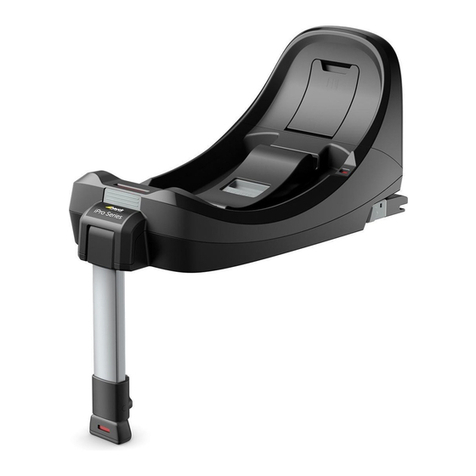
A Seat Base
B Seat Shell
C Seat Cover
C1Seat Liner and Head
Hugger*
D Headrest
E Harness Shoulder Straps
F Harness Pads (x 2)
G Red Adult Diagonal and
Lap Belt Guides
H Red Adult Diagonal
and Lap Belt Lock
I Harness Buckle
J Harness Buckle Pad
K Harness Connectors
L Harness Adjustment Button
M Harness and Headrest
Adjustment Lever
Your group 0+ / I car seat features guide
N Crotch Strap
O Harness Adjustment Strap
P Recline Lever
Q IsoxPointReleaseButtons
(x 2)
R IsoxAdjustmentButtons
(x 2)
S IsoxConnectionIndicators
T Support Leg Adjustment
Button
U Support Leg Indicator
V Adult Seat Belt Connector
V1 Safety Indicator
W Adult Seat Belt Buckle
X Instruction Manual Pocket
Y Car Seat Release Button
Z ISOFIX Connectors
isofix
* accessory

3
GB
HAUCK VARIOGUARD GROUP 0+ / I CAR SEAT
(approx birth to 18 kg / birth to 4 years)
Thank you for purchasing this Group 0+ / I car seat. If you are not
completelysatisedwiththecarseatoryouwouldliketochange
any accessory or obtain any help about the car seat, you can
contact our customer services department.
PleaseNote:Onlysuitableforuseinvehiclesttedwitha3point
retractable safety belt or ISOFIX attachments.
STORAGE OF THE USER GUIDE
Itismostimportantthattheseinstructionsremainwiththecarseat
at all times. You can store these instr uctions in the pocket
provided on the back of your car seat (Y).
Please read this instruction manual carefully before use. When
installingwithIsoFixrefertovehiclemanufacturershandbook.
CONSUMER INFORMATION
WARNING! AIRBAGS CAN CAUSE INJURY. DO NOT USE THIS
CHILD SEAT ON A PASSENGER SEAT FITTED WITH A FRON
TAL AIRBAG.
WARNING! ALWAYS GIVE PREFERENCE TO USING THE
REAR SEATS OF YOUR VEHICLE EVEN IF YOUR HIGHWAY
CODE PERMITS THE USE ON THE FRONT SEAT. CHECK
YOUR HIGHWAY CODE AS THIS REGULATION MAY VARY
ACCORDING TO THE COUNTRY. CHECK THE VEHICLE
MANUAL FOR ADVICE ON FITTING YOUR CAR SEAT IN THE
FRONT OF THE VEHICLE.
WARNING! THIS CHILD CAR SEAT CAN ONLY BE USED
WHEN INSTALLED WITH THE SEAT BASE. NEVER INSTALL
THIS CAR SEAT ONTO A VEHICLE SEAT WITHOUT THE
BASE.
WARNING! BUCKLE FAILURE WILL CAUSE INJURY. DO NOT
OIL ANY PART OF THE BUCKLE. ALWAYS CHECK THAT
THERE IS NO FOOD DEBRIS OR OTHER SUCH MATTER IN
THE HARNESS BUCKLE.
WARNING! ALWAYS USE THE SUPPORT LEG. ENSURE IT IS
ADJUSTED TO THE CORRECT LENGTH AND IN CONTACT
WITH THE FLOOR AND THAT THE INDICATOR IS GREEN (U).

4
GB
WARNING! TOXIC CLEANING FLUIDS CAN CAUSE ILLNESS.
NEVER USE BLEACH, DO NOT IRON, DO NOT MACHINE
WASH, DO NOT TUMBLE DRY AS THIS COULD DAMAGE THE
COVER AND REQUIRE REPLACING.
WARNING! A CORRECTLY ADJUSTED HARNESS IS
ESSENTIAL FOR YOUR CHILD’S PROTECTION. THERE
SHOULD NOT BE MORE THAN A FINGERS WIDTH BETWEEN
THE HARNESS AND YOUR CHILD.
WARNING! ENSURE THAT THE CAR SEAT IS SECURED ON
THE BASE, THAT IT IS SECURE AND THE INDICTORS ARE
GREEN.
IMPORTANT DO NOT USE FORWARD FACING BEFORE THE
CHILD’S WEIGHT EXCEEDS 9 kg.
GENERAL SAFETY INSTRUCTIONS
Keeptheseinstructionswiththecarseatincaseyouneedtorefer
tothemagaininthefuture.Failuretofollowtheseinstructions
may affect your child’s safety.
Your car seat must be positioned and installed so that, under
normal vehicle usage conditions, no part can become jammed
underorbetweenanymoveableseatorinthevehicledoor.
Alwaysreplacethecarseatafteranyaccident,incaseofany
unseen damage.
Donotmodifyoraddtoyourcarseatinanywaywithoutthe
approvalofacompetentauthorityorthemanufacturer,asthiswill
voidanywarranty.
Shade your car seat from sunlight to avoid hot items causing
injury to your child.
Donotleaveyourchildunattendedwheninthecarseatandin
the vehicle.
Make sure there is no loose luggage or other large objects that
are likely to cause injuries in the event of an accident. These may
causeinjurytootheroccupants.Alwayssecurelooseitems.
Donotusethecarseatwithouttheseatcover.Donotreplacethe
seatcoverwithanycoverotherthantheonerecommendedby
themanufacturer,asitdirectlyinuencesthesafetyperformance
of the car seat.
Ensurethatyourcarseatissecuredatalltimeswhileinthe

5
GB
vehicleusingthevehiclesseatbeltorisoxsystem,evenwhen
not in use. An unsecured car seat can cause injuries in the event
of a collision.
Thecarseatmayacquiresomewearandtearovertheyears,this
willresultinpartsrequiringreplacement,pleasecontactour
customer services department for replacement parts.
Makesureallhardorplasticpartsarestoredawaywhennotin
use and therefore cannot be misplaced.
Duringcoldwinterconditionstakecarethatanychangeof
clothing has not reduced the tension and effectiveness of the car
seat harness.
PREPARING YOUR CAR SEAT FOR USE
BeforeusingyournewCarSeatitisimportanttounderstandfully
howtoinstallyourcarseatproperly,secureyourchildcorrectly
andfamiliarizeyourselfwiththefeaturesandfunctionsoftheseat.
Please take the time to read and understand these instructions
fully.Thisisbestdonewiththeseatinfrontofyou.Pleasealways
readthesafetywarnings.Beforeusingtheseatinyourvehicle
you should prepare the seat for your child, by setting the harness
correctly.

6
GB

7
GB
CONTENTS
INSTALLINGTHEBASE-withaseatbelt 8-9
INSTALLINGTHEBASE-withISOFIX 9-11
Totyourcarseat
REARWARD FACING FOR GROUP 0+
(Birthto13kg/birthtoapprox.18months) 11-13
Totyourcarseat
REARWARD FACING FOR GROUP 1 (ISOFIX only)
(9kgto18kg/approx.9monthsto4years) 13-14
Totyourcarseat
FORWARD FACING FOR GROUP 1
(9kg to 18kg / approx. 9 months to 4 years) 14 - 16
INSTALLING THE BASE - with a seat belt

8
GB
PleaseNote:thatyourcarseatisdesignedtotonlywitha3
pointlapanddiagonalseatbeltandmustnotatanytimebetted
using only a 2 point lap belt (1).
IMPORTANT! Only use the red adult seat belt guides (G) and no
other load bearing points. Check if the adult seat belt buckle is
forwardoftheseatbeltguides(G)onthecarseat,orisina
positionthatinterfereswiththeseatbeltxingpoints,asitmaynot
be possible to get a secure installation of the car seat. If this is the
case, please try another seating position in the vehicle. If in doubt
please contact our customer service department.
WARNING! ALWAYS GIVE PREFERENCE TO USING THE
REAR SEATS OF YOUR VEHICLE EVEN IF YOUR HIGHWAY
CODE PERMITS THE USE ON THE FRONT SEAT. CHECK
YOUR HIGHWAY CODE AS THIS REGULATION MAY VARY
ACCORDING TO THE COUNTRY. CHECK THE VEHICLE
MANUAL FOR ADVICE ON FITTING YOUR CAR SEAT IN THE
FRONT OF THE VEHICLE. AIRBAGS CAN CAUSE INJURY. DO
NOT USE THIS CHILD SEAT ON A PASSENGER SEAT FITTED
WITH A FRONTAL AIRBAG.
Ensure the ISOFIX points are fully retracted. To do this, squeeze
together the ISOFIX adjustment buttons (R) located on either side
of the support leg at the front of the car seat base, and pull the
supportlegtowardsyou.
Fold out the support leg fully and place the car seat base onto the
vehicleseat(3).
Open the central red belt lock (H) (4). Extract the vehicle seat belt
and pass across the base.
Pass the lap section under both belt guides (G) making sure it
also passes through the belt lock (6) and pull the belt tight. Then
insert the vehicle seat belt connector (V) into the vehicle buckle
(W) (5).
Next pass the diagonal section under both belt guides (G) making
sure it also passes through the belt lock (6).
Ensurethattheseatbeltispulledtightandisnottwisted.Then
close the belt lock to secure the seat belt in place (7).
IMPORTANT! Alwaysusethesupportlegwhenthecarseatbase
isttedintothevehicle.
WARNING! ENSURE THAT AT ALL TIMES THE SUPPORT

9
GB
LEG IS IN CONTACT WITH THE FLOOR OF THE VEHICLE
AND THE INDICATOR IS GREEN.
To adjust the support leg, pull the RED support leg lock (T)
locatedontheofthesupportlegandextendthelowersectionof
thesupportleguntilitreachesthevehicleoor(8).Whenthe
supportlegislockedintopositionyouwillheara“click”.
If the lock does not engage, extend the leg to the next lock
position.
IMPORTANT! Make sure the indicator (U) on the support foot is
green. If the indicator is red you must re-adjust the support leg.
To remove the car seat base from the vehicle simply open the belt
lock and remove the seat belt.
CHECKLIST
Toensuretheoptimumsafetyofyourchild,checkthefollowing
after installation:
- Check that the seat belt is as tight as possible and not twisted!
- Check that the diagonal and lap section of the vehicle belt pass
under the two red belt guides and through the red belt lock (6) (7)!
- Checkthatthesupportlegisfullyextendedtotheoor(3)and
locked into position and the indicator on the foot of the support
leg is green (8)!
- Checkthatthecarseatbaseisinstalledsecurelyandrmlyin
thevehiclebytryingtomoveit!
INSTALLING THE BASE - with ISOFIX
WARNING! ALWAYS GIVE PREFERENCE TO USING THE
REAR SEATS OF YOUR VEHICLE EVEN IF YOUR HIGHWAY
CODE PERMITS THE USE ON THE FRONT SEAT. CHECK
YOUR HIGHWAY CODE AS THIS REGULATION MAY VARY
ACCORDING TO THE COUNTRY. CHECK THE VEHICLE
MANUAL FOR ADVICE ON FITTING YOUR CAR SEAT IN THE
FRONT OF THE VEHICLE. AIRBAGS CAN CAUSE INJURY. DO
NOT USE THIS CHILD SEAT ON A PASSENGER SEAT FITTED
WITH A FRONTAL AIRBAG.
Fold the support leg out and place the car seat base onto the
vehicleseat(3).
Squeeze together the ISOFIX adjustment buttons (R) located on

10
GB
either side of the support leg at the front of the car seat base, and
pushthesupportlegtowardstheseatbasetoextendtheisox
attachment points (15).
Linetheisoxattachmentpointswiththeisoxlatchesinthe
vehicleseat(16),andpushtheisoxpointsintotheisoxlatches
untilyouheara“click”.
Whentheisoxpointsarecorrectlyattached,theisoxconnection
indicators(S)willturngreen(17)iftheindicatorsremainredyou
mustreleaseandre-connecttheisoxpoints,todothissee
section“REMOVINGTHEBASE-whenattachedtotheISOFIX
points”.
Oncetheisoxpointsarecorrectlyattached,pushthebase
towardsthevehicleseatbackrestuntilrm(18).
IMPORTANT! Alwaysusethesupportlegwhenthecarseatbase
isttedintothevehicle.
WARNING! ENSURE THAT AT ALL TIMES THE SUPPORT
LEG IS IN CONTACT WITH THE FLOOR OF THE VEHICLE
AND THE INDICATORS ARE GREEN.
To adjust the support leg, pull the support leg adjustment button
(T) located on the back of the support leg and move the foot of the
supportlegdownwardsuntilitreachesthevehicleoor(8).
Whenthesupportlegislockedintopositionyourwillheara“click”
(9).
IMPORTANT! Make sure that the support leg indicator (V) is
green. If the indicator is red you must re-adjust the support leg.
CHECKLIST
Toensuretheoptimumsafetyofyourchild,checkthefollowing
after installation:
- Checkthattheisoxpointsaresecurelyattachedtothevehicleby
checkingthattheindicatorsontheisoxpoints(S)aregreen
(17)!
- Check that the support leg is fully folded out (3), that the lower
part of the leg is locked into position and the indicator on the foot
of the support leg is green (8)!
- Checkthatthecarseatbaseisinstalledsecurelyandrmlyinthe
vehicle!

11
GB
REMOVING THE BASE - when attached to the ISOFIX points
Squeezetogetherthetwoisoxconnectionadjustmentbuttons
(R) located on either side of the support leg at the front of the car
seatbaseandpulltheawayfromthevehicleseat(20).
Unlocktheisoxpoints(Z)bypullingbothlatches(Q)towardthe
front of the vehicle seat (21).
Thenpullthecarseatbaseforwardonthevehicleseattorelease
from the vehicle (22).
REARWARD FACING FOR GROUP 0+
(Birthto13kg/birthtoapprox.18months)
Firstly you must install the car seat base into your vehicle using
either the seat belt or ISOFIX points. See sections ‘Installing the
base-withaseatbelt’or‘Installingthebase-withISOFIX’.
You must also ensure that the harness and headrest is set
correctly for your child, to do this see sections ‘Headrest and
Safety Harness Adjustment’ and ‘Harness Tension and
Adjustment’.
The seat includes a seat liner and head hugger (C1) for the small
baby.
The liner has a cushion inserted in a pocket on the back of the
linerwhichissuitableforchildrenuptoapprox9Kgor12months.
For children over 9kg or 12 months remove the cushion and use
onlythelinerwhilethecarseatisrearwardfacing.
INSTALLING THE CAR SEAT INTO THE BASE FULLY
RECLINED
Firstly make sure that the seat is in its fully reclined position. First
click the metal bar on the backrest side of the car seat into the
base of the Varioguard and then the frontal side (9). Each time
you should hear a clear CLICK. Make sure that the safety indica-
tor (V1) fully turned GREEN. (19)
Checktheseatissecurebyliftingtheseatupwards.
To remove the car seat from the base, press the car seat release
button(Y)atthefrontofthebasewhileliftingthecarseatupfrom
the base (10, 11).

12
GB
INSTALLING YOUR CHILD IN THE CAR SEAT
Firstly open the buckle by pressing the red button in the centre of
The buckle (26). Then sit your child in the car seat, passing their
arms through the shoulder straps.
Bring the harness connectors together and insert into the buckle
untilyouheara“click”(28).
Tighten the harness by pulling on the harness adjustment strap
(29),oncetightmakesurethatthereisnomorethanangers
widthbetweentheharnessandyourchild.
The child’s head should sit directly in the middle of the headrest
and the sides of the headrest should sit just above the child’s
shoulders,andtheshoulderstrapsshouldbelevelwithorbelow
your child’s shoulders (26). If this is not the case please refer to
section ‘Headrest and Safety Harness Adjustment’.
CHECKLIST
WARNING! A CORRECTLY ADJUSTED HARNESS IS
ESSENTIAL FOR YOUR CHILD’S PROTECTION. THERE
SHOULD NOT BE MORE THAN A FINGERS WIDTH BETWEEN
THE HARNESS AND YOUR CHILD.
Howeversafeachildseatis,howeverwellbuiltitis,yourchild’s
safetydependsonyoucarryingoutthefollowingchecksbefore
every journey.
- Settheharnesscorrectlyandtothecorrectshoulder
height (22 - 29)!
- Ensure the harness straps are not twisted!
- Check the harness is set for the clothing and not loose!
- Ensure the seat liner is suitable for the weight and age of your
child!
- Check the harness is secure with the buckle and shoulder strap
connectors latched together and harness tension is correct (28,
29)!
- Check the car seat is facing rearwards in the vehicle (9) and in the
fully reclined position!
IMPORTANT!Misusingyourchildcarseatwillreducethe
protection and safety you offer your child.
To t your car seat

13
GB
REARWARD FACING FOR GROUP 1 (ISOFIX only)
(9kg to 18kg / approx. 9 months to 4 years)
Firstly you must install the car seat base into your vehicle using
the ISOFIX-points. See section ‘Installing the base - using the
ISOFIX points’.
You must also ensure that the harness and headrest is set cor
rectly for your child, to do this see sections ‘Headrest and Safety
Harness Adjustment’ and ‘Harness Tension and Adjustment’.
The car seat includes a seat liner and head hugger (C1) for the
small baby.
The liner has a cushion inserted in a pocket on the back of the
linerwhichissuitableforchildrenuptoapprox9Kgor12months.
removethecushionanduseonlythelinerwhilethecarseatis
rearwardfacing.
INSTALLING THE CAR SEAT INTO THE BASE FULLY
RECLINED
Firstly make sure that the seat is in its fully reclined position, then
placethecarseatontothebasefacingtowardstherearofthe
vehicleandpressthecarseatdownuntilyouheara“click”(9).
Checktheseatissecurebyliftingtheseatupwards.
To remove the car seat from the base, at the same time press the
carseatreleasebutton(Y)whileliftingthecarseatupfromthe
base (10, 11).
INSTALLING YOUR CHILD IN THE CAR SEAT
Firstly open the buckle by pressing the red button in the centre of
the buckle (27). Then sit your child in the car seat, passing their
arms through the shoulder straps.
Bring the harness connectors together and insert into the buckle
untilyouheara“click”(28).
Tighten the harness by pulling on the harness adjustment strap
(29),oncetightmakesurethatthereisnomorethanangers
widthbetweentheharnessandyourchild.
The child’s head should sit directly in the middle of the headrest
and the sides of the headrest should sit just above the child’s
shoulders,andtheshoulderstrapsshouldbelevelwithorbelow
your child’s shoulders (25, 26).
If this is not the case please refer to section ‘Headrest and Safety

14
GB
Harness Adjustment’.
CHECKLIST
WARNING! A CORRECTLY ADJUSTED HARNESS IS
ESSENTIAL FOR YOUR CHILD’S PROTECTION. THERE
SHOULD NOT BE MORE THAN A FINGERS WIDTH BETWEEN
THE HARNESS AND YOUR CHILD.
Howeversafeachildseatis,howeverwellbuiltitis,yourchild’s
safetydependsonyoucarryingoutthefollowingchecksbefore
every journey.
- Settheharnesscorrectlyandtothecorrectshoulder
height (22 - 29)!
- Ensure the harness straps are not twisted!
- Check the harness is set for the clothing and not loose!
- Check the harness is secure with the buckle and shoulder strap
connectors latched together and harness tension is correct (28,
28)!
- Check the car seat is facing rearwards in the vehicle and is fully
reclined (9)!
IMPORTANT!Misusingyourchildcarseatwillreducethe
protection and safety you offer your child.
FORWARD FACING FOR GROUP 1
(9kg to 18kg / approx. 9 months to 4 years)
IMPORTANT! DO NOT USE FORWARD FACING BEFORE THE
CHILD’S WEIGHT EXCEEDS 9 KG.
Firstly you must install the car seat base into your vehicle using
the vehicle seat belt or ISOFIX points. See section ‘Installing the
base - using the vehicle seat belt’ or section ‘Installing the
base - using the ISOFIX points’.
You must also ensure that the harness and headrest is set
correctly for your child, to do this see sections ‘Headrest and
Safety Harness Adjustment’ and ‘Harness Tension and Adjust
ment’.
INSTALLING THE CAR SEAT ONTO THE BASE
Place the car seat onto the car seat base facing in the direction of

15
GB
travelandpressthecarseatdownuntilyouheara“click”(12).
The car seat can be set in any of its 4 recline positions, to recline
thecarseatseesection“RECLININGYOURCARSEAT”.
To remove the car seat from the base, simultaneously press the
carseatreleasebutton(Y)whileliftingthecarseatupoutofthe
base(13,14).
INSTALLING YOUR CHILD IN THE CAR SEAT
Firstly open the buckle by pressing the red button in the centre of
the buckle (27). Then sit your child in the car seat, passing their
arms through the shoulder straps.
Bring the harness connectors together and insert into the buckle
untilyouheara“click”(28).
Tighten the harness by pulling on the harness adjustment strap
(29),oncetightmakesurethatthereisnomorethanangers
widthbetweentheharnessandyourchild.
The child’s head should sit directly in the middle of the headrest
and the sides of the headrest should sit just above the child’s
shoulders,andtheshoulderstrapsshouldbelevelwithorabove
your child’s shoulders (26).
If this is not the case please refer to section ‘Headrest and Safety
Harness Adjustment’.
CHECKLIST
WARNING! A CORRECTLY ADJUSTED HARNESS IS
ESSENTIAL FOR YOUR CHILD’S PROTECTION. THERE
SHOULD NOT BE MORE THAN A FINGERS WIDTH BETWEEN
THE HARNESS AND YOUR CHILD.
Howeversafeachildseatis,howeverwellbuiltitis,yourchild’s
safetydependsonyoucarryingoutthefollowingchecksbefore
every journey.
- Settheharnesscorrectlyandtothecorrectshoulder
height (22 - 29)!
- Ensure the harness straps are not twisted!
- Check the harness is set for the clothing and not loose!
- Check the harness is secure with the buckle and shoulder strap
connectors latched together and harness tension is correct (27 -
29)!

16
GB
- Check the car seat is facing forwards in the vehicle in the
direction of travel (12)!
RECLINING YOUR CAR SEAT (Forward Facing only)
Forrearwardfacingyourchildcarseatshouldbeinthefully
upright position only.
Forforwardfacingyourchildcarseatcanbereclinedinachoice
offourpositionstomakeitcomfortableforyourchild(30).
The recline lever (P) is located under the front edge of the seat
shell.
Squeezeandliftthelevertoreleasethelockandthenpullforward
orpushbacktothepreferredreclineposition(30).
HEADREST AND SAFETY HARNESS ADJUSTMENT
WARNING! A CORRECTLY ADJUSTED HARNESS IS
ESSENTIAL FOR YOUR CHILD’S PROTECTION. THERE
SHOULD NOT BE MORE THAN A FINGERS WIDTH BETWEEN
THE HARNESS AND YOUR CHILD.
Yourcarseatisttedwithamovableheadrestwhichalsoadjusts
the height of the harness. The headrest has seven positions (24).
The child’s head should sit directly in the middle of the headrest
and the sides of the headrest should sit just above the child’s
shoulders (25, 26).
Toadjusttheheightoftheheadrestrstlyopentheharness
buckle by pressing the red button in the centre of the buckle (26)
locatetheharnessadjustmentlever(M)whichislocatedbehind
theseatcoverin-betweentheharnessstraps(24).Pullthislever
towardsyouandmovetheheadrestupor
downtotheappropriateheightandrelease.
Try to move the headrest to check it is locked in position.
HARNESS TENSION AND ADJUSTMENT
Loosen the Harness: Press on the Harness Adjustment Button (L)
positionednearthefrontofthecarseat,andpullonthetwo
shoulderstrapssimultaneously(23).
TightentheHarness:PullrmlyontheHarnessAdjustmentStrap
(O) at the front of the car seat; it is not necessary to press on the
Adjustment Button (29).
MAINTENANCE ADVICE
WARNING! TOXIC CLEANING FLUIDS CAN CAUSE ILLNESS.

17
GB
NEVER USE BLEACH, DO NOT IRON, DO NOT MACHINE
WASH, DO NOT TUMBLE DRY AS THIS COULD DAMAGE THE
COVER AND REQUIRE REPLACING.
Thecarseatcoverisremovableandwashable.Incaseoflight
staining,cleanusingadampclothorsoapywater.Thecovercan
beremovedcompletelyandhandwashedupto30°c.
REMOVING THE COVER AND ACCESSORIES
Firstlyyouwillneedtoremovethecoverfromaroundtheheadrest
section of the car seat. To do this simply pull the cover from
around the top of the headrest, then remove from the base of the
headrest.
Then pull the harness straps through the cover.
Next release the cover from around the edges of the car seat by
releasing the elasticated straps at the front edge of the car seat.
Remove the harness shoulder straps and connectors from the
harness pads.
Next remove the buckle pad from the buckle, then pull the buckle
and crotch strap through the cover.
Then pull the elasticated part of the cover from around the central
adjuster and remove the cover from the car seat.
Toretthecoverandaccessories,simplyreversetheprocess,
howeverensuretheharnessandbucklearethecorrectway
roundandnottwisted.
REMOVING AND CLEANING THE BUCKLE
WARNING! BUCKLE FAILURE WILL CAUSE INJURY. DO NOT
OIL ANY PART OF THE BUCKLE. ALWAYS CHECK THAT
THERE IS NO FOOD DEBRIS OR OTHER SUCH MATTER IN
THE HARNESS BUCKLE.
Rinsethebucklethoroughlywithwarmwater.Allowthebuckleto
drythoroughly.Checkifyouheara‘click’,whenyoufastenthe
buckle to the shoulder strap connectors. If there is no ‘click’ repeat
the process.
Leave the buckle to dry before re-assembling on the seat.
Consumer Information
Hauck GmbH + Co KG

18
GB
Frohnlacher Str.8
D-96242 Sonnefeld
Germany
Tel: +49 9562 9860
ADDITIONAL INFORMATION
Do not use this car seat on a shopping trolley.
This car seat is not approved for use on aircraft. For more
information contact the airline.
Todisposeofyourcarseatsafelyalwaysremovetheharness
and render the seat unusable.
NOTICE
Thiscarseatisa“Semi-Universal”childrestraint.Itisapprovedto
Regulation No. 44/04 series of amendments, for general use in
vehiclesanditwilltinallcarsapprovedinthevehicletting
information.Acorrecttislikelyifthevehiclemanufacturerhas
declared in the vehicle handbook that the vehicle is capable of
acceptinga“Semi-Universal”childrestraintforthisagegroup.
Thischildrestrainthasbeenclassiedas“Semi-Universal”under
morestringentconditionsthenthosewhichappliedtoearlier
designswhichdonotcarrythisnotice.
Itcanbeinstalledinvehicleswith3-pointretractableseatbelts
thathavebeenapprovedcompliantwiththeECER16orother
equivalent standards. This car seat is also an ISOFIX CHILD
RESTRAINT SYSTEM. It is approved to Regulation No. 44/04
seriesofamendmentsforgeneraluseinvehiclesttedwith
ISOFIX anchorages systems.
ItwilltvehicleswithpositionsapprovedasISOFIXpositions
(as detailed in the vehicle handbook), depending on the category
ofthechildseatandofthexture.Themassgroupandthe
ISOFIXsizeclassforwhichthisdeviceisintendedis:0-18kg
- B1, C If in doubt, consult either the child restraint manufacturer

19
GB
or the retailer.
NOTICE
Thiscarseatisa“Semi-Universal”childrestraint.Itisapproved
to Regulation No. 44/04 series of amendments, for general use
invehiclesanditwilltinallcarsapprovedinthevehicletting
information.Acorrecttislikelyifthevehiclemanufacturerhas
declared in the vehicle handbook that the vehicle is capable of ac-
ceptinga“Semi-Universal”childrestraintforthisagegroup.This
childrestrainthasbeenclassiedas“Semi-Universal”undermore
stringentconditionsthenthosewhichappliedtoearlierdesigns
whichdonotcarrythisnotice.
Itcanbeinstalledinvehicleswith3-pointretractableseatbelts
thathavebeenapprovedcompliantwiththeECER16orother
equivalent standards. This car seat is also an ISOFIX CHILD
RESTRAINT SYSTEM. It is approved to Regulation No. 44/04
seriesofamendmentsforgeneraluseinvehiclesttedwithISO-
FIX anchorages systems.
ItwilltvehicleswithpositionsapprovedasISOFIXpositions(as
detailed in the vehicle handbook), depending on the category of
thechildseatandofthexture.ThemassgroupandtheISOFIX
sizeclassforwhichthisdeviceisintendedis:0-18kg-B1,C
If in doubt, consult either the child restraint manufacturer or the
retailer.

hauckGmbH+
Co KG
FrohnlacherStr.8
D-96242Sonnefeld
Germany
Tel.:
Fax:
E-mail:
Internet:
+49(0)9562/986-0
+49(0)9562/6272
http://www.hauck.de
Instraction_Varioguard_GB
Other manuals for Varioguard
1
Table of contents
Other Hauck Car Seat manuals

Hauck
Hauck prosafe 35 User manual

Hauck
Hauck iPRO BASE User manual

Hauck
Hauck SELECT KIDS User manual

Hauck
Hauck DRIVE N CARE User manual

Hauck
Hauck iPRO BASE User manual

Hauck
Hauck Zero Plus Select User manual

Hauck
Hauck SELECT KIDS User manual

Hauck
Hauck Guardfix User manual

Hauck
Hauck Varioguard Plus User manual

Hauck
Hauck Bodyguard Pro User manual