manuals.online logo
Brands
  1. Home
  2. •
  3. Brands
  4. •
  5. Havahart
  6. •
  7. Pet Care Product
  8. •
  9. Havahart 5140 Fence Free Setup guide

Havahart 5140 Fence Free Setup guide

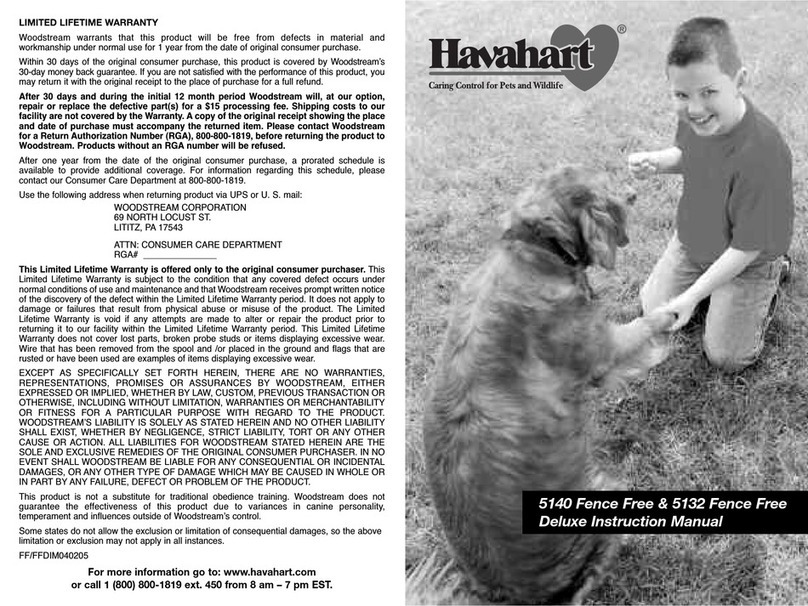
LIMITED LIFETIME WARRANTY
Woodstream warrants that this product will be free from defects in material and workmanship under
normal use for 1 year from the date of original consumer purchase.
Within 30 days of the original consumer purchase, this product is covered by Woodstream’s 30-day
money back guarantee. If you are not satisfied with the performance of this product, you may return
it with the original receipt to the place of purchase for a full refund.
After 30 days and during the initial 12 month period Woodstream will, at our option, repair
or replace the defective part(s) for a $15 processing fee. Shipping costs to our facility are
not covered by the Warranty. A copy of the original receipt showing the place and date of
purchase must accompany the returned item. Please contact Woodstream for a Return
Authorization Number (RGA), 800-800-1819, before returning the product to Woodstream.
Products without an RGA number will be refused.
After one year from the date of the original consumer purchase, a prorated schedule is available to
provide additional coverage. For information regarding this schedule please contact our Consumer
Care Department at 800-800-1819.
Use the following address when returning product via UPS or U. S. mail:
WOODSTREAM CORPORATION
69 NORTH LOCUST ST.
LITITZ, PA 17543
ATTN: CONSUMER CARE DEPARTMENT
RGA# _______________
This Limited Lifetime Warranty is offered only to the original consumer purchaser. This Limited Lifetime
Warranty is subject to the condition that any covered defect occurs under normal conditions of use and
maintenance and that Woodstream receives prompt written notice of the discovery of the defect within
the Limited Lifetime Warranty period. It does not apply to damage or failures that result from physical
abuse or misuse of the product. The Limited Lifetime Warranty is void if any attempts are made to alter
or repair the product prior to returning it to our facility within the Limited Lifetime Warranty period. This
Limited Lifetime Warranty does not cover lost parts, broken probe studs or items displaying excessive
wear. Wire that has been removed from the spool and /or placed in the ground and flags that are rusted
or have been used are examples of items displaying excessive wear.
EXCEPT AS SPECIFICALLY SET FORTH HEREIN, THERE ARE NO WARRANTIES,
REPRESENTATIONS, PROMISES OR ASSURANCES BY WOODSTREAM, EITHER EXPRESSED
OR IMPLIED, WHETHER BY LAW, CUSTOM, PREVIOUS TRANSACTION OR OTHERWISE,
INCLUDING WITHOUT LIMITATION, WARRANTIES OR MERCHANTABILITY OR FITNESS FOR A
PARTICULAR PURPOSE WITH REGARD TO THE PRODUCT. WOODSTREAM’S LIABILITY IS
SOLELY AS STATED HEREIN AND NO OTHER LIABILITY SHALL EXIST, WHETHER BY
NEGLIGENCE, STRICT LIABILITY, TORT OR ANY OTHER CAUSE OR ACTION. ALL LIABILITIES
FOR WOODSTREAM STATED HEREIN ARE THE SOLE AND EXCLUSIVE REMEDIES OF THE
ORIGINAL CONSUMER PURCHASER. IN NO EVENT SHALL WOODSTREAM BE LIABLE FOR
ANY CONSEQUENTIAL OR INCIDENTAL DAMAGES, OR ANY OTHER TYPE OF DAMAGE WHICH
MAY BE CAUSED IN WHOLE OR IN PART BY ANY FAILURE, DEFECT OR PROBLEM OF THE
PRODUCT.
This product is not a substitute for traditional obedience training. Woodstream does not guarantee
the effectiveness of this product due to variances in canine personality, temperament and influences
outside of Woodstream’s control.
Some states do not allow the exclusion or limitation of consequential damages, so the above limitation
or exclusion may not apply in all instances.
rev FF/FFD 082004TG
5140 Fence Free &
5132 Fence Free Deluxe
Training Guide
For more information go to: www.havahart.com,
or call 1 (800) 800-1819 ext 450, 8-5 EST.
There are four steps to training your dog successfully with the Havahart®Fence Free
Containment Systems. The first three steps are done using a 6-foot leash. It will take
time to teach your dog and by thoroughly following these instructions most mistakes can
be avoided. A leash will maintain a safe environment during the training period. Only
during the last phase of training will your dog be off the leash.
Each step should take approximately three days to complete. Training will take
10-20 minutes, 2-4 times a day for 12-14 days. Consistency during the training
period is a must!
Flag training without stimulation can begin as early as four months of age. Dogs who
are high spirited and confident can begin the stimulation phase of training immediately.
Dogs who are shy and less confident should begin training around six months of age.
4 Steps to Successful Training
1. Teaching – This phase will make your dog aware of the flags and your
suggestions to avoid them.
2. Training - This phase will make your dog aware of corrections associated with not
obeying what was taught in the first step, that he should avoid the flags.
3. On-Leash Proofing – This phase uses temptations to convince your dog that even
when excited the fence always matters.
4. Off-Leash Proofing – This phase will continue to use temptations without the
leash.
Step 1: Teaching
Goal: Teach your dog to understand that the flagged boundaries should
be avoided.
Start with your dog wearing the receiver collar, a separate collar with a 6-foot leash (the
collar and leash should be non-metal) and the wall mount unit/control box turned off.
Use the leash to keep your dog from passing the boundary flags.
1. Walk your dog around the safe area for 2-4 minutes avoiding contact with
the flags.
2. Approach the flags and shake them. Use a low disapproving tone to say,
“NO, bad flags, bad flags!” Do not yell or overwhelm your dog.
3. Return to the safe zone and praise your dog for a few minutes. Keep your
dog within 6 feet of boundary flags. While praising your dog, reach out and shake
the flag again, reminding your dog with a “NO, bad flags!” that they should be
avoided.
4. Repeat this exercise within a 20-foot area 4-6 times.
5. Finally, take your dog back to the safe zone and praise your dog. The training has
successfully begun.
6. Repeat this exercise 2-4 times a day in different areas of your yard.
7. Spend the next 3-4 days repeating this step 2-4 times a day before moving
on to Step 2.
Proceed to Step 2 when:
• You have practiced for 3 consecutive days as instructed.
• Your dog passes 10 consecutive “flag awareness” tests.
1
Flag Awareness Test – Walk your dog toward the flags. Success is determined by
your dog’s reluctance to approach the flags. Your dog has passed the test when it has
refused to go near the flags, but will walk anywhere within the safe area of the yard.
Step 2: Training
Goal: Allow your dog to feel the correction associated with going near the flags.
Use the leash to return your dog to the safe zone after any correction. This will
reinforce to your dog that the collar/stimulus is designed NOT to harm your dog but
rather to get their attention.
The first time your dog receives a correction, normal reactions may be yelping or
jumping. These reactions will decrease as he becomes accustomed to the collar. If you
ignore your dog’s reaction to the correction, he will accept the correction better.
Note: Use the test light to assure collar is receiving signal before all sessions.
Begin with your dog wearing a fully charged receiver collar, set at the lowest correct
level, a separate collar with a 6-foot leash (the collar and leash should
be non-metal) and the wall mount unit/control box turned on, loop light on, and
a boundary width set.
1. Walk your dog around the safe zone for 2-4 minutes, avoiding contact
with the flags.
2. Approach the flag line and pretend not to be paying attention to the dog. Your dog
should want to avoid the flag line. Continue to give your dog the opportunity to pass
the flag line.
3. If or when your dog approaches the flag line, there will be a tone and/or mild
stimulus depending on where the dog is in the signal field.
4. When your dog reacts, pull your dog back into the safe zone. Reach out and gently
shake the flag, reminding, “No, bad flags, bad flags!” If at any time during training
your pet vocalizes or reacts in some other negative manner to stimulation, it is most
commonly caused by stimulation that is set too high for the comfort level of this pet.
The stimulation level needs to be reduced. (See Section 7 – “Changing the Receiver
Collar Correction Level” in the Instruction Manual.) In addition to reducing the
correction level, you will need to restore the positive nature of the training by
reducing the training for a couple of days and adding a lot of praise, play and treats
when training resumes.
5. Step back a few feet from the flags, then praise and soothe your dog for a few
minutes. Additional flags may help remind your dog.
6. Play with your dog for a few minutes and then repeat the lesson in another area.
Allow no more than three stimulations per day during training.
7. Praise your dog whenever he avoids the flags.
8. Finish the lesson with some fun time in the safe zone. Always finish the session with
successful flag avoidance and then a few minutes of play.
9. The step should be repeated 3-5 times each day in different areas of your yard.
It is normal for dogs to become nervous during this stage of training. The key is to
remain upbeat and positive with your dogs. Try to avoid going inside your house
within five minutes of any correction.
2
Dogs – Ask neighbors to bring their dog to the outside of the flags.To see if your dog
respects the flags, let your neighbor’s dog play with yours for a few minutes.
Then take the neighbor’s dog out of your yard, let their dog come and go numerous
times.Watch how your dog reacts. If he attempts to cross the flag boundary, pull
him to the safe zone and remind him that the flags are bad. If your dog does not
attempt to cross the boundary, praise and reward your dog in the safe zone.
4. Any time your dog purposely avoids going near the flags, praise warmly.
5. Finish this lesson after successful flag avoidance and a few minutes of
play/relaxation in the safe zone.
6. This section should be repeated 3-5 times each day in different areas of the yard. It
is common for dogs to be somewhat nervous during this stage. The key is to remain
positive with your dog and avoid going inside your house within five minutes of any
correction.
Proceed to Step 4 when:
• Your dog passes 20 consecutive “run-through” tests.
Run-Through Test – Each of the temptations noted earlier qualifies as a test.
Your dog has passed the run-through test when he refuses to go past the flags, but will
walk anywhere else in the yard’s safe zone.
Troubleshooting at Step 3
Problem: Dog does not react after passing flags for two seconds.
Solution: System is turned on and the collar beeps when held a foot off the ground,
at or near the flags. If the collar beeps, the probes may not be making
contact with your dog’s skin. To improve contact, try any of the following:
1) tighten the collar; 2) reposition the collar. If collar beeps and you checked
for correct skin contact, adjust stimulus up one level. If collar does not beep
at or near the flags, check for sufficient battery charge. If there is sufficient
charge and the collar still will not beep, call Woodstream Customer Service
at 1-800-800-1819 ext. 450, 8-5 EST.
Problem: Dog becomes afraid of the yard.
Solution: Skip corrections for a few days and play in the safe zone. Even if
the dog refuses to move around the yard with you, keep the dog
on the leash and pull the dog to the center of the safe zone using
positive commands and treats.
Step 4: Off-Leash Proofing
Goal: Ensure your dog is fully trained to the fence without a leash.
Begin with your dog wearing a fully charged receiver collar set at the correct level for
your pet, a separate collar with a 6-foot leash (the collar and leash should be non-
metal) and system turned on.
1. Follow Step 3 instructions with your dog’s leash trailing on the ground, in case you
need to get a hold of your dog.
2. Use all the temptations and run-through tests from Step 3.
3. If the dog breaks through the fence during this training stage, quickly return your dog
to the safe zone and remind, “NO, bad flags, bad flags!” Soothe and reassure your
dog in the safe zone before repeating temptations.
4. Repeat this step until you are confident that your dog will ignore temptations outside the yard.
4
(Step 2 continued)
Proceed to Step 3 when:
• You have practiced for 3-5 days at this level OR
• Your dog passes 10 consecutive "flag avoidance" tests.
Flag Avoidance Test – Stand near the flag line and pretend not to pay attention.
Success occurs when your dog stops and shows an unwillingness to go near the flags.
You have passed the test when your dog refuses to go near the flags, but will walk
anywhere within the yard’s safe zone.
Troubleshooting at Step 2
Problem: Dog does not react after passing flags for two seconds.
Solution: System is turned on and the collar beeps when held a foot off the ground,
at or near the flags. If the collar beeps, the probes may not be making
contact with your dog’s skin. To improve contact, try any of the following:
1) tighten the collar; 2) reposition the collar. If collar beeps and you checked
for correct skin contact, adjust stimulus up one level (see Section 7 –
“Changing the Receiver Collar Correction Level” in the Instruction Manual).
If collar does not beep at or near the flags, check for sufficient battery
charge. If there is sufficient charge and the collar still will not beep, call
Woodstream Customer Service at 1-800-800-1819 ext. 450, 8-5 EST.
Problem: Dog becomes afraid of the yard.
Solution: Skip corrections for a few days and play in the safe zone. Even if
the dog refuses to move around the yard with you, keep the dog
on the leash and gently lead the dog to the center of the safe zone using
positive commands and treats.
Problem: Dog does not make mistakes, and thus receives no correction.
Solution: After 10 successful avoidances move on to Step 3. Some dogs may learn
the fence after one or two corrections. Four to six is average.
STEP 3: ON-LEASH PROOFING
Goal: Teach your dog to respect the fence when distractions are present.
Begin with your dog wearing a fully charged receiver collar set at the correct level for
your pet, a separate collar with a 6-foot leash (the collar and leash should be non-
metal) and system turned on.
1. If your dog makes a mistake, use the leash to pull your dog back to the safe
zone. Reach out and gently shake a flag, reminding your dog, “NO, bad flags,
bad flags!” Step back a few feet from the flags, gently praise and soothe your
dog.
2. Try walking through the flags a few times, this will ensure your dog knows to stop. If
your dog continues into the correction zone pull your dog back to the safe zone
immediately.
3. Success will depend on how well you “simulate” temptations your dog may face
when in the yard. Real-life distractions include neighbors, animals, including other
dogs, cars, etc. Ask yourself, “What excites my dog?” Examples:
Food – Toss your dog’s favorite treats past the flags.
Toys – Try tossing a favorite ball or toy past the flags.
3
Training with the Hand-Held Remote
(Model 5132 Fence Free Deluxe Only)
There are 4 options on the remote: 1 (Low), 2 (Medium), 3 (High), and Bad Tone.
Pressing the appropriate button sends the stimulus to the receiver collar. The
stimulus is delivered via the collar receiver probes.
When training, always start at the lowest level and check your dog’s response to
the stimulus. You should always use the lowest level necessary to get the desired
response. As a safety feature, the unit will automatically shut off after 10 seconds.
If you wish to use tone to control behavior, simply press the Bad Tone button. Your dog
will hear an audible tone instead of receiving stimulation and will begin to associate the
tone to the misbehavior.
Rest assured that electronic stimulus training is a proven technique used by essentially
all training professionals. It is a safe and highly effective method to effect two kinds of
behavior changes: eliminating negative behavior and creating desired positive behavior.
Eliminating Negative Behavior: The key here is visual observation of the behavior. Watch
your pet closely and every time they begin the negative activity administer a correction
without any other commands or action on your part. Very quickly your pet will relate the
undesired action with the corrective stimulus and stop. If they do not stop increase the
level of stimulus until you are certain they are aware of the stimulus.
Creating Positive Behavior: The hand held trainer and collar act as an invisible leash
allowing you to have control of your animal even at relatively great distances. The key
here is to teach the animal the behavior that you want (sit, stay, come, etc.) while using
a leash. Once they have learned you can use the collar to correct mistakes at the same
time that you correct with the leash. Once trained the training collar assures that
obedience continues even when the pet is off the leash.
Note: The hand held transmitter and receiver collar can be used independently
of the Fence Free system. To correct your dog at the park or away from home,
put on the dog's collar and use the hand-held remote with the 3 corrections and Bad
Tone. Always turn dog's collar off or take collar off when taking your dog away from
home.
We recommend training with the hand held transmitter both in the safe area of your yard
and outside of the fenced in area. Training with the hand held transmitter around the
boundary wire is not recommended. Use of the hand held transmitter around the
boundary wire when the fence is on will result in your dog receiving the programmed
level of stimulation from both the fence and the hand held transmitter. This enhanced
stimulation may be used as an option to reinforce fence training for stubborn dogs prior
to increasing the stimulation level.
6
Troubleshooting at Step 4
Problem: Dog runs through the fence.
Solution: System is turned on and the collar beeps when held a foot off the ground,
at or near the flags. If the collar beeps, the probes may not
be making contact with your dog’s skin. To improve contact, try any of the
following: 1) tighten the collar; 2) reposition the collar. If collar beeps and
you checked for correct skin contact, adjust stimulus up one level.
If collar does not beep at or near the flags, check for sufficient battery
charge. If there is sufficient charge and the collar still will not beep, call
Woodstream Customer Service at 1-800-800-1819 ext. 450, 8-5 EST.
Dogs sometimes make mistakes during this phase of training. The run-
through protection feature should discourage repeated mistakes.
Problem: Dog becomes afraid of the yard.
Solution: Skip corrections for a few days and play in the safe zone. Even if the
dog refuses to move around the yard with you, keep the dog on the leash
and pull the dog to the center of the safe zone using positive commands
and treats.
Marker Flag Removal – Within 60-90 days, the marker flags should lose their
significance and your dog should demonstrate a willingness to stay in the safe zone. At
this time, the flags should be removed gradually after step 4 is complete – every other
flag every few days until all flags have been removed.
Important Tips
1. It is important that the collar be snug to work. However, if the collar is left on
for more than 12 hours it can irritate your dog’s neck. Simply move the collar
to a different position if irritation occurs. Never leave the collar on the dog for
more than 12 consecutive hours.
2. Most dogs will not wear their collars indoors, unless the dog has a tendency to bolt
through the door and into the yard.
3. Setting your system too high after the training period may prevent your dog from
“testing” the fence.
4. Monthly Check-Up
A. Make sure the collar fits snugly
B. A playful stroll near the fence ensures that your dog still respects
the “boundary.”
5. Always use the lowest stimulation possible to train your dog. On small dogs (less
than 10 lbs.) use the lowest stimulation levels.
6. After your dog is trained, you may have occasion to take it out of the yard for a walk
in the neighborhood or to go with you in a vehicle. It is important that you exit a
fenced yard correctly, so that you don’t confuse the pet or negate your training
efforts. This is taught to the dog only after it has been successfully confined by
the fence for 2-3 weeks. Always do the following: Place dog on sit and stay about 5
feet from the signal field (on the driveway and always in the same spot.) Dog is on
leash. Take off containment collar. Owner walks across the signal field, while holding
leash (thus about a 10 foot leash is needed.) Owner tells dog to Come and pulls dog
through. Owner and dog go for a walk. When they come back, the reverse is
completed – containment collar goes back on and leash comes off.
5

This manual suits for next models

1

Other Havahart Pet Care Product manuals

Havahart 5125GX User manual

Havahart

Havahart 5125GX User manual

Havahart Radial-Shape 2 User manual

Havahart

Havahart Radial-Shape 2 User manual

Havahart 5144G User manual

Havahart

Havahart 5144G User manual

Havahart 5165 Setup guide

Havahart

Havahart 5165 Setup guide

Havahart Radial-Shape 2 User manual

Havahart

Havahart Radial-Shape 2 User manual

Havahart 5134G-B User manual

Havahart

Havahart 5134G-B User manual

Havahart 5150 User manual

Havahart

Havahart 5150 User manual

Havahart 5134G User manual

Havahart

Havahart 5134G User manual

Havahart Custom-Shape Wireless Dog Fence 5144G-B User manual

Havahart

Havahart Custom-Shape Wireless Dog Fence 5144G-B User manual

Havahart Radial-Shape 2 User manual

Havahart

Havahart Radial-Shape 2 User manual

Havahart Custom-Shape Wireless Dog Fence 5144G-A User manual

Havahart

Havahart Custom-Shape Wireless Dog Fence 5144G-A User manual

Havahart Custom-Shape Select 5144GSEL User manual

Havahart

Havahart Custom-Shape Select 5144GSEL User manual

Havahart Radial-Shape Select User manual

Havahart

Havahart Radial-Shape Select User manual

Havahart 5125G User manual

Havahart

Havahart 5125G User manual

Havahart Radial-Shape Select User manual

Havahart

Havahart Radial-Shape Select User manual

Havahart 5140G User manual

Havahart

Havahart 5140G User manual

Havahart 5145 User manual

Havahart

Havahart 5145 User manual

Havahart Custom-Shape Select 5144GSEL User manual

Havahart

Havahart Custom-Shape Select 5144GSEL User manual

Havahart 1092 User manual

Havahart

Havahart 1092 User manual

Havahart 5140 User manual

Havahart

Havahart 5140 User manual

Havahart 5150G User manual

Havahart

Havahart 5150G User manual

Popular Pet Care Product manuals by other brands

GSN Patrol 201 Pet Installation and user manual

GSN

GSN Patrol 201 Pet Installation and user manual

OverEZ Chicken Coop SOEZCKCP instruction manual

OverEZ Chicken Coop

OverEZ Chicken Coop SOEZCKCP instruction manual

Backyard Cat Enclosures Claws Cabin Assembly instructions

Backyard Cat Enclosures

Backyard Cat Enclosures Claws Cabin Assembly instructions

LUXURY DogHouse PAROS grey Assembly instructions

LUXURY DogHouse

LUXURY DogHouse PAROS grey Assembly instructions

EHEIM 3581 manual

EHEIM

EHEIM 3581 manual

Litter box Sauder Cat Shelf manual

Litter box

Litter box Sauder Cat Shelf manual

Cegla RC-Animal Chamber manual

Cegla

Cegla RC-Animal Chamber manual

TUYA SPF2000-W-TY quick start guide

TUYA

TUYA SPF2000-W-TY quick start guide

Petsafe SmartDoor Connected Pet Door Training guide

Petsafe

Petsafe SmartDoor Connected Pet Door Training guide

Chewy frisco 951774 instruction manual

Chewy

Chewy frisco 951774 instruction manual

Pet Cargo Cabrio user manual

Pet Cargo

Pet Cargo Cabrio user manual

Petsafe Drinkwell PWW00-13705 quick start guide

Petsafe

Petsafe Drinkwell PWW00-13705 quick start guide

Dogtra 1200 series owner's manual

Dogtra

Dogtra 1200 series owner's manual

DogWatch R9 operating instructions

DogWatch

DogWatch R9 operating instructions

THE DOGLINE SportDOG NoBark SBC-R-E operating guide

THE DOGLINE

THE DOGLINE SportDOG NoBark SBC-R-E operating guide

Nelson 1200 installation instructions

Nelson

Nelson 1200 installation instructions

Pet Lovers Stuff Wrist Wraps instructions

Pet Lovers Stuff

Pet Lovers Stuff Wrist Wraps instructions

Petsafe ULTRALIGHT SONIC BARK CONTROL quick guide

Petsafe

Petsafe ULTRALIGHT SONIC BARK CONTROL quick guide

manuals.online logo
manuals.online logoBrands
  • About & Mission
  • Contact us
  • Privacy Policy
  • Terms and Conditions

Copyright 2025 Manuals.Online. All Rights Reserved.