manuals.online logo
Brands
  1. Home
  2. •
  3. Brands
  4. •
  5. hawa
  6. •
  7. Indoor Furnishing
  8. •
  9. hawa Multifold 30/W User manual

hawa Multifold 30/W User manual

Montageanleitung
Beschlag für begehbare Schränke, einseitig angeschlagen,
ohne untere Führung, bis 30 kg Türgewicht
(einliegend oder vorliegend).
Instructions de montage
Ferrure pour armoire accessible, à charnière sur un côté,
sans guidage inférieur, jusqu'à 30 kg par porte
(intégré au corps ou coulissant devant).
Installation instructions
Hardware system for walk-in cabinet, hinged on one side,
without floor guide, up to 30 kg (66 lbs.) panel weight
(inlay or overlay).
Istruzioni di montaggio
Ferramenta per armadio transitable, incernierate da una sola
parte, senza guida inferiore, fino a 30 kg per anta
(all'interno o davanti).
Instrucciones de montaje
Herrajes para armario transitable, fijadas por un lado, sin
guía abajo, hasta 30 kg de peso por hoja
(enrasada o superpuesta).
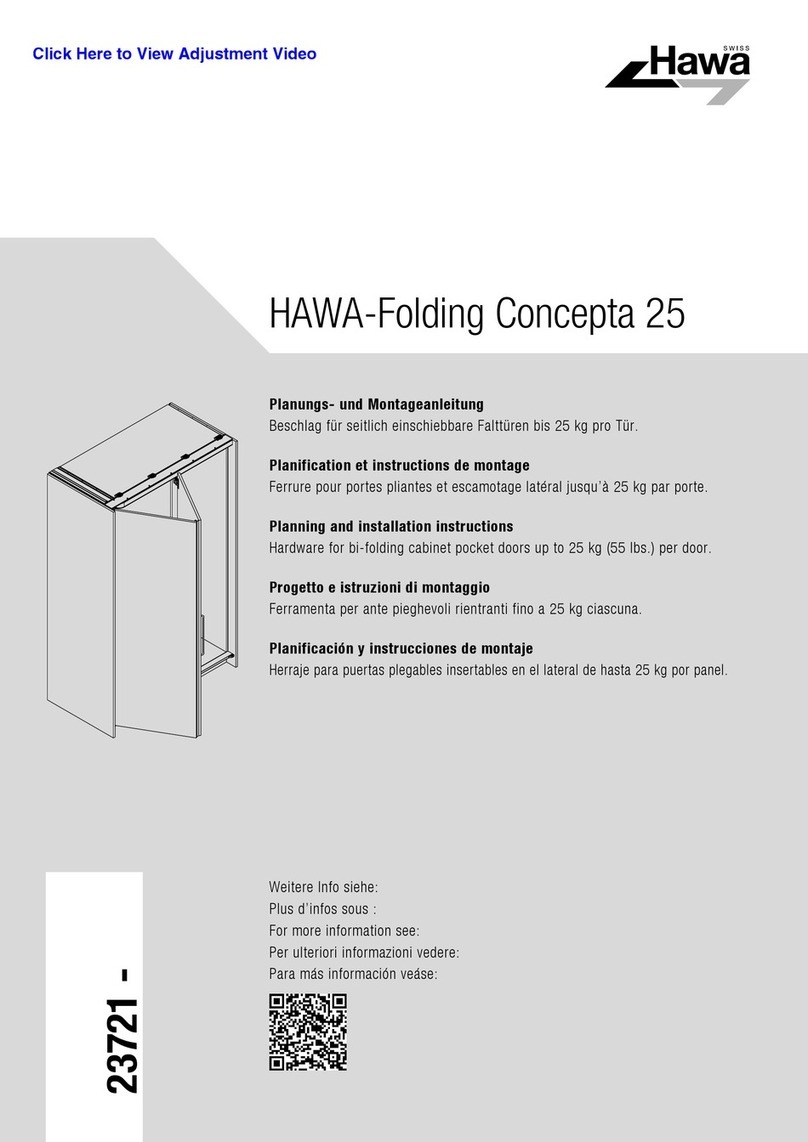
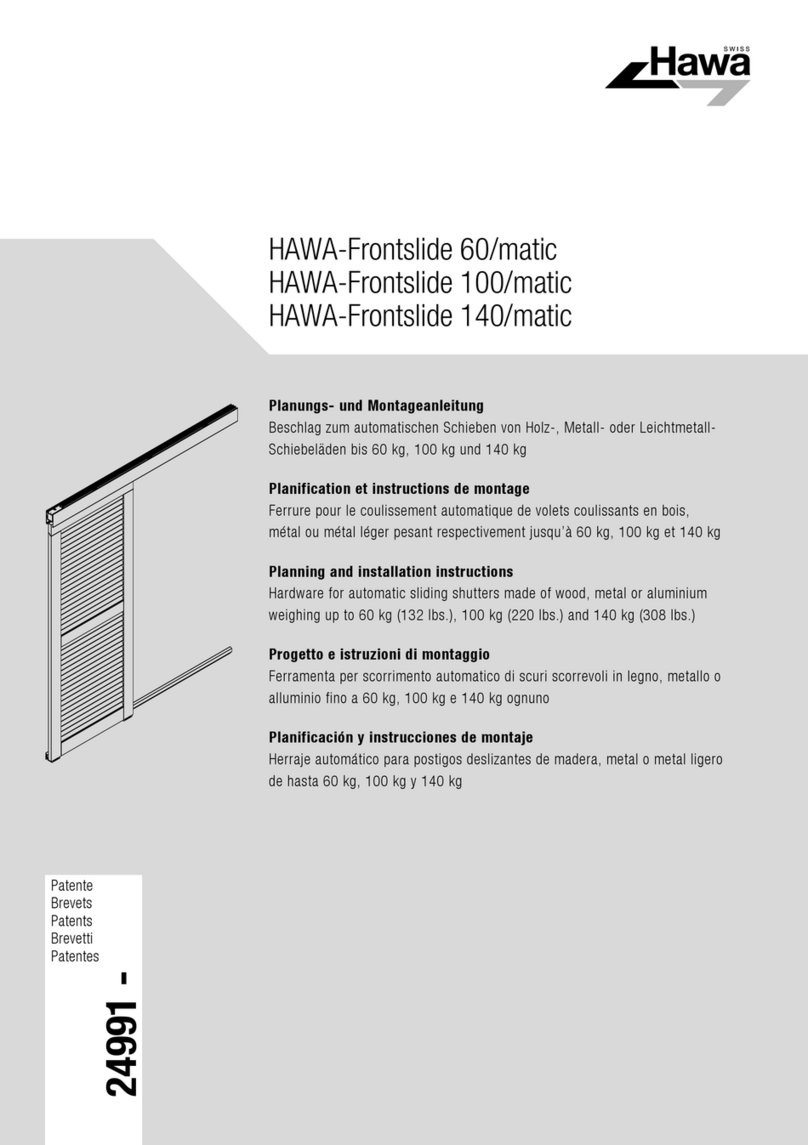
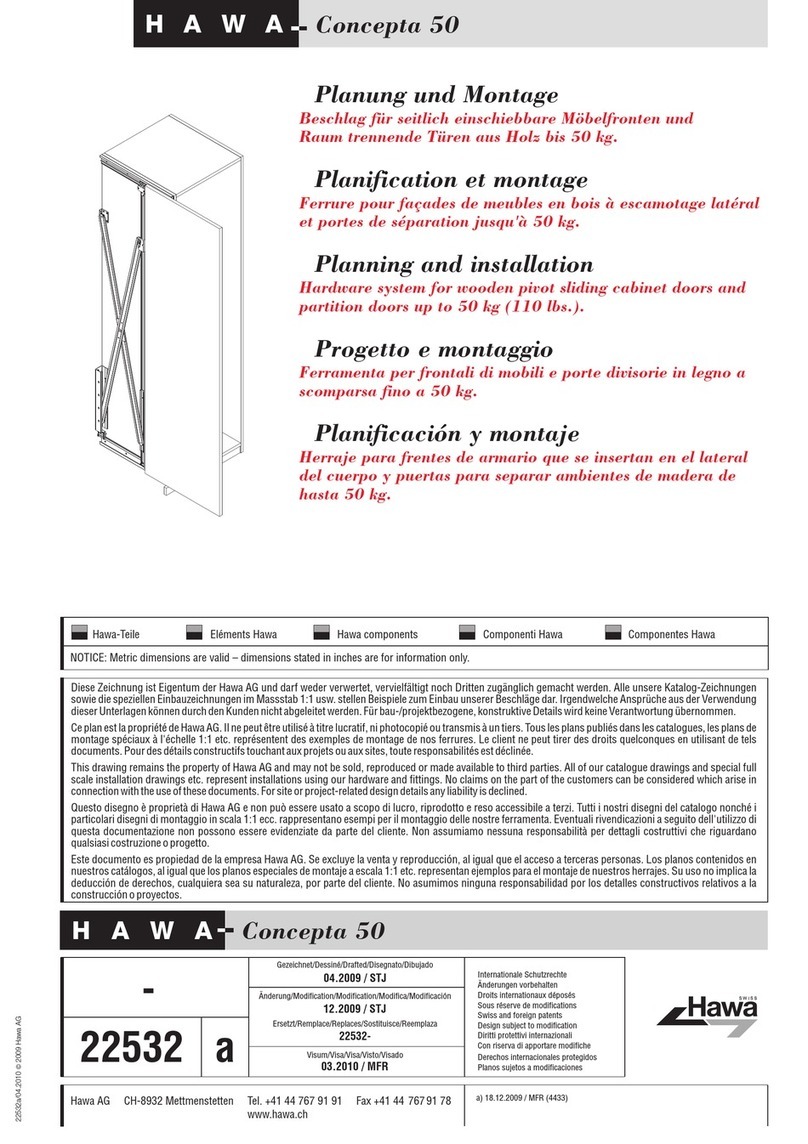
HAWA Multifold 30/W
Möbelbeschläge
Visum/Visa/Visa/Visto/Visado
Ersetzt/Remplacé/Replaced/Sostituito/Reemplaza
Gezeichnet/Dessiné/Drafted/Disegnato/Dibujado
Änderung/Modification/Modification/Modifica/Modificación
Internationale Schutzrechte
Änderungen vorbehalten
Droits internationaux déposés
Sous réserve de modifications
Swiss and foreign patents
Design subject to modification
Derechos internacionales protegidos
Planos sujetos a modificaciones
Diritti protettivi internazionali
Con riserva di apportare modifiche
HAWA
Diese Zeichnung ist Eigentum der Hawa AG und darf weder verwertet, vervielfältigt noch Dritten zugänglich gemacht werden. Alle unsere Katalog-Zeichnungen
sowie die speziellen Einbauzeichnungen im Massstab 1:1 usw. stellen Beispiele zum Einbau unserer Beschläge dar. Irgendwelche Ansprüche aus der Verwendung
dieser Unterlagen können durch den Kunden nicht abgeleitet werden. Für bau-/projektbezogene, konstruktive Details wird keine Verantwortung übernommen.
Ce plan est la propriété de Hawa AG. Il ne peut être utilisé à titre lucratif, ni photocopié ou transmis à un tiers. Tous les plans publiés dans les catalogues, les plans de
montage spéciaux à l'échelle 1:1 etc. représentent des exemples de montage de nos ferrures. Le client ne peut tirer des droits quelconques en utilisant de tels
documents. Pour des détails constructifs touchant aux projets ou aux sites, toute responsabilités est déclinée.
This drawing remains the property of Hawa AG and may not be sold, reproduced or made available to third parties. All of our catalogue drawings and special full
scale installation drawings etc. represent installations using our hardware and fittings. No claims on the part of the customers can be considered which arise in
connection with the use of these documents. For site or project-related design details any liability is declined.
Questo disegno è proprietà di Hawa AG e non può essere usato a scopo di lucro, riprodotto e reso accessibile a terzi. Tutti i nostri disegni del catalogo nonché i
particolari disegni di montaggio in scala 1:1 ecc. rappresentano esempi per il montaggio delle nostre ferramenta. Eventuali rivendicazioni a seguito dell'utilizzo di
questa documentazione non possono essere evidenziate da parte del cliente. Non assumiamo nessuna responsabilità per detagli costruttivi che riguardano
qualsiasi costruzioni o progetti.
Este documento es propiedad de la empresa Hawa AG. Se excluye la venta y reproducción, al igual que el acceso a terceras personas. Los planos contenidos en
nuestros catálogos, al igual que los planos especiales de montaje a escala 1:1 etc. representan ejemplos para el montaje de nuestros herrajes. Su uso no implica la
deducción de derechos, cualquiera sea su naturaleza, por parte del cliente. No asumimos ninguna responsabilidad por los detalles constructivos relativos a la
construcción o proyectos.
--
08.2010 / STJ
a) 01.04.97 / BG (-) d) 14.06.07 / HAG (3891)
b) 01.06.00 / HGU (2228)
c) 26.01.06 / BKU (3525)
Multifold 30/W
01.97 / BG
15567c
04.2014 / MFR
15567
-
d
Hawa-Teile Eléments Hawa Hawa components Componenti Hawa Componentes Hawa
NOTICE: Metric dimensions are valid – dimensions stated in inches are for information only.
Hawa AG 8932 Mettmenstetten Tel. +41 44 787 17 17 Fax +41 44 787 17 18
Switzerland www.hawa.ch
15567d/04.2014 ©Hawa AG
1
15567d-10.prn
S:\Media\Montageanleitungen\MULTIFOL\15567d-10.vp
Donnerstag, 10. April 2014 11:00:39
Farbprofil: Deaktiviert
Komposit Standardbildschirm
Deutsch HAWA-Multifold 30/W
maximales Türgewicht 30 kg
maximale Türhöhe 2600 mm
maximale Türbreite 500 mm
Türdicken 19 – 25 mm
Français HAWA-Multifold 30/W
poids maximal par porte 30 kg
hauteur maximale par porte 2600 mm
largeur maximale par porte 500 mm
épaisseurs portes 19 – 25 mm
English HAWA-Multifold 30/W
maximum panel weight 30 kg (66 lbs.)
maximum panel height 2600 mm (8'63
8")
maximum panel width 500 mm (1'7 11
16 ")
door thicknesses 19 – 25 mm (3
4"– 31
32 ")
Italiano HAWA-Multifold 30/W
max. peso anta 30 kg
max. altezza anta 2600 mm
max. larghezza anta 500 mm
spessori porte 19 – 25 mm
Español HAWA-Multifold 30/W
máx. peso de hoja 30 kg
máx. altura de hoja 2600 mm
máx. ancho de hoja 500 mm
espesores puertas 19 – 25 mm
2
HAWA Multifold 30/W
Hawa AG 8932 Mettmenstetten Tel. +41 44 787 17 17 Fax +41 44 787 17 18
Switzerland www.hawa.ch
Möbelbeschläge
Technische Änderungen vorbehalten Con riserva di apportare modifiche tecniche
Sous réserve de modifications techniques Bajo reserva de modificaciones técnicas
Subject to modification
Faltpaketbreite
Largeur du paquet de portes pliantes
Folding package width
Larghezza del pacchetto ripiegabile
Ancho del paquete plegable
2
15567d-10.prn
S:\Media\Montageanleitungen\MULTIFOL\15567d-10.vp
Donnerstag, 10. April 2014 11:00:41
Farbprofil: Deaktiviert
Komposit Standardbildschirm
Schrankkonstruktionen
Constructions d'armoire
Cabinet design versions
Tipi di armadi
Diseños de armarios
3
HAWA Multifold 30/W
Hawa AG 8932 Mettmenstetten Tel. +41 44 787 17 17 Fax +41 44 787 17 18
Switzerland www.hawa.ch
Möbelbeschläge
Technische Änderungen vorbehalten Con riserva di apportare modifiche tecniche
Sous réserve de modifications techniques Bajo reserva de modificaciones técnicas
Subject to modification
3
15567d-10.prn
S:\Media\Montageanleitungen\MULTIFOL\15567d-10.vp
Donnerstag, 10. April 2014 11:00:43
Farbprofil: Deaktiviert
Komposit Standardbildschirm
4
HAWA Multifold 30/W
Hawa AG 8932 Mettmenstetten Tel. +41 44 787 17 17 Fax +41 44 787 17 18
Switzerland www.hawa.ch
Möbelbeschläge
Technische Änderungen vorbehalten Con riserva di apportare modifiche tecniche
Sous réserve de modifications techniques Bajo reserva de modificaciones técnicas
Subject to modification
Standardausführung (gemäss Schablone)
Exécution standard (selon gabarit)
Standard design (according to template)
Esecuzione standard (conforme a maschera)
Ejecución standard (según plantilla)
Vorsicht: der Deckel darf nicht durchhängen!
Attention: le dessus ne doit pas fléchir!
Please note: The top may not be sagging!
Attenzione: il cielo non deve curvarsi!
Atención: el techo no debe combarse!
4
15567d-10.prn
S:\Media\Montageanleitungen\MULTIFOL\15567d-10.vp
Donnerstag, 10. April 2014 11:00:44
Farbprofil: Deaktiviert
Komposit Standardbildschirm
5
HAWA Multifold 30/W
Hawa AG 8932 Mettmenstetten Tel. +41 44 787 17 17 Fax +41 44 787 17 18
Switzerland www.hawa.ch
Möbelbeschläge
Technische Änderungen vorbehalten Con riserva di apportare modifiche tecniche
Sous réserve de modifications techniques Bajo reserva de modificaciones técnicas
Subject to modification
Handelsübliche Dichtung möglich
Joint du commerce possible
Commercial seal possible
Garnizione d'uso commerciale permessa
Junta corriente del mercado posible
5
15567d-10.prn
S:\Media\Montageanleitungen\MULTIFOL\15567d-10.vp
Donnerstag, 10. April 2014 11:00:46
Farbprofil: Deaktiviert
Komposit Standardbildschirm
Berechnung der Topfposition entsprechend der Türfugenbreite
Calcul de la position de la charnière en fonction du jeu des portes
Calculation of the hinge position as a function of the door rebate width
Calcolo della posizione del fondello in funzione della larghezza del giunto dell'anta
Cálculo de la posición de la armadura según el ancho de la juntura de la puerta
6
HAWA Multifold 30/W
Hawa AG 8932 Mettmenstetten Tel. +41 44 787 17 17 Fax +41 44 787 17 18
Switzerland www.hawa.ch
Möbelbeschläge
Technische Änderungen vorbehalten Con riserva di apportare modifiche tecniche
Sous réserve de modifications techniques Bajo reserva de modificaciones técnicas
Subject to modification
Multi/e = Min. Abstand der Topfausfräsung oben
siehe Standardausführung Seite 4 Detail B+C.
Multi/e = Ecart minimum de l'entaille de charnière en haut
voir exécution standard page 4 détail B+C.
Multi/e = Minimum distance of hinge recess on top
design on page 4 detail B+C.
Multi/e = Distanza minima della fresatura del fondello sopra
vedi esecuzione standard pag. 4 dettaglio B+C.
Multi/e = Distancia minima del fresado de la armadura arriba
véase de ejecución standard en pág. 4 detalle B+C.
Fugenbreite und Türdicke entsprechend den
Angaben der Topfbandhersteller.
Jeu et épaisseurs des portes selon les
spécifications du fabricant de charnières.
Rebate width and panel thickness according
to specifications of the hinge manufacturer.
Larghezza del giunto e spessore dell'anta in
conformità alle indicazioni del fornitore della
cerniera.
Ancho de juntura y espesor de puerta
correspondiendo a las indicaciones del
suministrador de la armadura.
Z = Türfugenbreite
Jeu entre porte-porte/porte-coté
Door rebate width
Larghezza del giunto
Ancho de la juntura
3 mm
(1
8") 4 mm
(5
32") 5 mm
(7
32")
a = Mass Türkante/Ausfräsung (Mitte Türenpaar)
Cote entre le chant de porte et l'entaille (milieu de la paire portes)
Dimension from panel edge to cutout (centre pair of panels)
Distanza spigolo anta - fresatura (centro coppia ante)
Cota del canto de la puerta - fresado (par de puertas mediano)
5 mm
(7
32") 4,5 mm
(3
16") 4 mm
(5
32")
y = Distanzholz (Schablone)
Epaisseur de la cale (gabarit)
Wooden spacer (template)
Distanziatore in legno (sagoma)
Madera distanciadora (plantilla)
0 mm 0,5 mm
(1
32") 1 mm
(1
16")
6
15567d-10.prn
S:\Media\Montageanleitungen\MULTIFOL\15567d-10.vp
Donnerstag, 10. April 2014 11:00:48
Farbprofil: Deaktiviert
Komposit Standardbildschirm
Bearbeitungsmass
Cotes de façonnage
Processing dimensions
Dimensione di lavorazione
Cotas de trabajo
7
HAWA Multifold 30/W
T = Tiefe
profondeur
depth
profondità
profundidad
An der Aussenseite können handelsübliche Topfscharniere mit Feder ≥110°, verwendet werden.
Sur le côté extérieur, il est possible d'utiliser des charnières invisibles avec ressort tu type commercial ≥110°.
On the outer side commercially available concealed spring-loades hinges for inset doors ≥110°, may be used.
Sulla parte esterna si usano comuni cerniere incassate con molla ≥110°.
En el lado exterior puedan utilizarse bisagras internas corrientes del mercado con resorte ≥110°.
Anordnung und Stückzahl der Scharniere
Disposition et nombre de charnières
Arrangement and number of hinges
Disposizione e numero di cerniere
Disposición y lista de piezas de la bisagra
7
15567d-10.prn
S:\Media\Montageanleitungen\MULTIFOL\15567d-10.vp
Donnerstag, 10. April 2014 11:00:49
Farbprofil: Deaktiviert
Komposit Standardbildschirm
Position der Tragbolzen und Führungsstücke
Postition des vis porteuses et des pièces de guidage
Position of the carrier bolts and guide pieces
Posizione dei bulloni supporto e pezzi guida
Posición de los tornillos soportantes y piezas de guía
8
HAWA Multifold 30/W
Hawa AG 8932 Mettmenstetten Tel. +41 44 787 17 17 Fax +41 44 787 17 18
Switzerland www.hawa.ch
Möbelbeschläge
Technische Änderungen vorbehalten Con riserva di apportare modifiche tecniche
Sous réserve de modifications techniques Bajo reserva de modificaciones técnicas
Subject to modification
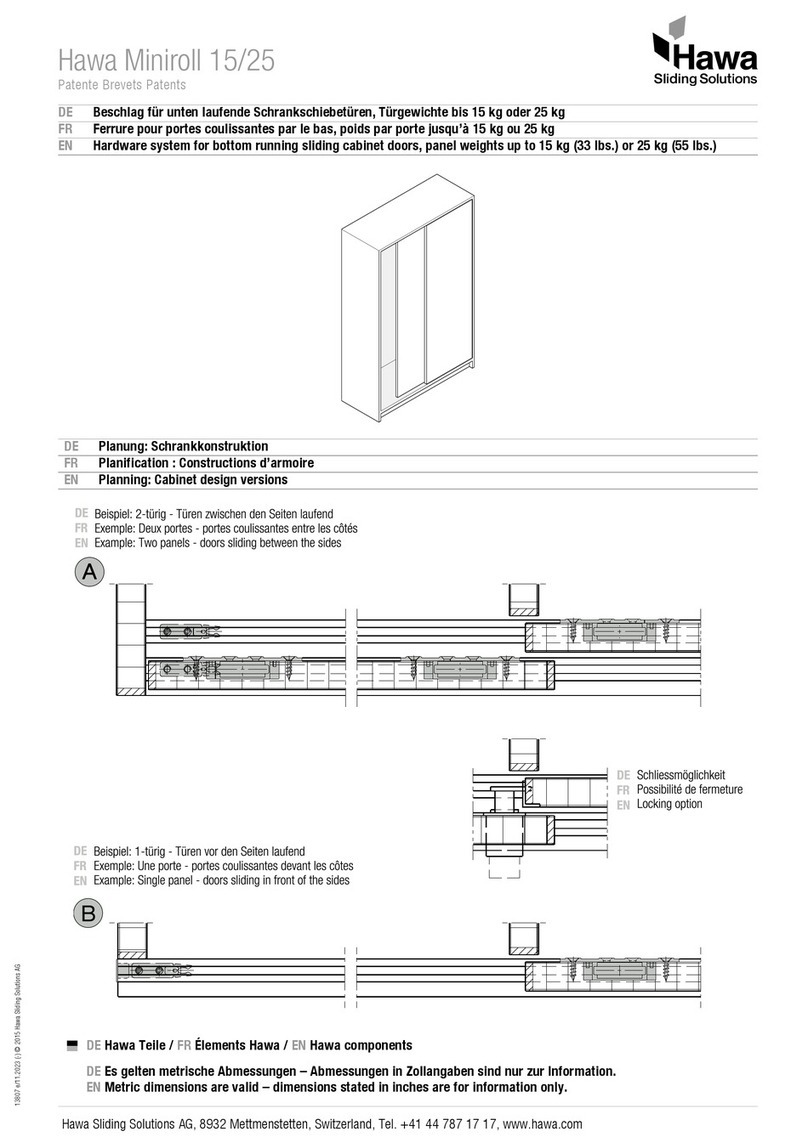
Türen einliegend
Portes intégrées
au corps
Inlaying doors
Ante all'interno
Puertas enrasadas
Türen vorliegend
Portes coulissant devant
le corps
Overlaying doors
Ante davanti
Puertas superpuestas
8
15567d-10.prn
S:\Media\Montageanleitungen\MULTIFOL\15567d-10.vp
Donnerstag, 10. April 2014 11:00:51
Farbprofil: Deaktiviert
Komposit Standardbildschirm
9
HAWA Multifold 30/W
Hawa AG 8932 Mettmenstetten Tel. +41 44 787 17 17 Fax +41 44 787 17 18
Switzerland www.hawa.ch
Möbelbeschläge
Technische Änderungen vorbehalten Con riserva di apportare modifiche tecniche
Sous réserve de modifications techniques Bajo reserva de modificaciones técnicas
Subject to modification
Bohrmasse Türbündighalter
Cotes de perçage dispositif égalisateur de la surface des portes
Drilling dimensions panel surface equalizer
Quota di foratura meccanismo di tenuta a filo ante
Cotas de perforación para el soporte de enrasado
Türzuhaltung
Blocage de porte
Door catch
Ritenuta per anta
Bloqueo de la puerta
Schubstange ablängen
Couper la tringle
Cut the espagnolette to size
Portare alla lunghezza il paletto
scorrevole
Ajustar la longitud de varilla
9
15567d-10.prn
S:\Media\Montageanleitungen\MULTIFOL\15567d-10.vp
Donnerstag, 10. April 2014 11:00:53
Farbprofil: Deaktiviert
Komposit Standardbildschirm
Deutsch Lauf- und Führungsschiene
1. Laufwerke (2) und Haltepuffer (3) in richtiger Reihenfolge in Laufschiene (5) einschieben siehe Seite 8.
2. Laufschiene (5) montieren siehe Seite 13.
Türen vorbereiten
3. Einfräsung für Aufhängetöpfe (8) siehe Seite 6+7 Detail A.
4. Frässchablone für Oberfräse kann geliefert werden, siehe Seite 6. Führungsring 27 mm, Wendeplattenfräser 14 mm.
5. Bohrungen für Mittelscharniere (10), siehe Seite 7 Detail B.
6. Das Türenpaar mit der Innenseite nach oben nebeneinander legen und Mittelscharniere (10) anschrauben. Den schmalen
Scharnierlappen an die Aussentüre siehe Seite 7 detail B.
7. Aufhängetöpfe (8) einpressen und festschrauben. Adapter (11) oben anschrauben siehe Detail A.
8. Türzuhaltung und Schlossmontage siehe Seite 9 Zeichnung K+L.
Einhängen der Türen
9. Aussentüre mit Topfscharnieren einhängen.Türe auf ca. 90° öffnen.
10. Die erste und zweite Türe mit Scharnierbandstiften verbinden. Adapter-Exzenterbolzen (11) oben in Laufwerke (2) drücken.
11. Die drei Sicherungsschrauben (14) von hinten eindrehen, jedoch nicht festziehen.
12. Mit Exzenterbolzen (11a) Türen in der Höhe einstellen und Sicherungsschrauben (14) festziehen.
13. Puffer (3) positionieren und festschrauben
14. Falls notwendig zwischen den einzelnen Türenpaaren Türbündighalter (16) montieren, siehe Seite 9 Detail J.
15. Montage des Dichtungsprofils. Dichtungsprofil (17) sorgfältig mit dem Daumen gleichmässig in die Nuten eindrücken,
siehe Seite 5 Detail D.
Achtung:
Durch Schieben des Dichtungsprofils entstehen Falten im Gummi.
Français Rail de roulement et de guidage
1. Introduire les chariots (2) et butées d'arrêt (3) en ordre correct dans le rail de roulement (5), voir page 8.
2. Monter le rail de roulement (5), voir page 13.
Comment préparer les portes
3. Pour les entailles des cuirasses de suspension (8), voir pages 6+7, détail A.
4. Un gabarit pour la défonceuse est disponible, voir page 6. Bague de guidage 27 mm, fraise à plaquette amovible 14 mm.
5. Percer les trous pour les charnières médianes (10), voir page 7, détail B.
6. Poser la paire de portes l'une à côté de l'autre, avec leur face intérieure en dessus et visser les charnières médianes (10).
La lame de charnière étroite doit se trouver sur la face de la porte extérieure, voir page 7, détail B.
7. Enfoncer les cuirasses de suspension (8) et les serrer à vis. Visser les pièce d'ajustage (11) en haut, voir détails A.
8. Monter le dispositif de blocage de porte et la serrure, voir page 9, dessin K+L.
Comment suspendre les portes
9. Suspendre la porte extérieure avec les charnières invisibles. Ouvrir la porte d'environ 90°.
10. Joindre la première au deuxième porte à l'aide des broches de charnière. Enfoncer en haut les boulons d'ajustage à
excentrique (11) dans les chariots (2).
11. Monter les trois vis de blocage (14) de derrière, mais ne pas les serrer à fond.
12. Régler la hauteur des portes à l'aide du boulon à excentrique (11a) et serrer les vis de blocage (14).
13. Positionner les butées (3) et serrer à vis.
14. En cas de besoin, monter des dispositifs d'affleurement des portes entre les paires de portes individuelles, voir page 9,
détail J.
15. Montage du profil anti-poussière. Utilisez le pouce pour enfoncer le profil anti-poussière dans les rainures de façon
soigneuse et uniforme, voir page 5, détail D.
Attention:
lorsqu'on pousse le profil anti-poussière, des plis peuvent se
former dans le caoutchouc.
10
HAWA Multifold 30/W
Hawa AG 8932 Mettmenstetten Tel. +41 44 787 17 17 Fax +41 44 787 17 18
Switzerland www.hawa.ch
Möbelbeschläge
Technische Änderungen vorbehalten Con riserva di apportare modifiche tecniche
Sous réserve de modifications techniques Bajo reserva de modificaciones técnicas
Subject to modification
10
15567d-10.prn
S:\Media\Montageanleitungen\MULTIFOL\15567d-10.vp
Donnerstag, 10. April 2014 11:00:55
Farbprofil: Deaktiviert
Komposit Standardbildschirm
English Top track and bottom guide channel
1. Slide trolleys (2) and retaining bumpers (3) into the top track (5) in correct order, see page 8.
2. Fit top track (5), see page 13.
How to prepare the panels
3. Recessing for concealed press-fit (8), see pages 6+7, detail A.
4. A mortising template for the recessing and shaping cutter can be made available, see page 6. Guide ring 27 mm (1 1
16 "),
cutter with indexable inserts 14 mm ( 9
16 ").
5. Drillholes for centre hinges (10), see page 7, detail B.
6. Place the pair of panels side by side with their inner face upwards and screw on the centre hinges (10), the small hinge
leaf being on the outer panel, see page 7, detail B.
7. Press in and tighten the concealed hinges (8). Screw on adapters (11) on top, see details A.
8. For fitting the door catch and lock, see page 9, drawing K+L.
How to suspend the panels
9. Suspend the outer panel with the concealed hinges. Open the panel about 90°.
10. Connect the first to the second panel with the hinge pins. Press the adapter eccenter bolts (11) on top into the trolleys (2).
11. Screw in the three fixing screws (14) from the rear, but do not screw them tight.
12. Use the eccenter bolt (11a) to adjust the panel height and tighten the screws (14)
13. Position the bumpers (3) and screw them tight.
14. If required, fit panel surface equalisers (16) between the individual pairs of panels, see page 9, detail J.
15. Fitting the seal profile. Use the thumb to press the seal profile carefully and evenly into the grooves, see page 5, detail D.
Please note:
Stretching the seal profile may cause folds in the rubber to occur.
11
HAWA Multifold 30/W
Hawa AG 8932 Mettmenstetten Tel. +41 44 787 17 17 Fax +41 44 787 17 18
Switzerland www.hawa.ch
Möbelbeschläge
Technische Änderungen vorbehalten Con riserva di apportare modifiche tecniche
Sous réserve de modifications techniques Bajo reserva de modificaciones técnicas
Subject to modification
11
15567d-10.prn
S:\Media\Montageanleitungen\MULTIFOL\15567d-10.vp
Donnerstag, 10. April 2014 11:00:57
Farbprofil: Deaktiviert
Komposit Standardbildschirm
Italiano Rotaie e rotaie di guida
1. Infilare i carrelli (2) e gli arresti paracolpi (3) nelle rotaie (5) e nell'ordine giusto vedi pag. 8.
2. Montare le rotaie (5) vedi pag. 13.
Preparazione delle ante
3. Fresare le cave per i fondelli di sospensione (8) vedi pag. 6+7 dettaglio A.
4. Sagoma per fresare con intestatrice può venir fornita, vedi pag. 6. Anello di guida 27 mm, fresa a palette ribaltabili 14 mm.
5. Fori per cerniere mediane a scatto (10), vedi pag. 7 dettaglio B.
6. Posare la coppia di ante una accanto all'altra con il lato interno verso l'alto ed avvitare la cerniera mediana (10). L'aletta
stretta della cerniera sull'anta esterna vedi pag. 7 dettaglio B.
7. Premere dentro i fondelli di sospensione (8) ed avvitarli saldamente. Avvitare gli adattatori (11) sopra vedi dettagli A.
8. Ritenuta per ante e montaggio serratura vedi pag. 9 disegno K+L.
Messa sui cardini delle ante
9. Mettere sui cardini le ante esterne con le cerniere a scatto. Aprire le ante a circa 90°.
10. Collegare la prima e la seconda anta con i perni della cerniera a nastro. Spingere il bullone eccentrico dell'adattatore (11)
sopra nel carrello (2).
11. Avvitare le tre viti di sicurezza (14) dal di dietro senza serrarle. Regolare le ante in altezza con i bulloni eccentrici (11a) e
serrare le viti di sicurezza (14).
12. Regolare le ante con i bulloni eccentrici (11a) e serrare le viti di sicurezza (14).
13. Posizionare i paracolpi (3) e avvitarli saldamente.
14. Se necesario montare fra le singole coppie di ante il meccanismo di tenuta a filo (16) vedi pag. 9 dettaglio J.
15. Montaggio del profilo guarnizione. Spingere con il pollice uniformemente e con cura il profilo guarnizione (17) nelle cave,
vedi pag. 5 dettaglio D.
Attenzione:
spingendo il profilo guarnizione si producono delle pieghe nella gomma.
Español Rieles de rodadura y de guía
1. Introducir el carro (2) y el soporte amortiguador (3) en el riel de rodadura (5) y en el orden correcto, ver página 8.
2. Montar los rieles de rodadura (5), ver página 13.
Preparación de las puertas
3. Fresado de las armaduras de suspensión (8), ver páginas 6+7, detalle A.
4. Puede ser suministrada la plantilla para la fresa de brazo superior, ver página 6. Anillo de guía 27 mm, fresa de plato
giratorio 14 mm.
5. Taladros para bisagra mediana (10), ver página 7, detalle B.
6. El par de puertas se colocará en el suelo, una al lado de la otra y con la cara interna hacia arriba y se atornillará la bisagra
mediana (10). Las orejetas más angostas de la bisagra en la puerta exterior, ver página 7, detalle B.
7. Apretar y atornillar las armaduras de suspensión (8). Atornillar los adaptadores (11) arriba, ver detalles A.
8. Montaje de la retención de la puerta y la cerradura, ver página 9, dibujo K+L.
Colgado de las puertas
9. Colgar la puerta exterior con la bisagra con armadura. Abrir la puerta en casi 90°.
10. Unir la primera puerta con la segunda con las espigas del paletón de la bisagra. Oprimir presionando los tornillos
excéntricos de adaptación (11), arriba en el carro (2).
11. Colocar los tornillos de seguridad atrás (14) pero sin apretarlos.
12. Ajustar la altura de las puertas con los tornillos excéntricos (11a) y apretar los de seguridad (14).
13. Posicionar los amortiguadores (3) y fijarlos atornillando.
14. Si resultase necesario, montar soportes de enrasado (16) entre cada puerta formando el par, ver página 9, detalle J.
15. Montaje de la junta de estanqueidad. Apretar uniforme y cuidadosamente con los dedos la junta (17), insertándola en la
ranura. Ver página 5, detalle D.
Atención:
al deslizar la junta aparecen pliegues en la goma.
12
HAWA Multifold 30/W
Hawa AG 8932 Mettmenstetten Tel. +41 44 787 17 17 Fax +41 44 787 17 18
Switzerland www.hawa.ch
Möbelbeschläge
Technische Änderungen vorbehalten Con riserva di apportare modifiche tecniche
Sous réserve de modifications techniques Bajo reserva de modificaciones técnicas
Subject to modification
12
15567d-10.prn
S:\Media\Montageanleitungen\MULTIFOL\15567d-10.vp
Donnerstag, 10. April 2014 11:00:59
Farbprofil: Deaktiviert
Komposit Standardbildschirm
13
HAWA Multifold 30/W
Hawa AG 8932 Mettmenstetten Tel. +41 44 787 17 17 Fax +41 44 787 17 18
Switzerland www.hawa.ch
Möbelbeschläge
Technische Änderungen vorbehalten Con riserva di apportare modifiche tecniche
Sous réserve de modifications techniques Bajo reserva de modificaciones técnicas
Subject to modification
13
15567d-10.prn
S:\Media\Montageanleitungen\MULTIFOL\15567d-10.vp
Donnerstag, 10. April 2014 11:01:00
Farbprofil: Deaktiviert
Komposit Standardbildschirm
Beschlägeübersicht
Composants de la ferrure
Hardware system components
Assortimento ferramenta
Componentes de los herrajes
14
HAWA Multifold 30/W
Hawa AG 8932 Mettmenstetten Tel. +41 44 787 17 17 Fax +41 44 787 17 18
Switzerland www.hawa.ch
Möbelbeschläge
Laufwerk, ohne Schrauben
Chariot, sans vis
Trolley, without screws
Carrello, senza viti
Carro, sin tornillos
15032
Aufhängung
Unité de suspension
Suspension unit
Supporto nichelato
Pieza de suspensión
15029
SK-Spanplattenschrauben-Set 4/16 mm
Jeu de vis aggloméré, tête fraisée 4/16 mm
Set of counters.head press screw 4/16mm
Gioco di viti a testa svasata 4/16mm
Juego de tornillos cabeza 4/16 mm
14172
Montageschrauben-Set zu 15032
Jeu de vis de fixation pour 15032
Set of fixing screws for 15032
Gioco di viti di montaggio per 15032
Juego de tornillos de fijación para 15032
15657
Mittelscharnier, matt vernickelt
Charnière médiane, nickelée mat
Centre hinge, dull nickel finish
Charniera mediana, nichelata matta
Bisagra mediana, niquelada mate
15041
Türzuhaltung, Kunststoff schwarz
Blocage de porte, plastique noir
Door catch, plastic black
Ritenuta per ante, plastica nero
Dispositivo sujetapuertas, plástico negro
15033
Haltepuffer oben
Butée d'arrêt supérieure
Retaining bumper on top
Arresto paracolpi superiore
Amortiguador superior
14960
Türenbündighalter, Kunststoff schwarz
Dispositif d'affleurement des portes,
plastique noir
Panel surface equaliser, plastic black
Meccanismo per tenuta a filo,plast.nero
Soporto de enrasado para puertas,
plástico negro
14906
Bündighalter zu Seitenwand
Dispositif d'affleurement paroi latérale
Surface equalizer for side wall
Meccanismo per tenuta a filo rispetto alla
parete laterale
Soporto de mantenimiento al ras de la
pared lateral
17266
Laufschiene, LM,
mit Bürstendichtung
Rail de roulement, métal léger,
avec joint brosse
Top track, alu,
with brush seal
Binario, alluminio,
con guarnizione a spazzola
Riel de rodadura, aluminio,
con junta de cepillo
1100 mm
(3'7 5
16") 15014
1800 mm
(5'10 7
8") 15015
2500 mm
(8'2 7
16") 15016
Dichtungsprofil, weiss
Profil anti-poussière, blanc
Seal profile, white
Profilo guarnizione, bianco
Cubrejuntas, blanco
5 m
(16'4 27
32") 15227
10 m
(32'9 23
32") 15228
Dichtungsprofil, schwarz
Profil anti-poussière, noir
Seal profile, black
Profilo guarnizione, nero
Cubrejuntas, negro
5 m
(16'4 27
32") 15224
10 m
(32'9 23
32") 15225
Möbel-Stangenschloss,
mit Schlüssel
Serrure à tringles,
avec clé à gorge
Extending rod lock, with key
Serratura a paletti, con chiave
Cerradura de varillas, con llave
links
gauche
left
sinistra
izquierda
20875
rechts
droite
right
destra
derecha
20876
Möbel-Stangenschloss,
Zylinder 22 mm
Serrure à tringles, avec
cylindre 22 mm
Extending rod lock, with
cylinder 22 mm
Serratura a paletti, con
cilindro 22 mm
Cerradura de varillas, con
cilindro 22 mm
links
gauche
left
sinistra
izquierda
20873
rechts
droite
right
destra
derecha
20874
Einfrässchablone
Gabarit pour défoncer les cuirasse
Mortising template for cup recesses
Sagoma per fresare
Plantilla para fresado
14761
Topfscharnier 110°mit Feder (inliegend)
Charnière invisible 110°avec ressort
(porte à l'intérieur)
Spring-loaded concealed hinge 110°
(inset doors)
Cerniera incassate con molla 110°
(ante all'interno)
Bisagra interna con resorte 110°
(puertas interior)
14528
Topfscharnier 120° mit Feder (Eckanschlag)
Charnière invisible 120°avec ressort
(porte à l'extérieur)
Spring-loaded concealed hinge 120°
(overlay doors)
Cerniera incassate con molla, 120°
(ante all'esterno)
Bisagra interna con resorte 120°
(puertas exterior)
15059
14
15567d-10.prn
S:\Media\Montageanleitungen\MULTIFOL\15567d-10.vp
Donnerstag, 10. April 2014 11:01:03
Farbprofil: Deaktiviert
Komposit Standardbildschirm

Other hawa Indoor Furnishing manuals

hawa Frontslide 60/matic-Symmetric 2 Technical manual

hawa

hawa Frontslide 60/matic-Symmetric 2 Technical manual

hawa H390 User manual

hawa

hawa H390 User manual

hawa Concepta 40 User manual

hawa

hawa Concepta 40 User manual

hawa Concepta 25 Technical manual

hawa

hawa Concepta 25 Technical manual

hawa Concepta 35 pre-mounted User manual

hawa

hawa Concepta 35 pre-mounted User manual

hawa Folding Concepta 25 Technical manual

hawa

hawa Folding Concepta 25 Technical manual

hawa Frontslide 60/A Technical manual

hawa

hawa Frontslide 60/A Technical manual

hawa Concepta 50 Technical manual

hawa

hawa Concepta 50 Technical manual

hawa HAWA-Frontslide 60/matic-Telescopic 4 Technical manual

hawa

hawa HAWA-Frontslide 60/matic-Telescopic 4 Technical manual

hawa Frontslide 60/A-Telescopic 3 Technical manual

hawa

hawa Frontslide 60/A-Telescopic 3 Technical manual

hawa Miniroll 15 User manual

hawa

hawa Miniroll 15 User manual

hawa Concepta 40 Technical manual

hawa

hawa Concepta 40 Technical manual

hawa Junction Box K10 User manual

hawa

hawa Junction Box K10 User manual

hawa Concepta 40 Technical manual

hawa

hawa Concepta 40 Technical manual

hawa Frontslide 60/matic Technical manual

hawa

hawa Frontslide 60/matic Technical manual

hawa Interlocking Series Owner's manual

hawa

hawa Interlocking Series Owner's manual

Popular Indoor Furnishing manuals by other brands

Dorel DA8313 manual

Dorel

Dorel DA8313 manual

BRV Móveis BR 398 Assembly instructions

BRV Móveis

BRV Móveis BR 398 Assembly instructions

Duo Collection TORONTO XXL Original instructions

Duo Collection

Duo Collection TORONTO XXL Original instructions

Allied MDPED Assembly instructions

Allied

Allied MDPED Assembly instructions

BLACK RED WHITE GRACE B186-SFW quick start guide

BLACK RED WHITE

BLACK RED WHITE GRACE B186-SFW quick start guide

Steelcase Montage Wood Selections Assembly Directions

Steelcase

Steelcase Montage Wood Selections Assembly Directions

Indiana Furniture Square One 17-1 Assembly instructions

Indiana Furniture

Indiana Furniture Square One 17-1 Assembly instructions

Crosley Furniture CF4201 manual

Crosley Furniture

Crosley Furniture CF4201 manual

OSP Designs ASV262 Assembly instructions

OSP Designs

OSP Designs ASV262 Assembly instructions

Woltra COOL C-09 Assembly instructions

Woltra

Woltra COOL C-09 Assembly instructions

Ballard Designs Saratoga SL074 manual

Ballard Designs

Ballard Designs Saratoga SL074 manual

Next HANLEY 921278 Assembly instructions

Next

Next HANLEY 921278 Assembly instructions

JWA SMITHERS 69430 Assembly instruction

JWA

JWA SMITHERS 69430 Assembly instruction

Allen + Roth 1650VA-48-285 manual

Allen + Roth

Allen + Roth 1650VA-48-285 manual

greencastle B09 Assembly instructions

greencastle

greencastle B09 Assembly instructions

Kvik MH943-040 Assembly instructions

Kvik

Kvik MH943-040 Assembly instructions

Pride Mobility Power Lift Recliner Series owner's manual

Pride Mobility

Pride Mobility Power Lift Recliner Series owner's manual

Habitat Milk 811045 manual

Habitat

Habitat Milk 811045 manual

manuals.online logo
manuals.online logoBrands
  • About & Mission
  • Contact us
  • Privacy Policy
  • Terms and Conditions

Copyright 2025 Manuals.Online. All Rights Reserved.