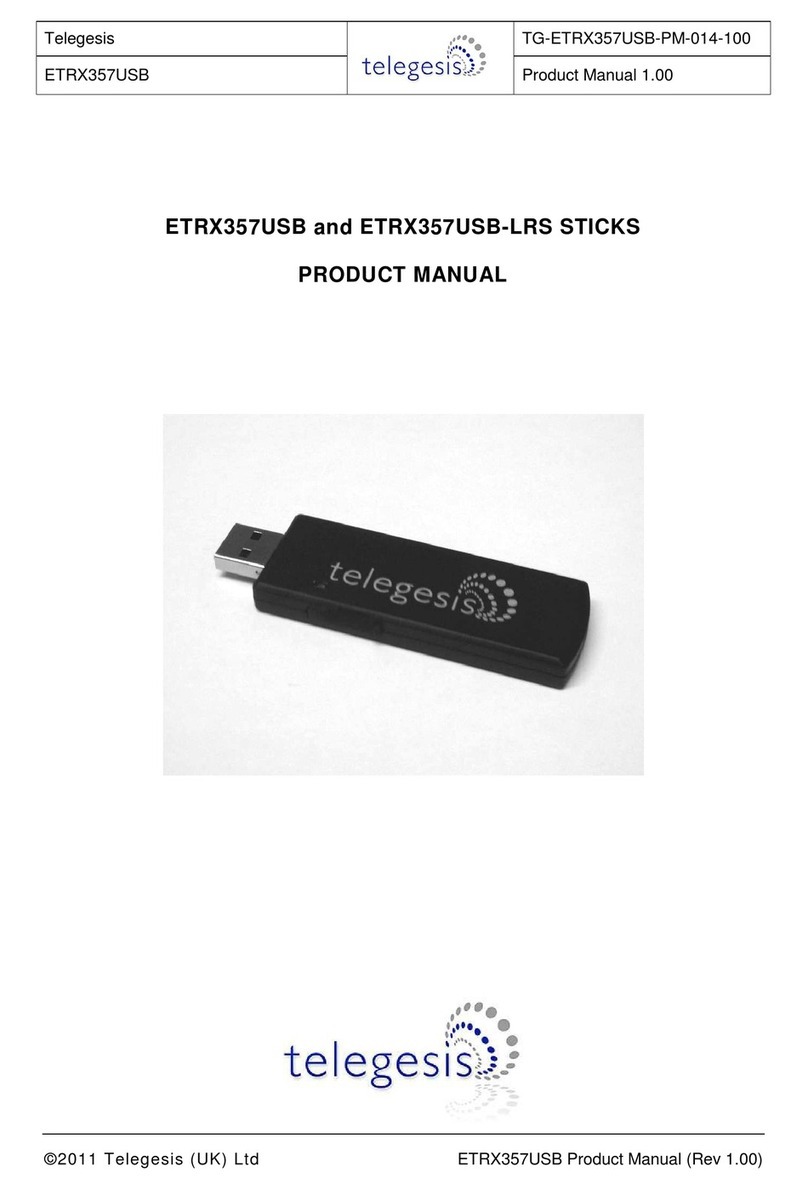
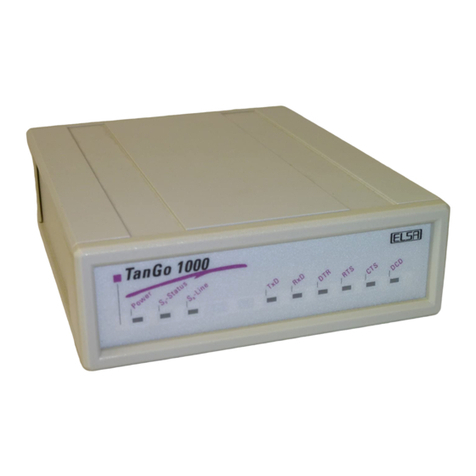
Hayes Series 1057 User manual

Quick Start
PCI Modem
Series 1057
English. . . . . . . . . . . . . . . . . . . . 3
Deutsch. . . . . . . . . . . . . . . . . . .10
Español. . . . . . . . . . . . . . . . . . .15
Français. . . . . . . . . . . . . . . . . . 21
Ελληνικά. . . . . . . . . . . . . . . . . .27
Italiano. . . . . . . . . . . . . . . . . . . 33
Nederlands. . . . . . . . . . . . . . . 39
Polski. . . . . . . . . . . . . . . . . . . . .45
Português. . . . . . . . . . . . . . . . .51
Svenska. . . . . . . . . . . . . . . . . . 57
Türkçe. . . . . . . . . . . . . . . . . . . . 63

2
NOTICE
This document contains proprietary information protected by copyright,
and this Quick Start Guide and all the accompanying hardware,
software, and documentation are copyrighted. All rights are reserved.
No part of this document may be photocopied or reproduced by
mechanical, electronic, or other means in any form.
The manufacturer does not warrant that the hardware will work properly
in all environments and applications, and makes no warranty and
representation, either implied or expressed, with respect to the quality,
performance, merchantability, or fitness for a particular purpose of the
software or documentation. The manufacturer reserves the right to
make changes to the hardware and Quick Start Guide content without
obligation to notify any person or organization of the revision or change.
All brand and product names are the trademarks of their respective
owners.
© Copyright 2006
All rights reserved

3
PCI MODEM
This Quick Start describes PCI modem installation for
computers using Windows®98, Me, 2000, or XP.
Quick Start
Make sure you have the following:
modem telephone cord software CD
free PCI slot in your computer
Important: You must run the setup software before installing the
modem card.
If your computer already has an internal PCI modem
installed, you should remove the modem and its drivers now.
Your old modem may interfere with the installation of your new
modem. Please refer to page 8 now.
Installing the Drivers
1Your computer should be on. Close any running
applications.
Insert the CD that came with your modem into your CD-
ROM drive. If the CD does not start automatically, double-
click My Computer on your desktop; then double-click the
icon for your CD-ROM drive. If the installation program
doesn’t begin immediately, double-click Setup.exe.
2When the main installation menu opens, click Install
Modem Drivers and then click PCI Drivers.
The installation program runs and automatically copies
driver files to your hard drive. Follow the prompts.
3When asked whether or not you want to restart your
computer, select No, I will restart my computer later,
click Finish, return to the CD’s main menu, exit, and shut
down manually. Continue with Installing the Modem
Card, below.

4
Installing the Modem Card
1Before you start the hardware installation, close all
running programs and shut down Windows if you have
not already done so. Turn your computer off and unplug
it. Don’t plug it back in or turn it on until you complete the
modem hardware installation.
2Take the cover off your computer.
3On the rear of the computer, unscrew and remove the
metal cover plate that lines up with a free PCI slot. (Save
the screw.)
CAUTION
Do not handle any internal modem card when the
phone line is plugged into it. The voltage present
when the line is ringing is potentially harmful.
CAUTION
Electrostatic Discharge Protection
Static electricity can damage modem components
or your computer. Before removing the modem
from its antistatic bag, touch the computer’s metal
chassis to statically discharge yourself.
4Remove your new modem from its antistatic bag and
make a note of its serial number.

5
5Slide the modem card firmly into the free PCI slot.
Be sure that the back end of the card (smaller gold finger
area) is properly seated into the connector. If you have a
tower or mini-tower computer case with a vertical main
board, lay the computer down on its side so you can
push straight down on the modem card to seat it firmly in
its slot. Be sure that the bracket is lined up properly, then
screw the bracket into the computer using the screw you
removed earlier.
6Replace the computer cover.
7Connect the telephone cord:
Plug one end of the phone cord into the jack marked
LINE. Plug the other end into a phone jack (typically the
wall jack where you would normally connect a phone).
OPTIONAL: Plug your phone into the PHONE jack if you
want to use a phone on the same line.
If you do not use the supplied telecommunications cord,
use an equivalent of minimum AWG 26 line cord.
8Plug in your computer and turn it on.
9Windows 98/Me Users: As Windows starts up, it detects
your new modem. Because the installation program has
already provided your computer with the required files,
you will see Windows reporting on its progress, but no
action is required on your part. Continue below with
Completing the Installation.
PCI slot
Metal cover plate

6
Windows 2000 Users: A few seconds after startup, you
may see the Digital Signature Not Found dialog box.
You can safely ignore this message and click Yes.
Continue below with Completing the Installation.
Windows XP Users: When the Found New Hardware
Wizard dialog box appears, click Next. You may see a
disclaimer box regarding Windows logo testing. You can
safely disregard this message and click Continue
Anyway. Continue with Completing the Installation.
Completing the Installation
1Open Control Panel (and, in Windows XP only, click
Printers and Other Hardware). Then double-click the
Modems or Phone and Modem Options icon.
2You may be asked to fill out Location Information if you
have not had a modem installed previously. Type the
required information and, when done, click OK or Close.
Windows XP and Windows 2000 Users: Click the
Modems tab, under Phone and Modem Options, to
proceed to Step 3.
3Select the entry for your new modem and then click
Properties.
4Set the Maximum speed to the highest speed available
(115,200).
Windows XP Users: You have to click the Modem tab
before you can set the Maximum speed.
Click OK and close the currently open dialog box.
5Click the Diagnostics tab. In Windows XP, click Query
Modem. Select the port next to the entry for your new
modem (for example, COM3) and click More info or
Query Modem. This step tests the modem by querying it
with AT commands. A list of responses means that your
new modem is properly connected.
CONGRATULATIONS! You have successfully installed your PCI
modem. Installing the Communications Software, described
below, is optional.

7
Important—If Your PC Had an Existing Modem
You must redirect your application software so that it recognizes
your new modem.
America Online Users: From the AOL Welcome screen, click
the Setup button; then click Expert Setup. Select the Devices
tab and double-click the name of your new modem.
Dial-up Networking Users: From your computer’s desktop,
double-click My Computer and then Dial-up Networking.
Double-click the Make New Connection icon, select your new
modem from the dropdown list, and follow the prompts.
Tip: If your modem is not working, first try turning off your
computer and restarting it. Sometimes this will help Windows
identify and activate the correct drivers.
If you ever need to reinstall the operating system
You must physically remove the PCI modem first. After
reinstalling the operating system, reinstall the modem following
the instructions in this Quick Start.
Installing the Communications Software
The accompanying CD describes the communications software
included with your modem and provides easy point-and-click
installation. If necessary, consult the CD’s online help. Please
run the modem’s CD now. You should not install the drivers
again, but you may install any application software you like.
How to Use NetWaiting Modem-on-Hold
Your modem includes the NetWaiting Modem-on-Hold program
from BVRP Software. Basic information on this software is
included here. For more details, please refer to NetWaiting’s
built-in help.
Note: Your Internet Service Provider must support the V.92
protocol for all the Modem-on-Hold features to work. Contact
your provider if you are unsure. You must have Call
Waiting/Caller ID (Type 2 Caller ID) service from your telephone
company to use the modem’s Call Waiting/Caller ID feature.
When you turn your computer back on after installing your
modem software and hardware, you will see NetWaiting’s phone
icon in your computer’s system tray at the bottom right of the

8
screen. (If you do not see it, from the desktop go to Start |
Programs | NetWaiting, and select NetWaiting to display the
icon.)
Tip: To avoid the need to reactivate Modem-On-Hold every time
you log on, right-click the NetWaiting icon and select Settings |
Launch at Windows startup.
If someone calls while you are online, the NetWaiting dialog box
appears on your computer screen, offering three choices.
•Click the green OK icon to place your Internet connection on
hold and accept the call.
•Click the red Xicon to reject the call and remain connected
to the Internet.
•Click the yellow
Disconnect icon to drop your Internet
connection and accept the call.
Note: The length of time that your modem can be on hold varies
depending on your ISP.
Removing a PCI Modem and Its Drivers
You should follow these instructions if your computer already has
a PCI modem installed, and you want to replace it with your new
modem.
1From the desktop, open Control Panel, and then click
Add or Remove Programs. In the dialog box that opens,
select the modem that you want to uninstall and click
Remove. (Depending on your operating system, some of
these buttons may have slightly different labels.)
2Follow the on-screen instructions and click Finish.

9
3In one of the subsequent dialog boxes (depending on your
operating system, Modems, or Phone and Modem
Options, or Modem Properties), select the modem you
want to uninstall and click Remove.
4•Take the cover off the computer.
•Unplug any cords connected to the card.
•Remove the screw that is holding the modem card in
place and slide the card out.

10
PCI MODEM
In diesem Schnelleinstieg wird die Installation des PCI
Faxmodems an PC unter Windows 98/Me/2000/XP beschrieben.
Quick Start
Vergewissern Sie sich, dass Sie folgende Dinge bereit haben:
Modem
Telefonkabel
Software auf CD
Verfügbar PCI Steckplatz
Sie müssen die Setup-Software ausführen, bevor Sie die
Modem-Hardware installieren.
Hinweis: Wenn Ihr Computer schon ein Modem hat, empfehlen
wir, zuerst die Modemtreiber zu deinstallieren, siehe Seite 14.
Installation der Treiber
1Ihr Computer muss eingeschaltet sein. Schließen Sie alle
offenen Anwendungen.
Legen Sie die mit dem Faxmodem mitgelieferte CD-ROM
in Ihr CD-ROM Laufwerk ein. Falls die CD nicht
automatisch startet: Klicken Sie auf Arbeitsplatz an Ihrem
Desktop und doppelklicken Sie dann auf das Symbol für
Ihr CD-ROM Laufwerk. Startet das Installationsprogramm
nicht sofort, doppelklicken Sie auf Setup.exe.
2Wenn das Installationshauptmenü erscheint, klicken Sie
auf Modemtreiber installieren und dann auf PCI-Treiber.
Das Installationsprogramm wird nun ausgeführt und
kopiert die Treiberdateien auf Ihre Festplatte. Befolgen Sie
die Aufforderungen am Bildschirm.
3Wählen Sie auf die Frage, ob Sie den Computer neu
starten wollen, Nein, später starten, klicken Sie auf
Fertig, gehen Sie zurück ins Hauptmenü der CD, beenden
Sie und fahren Sie den Computer manuell herunter.
Machen Sie weiter mit dem Abschnitt Installation der
Faxmodemkarte.

11
Installation der Faxmodemkarte
1Schließen Sie, bevor Sie mit der Hardware-Installation
beginnen, alle laufenden Programme und Windows, falls Sie
es noch nicht getan haben. Schalten Sie dann den
Computer aus und ziehen Sie den Netzstecker ab. Stecken
Sie ihn erst wieder ein und schalten Sie den Computer erst
wieder ein, wenn Sie mit der Installation der
Faxmodem-Hardware fertig sind.
2Nehmen Sie die Abdeckung Ihres Computers ab.
3Schrauben Sie an der Rückseite des Computers das
Metallplättchen ab, das beim freien PCI Steckplatz
angebracht ist, und entfernen Sie es. (Heben Sie die
Schraube auf).
VORSICHT
Fassen Sie eine etwa vorhandene interne
Modemkarte nicht an, so lange das Telefonkabel
daran angesteckt ist. Die bei einem Telefonanruf
darin enthaltene Spannung kann zu Verletzungen
führen.
VORSICHT
Schutz gegen elektrostatische Aufladung
Statische Elektrizität kann Modemkomponenten
oder Ihren Computer beschädigen. Berühren Sie
das Metallgehäuse des Computers, um sich selbst
statisch zu entladen, bevor Sie das Modem aus
seinem Antistatikbeutel herausnehmen.
4Nehmen Sie das neue Faxmodem aus dem Antistatikbeutel
und notieren Sie sich die Seriennummer.

12
5Schieben Sie die Faxmodemkarte fest in den freien PCI
Steckplatz wie in der folgenden Abbildung gezeigt:
PCI Steckplatz
Typische Deckenplatte
Vergewissern Sie sich, dass das hintere Ende der Karte
(kleinerer Goldfingerbereich) richtig auf den Anschlüssen
aufsitzt. Wenn Sie einen Tower oder Mini-Tower Computer
mit einer vertikalen Hauptplatine haben, legen Sie den
Computer auf die Seite, damit Sie die Modemkarte direkt
nach unten drücken können und sie fest in ihrem Steckplatz
sitzt. Vergewissern Sie sich, dass die Klammer richtig sitzt
und schrauben Sie sie mit der von vorher aufgehobenen
Schraube am Computer fest.
6Bringen Sie die Abdeckung wieder am Computer an.
7Schließen Sie das Telefonkabel an: Stecken Sie ein Ende
des Telefonkabels in den mit LINE gekennzeichneten
Anschluss. Stecken Sie das andere Ende in die
Telefonsteckdose (normalerweise die Wandsteckdose, in
die Sie ein Telefon einstecken würden). Stecken Sie Ihr
Telefon in dem mit PHONE gekennzeichneten Anschluss,
wenn Sie am selben Anschluss ein Telefon benutzen
wollen.
8Stecken Sie den Netzstecker Ihres Computers ein und
schalten Sie ihn ein.
9Windows 98/Me: Beim Start entdeckt Windows Ihr neues
Modem. Das Installationsprogramm liefert bereits die
erforderlichen Dateien, Windows zeigt den Verlauf an, aber
Sie müssen dabei nichts tun. Machen Sie unten mit dem
Abschnitt Abschluss der Installation weiter.

13
Windows 2000: Ein paar Sekunden nach dem Start kann
es sein, dass der Dialog Digital Signature Not Found
erscheint. Sie können diesen Hinweis getrost ignorieren und
auf Yes klicken. Machen Sie unten mit dem Abschnitt
Abschluss der Installation weiter.
Windows XP: Klicken Sie, wenn der Dialog Assistent für
neue Hardware erscheint, auf Weiter. Es kann sein, dass
der übliche Warnhinweis für Windows Logo-Tests erscheint.
Sie können diese Nachricht getrost ignorieren und auf
Trotzdem weiter klicken und dann auf Fertig. Machen Sie
mit dem Abschnitt Abschluss der Installation weiter.
Abschluss der Installation
Schalten Sie Ihren Computer wieder ein, sofern Sie das nicht
schon getan haben. Führen Sie folgende Schritte aus, um die
Installation abzuschließen.
1Öffnen Sie die Systemsteuerung und doppelklicken Sie auf
Modems oder Telefon und Modems. Klicken Sie auf den
Eintrag für Ihr neues Modem und dann auf Eigenschaften.
Setzen Sie die Maximale Rate auf die höchste verfügbare
Rate (wahrscheinlich 115.200). Damit legen Sie die
Geschwindigkeit fest, mit der der Computer intern mit dem
Faxmodem kommuniziert.
2Klicken Sie auf das Register Diagnose. Markieren Sie den
Port neben dem Eintrag für das neue Faxmodem und
klicken Sie auf Weitere Informationen oder Query Modem.
Notieren Sie sich die Einträge für Port und Interrupt unter
Port Information.
In diesem Schritt wird das Modem getestet und mit
AT-Kommandos abgefragt. Erscheint eine Liste von
Antworten, so ist Ihr neues Modem korrekt angeschlossen.
Tip: Wenn Sie feststellen, dass Ihr Faxmodem nicht
funktioniert, versuchen Sie als Erstes, Ihren Computer
auszuschalten und neu zu starten. Manchmal hilft dies
Windows, die richtigen Treiber zu finden und zu
aktivieren. Wenn das Neustarten des Computers nicht
hilft, schlagen Sie im Abschnitt Fehlerbehebung im
ausführlichen Benutzerhandbuch nach.

14
Installation der Kommunikationssoftware
Die mitgelieferte CD enthält eine Beschreibung des
Kommunikations-Softwarepakets für Ihr Modem und lässt sich
ganz einfach mit ein paar Mausklicks installieren. Bei Bedarf
rufen Sie die Online-Hilfefunktion auf der CD auf. Führen Sie
nun die CD aus. Installieren Sie die Treiber nicht nochmals, aber
installieren Sie jede gewünschte Anwendungssoftware.
Wenn Sie bereits ein Modem an Ihrem Computer installiert
haben, müssen Sie die Anwendungssoftware umprogrammieren,
damit sie das neue Modem erkennt. Dies wird im ausführlichen
Benutzerhandbuch beschrieben.
Deinstallation der PCI-Modemtreiber
Wenn Sie Ihre PCI-Modemtreiber deinstallieren oder ein älteres
PCI-Modem durch ein neues ersetzen wollen, gehen Sie wie
folgt vor.
1Öffnen Sie aus dem Desktop die Systemsteuerung und
klicken Sie auf Programme hinzufügen oder entfernen.
Wählen Sie in dem daraufhin geöffneten Dialog das Modem,
das Sie deinstallieren wollen, und klicken Sie auf Entfernen.
(Je nachdem, welches Betriebssystem Sie verwenden, kann
die Bezeichnung der Schaltflächen etwas von den hier
genanten abweichen.)
2Befolgen Sie die Hinweise auf dem Bildschirm und klicken
Sie zuletzt auf Fertig.
3Je nach Betriebssystem wählen Sie das Modem, das Sie
deinstallieren wollen, aus einem der folgenden Dialoge:
Modems, Telefon- und Modemoptionen oder Modem-
Eigenschaften, und klicken Sie dann auf Entfernen.
4•Nehmen Sie die Decke dem Computer ab.
•Ziehen Sie irgendeine Schnüre heraus, die zur Karte
verbunden werden.
•Nehmen Sie die Schraube, die die Modemkarte an der
richtigen Stelle hält, heraus und schieben Sie die Karte
aus.
Wenn Sie Hilfe brauchen
Das wars! Sollten Sie noch auf irgendwelche Probleme stoßen,
schlagen Sie bitte in Ihrem Benutzerhandbuch, welches sich auf
der mitgelieferten CD befindet, die Problemlösung nach.

15
MÓDEM PCI
Esta guía de inicio rápido describe la instalación del faxmódem
PCI para ordenadores personales utilizando Windows 98, Me,
2000 or XP.
Guía de inicio
rápido
Compruebe que cuenta con los siguientes elementos:
módem cable telefónico software en CD-ROM
ranura disponible del PCI en su computadora
¡Importante! Necesita ejecutar el software de configuración
antes de instalar el hardware del módem.
Nota: Si su ordenador ya tiene un módem, le recomendamos
que desinstale primero los controladores del módem. Consulte la
página 20.
Instalación de los controladores
1Su ordenador debería estar encendido. Cierre todas las
aplicaciones que estén activas.
Introduzca el CD-ROM que venía con su módem en su unidad
de CD-ROM. Si el CD no arranca automáticamente, haga
doble clic en Mi PC en su escritorio; a continuación haga
doble clic en el icono de su unidad de CD-ROM. Si el
programa de instalación no arranca inmediatamente, haga
doble clic en Setup.exe.
2Cuando se abra el menú de instalación principal, haga clic en
Install Modem Drivers (Instalar controladores del módem)
y a continuación en PCI Drivers (Controladores de PCI).
El programa de instalación se ejecuta y copia
automáticamente los archivos de controlador en su unidad de
disco duro. Siga las instrucciones en pantalla.
3Cuando se le pregunte si desea o no reiniciar su ordenador,
seleccione No, I will restart my computer later (No,

16
reiniciaré mi equipo más tarde), haga clic en Finish
(Finalizar), vuelva al menú principal del CD, salga y apague
el ordenador manualmente. Continúe con Instalación de la
tarjeta faxmódem, más adelante.
Instalación de la tarjeta faxmódem
Siga los pasos siguientes para instalar su tarjeta faxmódem.
1Antes de comenzar la instalación del hardware, cierre
todos los programas activos y apague Windows si no lo
ha hecho ya. A continuación apague el ordenador y
desenchúfelo de la red. No vuelva a enchufarlo ni
encenderlo hasta que concluya la instalación del hardware
del faxmódem.
2Quite la tapa de su ordenador.
3En la parte posterior del ordenador, destornille y quite la
placa metálica que esté alineada con una ranura PCI libre.
(Guarde el tornillo.)
PRECAUCIÓN
No manipule ninguna tarjeta de módem interno mientras la línea
telefónica esté conectada a ella. La tensión presente cuando
suena la línea es potencialmente peligrosa.
PRECAUCIÓN
Protección contra descargas electrostáticas
La electricidad estática puede dañar los
componentes del módem o de su ordenador.
Antes de sacar el módem de su bolsa
antiestática, toque el chasis metálico del
ordenador para descargar la electricidad estática
de su cuerpo.
4Saque su nuevo faxmódem de su bolsa antiestática y tome
nota de su número de serie.

17
5Deslice la tarjeta faxmódem firmemente en la ranura PCI
disponible.
Ranura PCI
disponible
Placa metálica típica
Verifique que el extremo posterior de la tarjeta (el área
dorada más corta) está bien asentada en el conector. Si
tiene una carcasa de ordenador de tipo torre o minitorre con
una placa principal vertical, acueste el ordenador sobre su
lateral para poder presionar hacia abajo la tarjeta del
módem de modo que se asiente firmemente en su ranura.
Compruebe que la escuadra está correctamente alineada y
a continuación atornille la escuadra en el ordenador
empleando el tornillo que quitó antes.
6Vuelva a colocar la tapa del ordenador.
7Conecte el cable telefónico: Enchufe un extremo del cable
telefónico en la toma marcada como LINE. Enchufe el otro
extremo en una toma de teléfono (normalmente la toma de
la pared donde habitualmente se conecta un teléfono).
Enchufe su teléfono en la toma PHONE si desea utilizar un
teléfono en la misma línea.
8Enchufe el ordenador y enciéndalo.
9Usuarios de Windows 98/Me: Cuando Windows arranca,
detecta su nuevo módem. Debido a que el programa de
instalación ya ha proporcionado a su ordenador los archivos
necesarios observará que Windows informa sobre el
desarrollo pero usted no necesita hacer nada. Continúe más
adelante con Concluir la instalación.
Usuarios de Windows 2000: Unos pocos segundos
después del arranque, puede que vea el cuadro de diálogo

18
No se encuentra la firma digital. Puede ignorar este
mensaje tranquilamente y hacer clic en Sí. Continúe más
adelante con Concluir la instalación.
Usuarios de Windows XP: Cuando aparezca el cuadro de
diálogo Asistente para hardware nuevo encontrado,
haga clic en Siguiente. Puede que vea un cuadro de
diálogo estándar con texto legal en relación con el testado
del logotipo de Windows. Puede ignorar tranquilamente este
mensaje y hacer clic en Continuar. A continuación haga clic
en Finalizar. Continúe con Concluir la instalación.
Concluir la instalación
Vuelva a encender el ordenador si no lo ha hecho ya. Siga los
pasos siguientes para concluir la instalación.
1Abra el Panel de Control y haga doble clic en el icono
Módems o Teléfono y Módems. Haga clic en el nombre
de su módem nuevo y a continuación en el botón
Propiedades.
Ajuste la Velocidad máxima a la velocidad más alta
disponible (probablemente 115.200). Este parámetro
ajusta la velocidad a la que el ordenador se comunica
internamente con el faxmódem.
2Haga clic en la ficha Diagnósticos. Seleccione el puerto
adyacente a la entrada de su nuevo faxmódem y haga
clic en Más información o Consultar módem.
Bajo Información de puerto, tome nota de los
parámetros para Puerto e Interrupción.
Este paso prueba el módem enviándole comandos AT.
Una lista de respuestas indica que su nuevo módem está
correctamente conectado.

19
¡Importante! Si su PC tenía un módem existente usted debe
volver a dirigir su software de uso de modo que reconozca su
módem nuevo.
Usuarios De America Online: De la pantalla de AOL, haga clic el
botón de Arreglo; entonces hace clic Arreglo Experto. Escoja
la etiqueta de Dispositivos y haga doble clic el nombre de su
nuevo módem
Usuarios de Marcado Manual Del Establecimiento de Una Red:
Del tablero del escritorio de su computadora, haga doble clic Mi
Computadora y entonces del Establecimiento de Una Red de
Marcado Manual. Haga doble clic el nuevo icono de la conexión
de la marca, selecciona su módem nuevo de la lista, y sigue los
avisos.
Consejo: Si su faxmódem no funciona, pruebe primero a apagar
el ordenador y volver a encenderlo. A veces esto ayuda a
Windows a identificar y activar los controladores correctos. Si la
reiniciación del ordenador no da resultados, consulte la sección
Resolución de problemas del manual completo de
instrucciones.
Instalación del software de
comunicaciones
El CD adjunto describe el paquete de software de
comunicaciones incluido con su módem y proporciona una
sencilla instalación a realizar con el ratón. Si es preciso, consulte
la ayuda en línea del CD. Ejecute ahora el CD del módem. No
debe instalar los controladores de nuevo, sino que debe instalar
cualquier aplicación que desee.
Si ya tiene un módem instalado en su ordenador, necesitará
redirigir el software de la aplicación para reconocer su nuevo
módem tal como se describe en el manual completo.

20
Cómo desinstalar sus controladores de
módem PCI
Si desea desinstalar sus controladores de módem PCI, o si
desea sustituir un módem PCI antiguo por uno nuevo, siga estos
pasos.
1Desde el escritorio, abra el Panel de control y haga clic en
Agregar o quitar programas. En el cuadro de diálogo que
se abre, seleccione el módem que desee desinstalar y haga
clic en Quitar.
(Dependiendo de su sistema operativo, algunos de estos
botones pueden tener nombres ligeramente diferentes.)
2Siga las instrucciones en pantalla y haga clic en Finalizar.
3En uno de los siguientes cuadros de diálogo (dependiendo
de su sistema operativo):
Módems, Opciones de teléfono y módem, o
Propiedades del módem, seleccione el módem que desea
desinstalar y haga clic en Quitar.
4•Tome la cubierta de la computadora.
•Desenchufe cualquier cuerda conectada con la tarjeta.
•Quite el tornillo que está sosteniendo la tarjeta del
módem en lugar y resbale la tarjeta hacia fuera.
Si necesita ayuda
¡Eso es! Si tiene algún problema, consulte en la versión
electrónica del manual que se encuentra en su CD.
Table of contents
Languages:
Other Hayes Modem manuals

Hayes
Hayes V.92 User manual

Hayes
Hayes ADSL Duo Modem User manual
Hayes
Hayes H08-15530DF User manual

Hayes
Hayes Modem User manual

Hayes
Hayes Modem User manual
Hayes
Hayes ACCURA External ISDN TA User manual

Hayes
Hayes H08-15531-EF User manual
Hayes
Hayes H08-15531DF User manual
Hayes
Hayes RocketModem Manual
Hayes
Hayes USB Modem User manual
Popular Modem manuals by other brands
Teledyne
Teledyne 2103 Installation and operation guide
3Com
3Com OfficeConnect 3C891A release note
Paradyne
Paradyne KeepInTouch 3760 user guide
Elastic Networks
Elastic Networks 401 installation guide
Patton electronics
Patton electronics 1058 quick reference
ZyXEL Communications
ZyXEL Communications IES-612-51A user guide


