Hayes H08-15530DF User manual

PCI Modem User’s Guide

NOTICE
This document contains proprietary information protected by copyright,
and this User’s Manual and all the accompanying hardware, software,
and documentation are copyrighted. All rights are reserved. No part of
this document may be photocopied or reproduced by mechanical, elec-
tronic, or other means in any form.
The manufacturer does not warrant that the hardware will work properly
in all environments and applications, and makes no warranty and rep-
resentation, either implied or expressed, with respect to the quality,
performance, merchantability, or fitness for a particular purpose of the
software or documentation. The manufacturer reserves the right to
make changes to the hardware and User’s Manual content without obli-
gation to notify any person or organization of the revision or change.
All brand and product names are the trademarks of their respective
owners.
© Copyright 2002. All rights reserved.

Contents
INTRODUCTION .................................................................... 1
WHAT YOU NEED TO USE YOUR MODEM ..................................... 1
INSTALLING YOUR PCI MODEM......................................... 2
WINDOWS 95/98/ME/2000/XP.................................................... 2
INSTALLING THE DRIVERS ........................................................... 2
INSTALLING THE MODEM CARD ................................................... 3
COMPLETING THE INSTALLATION ................................................. 5
IMPORTANT INFORMATION FOR OWNERS OF V.92
MODEMS ................................................................................ 8
FIRMWARE UPGRADES................................................................ 9
COMMUNICATING WITH YOUR MODEM ......................... 10
ACCESSING THE INTERNET ........................................................ 10
COMMUNICATION SETUP OPTIONS............................................. 10
INITIALIZATION STRINGS AND AT COMMANDS ............................ 11
TROUBLESHOOTING ......................................................... 13
PLUG AND PLAY SETUP PROBLEMS WITH WINDOWS .................. 13
OTHER TROUBLESHOOTING TIPS .............................................. 15
APPENDIX A: HOW TO UNINSTALL MODEM DRIVERS. 25
APPENDIX B: REGULATORY INFORMATION.................. 26
INDUSTRY CANADA EMISSIONS STATEMENT ............................... 27
EUROPE – DECLARATION OF CONFORMITY ................................ 28
APPENDIX C: REFERENCE INFORMATION .................... 30


Introduction 1
Introduction
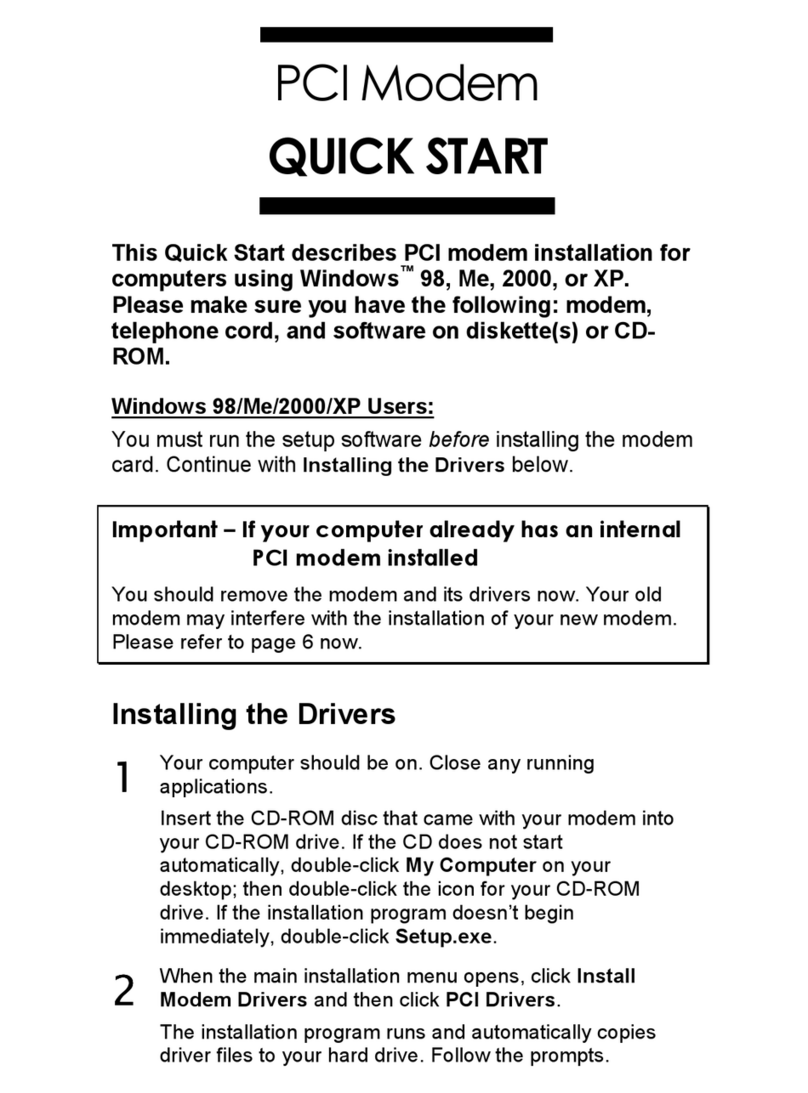
This Modem User Guide expands the Quick Start included with
your modem package and contains all the information you should
need to use and troubleshoot your new modem. The Table of
Contents shows the various useful sections of this User Guide.
What You Need to Use Your Modem
Make sure that you have received the following items in ad-
dition to this manual:
•PCI modem
•Phone cord
•A CD-ROM disc or floppy diskette containing installation
software, modem drivers, and communications software.
You also need the following:
•Computer with 16 megabytes of RAM (32 MB recom-
mended) and a hard drive with at least 5 MB available
•An available PCI slot
•For software supplied on a CD-ROM disc, a CD drive
•Windows® 95, 98, Me, 2000 or XP operating system
•A telephone jack to plug the modem into, so the modem can
dial out and receive calls
•Screwdriver or tool to remove and replace your computer
cover.

2 PCI Modem User’s Guide
Installing Your PCI Modem
Windows 95/98/Me/2000/XP
We have streamlined the installation of your modem by providing
an InstallShield® program that you must run before you install
your modem card.
The InstallShield program installs driver files and sets up your
computer to recognize the new modem. When you restart your
computer after installing the modem, your hard drive will already
contain the files Windows needs to complete the installation.
Please continue with the Installing the Drivers section.
Installing the Drivers
1Your computer should be on. Close any running applica-
tions.
Insert the CD-ROM disc that came with your modem into
your CD-ROM drive. If the CD does not start automatically,
double-click My Computer on your desktop; then double-
click the icon for your CD-ROM drive. If the installation
program doesn’t begin immediately, double-click
Setup.exe.
2When the main installation menu opens, click Install Mo-
dem Drivers.
The installation program runs and automatically copies
driver files to your hard drive. Follow the prompts.
3Windows 95/98/Me/2000/XP Users:
When asked whether or not you want to restart your com-
puter, select No, I will restart my computer later, click
Finish, return to the CD’s main menu, exit, and shut down
manually. Continue with
Installing the Modem Card.

Installing Your PCI Modem 3
Installing the Modem Card
Follow the steps below to install your modem card.
Note: If your computer has an existing modem, we recommend
that you first uninstall the modem drivers. Please refer to
Appendix A on page 25.
1Before you start the hardware installation, close all
running programs and shut down Windows if you
have not already done so. Then turn your computer
off and unplug it. Don’t plug it back in or turn it on until
you complete the modem hardware installation.
2Take the cover off your computer.
IMPORTANT: If you no longer want your older modem in
your computer, you should remove it now. First unplug
any phone cords connected to the card. One cord is the
connection to your telephone. You can reuse this cord
with your new modem. The other cord is the connection to
your telephone line at a wall jack. It is a good idea to re-
place this cable with the one that came with your new mo-
dem. Then remove the screw that is holding the modem
card in place and slide it out.
3On the rear of the computer, unscrew and remove the
metal cover plate that lines up with a free PCI slot.
CAUTION
Do not handle any internal modem card when the phone line is
plugged into it. The voltage present when the line is ringing is
potentially harmful.

4 PCI Modem User’s Guide
CAUTION
Electrostatic Discharge Protection
Static electricity can damage modem compo-
nents or your computer. Before removing the
modem from its antistatic bag, touch the com-
puter’s metal chassis to statically discharge your-
self.
4Remove your new modem from its antistatic bag and rec-
ord its serial number in the table on page 26 of this man-
ual.
5Slide the modem card firmly into the free PCI slot. See
the following illustration:
PCI slot
16-bit
ISA slots
Typical cover
plate
Be sure that the back end of the card (smaller gold finger
area) is properly seated into the connector. If you have a
tower or mini-tower computer case with a vertical main
board, lay the computer down on its side so you can push
straight down on the modem card to seat it firmly in its
slot. Be sure that the bracket is lined up properly, then
screw the bracket into the computer using the screw you
removed earlier.
6Replace the computer cover.

Installing Your PCI Modem 5
7Connect the telephone cord: Plug one
end of the phone cord into the jack
marked LINE. Plug the other end into a
phone jack (typically the wall jack where
you would normally connect a phone).
Plug your phone into the PHONE jack if
you want to use a phone on the same
line.
LINE
LINE
PHONE (optional)
PHONE
8Plug in your computer and turn it on.
9Windows 95/98/Me Users: As Windows starts up, it de-
tects your new modem. Because the installation program
has already provided your computer with the required
files, you will see Windows reporting on its progress, but
no action is required on your part. Continue with
Completing the Installation.
Windows 2000 Users: A few seconds after startup, you
may see the Digital Signature Not Found dialog box.
You can safely ignore this message and click Yes. Con-
tinue with Completing the Installation.
Windows XP Users: When the Found New Hardware
Wizard dialog box appears, click Next. A standard dis-
claimer dialog box appears if your modem has not yet
been tested by Microsoft’s Windows Hardware Quality
Labs (WHQL). There is no cause for concern about the
stability of your modem or your PC. You can safely disre-
gard this box and click Continue Anyway. Then click
Finish. Continue with Completing the Installation.
Completing the Installation
Perform the following steps to complete the installation:
1Open the Control Panel (and, in Windows XP only, click
Printers and Other Hardware). Then double-click the
Modems or Phone and Modem Options icon.

6 PCI Modem User’s Guide
2You may be asked to fill out Location Information if you
have not had a modem installed previously. Type the re-
quired information and, when done, click OK or Close.
Windows XP and Windows 2000 Users: Click the Mo-
dems tab, under Phone and Modem Options, to pro-
ceed to Step 3.
3Select the entry for your new modem and then click
Properties.
4Set the Maximum speed to the highest speed available
(probably 115,200).
Windows XP Users: You have to click the Modem tab
before you can set the Maximum speed.
Click OK and close the currently open dialog box.
5Click the Diagnostics tab. In Windows XP, click Query
Modem. Select the port next to the entry for your new
modem (for example, COM3) and click More info or
Query Modem.
This step tests the modem by querying it with AT com-
mands. A list of responses means that your new modem
is properly connected.
IMPORTANT: If you already have a modem installed in your
computer, you’ll need to redirect your application software so that
it recognizes your new modem. Please turn to the
Troubleshooting section for instructions, page 13. Otherwise,
continue with Installing the Communications Software below.
Tip: If you determine that your modem is not working, first try
turning off your computer and restarting it. Sometimes
this will help Windows identify and activate the correct
drivers. If restarting your computer doesn’t work, please
consult the Troubleshooting section on page 13.

Installing Your PCI Modem 7
Congratulations! You have successfully installed your PCI mo-
dem. Installing the Communications Software, described be-
low, is optional. For uninstallation instructions, go to page 25.
Installing the Communications Software
The modem’s CD describes the communications software pack-
age and online service included with your modem and provides
easy point-and-click installation. If necessary, consult the CD’s
online help. Please run the modem’s CD now. You should not in-
stall the drivers again, but you should install any application soft-
ware you like.
If you have a V.92 modem, after you’ve installed the CD soft-
ware, you should read the Important Information for Owners
of V.92 Modems section of this manual on page 8. If you don’t
have a V.92 modem, you’re done! Enjoy your modem.

8 PCI Modem User’s Guide
Important Information for Owners of
V.92 Modems
With V.92, as with the earlier V.90 standard, your connection
speed depends on your phone line and your Internet Service
Provider (ISP). To enhance compatibility, this modem automati-
cally detects whether to use V.92, V.90, or a slower mode when it
connects to your ISP.
Your V.92 modem includes the following capabilities.
•QuickConnect:
A V.92 modem remembers the line conditions of the last
number called, and uses this information to try to reduce
connection times.
•Modem-on-Hold:
You have the option of receiving voice calls while online. You
can answer the call and put your Internet session on hold if
your ISP supports this capability and you have Call Waiting
service compatible with the modem.
•Faster Upload Speeds:
Upload speeds may be increased, from 33.6K bps to a
maximum of 48K bps. (Actual rates vary, depending on line
conditions.)
•V.44 Data Compression:
The V.44 standard lets you browse the Web and transfer
data at higher speeds.
To make the most of your V.92 modem, follow these steps:
1. Contact your ISP and get the phone number of a V.92 con-
nection to the ISP.
2. Check our web site for news of any V.92 updates. If an up-
date is available, follow the directions below for upgrading
your modem.
Note: If you want to manually change the way your modem
connects, please consult the AT command tables begin-
ning on page 20 in the Troubleshooting section.

Important Information for Owners of V.92 Modems 9
Firmware Upgrades
Your modem’s software, or “firmware,” can be easily upgraded.
This is useful for code updates and feature enhancements. To
upgrade your modem’s firmware, you simply download the new
firmware files from our Web site and then run a program we pro-
vide. Before calling your first V.92 site, we strongly suggest that
you download the latest firmware.
We also suggest that you register your modem with us so that we
can notify you via e-mail when new firmware releases are avail-
able.

10 PCI Modem User’s Guide
Communicating with Your Modem
The faxing and communications software that came with your
modem sets itself up automatically and takes care of sending any
necessary commands to the modem.
You should read this section, however, if you want to learn some
general facts about how software works with your modem, or if
you intend to use your new modem with other software.
Accessing the Internet
To access the Internet and the World Wide Web, you need an
online service such as America Online (AOL) or CompuServe, or
an Internet Service Provider (ISP). The best place to start is the
CD included with your modem package, which contains Internet
and online services for you to try.
Online services provide installation software that makes signing
up almost automatic. ISPs typically supply or suggest the
browser software needed to access their service. They also pro-
vide additional instructions and software for setting up your ac-
count.
Note: You may need to redirect your application software to rec-
ognize your new modem; refer to the Troubleshooting section,
page 13, if you need assistance.
Communication Setup Options
If you run into configuration difficulties with your communication
software, it may be helpful to read the following section.
In setting up some older software programs, you may be asked
to enter certain information. Most programs have default settings
that are correct for use with this modem, and there is no need to
change them. However, you should be aware of the following
items:
If you are asked to select the “modem type” from a menu, and
you don’t see this modem listed by name, select the most
descriptive name such as V.92 modem, 56K modem, or generic
Class 1 Modem.

Troubleshooting 11
In the dialing directory, set all entries to the highest possible baud
rate, if your software and serial port support these speeds (do not
go over 115,200 bps). All communications between the computer
and the modem take place at this higher speed, independent of
the modem-to-modem speed.
If there is a section of your software called “Terminal Settings,”
make sure that Hardware Flow Control (RTS/CTS) is ON (or
YES).
Set auto baud detect to OFF (or NO).
If your fax software gives you the option of selecting Class 1 or
Class 2 fax drivers, select Class 1.
Finally, some programs ask Send init if CD high?, which you
should set to YES. Otherwise, the modem may not receive the
proper initialization string.
Initialization Strings and AT Commands
An initialization string is a group of AT command settings that is
sent to the modem as soon as you start up the software. The
software determines which commands should be included in the
initialization string, based on the device you select during instal-
lation. The commands remain in effect throughout the communi-
cations session, unless the software sends other commands to
override them.
The software uses other AT command strings for all commands
sent to the modem. This is transparent to you—the software
does this in the background without you being aware of it.
It is sometimes necessary, however, to add other AT commands
to initialization strings. You can find a table of AT commands on
the World Wide Web at www.modems.com. Click Reference
and then on AT Command Sets.
If your software suggests an initialization string for this modem,
you should use it. If your software does not list this modem and
no initialization string is suggested, use the following: AT &F.
Your telephone service may include Call Waiting that you can
temporarily suspend by using your phone to dial a special code.
(For example, in the U.S., you can disable call waiting by adding
*70 to your dialing prefix; please check with your local phone
company for the correct code for your area.) You can include that

12 PCI Modem User’s Guide
code, followed by a comma, in the dial string or dial prefix in your
software.
If your software does not handle AT commands automatically, it
should provide a place to enter AT commands in its setup
menus. However, in some cases you may need to enter AT
commands directly to the modem. You must do so from a data
program’s terminal mode.
Refer to the Troubleshooting section for more tips about AT
commands.
Using Terminal Mode to Enter AT Commands
Start your data communications program.
Change to terminal mode (also called command, local, direct, or
dumb mode). Check your software documentation for additional
instructions.
Type AT plus the command you need and press Enter. You will
see an OK response.
When you finish, you can return to the data communications pro-
gram’s standard user interface. See the software program’s
documentation if you need help.
To return to the factory default settings for the modem, in termi-
nal mode, type AT &F and press Enter.

Troubleshooting 13
Troubleshooting
If your modem stops working, please read this section carefully
before calling Customer Support. In addition, your modem CD in-
cludes a list of Frequently Asked Questions (FAQs).
Important—If Your Computer Has an Existing Modem
You must redirect your application software so that it recognizes
your new modem. To do so, follow these instructions:
•Dial-up Networking Users:
From your computer’s desktop, double-click My Computer
and then Dial-up Networking. Double-click the Make New
Connection icon, select your new V.92 modem from the
dropdown list, and follow the prompts.
•America Online Users:
From within AOL, click the Setup button; then click the Ex-
pert Setup button. Select the Devices tab and double-click
the new V.92 modem you’ve installed. Click OK and then
Close.
Plug and Play Setup Problems with Windows
Under some circumstances, the Plug and Play setup under Win-
dows 95/98/Me/2000/XP may not resolve all installation prob-
lems. The Windows Help system has an excellent tool for thor-
oughly diagnosing and solving many problems.
1. On your desktop, double-click the My Computer icon.
2. Choose the Help Topics command from the Help menu.
Windows displays the Windows Help dialog box.
Windows XP Users: Choose Help and Support Center
from the Help menu. Then use the Search feature.
3. Select the Contents tab. Note: Windows Me, 2000, and
XP include a Help Search option, which you can use in-
stead; search for “hardware conflict,” for example.
4. Click Troubleshooters. (For Windows 98, you will also
have to click Windows 98 Troubleshooters.) Then click
the hardware conflict help entry.

14 PCI Modem User’s Guide
5. Follow the instructions for determining and resolving a
hardware conflict.
This should solve your problem. Remember to write down your
COM port setting. Return to page 5 to complete the installation.
If you still have problems, it probably means that although you
are running a version of Windows that supports Plug and Play,
you may have an older computer that is not completely compati-
ble with this feature. Try the steps in the next section.
Freeing up Resources in BIOS under Windows
95/98/Me/2000/XP
This procedure is a little more difficult than the previous one, but
with the help of your computer’s documentation you should be
able to clear up any remaining problems.
1. Close all running programs. Shut down your computer and
restart it: Click Start and then Shut Down. Shut down
your computer completely. Turn the power off, wait about 5
seconds, and turn the power back on.
2. As your computer goes through the startup process, it
should display a key or key combination that you can use
to enter the BIOS Setup program. Enter the BIOS Setup
program and disable COM2. Consult your computer’s
documentation if the procedure is not clear based on the
on-screen prompts. Note: Some computers may not use
the BIOS settings to control the COM ports. Check your
computer’s documentation to see if you have to reset the
computer’s jumpers or switches instead.
3. Write down and save the new COM port setting and exit
Setup.
4. The BIOS automatically reboots your computer.
5. Choose Control Panel from the Settings command in the
Start menu.
6. Double-click the System icon.
7. Click the Device Manager tab.
Find the Ports (COM & LPT) device and click the +sign.
This expands the device list under Ports.
8. Select Communications Port (COM2). Click the Remove
button in the Device Manager window. This removes the
device currently assigned to COM2.

Troubleshooting 15
9. When Windows displays the Confirm Device Removal
warning, click OK.
10. Double-click Modem in the Device Manager window.
11. Double-click the Modem icon for your model.
12. Click the Resources tab.
13. Uncheck the Use automatic settings checkbox.
14. Scroll through the Basic configuration options until you find
the one that displays the Input/Output Range 02F8 -
02FF. This is COM2. The Conflicting device list box
should say No conflicts. If there are conflicts, call Tech
Support.
15. If there are no conflicts, close the Modem Properties win-
dow, System Properties window, and Control Panel win-
dow by clicking OK for each.
16. Shut down your computer, turn off the power, and restart
it. Going through this power cycle can be important.
Merely restarting Windows may not allow the BIOS to reg-
ister the changes properly.
If Windows finds your other serial port, it may try to assign the
port to COM2, but won’t be able to because your Modem is al-
ready using that system resource.
Other Troubleshooting Tips
IMPORTANT:
If you need to reformat your hard drive or to re-
install Windows 95/98/Me/2000/XP, you must
physically remove your modem before do-
ing so.
Install the drivers and then the modem as a
new install, following the instructions in this
manual.

16 PCI Modem User’s Guide
Problem:Your system
−
−−
−doesn’t boot-up, or
−doesn’t recognize your PCI Modem, or
−doesn’t respond in Control Panel | Modems |
Diagnostics.
Solution:Your PCI Modem is a BIOS and driver-dependent
device. Sometimes the modem will be mistakenly
assigned to an IRQ (Interrupt Request) already in
use by another device.
If you install the modem in a different slot in your
computer, this may solve the problem.
You should also check your computer for an avail-
able IRQ if you have other devices connected to your
computer.
Windows 95/98/Me Users: Go to Settings | Con-
trol Panel | System | Device Manager. Highlight
Computer, press Properties, and check for an
available IRQ. Any IRQ from 0 to 15 which does not
already have a device assigned to it is available for
use.
Windows 2000/XP Users: Go to Control Panel |
System | Hardware Device Manager. Highlight
Computer, press Properties, and check for an
available IRQ. Any IRQ from 0 to 15 which does not
already have a device assigned to it is available for
use.
Windows 95/98/Me/2000/XP Users: When PCI bus
IRQ steering is enabled, Windows will direct PCI bus
IRQs to devices such as your modem. Sometimes,
however, the IRQ that Windows assigns to your mo-
dem will conflict with the computer’s BIOS.
To disable IRQ steering in computers running these
operating systems, from Control Panel, go to Sys-
tem | Device Manager | System Devices | PCI Bus
|IRQ Steering and click the option button to disable
IRQ steering. If the PCI modem you have just in-
stalled is listed, highlight it and click Remove, and
then reboot your system. If this doesn’t disable the
“IRQ Holder for PCI Steering,” please contact Micro-
soft Technical Support.
This manual suits for next models
4
Table of contents
Other Hayes Modem manuals

Hayes
Hayes PCI Modem User manual

Hayes
Hayes PC Card User manual

Hayes
Hayes Modem User manual

Hayes
Hayes H08-15531-EF User manual
Hayes
Hayes ACCURA External ISDN TA User manual
Hayes
Hayes RocketModem Manual
Hayes
Hayes USB Modem User manual
Hayes
Hayes V.92 User manual

Hayes
Hayes Modem User manual

Hayes
Hayes V.92 User manual
Popular Modem manuals by other brands
Speedtouch
Speedtouch 330 How to set up
3One data
3One data 277 Series Quick installation manual
Multitech
Multitech MultiMobile MT128ZLX-ST/NT quick start guide
Multitech
Multitech MTSMC-G2 Hardware guide
NetComm Wireless
NetComm Wireless NL1901ACV Primary Setup Guide
Multitech
Multitech MultiModem MT2834ZDX Series Quick reference guide


