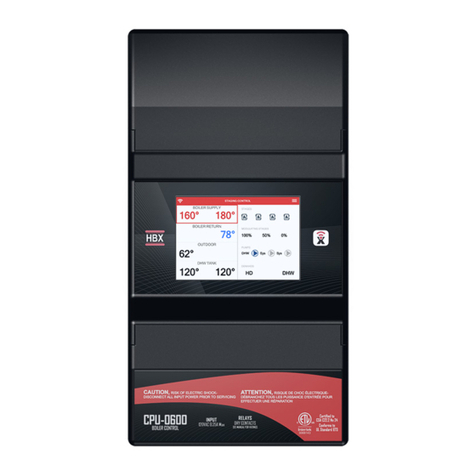
HBX HydroBloc 0110 User manual

HBX HYD-0110 HydroBloc
Version 1.2.0
HydroBloc Manual Page 1 © HBX Control Systems Inc.
HBX Control Systems Inc.
Installation Manual
HydroBloc 0110
Version 1.2.0
HYD-0110

HBX HYD-0110 HydroBloc
Version 1.2.0
HydroBloc Manual Page 1 © HBX Control Systems Inc.
Control Systems Inc.
Comfort
Control
Innovation
HBX HYD-0110 HydroBloc
Version 1.2.0
HydroBloc Manual Page 1 © HBX Control Systems Inc.
TABLE OF CONTENTS
Section 1 - Introduction & Installation 2-7
Getting Started ........................................................... 2
Receiving Inspection and Storage ........................... 2
General Technical Data ............................................ 3
Nameplate Information ............................................ 3
Main Parts and Labels ............................................... 4
Pump Curve ................................................................ 5
Fitting Installation ...................................................... 6
Terminal Designations ............................................... 7
Section 2 - Programming the Control 8-11
Screen Colours ........................................................... 8
HydroBloc Status &
Programming Screens............................................... 8-11
Section 3 - Application Drawings 12-13
Warranty Information 14
Table of Contents

HBX HYD-0110 HydroBloc
Version 1.2.0
HydroBloc Manual Page 2
GETTING STARTED
This manual will help with the installation, parameter
setting, troubleshooting and general maintenance
requirements for the HydroBloc. To guarantee the safe
and reliable operation of this HydroBloc, you must first
read this manual in detail and take particular note to any
and all warnings or caution directives prior to connecting
to AC power.
Only suitably qualified individuals with
formal training in electrical and HVAC
controls should attempt the installation
of this equipment. Incorrect wiring and
installation will affect the warranty provided
with this unit. Wiring must be completed
in accordance with the codes and practices
applicable to the jurisdiction for the actual
installation.
The HBX HYD-0110 is a microprocessor
based controller and as such is not to
be regarded as a safety (limit) control.
Please consult and install the heating or
cooling appliance in accordance with the
manufacturer’s recommendations.
SAFETY SYMBOLS:
RECEIPT, RECEIVING & INSPECTION
This HYD-0110 has gone through rigorous quality
control tests at the factory before shipment. After receipt
and before installation perform the following checks:
Receipt
After receiving, inspect the unit for any possible
physical damage that may have occurred during
transportation.
Inspection
After unpacking the unit make sure the box contains:
• HYD-0110 HydroBloc
• Terminal Block
• 3 Fittings:
– Delivery Fitting with Pressure and
Temperature Sensor
– Return Connection
– Supply Fitting
• 4 3/4” Unions
• 1 Interconnect Wire
• 1 Outdoor Sensor
• 3 O-Rings
• 3 Stainless Steel Fitting Clips
• 1 Stainless Steel Backplate
• 1 Universal Sensors
• 1 Screwdriver
• 1 Cable Tie
• 1 Stainless Steel Temperature Sensor Clip
Make sure the part number on the unit corresponds to
the part number on the original box.
Storage
The HYD-0100 should be kept in its original shipping
carton prior to installation. In order to retain the
warranty coverage it should be stored properly:
• Store in a clean dry place
• Store within an ambient temperature range of
+10ºC to +40ºC
• If possible, store in an air-conditioned
environment where the relative humidity is less
than 95%
• Do not store in places where the unit may come
into contact with corrosive substances
• Do not store on unstable surfaces where it may
become damaged due to falling
Extreme Hazard -
This action poses a serious threat that could
result in personal injury or death, as well as
permanent damage to the equipment. Proceed
with caution.
Moderate Hazard -
This action may cause personal injury or have
adverse effects on the installation process if
handled incorrectly.
Disconnect Power Source -
The presence of low voltage(24VAC) or high
voltage(120VAC) could result in personal
injury or permanent damage to components or
equipment.
Point of Interest -
This point clarifies pertinent information, or
brings your attention to an action that may have
adverse effects on the installation process.

HBX HYD-0110 HydroBloc
Version 1.2.0
HydroBloc Manual Page 3 © HBX Control Systems Inc.
GENERAL TECHNICAL DATA
Input Voltage:
120 VAC, ± 10%, 60Hz, 2A
2 x Thermistor Inputs:
Boiler / Outdoor
1 x Boiler Output Relays:
24 VAC 1A
1 x Relay Contact
24 VAC 1A
1 x Pressure/Temperature Sensor:
System Sensor
Microprocessor:
16Bit, 20MHz
Languages:
English
Weight:
4.53 KG (10 lbs)
Dimensions:
309mm (12.180”) W x 255mm (10.039”) H x 169mm
(6.661”) D
ETL Listings:
Meets CSA C22.2 No. 24
Meets UL Standard 873
ETL Control No. 3068143
Storage:
Store in a clean dry place
Temperature: +10¼C to +40¼C
Humidity: 0 to 95% (air conditioned environment)
Nameplate Information:
The exterior label contains specific information unique
to your HBX HydroBloc and identifies some of the
basic features. The label displays the serial number
which will match the serial number on your actual
HydroBloc, the lot number, the bar code and the
products ETL number.
10.039”
6.457”
4.724”
12.180”
12.180”
6.690”
3.898”
2.494” 1.705”
7.718”
2.462”
6.661”
000250723
L
ot #:00000001
S
erial #:
Date:2023-07-20
V1.20
HYD-0100

HBX HYD-0110 HydroBloc
Version 1.2.0
HydroBloc Manual Page 4
9. Unions:
(3/4’’)
10. Delivery Fitting w/ Sensor:
Out to system load
11. Stainless Steel Temperature Sensor Clip:
This clip to holds the pressure sensor in place.
12. Pressure and Temperature Sensor:
Sensor indicates both ongoing system temperature and
pressure.
13. Terminal Block:
Seven pin terminal block used to hook up sensor inputs,
boiler demand, and heat demand inputs.
14. Air Purger
Purges air from the hydronic system.
Viewing from top left and moving right in a clockwise
direction:
1. Digital Display:
Multi-colour backlight that indicates all parameters.
2. Navigation Buttons:
Up button, down button, center button
3. 120V Pump:
Adjustable three speed pump.
4. HydroBloc Mounting Hole
5. Supply Fitting:
Boiler input.
6. Mounting Bracket:
Stainless steel bracket that is used to fix fitting positions
and help with wall mounting.
7. Mounting Bracket Hole
8. Return Connection:
System and Boiler Return
1. Digital Display
13. Terminal Block
12. Pressure and
Temperature Sensor
11. Stainless Steel
Temperature
Sensor Clip
10. Delivery Fitting
9. 3/4” Unions
8. Return
Connection
2. Navigation Buttons
3. 120V Pump
4. HydroBloc
Mounting Hole
6. Mounting
Bracket
7. Mounting
Bracket Hole
5. Supply
Fitting
14. Air Purger

HBX HYD-0110 HydroBloc
Version 1.2.0
HydroBloc Manual Page 5 © HBX Control Systems Inc.
0
5
10
15
20
25
30
0 2 4 6 8 10 12
Head (Ft)
Flow (USGPM)
Pump Curve for UPS15-78
Speed 1
Speed 2
Speed 3
HYDROBLOC PERFORMANCE PUMP CURVE

HBX HYD-0110 HydroBloc
Version 1.2.0
HydroBloc Manual Page 6
4. Return Connection
This fitting is to be installed on the lower left hand
side of the Hydrobloc.
5. Fitting Clip
Secure all three fittings to the Hydrobloc.
6. Terminal Block
Seven pin terminal block used to hook up sensor inputs,
boiler demand, and demand inputs.
INSTALLATION
FITTING ASSEMBLY
To place each fitting into the port on the Hydrobloc
first place the o-ring over the fitting. Once the o-ring
is in place firmly twist and press the fitting into its
appropriate position as shown in the diagram below.
Hydrobloc Assembly
1. Backplate
Installed on the wall to mount the Hydrobloc.
2. Supply Fitting
This fitting is to be installed on the lower right hand
side of the Hydrobloc.
3. Delivery Fitting
This fitting is to be installed on the top left hand
side of the Hydrobloc closest to the front of the
Hydrobloc.
HydroBloc
Type UPS15-58
IMPEDANCE PROTECTED
FOR INDOOR USE ONLY
P/N: 59T02930
115V ~
60Hz
10µF
0.45
0.57
0.65
50
1/1(A) P1(A)
65 MAX WATER TEMP 203°F
75
PC: 0711HBX
IP 42
TF 95
MAX 3bar
5. Fitting Clip
2. Supply Fitting
6. Terminal Block
3. Delivery Fitting
7. 3/4” Unions
4.Return Connection
1. Backplate

HBX HYD-0110 HydroBloc
Version 1.2.0
HydroBloc Manual Page 7 © HBX Control Systems Inc.
WIRING AND INSTALLATION
Terminal 1 and 2:
Thermostat Input
Run wire straight from thermostat.
Terminal 3 and 4:
Outdoor Sensor
Place outside on the North side of the building
(if possible).
Terminal 4 and 5:
Boiler Sensor
This sensor is put on the main boiler loop.
Terminal 6 and 7:
Boiler Contacts
This contact is used to send the demand signal for the
boiler to turn on.
Terminal 8 and 9:
Relay contact that functions as a pump contact. Dry contact
connection.
Do not apply power here as the thermostat input
functions on closed contacts.

HBX HYD-0110 HydroBloc
Version 1.2.0
HydroBloc Manual Page 8
Heating — this will appear on the screen with a heat demand is present.
When this is present the HYD-0110 will be calling for heat.
Boil Sup — this shows the actual boiler temperature on the left and the
boiler target temperature on the right side of the screen.
System — this shows the actual system temperature reading on the left and
the system target temperature on the right of the screen.
Outdoor — this shows the current outside temperature.
Pressure — this shows the system pressure reading. If the there is low
pressure then the word LOW will be shown on the screen. If LOW is
displayed for 1 minute or longer the control will shut off.
Valve Position — this indicated the position of the valve. 100% would be
fully open.
Boiler Protect — Boiler Protect will appear on the screen in the bottom
corners when in Boiler Protection.
STATUS SCREEN
The Setup Menu is where to access the other menus for the controller.
1. Back — selecting the back option will send the controller to the previous
screen.
SETUP MENU
Operation — when set to ON/OFF the circulator will turn on and off
based on the demand. When set to CONSTANT the circulator will
constantly be on unless it WWSD. (This option will not be available in
BOILER AQUASTAT mode). Default: ON/OFF
CIRCULATOR
SCREEN COLOURS
Light Blue — No Heat Demand
Red — Heat Demand and the boiler is running
Yellow/Green — Heat Demand and boiler is running but it is in boiler protection
Dark Blue — Heat Demand and the boiler target is satisfied. Boiler will not be running
Flashing Red — Faulty or fail sensor. 80F fluid will be supplied to the floor to prevent
freezing.
Flashing Purple — Purge. The valve will open for 30 minutes.

HBX HYD-0110 HydroBloc
Version 1.2.0
HydroBloc Manual Page 9 © HBX Control Systems Inc.
OUT DESIGN — This is the design outdoor temperature. It is used in
outdoor reset design calculation. Set this value to a temperature at which the
maximum target temperature the control will go to once the OUT DESGIN
is reached.
(-40F – 70F) Default: 10F
ROOM DESIGN — This is the design room temperature. It is used in the
outdoor reset design calculation. Set it to the approximate room temperature.
(35F – 120F) Default: 70F
WWSD — This sets the temperature at which the control will enter WWSD.
This temperature will shut the circulator/ control off.
(35F – 120F) Default: 70F
DESIGN TEMPERATURES
Temp Control: Fixed — A consistent water temperature will be maintained.
Water Temp — When there is a demand and not in WWSD the control will
target this temperature. (50F – 180F). Default: 120F
WATER TEMPERATURE CONTROL
Temp Control: Reset — The water temperature target will change based on
outdoor reset design calculation.
Mix Design — This setting is the top of the heat curve. The target will hit
this temperature as the outdoor temperature approaches the OUT DESIGN.
(50F – 180F) Default: 120F
Mix Min — This setting is the bottom of the heat curve. The target will hit
this temperature as the outdoor temperature approaches WWSD.

HBX HYD-0110 HydroBloc
Version 1.2.0
HydroBloc Manual Page 10
BOILER SETTINGS
Type: Reset — When set to RESET the supply water temperature will
change based on outdoor reset. Default: RESET
Boiler Design — This setting is the top of the heat curve. The target will hit
this temperature as the outdoor temperature approaches the OUT DESIGN.
(70F – 200F) Default: 180F
Boiler Min — This is the minimum boiler temperature. Set this to the
temperature that the boiler will be at when is approaches WWSD.
(70F – 200F) Default: 140F
Boiler Diff: Adjust this setting to the desired differential for the boiler. This
value will center the differential around the set point. (Eg- 20F differential
would be 10F below and 10F above).
(10F – 50F) Default: 20F
Type: Condensing — When set to CONDENSING the control recognizes
this boiler being used is a condensing type and that the boiler will maintain
its own temperatures.
Type: Aquastat — When set to AQUASTAT the control will recognize
that a non-condensing boiler is being used that will maintain its own
temperatures. This setting cannot be used if CONSTANT CIRCULATION
is selected.
Sensor — Depending on how the sensor is placed will depend on what to
set this to. If the sensor is placed on the supply line then SUPPLY must be
selected and if it is placed on the return then RETURN must be selected.
Supply Min/ Return Min — the minimum supply or return temperature.
(70F- 200F) Default: 140F

HBX HYD-0110 HydroBloc
Version 1.2.0
HydroBloc Manual Page 11 © HBX Control Systems Inc.
C or F — This setting is used to set the temperatures displayed on the
control in either Celsius or Fahrenheit. Default: F
Overwrite Defaults — This settings will overwrite the Factory Default
Settings with the selected settings.
Restore Defaults — This will restore the settings to their Default settings. If
the Factory Default Settings were overwritten then the user settings selected
during the overwrite will be restored instead.
Purge — This will open PURGE MODE.
DEFAULTS/PURGE
Activate — This will open the internal valve for 30 minutes for the purposes
of purging.
Cancel — This will end the Purge Mode. This in turn will close the internal
valve and end the timer.
PURGE MODE

HBX HYD-0110 HydroBloc
Version 1.2.0
HydroBloc Manual Page 12
HYD-0110-02 DRAWING:
Outdoor
Sensor
Indoor
Thermostat
Boiler
Sensor
Boiler/ Chiller
HT
Description:
This is an example of the Hydrobloc in a typical application. It is used to mix into a low temperature loop.
HYD-0110-01 DRAWING:
Outdoor
Sensor
Indoor
Thermostat
HT
r/ ChillerelioB
Outdoor
Sensor
Indoor
Thermostat
HT
Outdoor
Sensor
Indoor
Thermostat
HT
Boiler
Sensor
Boiler
Sensor
Boiler
Sensor
Boiler/Chiller
Controller
Description:
This drawing exhibits the HydroBloc in a multiple-
mixing manifold application.

HBX HYD-0110 HydroBloc
Version 1.2.0
HydroBloc Manual Page 13 © HBX Control Systems Inc.
HYD-0110-04 DRAWING:
Boiler/ Chiller
Outdoor
Sensor
Indoor
Boiler/
Chiller
Sensor
System
Sensor
Thermostat
HT
Note:
The system temperature/pressure sensor is no longer used. You must use the thermistor extension wire and the
extra strap-on thermistor for this configuration, as well as turn the Mixing Adjustment to OFF in the programing
adjustments of the HydroBloc (pg 10). See the System Sensor Attachment section on page 6.
HYD-0110-03 DRAWING:
Outdoor
Sensor
Outdoor
Sensor
Outdoor
Sensor
Outdoor
Sensor
Description:
Each unit of a multi-family dwelling (an apartment
for example) can have independent outdoor reset
control. This provides optimum comfort as well as
offering improved control and energy efficiency.
Description:
This is an example of the HydroBloc being used as an injection pump. (See note below)

HBX HYD-0110 HydroBloc
Version 1.2.0
HydroBloc Manual Page 14
Limited Warranty
HBX Controls warrants each of its products to be free from defects in workmanship and materials under normal use and service for a
period of 24 months from date of manufacture or 12 months from date of purchase from an HBX Authorized Dealer, if within the above
documented period after date of manufacture.
If the product proves to be defective within the applicable warranty period, HBX on its sole discretion will repair or replace said product.
Replacement product may be new or refurbished of equivalent or better specifications, relative to the defective product. Replacement product
need not be of identical design or model. Any repair or replacement product pursuant to this warranty shall be warranted for not less than
90 days from date of such repair, irrespective of any earlier expiration of original warranty period. When HBX provides replacement, the
defective product becomes the property of HBX Controls.
Warranty Service, within the applicable warranty period, may be obtained by contacting your nearest HBX Controls office via the original
Authorized Agent and requesting a Return Material Authorization Number (RMA #). Proof of purchase in the form a dated invoice/receipt
must be provided to expedite the issuance of a Factory RMA.
After an RMA number has been issued, the defective product must be packaged securely in the original or other suitable shipping package to
ensure that it will not be damaged in transit. The RMA number must be visible on the outside of the package and a copy included inside the
package. The package must be mailed or otherwise shipped back to HBX with all costs of mailing/shipping/insurance prepaid by the warranty
claimant.
Any package/s returned to HBX without an approved and visible RMA number will be rejected and shipped back to purchaser at purchaser’s
expense. HBX reserves the right, if deemed necessary, to charge a reasonable levy for costs incurred, additional to mailing or shipping costs.
Limitation of Warranties.
If the HBX product does not operate as warranted above the purchasers sole remedy shall be, at HBX’s option, repair or replacement. The
foregoing warranties and remedies are exclusive and in lieu of all other warranties, expressed or implied, either in fact or by operation of law,
statutory or otherwise, including warranties of merchantability and fitness for a particular purpose/application. HBX neither assumes nor
authorizes any other person to assume for it any other liability in connection with the sale, installation maintenance or use of HBX Controls
products.
HBX shall not be liable under this warranty; if its testing and examination discloses that the alleged defect in the product does not exist or was
caused by the purchasers or third persons misuse, neglect, improper installation or testing, unauthorized attempts to repair or any other cause
beyond the range of intended use, or by accident, fire, lightning or other hazard.
Limitation of Liability.
In no event will HBX be liable for any damages, including loss of data, loss of profits, costs of cover or other incidental, consequential or
indirect damages arising out of the installation, maintenance, commissioning, performance, failure or interruption of an HBX product, however
caused and on any theory of liability. This limitation will apply even if HBX has been advised of the possibility of such damage.
Local Law.
This limited warranty statement gives the purchaser specific legal rights. The purchaser may also have other rights which vary from state to
state in the United States, from Province to Province in Canada and from Country to Country elsewhere in the world.
To the extent this Limited Warranty Statement is inconsistent with local law, this statement shall be deemed modified to be consistent with
such local law. Under such local law, certain disclaimers and limitations of this statement may not apply to the purchaser. For example, some
states in the United States, as well as some governments outside the United States (including Canadian Provinces), may:
Preclude the disclaimers and limitations in this statement from limiting the statutory rights of a consumer (e.g. United Kingdom);
Otherwise restrict the ability of a manufacturer to enforce such disclaimers or limitations; or
Grant the purchaser additional warranty rights which the manufacturer cannot disclaim, or not allow limitations on the duration of implied
warranties.

HBX HYD-0110 HydroBloc
Version 1.2.0
HydroBloc Manual Page 15
©HBX Control Systems Inc. 2020
Phone: +1 (403) 720-0029 Fax: +1 (403) 720-0054
Email: info@hbxcontrols.com Web: www.hbxcontrols.com
HBX Control Systems Inc.
4516 - 112th Avenue SE
Calgary, AB Canada T2C 2K2
Toll Free Technical Support: +1 (855) 410 2341
This manual suits for next models
1
Table of contents
Other HBX Control System manuals