HDFury HDfury3 User manual

HDfury3
USER MANUAL

HDfury3.com
2 HDfury3 User Manual
Table of Contents
Table of Contents .......................................................................................................... 2
Overview ........................................................................................................................ 3
Connecting Cables ........................................................................................................ 4
Power/Status L D ......................................................................................................... 5
HDMI Input Selection .................................................................................................... 6
RGB Shift (Image Centering) ........................................................................................ 7
DIP Switch Settings ....................................................................................................... 8
RGB/Component Output 10
RGB Sync 11
Enhanced Colour Depth 13
RGB Shift 14
Power/Status LED 15
Limiting Resolution Support (EDID) 16
Frequently Asked Questions (FAQ) ........................................................................... 18
General 18
Sound 18
Inputs and Switching 20
Video 20
Image Shifting 23
RGB Image Sync 24
Colour Depth Upscaling 25
Limiting Resolution Support (EDID) 25
Power 26
Miscellaneous 27
Specifications .............................................................................................................. 28

HDfury3.com
3 HDfury3 User Manual
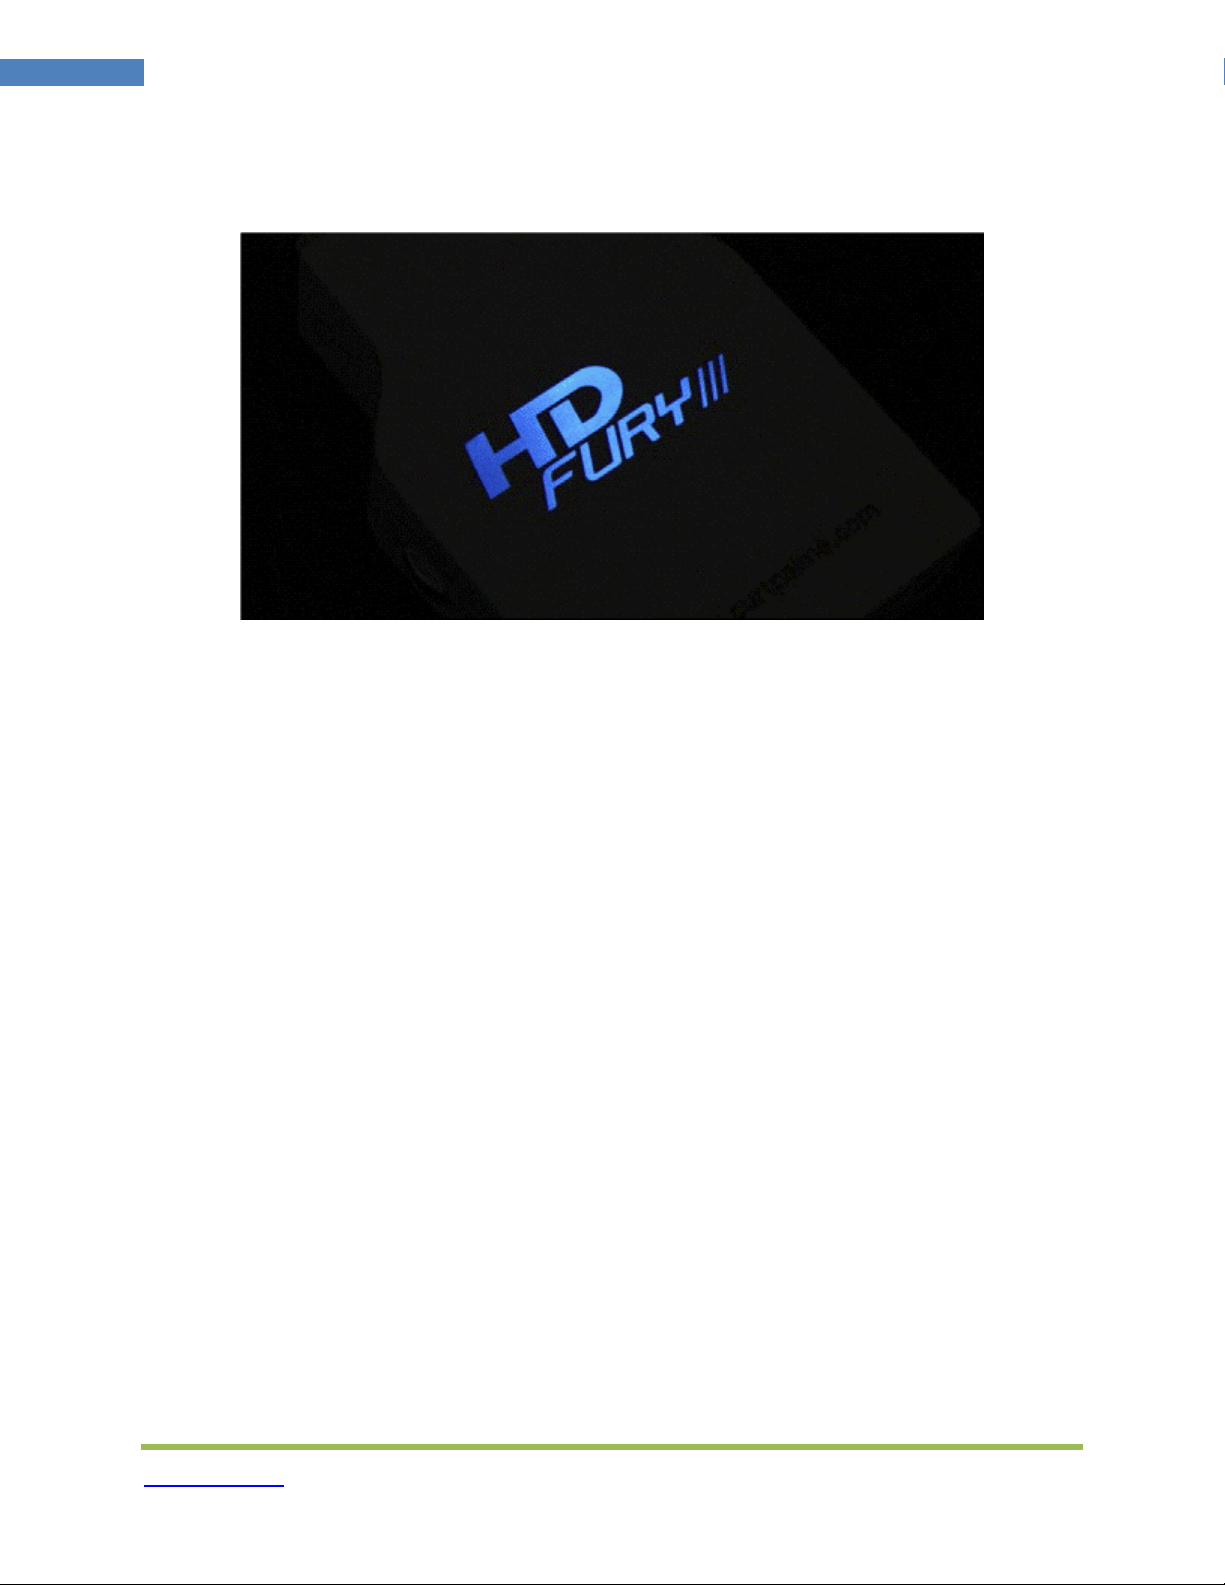
Overview
Thank you for purchasing the HDfury3!
This unique HDMI converter will allow you to connect newer HDMI devices to HD ready
displays and projectors that do not have HDMI inputs
The HDfury3 upgrades your HD-ready TV or projector allowing you to watch high-
definition at up to FULL HD 1080p resolution
The HDfury3 is the world’s most powerful HDCP deciphering converter ever built It
includes advanced features such as:
• Two HDMI 1 3 inputs with Deep Color
TM
support
• Auto/Manual input switching
• 5 1 Dolby Digital/DTS sound
• Perfect image centering in both Component and RGB modes
• Output resolution limiting
• User customizable options via DIP switches

HDfury3.com
4 HDfury3 User Manual
Connecting Cables
To use your HDfury3:
• Connect up to two HDMI input cables to the HDMI inputs
• Connect a video output cable to the analog video output
• Connect the HDfury3 power supply
• Connect an audio output cable (optional)
As shipped, the HDfury3 defaults to Component (Y/Pb/Pr) video output and will convert
all resolutions up to and including FULL HD 1080p In most cases no further
adjustments are required For displays with RGB (VGA) inputs or special requirements,
please see the DIP Switch Settings section further below to customize your HDfury3
HDfury3.com
5 HDfury3 User Manual
Power/Status L D
The HDfury3 logo will glow blue when in use When the HDfury3 first receives an HDMI
signal the logo will quickly turn on, then off, and then on permanently to indicate that the
HDCP handshake has been completed
The status of the blue logo may be used for troubleshooting:
Logo OFF: Insufficient power Use the HDfury3 power supply
Logo BLINKING (on for split second, off for 5 seconds): The HDfury3 is
receiving power and is ready to accept an HDMI signal
Logo ON: The HDfury3 is powered and receiving and decoding the HDMI signal

HDfury3.com
6 HDfury3 User Manual
HDMI Input Selection
The HDfury3 has two HDMI-inputs The “1A / AUTO / 2B” switch may be used to select
the active HDMI input as follows:
1A: Input 1A is always active
AUTO: The input that is provided a signal first will remain active
To switch to the other input, turn off the active input device
2B: Input 2B is always active
You may switch between HDMI inputs at any time without first powering off the HDfury3
HDfury3.com
7 HDfury3 User Manual
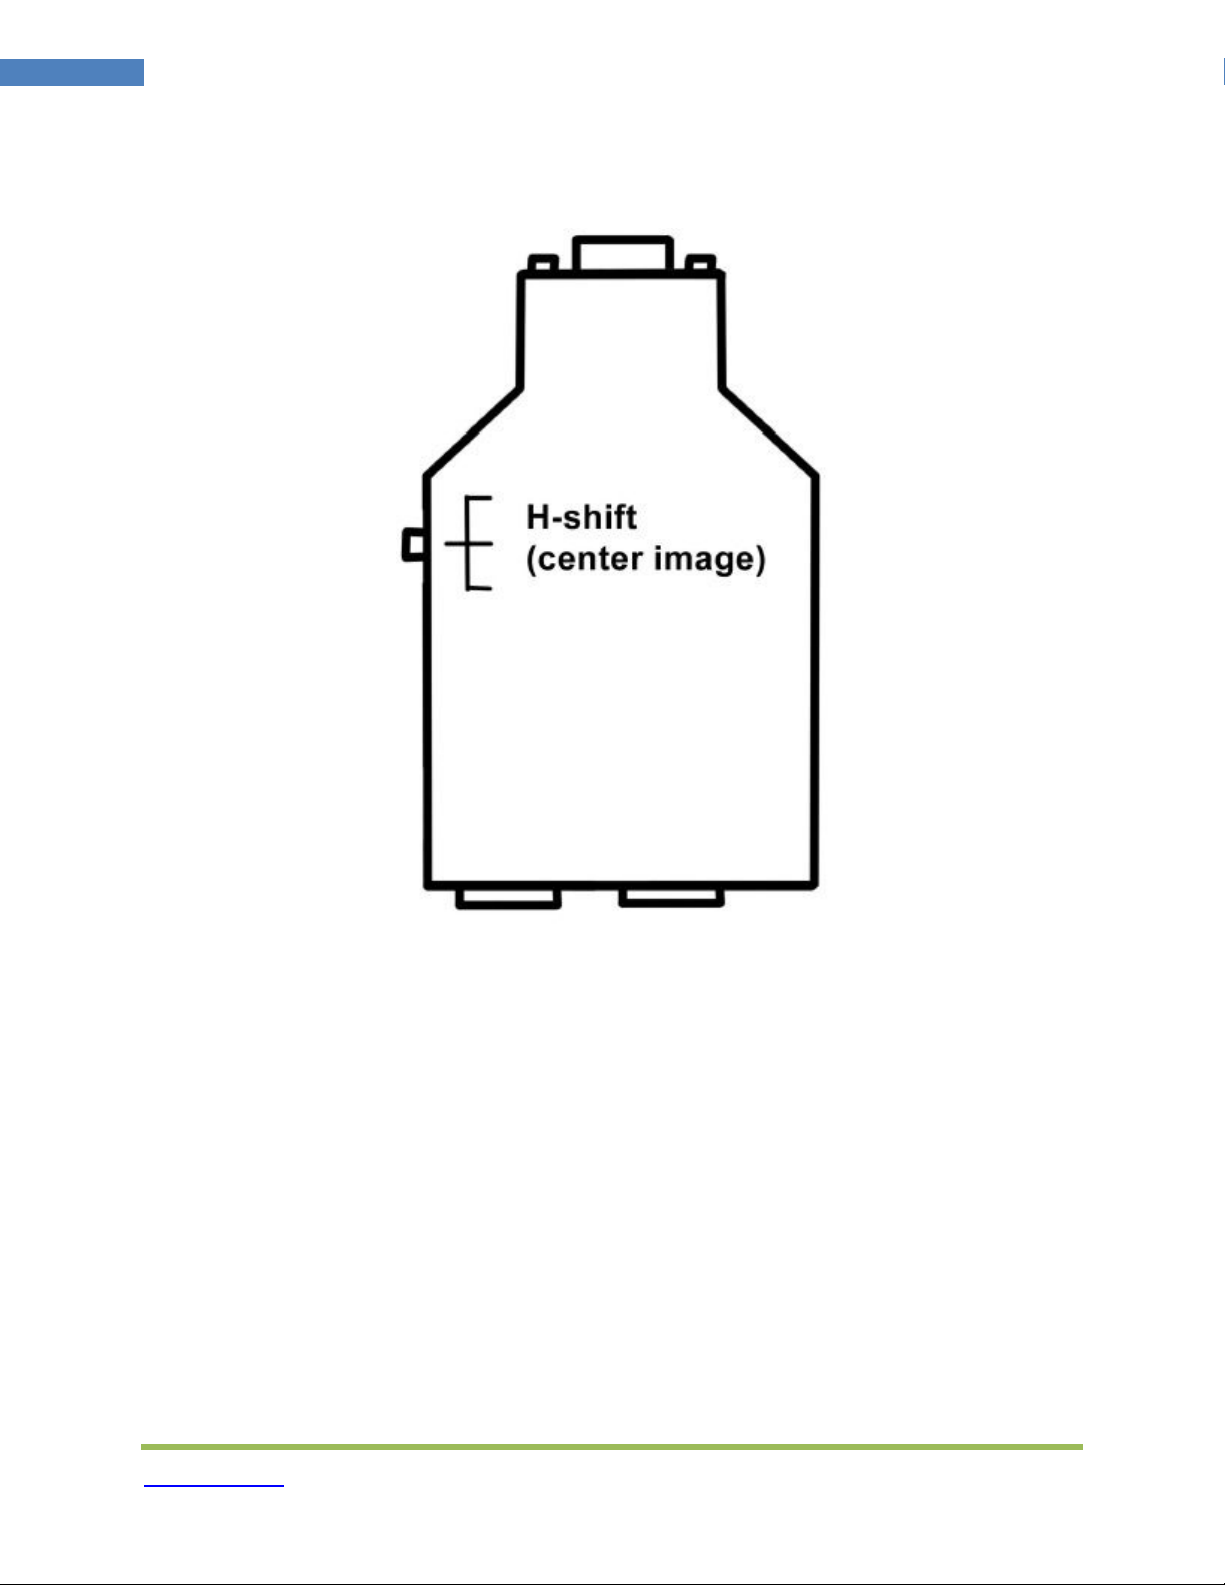
RGB Shift (Image Centering)
The HDfury3 perfectly centers the image automatically when Component video output is
used
If RGB video output is required, some fine tuning of the image centering may be
required The “L/R” switch may be pushed up or down to shift the image until it is
perfectly centered
Hold the switch in either direction to shift the image faster To reset back to the default
settings, hold the switch in either direction for 15 seconds
The HDfury3 automatically saves the setting and will remember it the next time the
resolution is used

HDfury3.com
8 HDfury3 User Manual
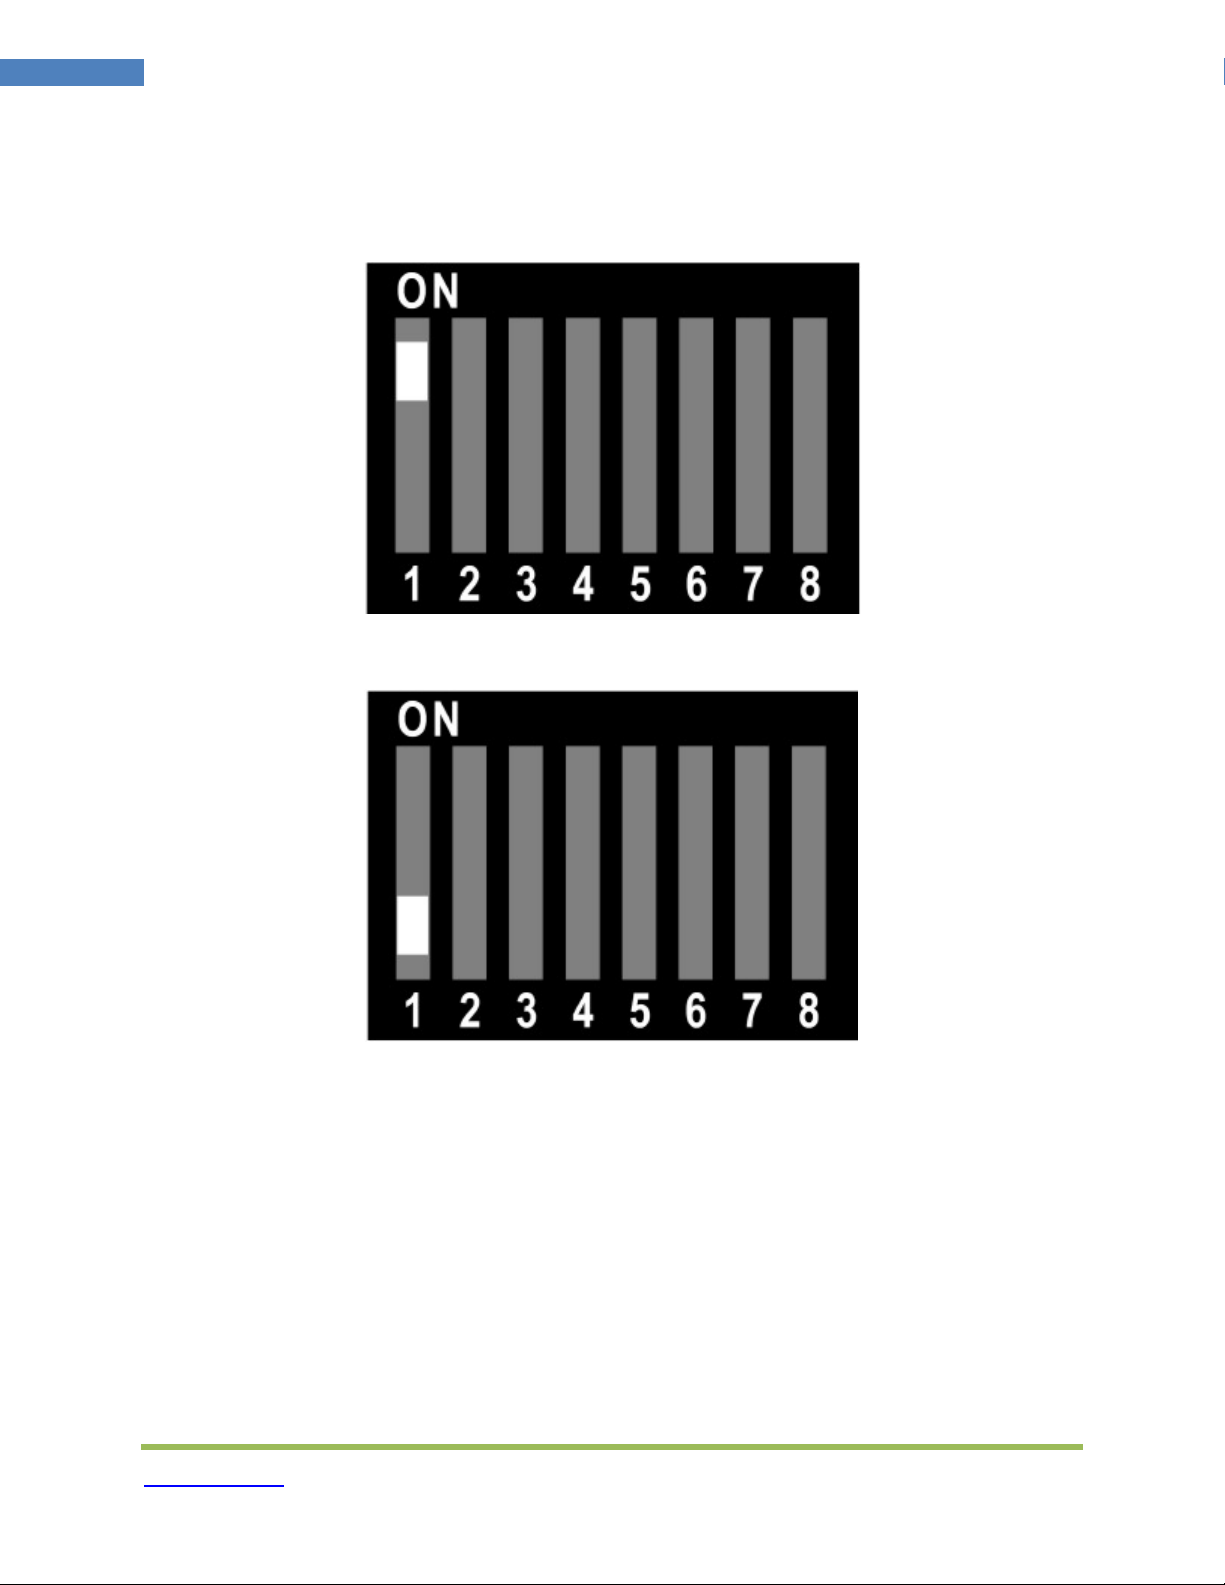
DIP Switch Settings
To customize your HDfury3, a bank of eight (8) DIP switches are provided Remove the
small cover on the back of the HDfury3 to access the DIP switches:
The HDfury3 ships with the following factory default DIP switch settings:

HDfury3.com
9 HDfury3 User Manual
For convenience, the default factory settings and DIP switch features are printed on the
back of the HDfury3:
The factory defaults result in the following setup:
DIP 1: OFF = Component output
DIP 2: ON = Sync passed
DIP 3: OFF = Sync not forced positive (passthrough)
DIP 4: ON = RGB color depth 0-255
DIP 5: OFF = RGB shift disabled
DIP 6: ON = Power LED ON
DIP 7: ON = 1080p allowed on Port 2
DIP 8: ON = 1080p allowed on Port 1
These settings are explained in the sections that follow
HDfury3.com
10 HDfury3 User Manual
RGB/Component Output
For displays with an RGB (VGA) input set DIP switch #1 to ON:
For displays with a Component (Y/Pb/Pr, Y/Cb/Cr, YUV) input set DIP switch #1 to OFF:

HDfury3.com
11 HDfury3 User Manual
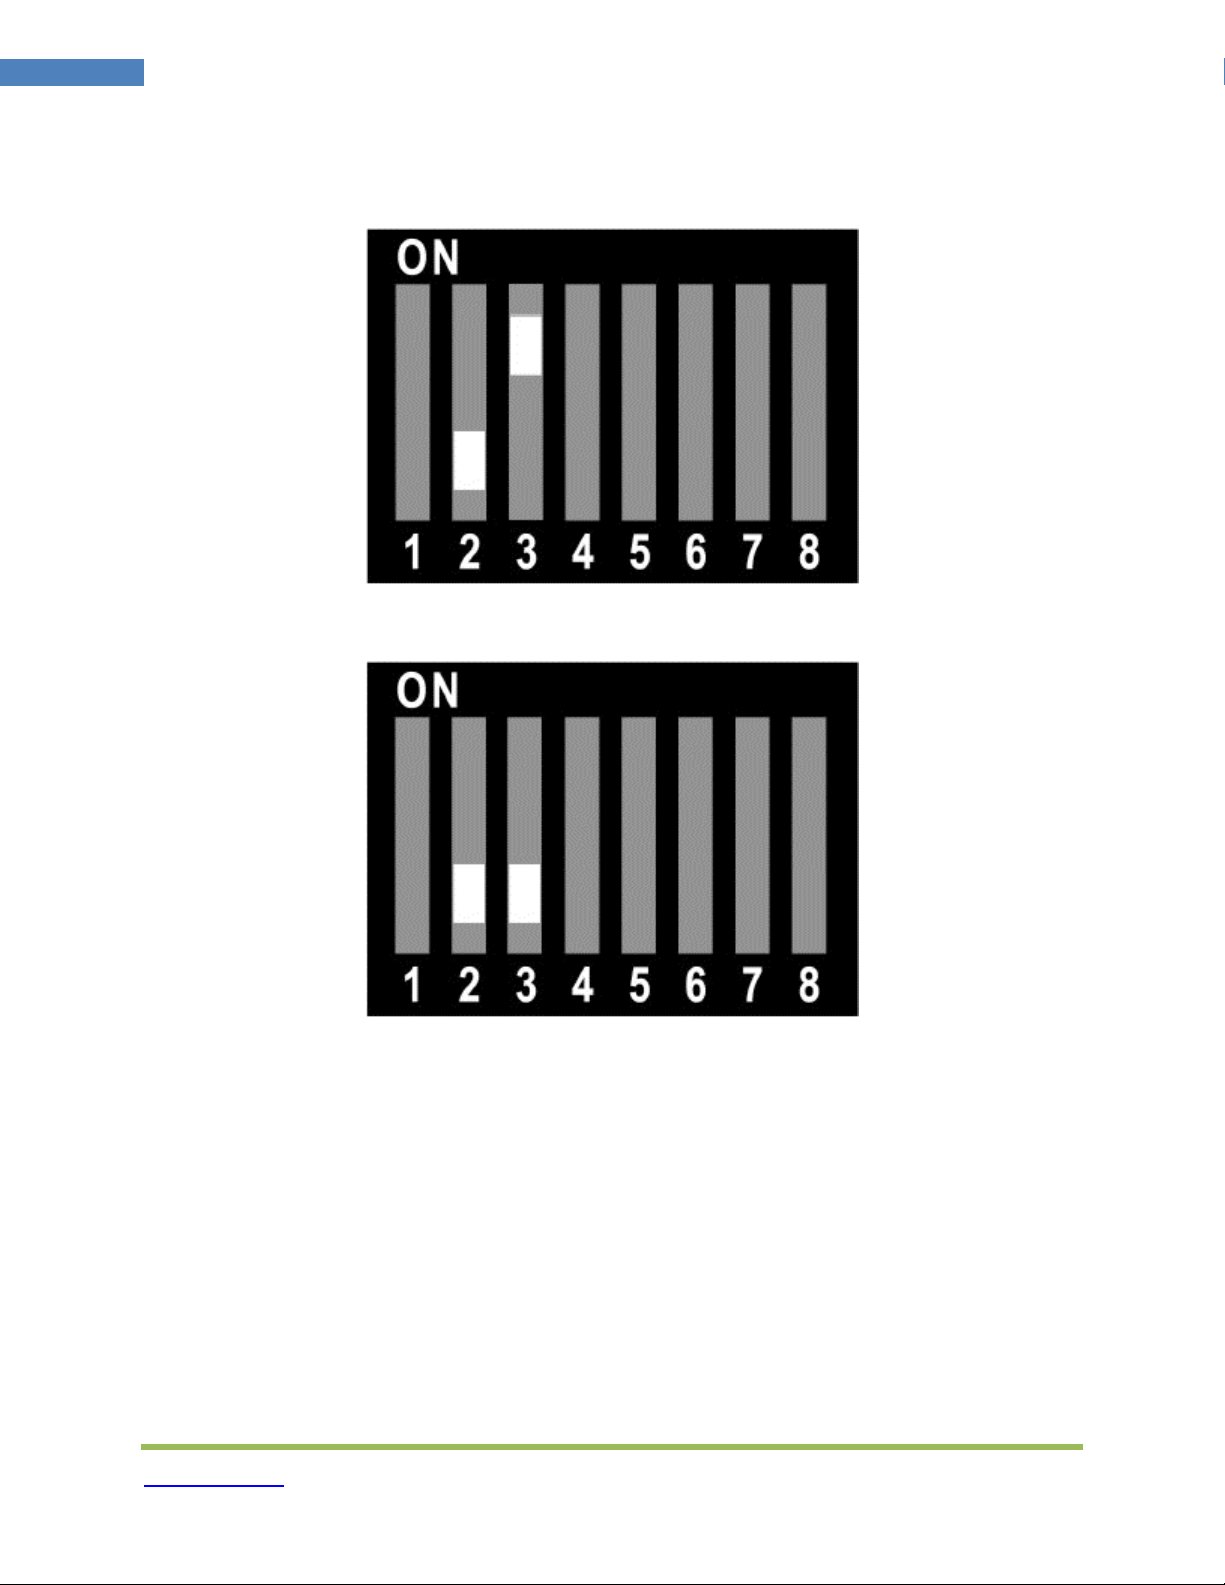
RGB Sync
When the HDfury3 is set to RGB output mode the sync signals may be passed through
as is, forced positive, forced negative, or inverted Check your owners manual to see if
your RGB display has any special sync requirements RGB sync is not used when the
HDfury3 is set to Component output mode
To pass the RGB sync signals through as is, set DIP switch #2 to ON and DIP switch #3
to OFF:
To force the RGB sync signals positive, set DIP switch #2 to ON and DIP switch #3 to
ON:
HDfury3.com
12 HDfury3 User Manual
To force the RGB sync signals negative, set DIP switch #2 to OFF and DIP switch #3 to
ON:
To invert the RGB sync signals, set DIP switch #2 to OFF and DIP switch #3 to OFF:
HDfury3.com
13 HDfury3 User Manual
nhanced Colour Depth
The HDfury3 expands colour depth from the standard 16-235 range to 0-255 in order to
provide a more dynamic picture Some users may choose to disable this feature
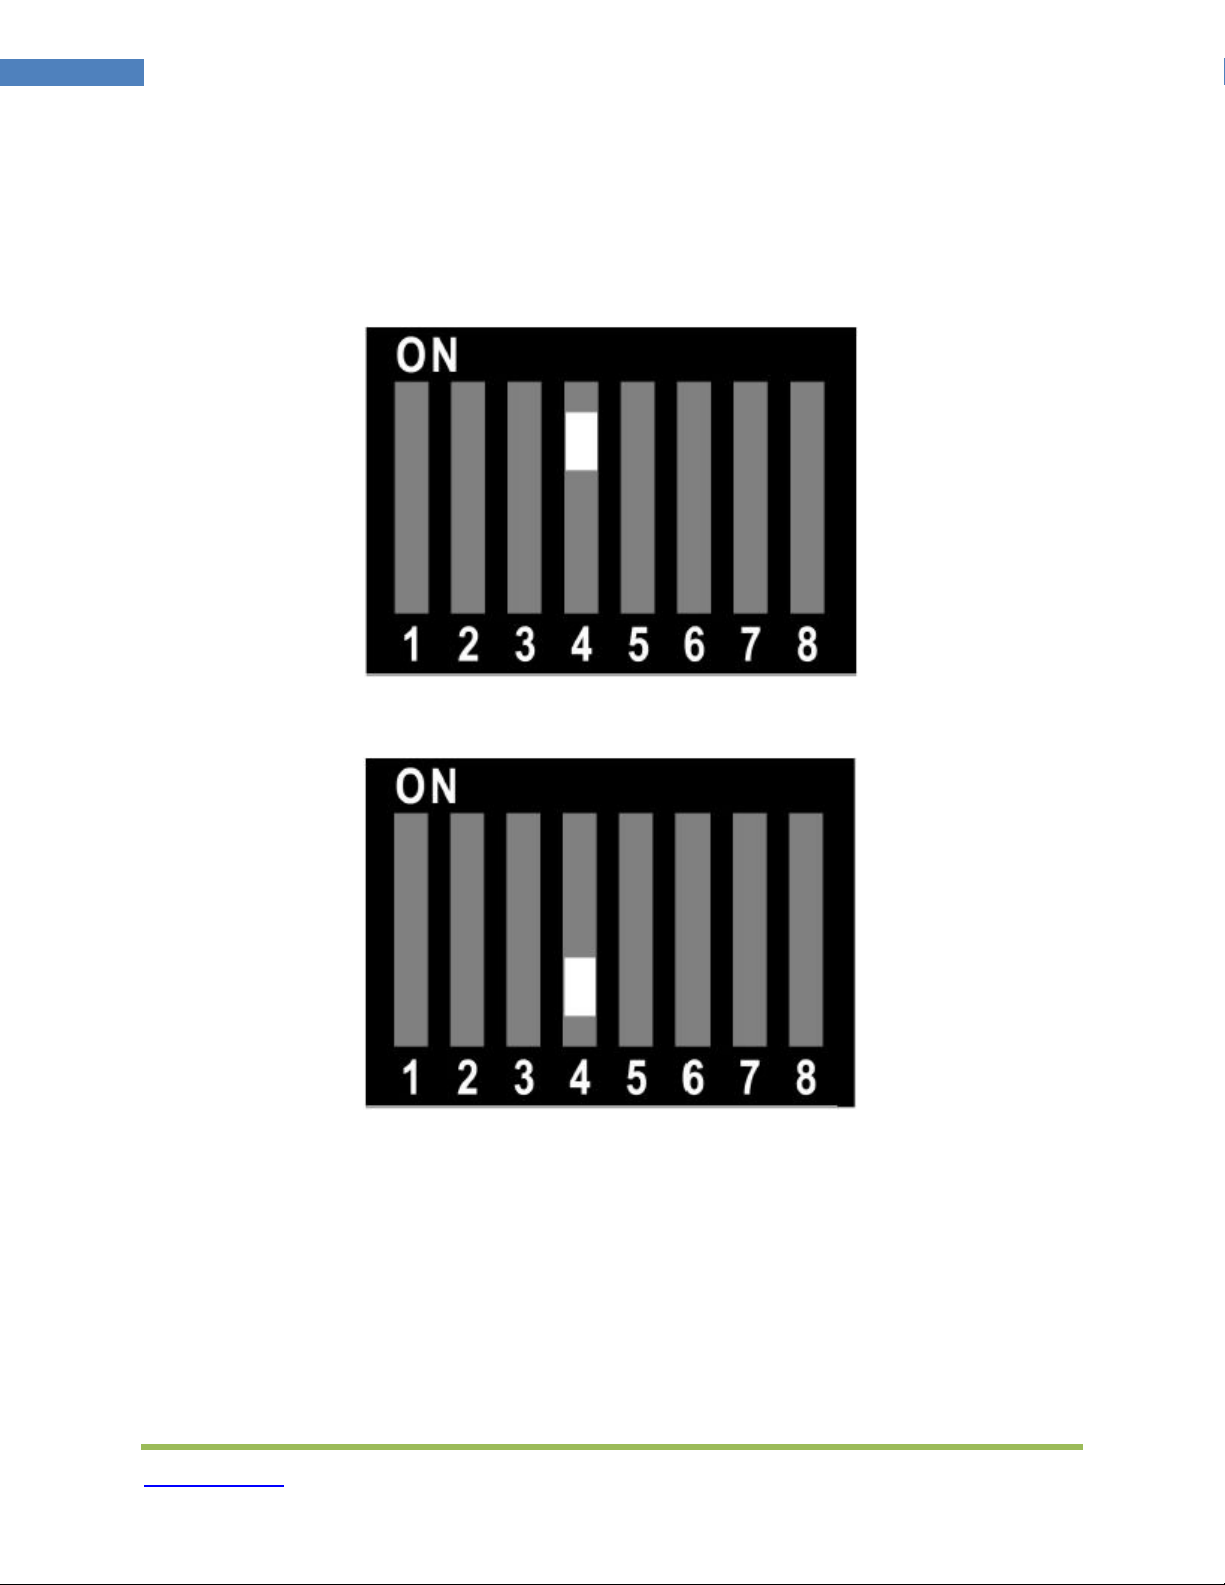
To use enhanced colour depth (0-255), set DIP switch #4 to ON:
To disable this feature and use normal colour depth (16-235), set DIP switch #4 to OFF:

HDfury3.com
14 HDfury3 User Manual
RGB Shift
Some users may choose to disable the RGB Shift button if they choose to shift the
image in a video processor or in the display
To disable the RGB Shift button, set DIP switch #5 to OFF:
To enable the RGB Shift button, set DIP switch #5 to ON:

HDfury3.com
15 HDfury3 User Manual
Power/Status L D
Some users may choose to disable the blue power/status LED on the front of the
HDfury3 When powered, the HDfury3 logo will glow blue For troubleshooting purposes
we recommend that you leave the power/status LED enabled
To disable the Power/Status LED, set DIP switch #6 to OFF:
To enable the Power/Status LED, set DIP switch #6 to ON:

HDfury3.com
16 HDfury3 User Manual
Limiting Resolution Support ( DID)
Some users may find it useful to disable FULL HD 1080p resolution support on the
HDfury3 for older displays or Blu-ray players that automatically reset to 1080p when
turned on
To disable 1080p support for Port 2B, set DIP switch #7 to OFF:
To enable 1080p support for Port 2B, set DIP switch #7 to ON:

HDfury3.com
17 HDfury3 User Manual
To disable 1080p support for Port 1A, set DIP switch #8 to OFF:
To enable 1080p support for Port 1A, set DIP switch #8 to ON:

HDfury3.com
18 HDfury3 User Manual
Frequently Asked Questions (FAQ)
General
Why do I need HD (720p) or Full HD (1080p)?
Blu-ray players, HDMI graphic cards, PS3, Xbox 360 Elite are all able to unleash their
true potential (720p/1080p mode) only through the HDMI output If you want a valid
ticket to the Full HD world you either need a compatible display (with HDMI input) or an
HDfury3 for your existing display 1080p FULLHD as found on Blu-ray and HD has over
6 times the resolution as standard DVD and TV For the best movie and home theater
experience, you *need* Blu-ray/HD
Why do I need an HDCP compliant display?
HDMI is a new standard that comes with a form of hardware protection called HDCP If
your display doesn't have a HDMI input you won't be able to display a 720p/1080p
signal (from HDMI sources) Prior to exchanging video data, the HDMI source
exchanges HDCP keys with HDMI display Both devices have a special HDCP chip
embedded If your display doesn't include an HDCP chip, even if it's technically able to
display 720p or 1080p signal, it will display a BLACK SCREEN On some devices (ex:
Playstation3, Xbox360) 1080p mode is only available through the HDMI output
I use component cables to connect my Blu-ray or DVD player to my display
device and it works just fine! Why do I need HDfury3?
Blu-ray and many DVD players can also up-convert standard definition DVDs to higher
resolutions (720p, 1080i, 1080p), but they only do this via the HDMI outputs (not
component) So if you want to get the higher resolution benefits of your player's up-
conversion circuitry, you're forced to use HDMI As well, in the future it may not be
possible to pass certain high definition content over component video cables A content
flag called the ICT (Image Constraint Token) allows broadcasters and movie studios to
limit or "down-res" the HD video signal to standard definition 480P resolution over
component video cables Hollywood has reportedly agreed to not activate this flag until
2011-2012 And the most important reason to use HDfury3: The picture quality is
substantially better! (Sharper/cleaner/less noise/less ringing/etc)
Sound
Do I need to use the sound output on the HDfury3?
Likely not The audio output of the HDfury3 is a convenience feature if you do not have
a home theater receiver The HDfury3 supports stereo analog output as well as 5 1
Dolby/DTS digital SPDIF output If all you have are the speakers in your TV you can use
the 2-channel analog audio output of the HDfury3 as a convenient way to feed audio
directly into your TV without having to run separate (possibly long) audio cables from
the source to your TV as in many setups the HDfury3 will be plugged right into the TV
This way you only need to run one HDMI cable to the TV and then use a short audio
cable from the HDfury3 to the TV sound input Anyone with a home theater receiver/pre-
amp and separate speakers should instead connect their source devices directly to the

HDfury3.com
19 HDfury3 User Manual
receiver/pre-amp and not use the HDfury3 sound output You may use the 5 1
Dolby/DTS digital audio output of course if the positioning of your HDfury3 makes this
more convenient The choice is up to you! Typically there is no need to use the audio
features of the HDfury3 with a home theater setup
How do I hook up the audio from the HDfury3?
The HDfury3 has both analog and digital (TOSLINK) audio output in one connector
located on the bottom of the unit labelled "D/A" along with a headphone symbol It's a 2-
in-1 connector meaning that you can plug in either a 3 5mm stereo analog jack or a
digital mini-TOLINK (3 5mm mini-jack) cable and get stereo analog sound or 5 1
Dolby/DTS digital sound out of the HDfury3 See further below for pictures of both types
of connectors/cables
HDfury3 3 5mm mini-TOSLINK digital audio cable:
If you'd like to use a "regular" TOSLINK cable, use a 3 5mm Mini-TOSLINK to regular
TOSLINK adapter:
A 3 5mm stereo audio cable can be used for connecting the HDfury3 to a TV if you do
not have a home theater setup (you only have 2 speakers in your TV):

HDfury3.com
20 HDfury3 User Manual
Inputs and Switching
How many inputs does the HDfury 3 have?
Two inputs, both HDMI 1 3 compliant with HDCP with support for Deep Color(TM) The
HDfury3 is the first HDfury to support Deep Colour(TM)
How do I switch between the two inputs?
The switch on the side of the HDfury3 labelled "1A AUTO 2B" is used to switch inputs or
to set the HDfury3 to switch automatically To always use input 1A, set the switch to 1A
To always use input 2B, set the switch to 2B To have the HDfury3 autoswitch, set the
switch to AUTO
How does the HDfury3 auto switching work?
The AUTO position will cause the HDfury3 to switch automatically to the source device
with an active video signal In the case of two active video signals whichever became
active first will be chosen The HDfury3 will then remain locked on that input until that
source is turned off In order words: If two sources are active and you wish to switch to
the other, turn off the currently active one in order to switch to the other
Video
What resolutions does the HDfury3 support?
The HDfury3 supports any resolution/refresh rate combination (interlaced or
progressive) up to 1080p/72Hz in RGB output mode including 1080p/24 All standard
definition (SD) and high definition (HD) resolutions are supported in component
(Y/Pb/Pr) output mode, including 1080p/60 and 1080p/24
Does the HDfury3 change the resolution? Up-convert or down-covert?
The HDfury3 does not change the resolution or refresh rate in any way It converts the
HDMI 1 3 digital input signal to an analog RGBHV (VGA) or Component (Y/Pb/Pr)
signal It also provides HDCP decryption if needed The HDfury3 outputs whatever
resolution you feed it Feed 1080p in and you'll get 1080p out Feed 480i in and you'll
get 480i out
Does the HDfury3 support both Component and RGB video output? I thought they
were the same?
The HDfury3 supports both component (Y/Pb/Pr or YUV) and RGBHV (sometimes
called VGA) signal types on the output They are not the same at all and cannot be
used interchangeably Some displays have component inputs, some displays have
RGB, some have both The HDfury3 lets you choose between the two to best match
your display's requirements
My picture is all green! What's going on?
You likely have a display that only accepts RGB and you have the HDfury3 set to
component output (Y/Pb/Pr) Switch it to RGB
Table of contents
Other HDFury Media Converter manuals

HDFury
HDFury Ultra AVR Key User manual

HDFury
HDFury 4K Linker User manual

HDFury
HDFury Nano GX User manual

HDFury
HDFury Integral 2 User manual

HDFury
HDFury 4 User manual

HDFury
HDFury 4K Vertex User manual

HDFury
HDFury 4K Integral User manual

HDFury
HDFury Vertex2 User manual

HDFury
HDFury 4K Diva 18Gbps User manual


