Heinner HPM-1000ACC User manual

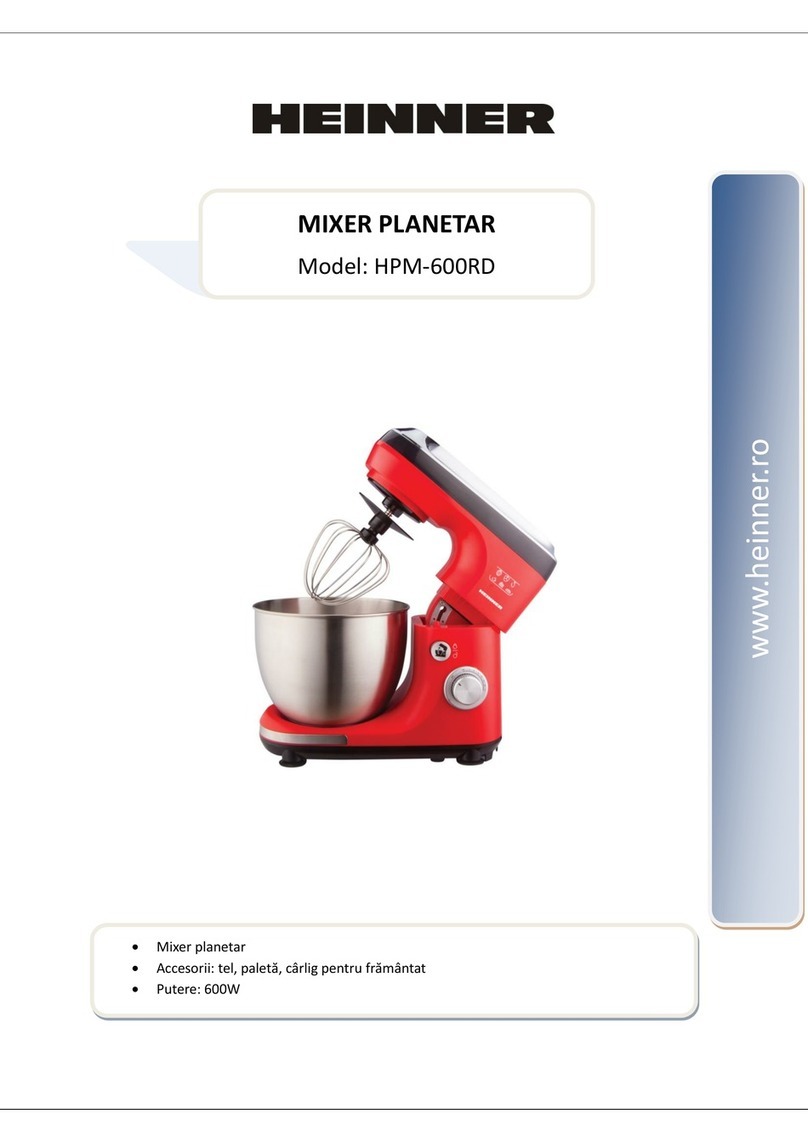
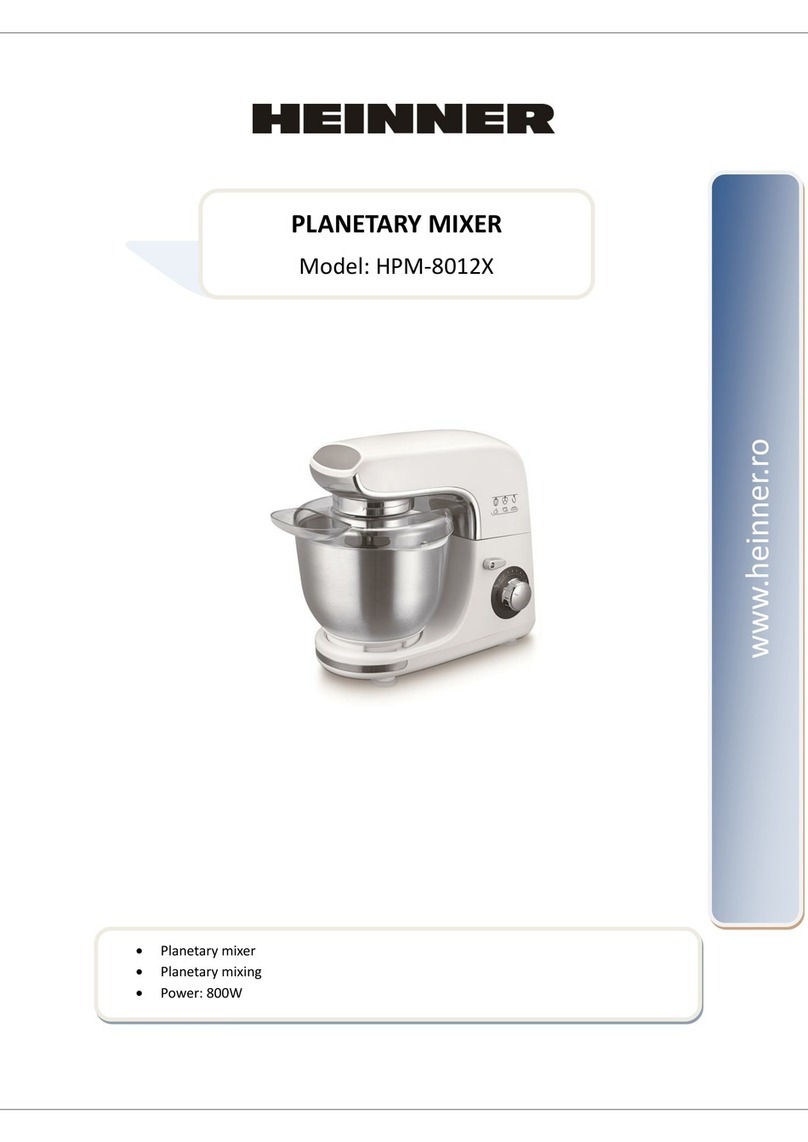
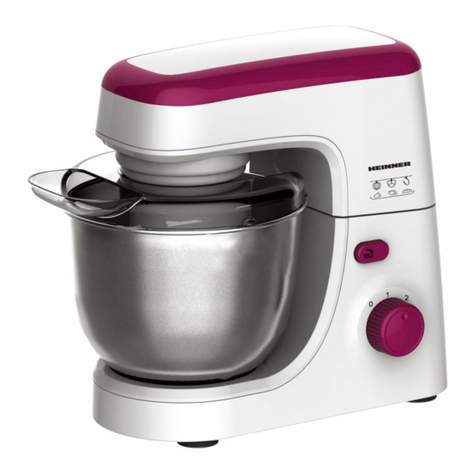
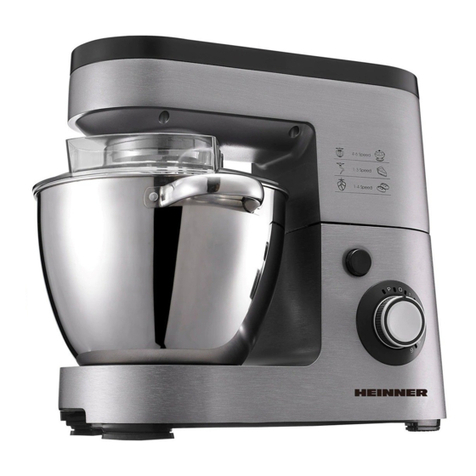
PLANETARY MIXER
Model: HPM-1000ACC
www.heinner.ro
Planetary mixer
Planetary mixing
Power: 1000W

www.heinner.com 1000W, 50/60Hz, 220-240V
1
Thank you for purchasing this product!
I. INTRODUCTION
Before using the appliance, please read carefully this instruction manual and keep it for future
reference.
This instruction manual is designed to provide you with all required instructions related to the
installation, use and maintenance of the appliance.
In order to operate the unit correctly and safety, please read this instruction manual carefully before
installation and usage.
Planetary mixer
Detachable accessories: blender, grinder, meat grinder
User manual
Warranty card
II. PACKAGE CONTENT

www.heinner.com 1000W, 50/60Hz, 220-240V
2
Before using the appliance, you must always follow these basic precautions:
1. Read all instructions.
2Make sure that your outlet voltage corresponds to the stated on the rating label of
the mixer.
3. Do not operate mixer with a damaged cord or plug, after the appliance malfunction,
or if it is dropped or damaged in any manner. Return the appliance to the nearest
authorized Service Center for examination, repair or electrical or mechanical
adjustment.
4. Do not leave mixer unattended while it is operating.
5. Close supervision is necessary when any appliance is used by or near children.
6. Unplug from outlet while not in use, before putting on or taking off parts, and before
cleaning.
7. The use of attachments not recommended or sold by the manufacturer may cause
fire, electric shock or injury.
8. Remove beater/dough hook/whisk from mixer before washing.
9. Do not place on or near a hot gas or electric burner or in a heated oven.
10. Always check that the control is OFF before plugging cord into wall outlet. To
disconnect, turn the control to OFF, then remove plug from wall outlet.
11. Avoid contacting with moving parts.
12. Keep hands, clothing, as well as spatulas and other utensils away from beaters
during operation to reduce the risk of injury to persons, and/or damage to the mixer.
13. To protect against risk of electrical shock, do not put mixer in water or other liquid.
This may cause personal injury or damage to the product.
14. Do not use mixer for other than intended use.
15. This appliance is not intended for use by persons with reduced physical (including
children), sensory or mental capabilities or lack of experience and knowledge, unless
they have been given supervision or instruction concerning use of the appliance by a
person responsible for their safety.
16. Keep the appliance and its cord out of reach of children less than 8 years.
17. Do not let cord hang over edge of table or counter or touch hot surfaces, including
the stove.
18. Do not use outdoors.
19.Save these instructions.
III. SAFETY INSTRUCTIONS

www.heinner.com 1000W, 50/60Hz, 220-240V
4
Before assembling the mixer, be sure the power cord is unplugged from the power
outlet and the speed selector is in the “O” position.
1. Depressing the tilt/release button, the head of mixer will automatically release and
lift it backwards with hand lightly to lock it into tile position.
2. Select the desired attachments, which are depending on the mixing task to be
performed: flat beater for normal to heavy mixtures, and dough hook for mixing and
kneading yeast dough, the whisk for mixture that need air incorporated.
3. Assemble the flat beater/ dough hook/whisk into the shaft under the head, align the
rectangle groove of flat beater/dough hook/whisk with the pin on the shaft to insert,
then push the flat beater/dough hook/whisk upwards as far as possible and turn it in
anti-clockwise synchronously, hooking beater/dough hook/whisk over pin on shaft.
When detaching, firstly push the beater/dough hook/whisk upwards and turn it in
clockwise synchronously, then pull out for detaching.
Note: Ensure the flat beater/dough hook/ whisk is fully locked into the shaft, otherwise
it may drop out during operation.
4. Place bowl on position. First place the bowl on the base, then turn the bowl in
clockwise until it locks into position.
5. To lower the head, firstly press the tile/release button and place beater/dough
hook/whisk into the bowl by pressing down the head with hand directly. A click sound
will be heard when the head has reached the correct position.
6. And make sure the bowl cover in place.
V. BEFORE USING

www.heinner.com 1000W, 50/60Hz, 220-240V
5
VI. USING THE MIXER
1. Ensure that the speed selector is at the “O” position, then plug in the power
source.
2. Turn the speed selector to your desired setting. There are 12 settings.
Warning: Do not stick knife, metal spoons, fork and so on into bowl when operating.
3. The max operation time per time shall not exceed 8 minutes and minimum 20
minutes’ rest time must be maintained between two consecutive cycles. When
kneading yeast dough, use low speed for slowing mixing, if using high speed, it may
damage the mixer.
Note: during kneading, some flour may be adhered on the inside of the bowl, you
shall stop the appliance and remove the bowl cover, scrape the flour on the inside
wall of bowl by spatula to obtain well kneading results.
4. During mixing, you can add ingredient according to your task from the opening of
bowl cover. When mixing is completed, turn the speed selector to “O” position,
unplug the cord from power outlet.
5. Press down the tilt button, the head of the mixer will automatically lift and lock
into the tilt position.
6. If necessary you can scrape the excess food particles from the beater/dough hook
by plastic spatula.
7. Firstly push the beater/dough hook/whisk upwards and turn it in clockwise
synchronously, then pull out for detaching.
Caution: The speed selector must be at “O” position and the power outlet must be
unplugged before pulling out the beater/dough hook/whisk.

www.heinner.com 1000W, 50/60Hz, 220-240V
6
VII. USING THE BLENDER
1. Lay the motor unit on the flat horizontal surface and make sure it is unplugged.
2. Place the Jar on the Motor Unit, then turn the jar clockwise until locked it into
position properly.
NOTE: There is a safety interlock device at the bottom of jar, if the jar is not
assembled in place, the blender will not operate.
3. Open the jar cover by turning anticlockwise and place it on the surface. Peel or
core the fruits or vegetables and then cut it into small pieces, then put them into the
jar. Usually certain amount of purified water has to be added to facilitate the smooth
running of appliance. The amount of mixture should not exceed the max level as
indicated on the jar, nor sit lower the min level. The best proportion of the fruits or
vegetables and water is 2:3.
NOTE: The blender is not applicable for beating egg white, mashing potatoes,
mixing dough, extracting juice from fruit and vegetable.
4. Replace jar cover on the jar and turn it clockwise.
NOTE: There is a safety interlock device at the side of jar cover, if the jar cover is not
assembled in place, the blender will not operate.
5. You may add ingredients into the jar through the center opening of jar cover
during operation, then replace measuring cup if necessary. Let the tabs of measuring
cup aligns with the grooves of jar cover, put down and turn the measuring cup by
clockwise until it in place.
6. Ensure the Speed Selector to “O” Position, then plug into power outlet and set
Speed Selector to your desired setting. You can press down the Pulse button without
releasing it if want to accelerate the process of blending.
NOTE: Make sure the jar cover is placed in position completely before operating, and
never open the jar cover during operation. In addition, for the sake of consistency,
you can use the stir stick to stir mixture through the opening in the center of the
measuring cup.
7. Do not run the appliance for more than 3 minutes per time, and only wait until
the unit is cooled to room temperature before performing next operation cycle.
8. Trun the Speed Selector to „O” position once the mixture has been blended to
your desired consistency.
9. Turn the jar anti-clockwise and remove it from the motor unit, carefully take down
the jar cover, then pour and serve.
www.heinner.com 1000W, 50/60Hz, 220-240V
7
VIII. USING THE MEAT MINCER
1. Lay the appliance on the flat horizontal surface and make sure it is unplugged.
2. Prepare 500g stringless and boneless beef and cut them into square pieces with size
of 2cm*2cm*6cm.
3. Open the low speed outlet cover, and then put the meat-mincing attachment into
the low speed outlet and rotate it anticlockwise until it is locked in position.
4. Put the beef pieces on the meat-mincing attachment and place a container to hold
the miced beef.
5. Turn the speed selector to the speed setting 5 and the appliance starts to work. Put
the beef pieces into the funnel and then push it with the food pusher. Put one piece
of beef every time.
6. After mincing all the beefs, turn the speed selector to “O” position, and the
appliance stops working.
Note: The appliance must rest for 10 minutes after runing for two consecutive cycles.
7. Rotate the meat-mincing attachment clockwise to move it out of the low speed
outlet, and then pour them out for preparing food or you can use the minced meat to
make sausages with big or small sausage tool.
Caution: The speed selector must be at “O” position and the power outlet must be
unplugged before removing the meat-mincing attachment.
IX. USING THE GRINDER
1. Place the motor unit on the flat surface. Make sure the power outlet is unplugged.
2. Place the grinding cup on a flat surface with the open ending facing up. Fill the cup
with your favorite ingredients (eg. Soybean, coffee bean). Be sure not to fill
ingredients exceed 50ml.
3. Assemble the cup base onto the opening end of the cup by turning it in clockwise.
4. Upend the assembly of cup and cup base, and insert them into the motor unit,
make sure arrow on the motor unit align with the cup base, then turn the cup base
in clockwise to lock them.
5. Connect the plug to wall outlet and turn the speed selector to the desired setting.
The setting 1 is the lowest speed and the setting 12 is the highest speed.
NOTE: Do not operate this appliance continuously for more than 30s, allow appliance to
cool down for 3 minute between two continuous cycles.
6. When the operation is finished, unplug the power outlet. Then turning the cup
assembly in anti-clockwise to remove them.
7. Upend the cup assembly, hand the cup with one hand, and turning the cup base in
anti-clockwise with the other hand to remove it.

www.heinner.com 1000W, 50/60Hz, 220-240V
8
1. Unplug the appliance and wait it completely cool down before cleaning.
Caution: the mixer cannot be immersed in water or other liquid.
2. Wipe over the outside surface of the head and base with a dampened cloth and polish with
a soft dry cloth.
3. Wipe any excess food particles from the power cord.
4. Immerse the bowl, beater, spatula, dough hook and whisk in warm soapy water for
complete cleaning. Then rinse under running water and wipe dry. They also can be placed in
the dishwasher.
Warning: Any other serving should be performed by an authorized service representative.
X. CLEANING AND MAINTENANCE
XI. COOKERY TIPS
1. Refrigerated ingredients, such as butter and eggs, then should be at room temperature
before mixing begins. Set these ingredients out ahead of time.
2. To eliminate the possibility of shells or deteriorated-off eggs in your recipe, break eggs into
separate container first, then adding to the mixture.
3. Do not over-beat. Be careful that you only mix/blend mixtures until recommended in your
recipe. Fold into dry ingredients only until just combined. Always use the low speed.
4. Climatic conditions. Seasonal temperature changes, temperature of ingredients and their
texture variation from area to area all play a part in the required mixing time and the results
achieved.
5. Always start mixing at lower speed. Gradually increase to the recommended speed as
stated in the recipe.

www.heinner.com 1000W, 50/60Hz, 220-240V
9
Basic Two Egg
Yellow Cake
(dough hook)
Ingredients
Procedure
2 cups sifted cake flour
1) Sift together into a big bowl, sifted flour, sugar,
baking powder and salt. Add shortening; pour in
the milk and vanilla
2) Knead 0.5min, on the lowest setting until
blended
3) Then on the medium setting for 2 min.
4)Stop, scrape sides and bottom of bowl
5) Add eggs, knead 1-1/2min longer on the
highest setting
1-1/4cups granulated sugar
2-1/2teasp. Double-acting
baking powder
3/4 teaspoon. Salt
1/2 cup soft shortening
3/4 cup milk
1-1/4 teaspoon. Vanilla
2 eggs, unbeaten
Oatmeal bread
(dough hook)
2 cups sifted all-purpose flour
1) Sift together flour, soda, salt and cinnamon,
then add oatmeal. set aside
2) Combine butter, sugar, eggs and vanilla in
mixing bowl.
3) cream on the highest setting for 2 min, stop,
scrape bowl
4) Add milk and half of flour mixture, blend in on
fold-blend, then knead on the highest setting for
1min
5) Add remaining flour mixture and repeat
mixing. Stop, scrape bowl,
6) Knead in chocolate chips and nuts on the
highest setting for 1 min
1 teaspoon. Soda
1 teaspoon. Salt
1-1/2 teaspoon. Cinnamon
2 cups quick-cooking oatmeal
1 cup shortening or margarine
1/2 cup granulated sugar
3/4 cup brown sugar
2 eggs, unbeaten
1-1/2 teaspoons. vanilla
1/3 cup milk
1 cup chocolate chips
3/4 cup chopped nuts
XII. RECIPE

www.heinner.com 1000W, 50/60Hz, 220-240V
10
Oatmeal Drop
Cookies (dough
hook)
2 cups sifted all-purpose flour
1) Sift together flour, soda, salt and cinnamon,
then add oatmeal. set aside
2) Combine butter, sugar, eggs and vanilla in
mixing bowl.
3) Cream on the highest setting for 2 min, stop,
scrape bowl
4) Add milk and half of flour mixture, blend in
on fold-blend, then knead on the highest setting
for 1min
5) Add remaining flour mixture and repeat
mixing. Stop, scrape bowl,
6)Knead in chocolate chips and nuts on the
highest setting for 1 min
1 teaspoon. Soda
1 teaspoon. Salt
1-1/2 teaspoon. Cinnamon
2 cups quick-cooking oatmeal
1 cup shortening or margarine
1/2 cup granulated sugar
3/4 cup brown sugar
2 eggs, unbeaten
1-1/2 teaspoon. vanilla
1/3 cup milk
1 cup chocolate chips
3/4 cup chopped nuts
1 teaspoon. Soda
1 teaspoon. Salt
1-1/2 teaspoon. Cinnamon
Whipped
Potatoes
(beater)
2 lbs peeled potatoes
1) Pare potatoes and cook until tender, but not
mushy in boiling salt water
2) When mealy, mash in sauce pan or turn into a
large potato, then beat on the medium setting
about 1min
3) Stop, scrape bowl or sauce pan.
4) Combine hot milk, butter and salt. Pour over
potatoes, whip on the highest setting for 1min
1/2 cup hot milk
2 tbsp. margarine
1 teaspoon. Salt
Make egg white
(whisk)
2 eggs
1) Put the egg white into a bowl
2) Whisk at the highest setting

www.heinner.com 1000W, 50/60Hz, 220-240V
11
Power
1000W
Voltage
220-240V, 50/60Hz
Color
White
XIII. TECHNICAL DETAILS
Environment friendly disposal
You can help protect the environment!
Please remember to respect the local regulations: hand in the non-working electrical equipment’s to
an appropriate waste disposal center.
HEINNER is a registered trademark of Network One Distribution SRL. Other brands and
product names are trademarks or registered trademarks of their respective holders.
No part of the specifications may be reproduced in any form or by any means or used to make any
derivative such as translation, transformation, or adaptation without permission from NETWORK
ONE DISTRIBUTION.
Copyright © 2013 Network One Distribution. All rights reserved.
www.heinner.com,http://www.nod.ro
This product is in conformity with norms and standards of European Community.
Importer: Network One Distribution
Marcel Iancu Street, 3-5, Bucharest, Romania
Tel: +40 21 211 18 56, www.heinner.com ,www.nod.ro

www.heinner.com 1000W, 50/60Hz, 220-240V
13
Vă mulțumim pentru achiziționarea acestui produs!
I. INTRODUCERE
Înainte de a utiliza acest aparat, citiți cu atenție manualul de instrucțiuni și păstrați-l pentru
consultări ulterioare.
Acest manual este conceput pentru a vă oferi toate instrucțiunile necesare referitoare la instalarea,
utilizarea și întreținerea aparatului.
Pentru utilizarea corectă și în siguranță a aparatului, vă rugam să citiți cu atenție acest manual de
instrucțiuni înainte de instalare și utilizare.
Mixer planetar
Accesorii detașabile: blender, râșniță, mașină de tocat
Manual de utilizare
Certificat de garanție
II. CONȚINUTUL PACHETULUI DUMNEAVOASTRĂ

www.heinner.com 1000W, 50/60Hz, 220-240V
14
Înainte de a utiliza aparatul, este necesar să luați următoarele măsuri de precauție:
1. Citiți toate instrucțiunile.
2. Asigurați-vă că tensiunea sursei de alimentare corespunde celei specificate pe
eticheta cu date tehnice a mixerului.
3. Nu utilizați mixerul dacă acesta are cablul de alimentare deteriorat sau dacă prezintă
defecțiuni, dacă a fost scăpat pe jos sau avariat în orice fel. Returnați aparatul
producătorului sau celui mai apropiat centru service autorizat în vederea examinării,
reparării sau reglării electrice sau mecanice.
4. Nu lăsați mixerul nesupravegheat în timp ce acesta este în funcțiune.
5. Atunci când aparatele electrocasnice sunt utilizate de către copii sau în preajma
acestora, este necesară o supraveghere atentă.
6. Scoateți aparatul din priză atunci când nu este folosit, înainte de a fi curățat și înainte
de montarea sau demontarea accesoriilor.
7. Utilizarea de accesorii care nu sunt recomandate sau vândute de către producător
poate avea ca rezultat provocarea unui incendiu, electrocutarea sau vătămarea.
8. Demontați paleta/cârligul pentru frământat/ telul de pe mixer înainte de a le spăla.
9. Nu puneți aparatul pe sau lângă un arzător cu gaz sau electric; nu puneți aparatul
într-un cuptor încălzit.
10. Asigurați-vă de fiecare dată că selectorul este în poziția OFF înainte de a introduce
ștecărul în priza de perete. Pentru deconectarea de la sursa de alimentare, rotiți
selectorul la poziția OFF și scoateți ștecărul din priză.
11. Evitați atingerea componentelor aflate în mișcare.
12. În timpul funcționării aparatului, nu atingeți paletele cu mâinile, hainele, spatule
sau alte ustensile, pentru a reduce riscul de vătămare corporală și/sau deteriorare a
mixerului.
13. Pentru a vă proteja împotriva riscului de electrocutare, nu introduceți mixerul în
apă sau în alt lichid. Aceasta poate cauza vătămări corporale sau deteriorarea
produsului.
14. Nu utilizați mixerul în alt scop decât cel pentru care a fost proiectat.
15. Aparatul nu este destinat utilizării de către persoane (inclusiv copii) care au
capacități fizice, senzoriale sau mentale reduse, sau cărora le lipsesc experiența și
cunoștințele necesare, decât dacă sunt supravegheate sau au fost instruite cu privire la
utilizarea aparatului de către o persoană care răspunde de siguranța acestora.
16. Nu lăsați aparatul și cablul de alimentare la îndemâna copiilor cu vârste mai mici de
8 ani.
17. Nu lăsați cablul de alimentare să atârne peste marginea mesei sau să atingă
suprafețele fierbinți.
18. Nu utilizați aparatul în aer liber.
19.Păstrați aceste instrucțiuni.
III. INSTRUCȚIUNI PRIVIND SIGURANȚA

www.heinner.com 1000W, 50/60Hz, 220-240V
16
Înainte de asamblarea mixerului, asigurați-vă că ștecărul este scos din priză și că
selectorul de viteze este în poziția „O”.
1. Prin apăsarea butonului pentru înclinare/deblocare, capul mixerului se va debloca
automat și vă va permite să îl ridicați cu mâna și să îl fixați în poziția în care aceasta este
înclinat.
2. Utilizați accesoriile corespunzătoare, în funcție de operația pe care doriți să o
efectuați. Utilizați paleta pentru compoziții normale spre consistente, utilizați cârligul
pentru frământarea și amestecarea aluaturilor cu drojdie, utilizați telul pentru
amestecuri care necesită încorporarea aerului.
3. Montați paleta/cârligul pentru frământat/telul în axul de sub capul mixerului, aliniați
canelura dreptunghiulară a paletei/cârligului pentru frământat/telului cu știftul de pe
ax, apoi împingeți în sus și rotiți în sens antiorar paleta/cârligul pentru frământat/telul ,
fixând paleta/cârligul pentru frământat/telul în știftul de pe ax. Pentru detașare,
împingeți și rotiți în sens orar paleta/cârligul pentru frământat/telul, apoi trageți.
Notă: Asigurați-vă că paleta/cârligul pentru frământat/telul sunt fixate corespunzător
pe ax. În caz contrar, acestea se pot desprinde în timpul funcționării.
4. Fixați bolul. Puneți bolul pe bază, apoi rotiți-l în sens orar pentru a îl fixa.
5. Pentru a coborî capul mixerului, apăsați mai întâi butonul de înclinare/deblocare,
apoi introduceți paleta/cârligul pentru frământat/telul în bol prin apăsarea capului
mixerului cu mâna. În momentul în care capul mixerului ajunge în poziția corectă, se va
auzi un clic.
6. Asigurați-vă că ați pus capacul bolului.
V. ÎNAINTE DE UTILIZARE

www.heinner.com 1000W, 50/60Hz, 220-240V
17
VI. UTILIZAREA MIXERULUI
1. Asigurați-vă că selectorul de viteze este în poziția „0”, apoi introduceți ștecărul
în priză.
2. Rotiți selectorul de viteze la setarea dorită. Sunt disponibile 12 setări.
Avertisment: În timpul funcționării, nu introduceți în bol cuțite, linguri metalice,
furculițe sau alte ustensile.
3. Durata maximă a unui ciclu de funcționare nu trebuie să depășească 8 minute,
fiind necesară o pauză de cel puțin 20 de minute între două cicluri de funcționare
consecutive. În cazul frământării aluatului, utilizați mixerul la viteză redusă.
Utilizarea la viteză ridicată poate deteriora mixerul.
Notă: În timpul frământării, făina se poate lipi de pereții interiori ai bolului. În acest
caz, opriți aparatul, apoi scoateți capacul bolului și răzuiți cu o spatulă făina de pe
pereții interiori ai bolului, pentru a obține rezultate satisfăcătoare.
4. În timpul amestecării, puteți adăuga ingrediente prin orificiul din capacul bolului.
Când amestecarea este completă, rotiți selectorul de viteze la poziția „0”, apoi
scoateți ștecărul din priză.
5. Apăsați butonul de înclinare, iar capul mixerului se va ridica automat și se va
bloca în poziția în care aceasta este înclinat.
6. Dacă este necesar, puteți răzui ingredientele în exces de pe paletă/ cârligul
pentru frământat cu ajutorul unei spatule din plastic.
7. Mai întâi împingeți și rotiți în sens orar paleta/cârligul pentru frământat/telul,
apoi trageți pentru detașare.
Atenție: Selectorul de viteze trebuie să fie în poziția „0”, iar ștecărul trebuie să fie
scos din priză înainte de detașarea paletei/cârligului pentru frământat/telului.

www.heinner.com 1000W, 50/60Hz, 220-240V
18
VII. UTILIZAREA BLENDERULUI
1. Puneți unitatea motorului pe o suprafață orizontală plană și asigurați-vă că
ștecărul este scos din priză.
2. Puneți cana blenderului pe unitatea motorului, apoi rotiți cana în sensul acelor de
ceasornic până la fixarea corespunzătoare a acestuia.
NOTĂ: Partea inferioară a cănii este prevăzută cu un dispozitiv de siguranță care
împiedică funcționarea blenderului în cazul în care cana nu este montată corect.
3. Deschideți capacul cănii blenderului prin rotirea acestuia în sens contrar acelor de
ceasornic. Descojiți fructele sau legumele și îndepărtați semințele sau sâmburii
acestora, apoi puneți ingredientele în cana blenderului. De obicei, se adaugă puțină
apă pentru ca aparatul să funcționeze mai ușor. Cantitatea de ingrediente nu trebuie
să depășească nivelul maxim indicat pe cană, nici să fie sub nivelul minim. Raportul
optim de fructe/legume și apă este de 2:3.
NOTĂ: Blenderul nu poate fi utilizat pentru baterea albușului de ou, pentru
pasarea cartofilor, amestecarea aluatului sau extragerea sucului din fructe sau
legume.
4. Puneți la loc capacul cănii blenderului și rotiți-l în sensul acelor de ceasornic.
NOTĂ: Partea laterală a capacului cănii este prevăzută cu un dispozitiv de siguranță
care împiedică funcționarea blenderului în cazul în care capacul cănii nu este montat
corect.
5. Puteți adăuga ingrediente prin orificiul din centrul capacului în timpul funcționării
blenderului. După adăugarea ingredientelor, puneți la loc paharul gradat. Aliniați
proeminențele de pe paharul gradat cu canelurile din capacul cănii, împingeți
paharul în jos și rotiți-l în sensul acelor de ceasornic până când se fixează.
6. Asigurați-vă că selectorul de viteze este la poziția „0”, apoi conectați ștecărul la
sursa de alimentare și reglați selectorul de viteze la poziția dorită. Dacă doriți că
accelerați procesarea, puteți apăsa butonul „Pulse”.
NOTĂ: Înainte de punerea în funcțiune, asigurați-vă că ați poziționat corespunzător
capacul cănii blenderului. Nu deschideți capacul în timpul funcționării. În plus, puteți
utiliza o tijă pentru amestecarea ingredientelor prin orificiul situat în centrul
capacului.
7. Nu lăsați aparatul să proceseze continuu pentru o durată mai mare de 3 minute.
Lăsați aparatul să se răcească la temperatura camerei înainte de pornirea
următorului ciclu de funcționare.
8. Rotiți butonul de comandă la poziția „0” odată ce ingredientele procesate au
consistența dorită.
9. Rotiți cana blenderului în sens contrar acelor de ceasornic și scoateți-o de pe
unitatea motorului. Scoateți cu grijă capacul cănii și vărsați amestecul obținut.

www.heinner.com 1000W, 50/60Hz, 220-240V
19
VIII. UTILIZAREA MAȘINII DE TOCAT
1. Puneți aparatul pe o suprafață orizontală plană și asigurați-vă că ștecărul este scos
din priză.
2. Pregătiți 500 g carne macră de vită și tăiați-o în cuburi de 2 x 2 x 6 cm.
3. Deschideți capacul racordului pentru viteză redusă, montați accesoriul pentru
tocare în racordul pentru viteză redusă și rotiți-l în sens contrar acelor de ceasornic
până la fixarea acestuia.
4. Puneți bucățile de carne pe accesoriul pentru tocare și poziționați un vas în care să
cadă carnea tocată.
5. Rotiți selectorul de viteze la poziția 5, iar aparatul va începe să funcționeze. Puneți
bucățile de carne în pâlnie și împingeți-le cu dispozitivul de împingere. Puneți câte
o bucată de carne.
6. După tocarea cărnii de vită, rotiți selectorul de viteze la poziția „0”, iar aparatul se
va opri.
Notă: Aparatul trebuie să stea în repaus timp de 10 minute după ce fost utilizat pentru
două cicluri de funcționare consecutive.
7. Rotiți accesoriul pentru tocare în sensul acelor de ceasornic pentru a-l scoate din
racordul pentru viteză redusă. Puteți utiliza carnea astfel obținută pentru prepararea
mâncărurilor sau pentru cârnați.
Atenție: Selectorul de viteze trebuie să fie la poziția „0”, iar ștecărul trebuie să fie scos
din priză înainte de detașarea accesoriului pentru tocare.
IX. UTILIZAREA RÂȘNIȚEI
1. Puneți unitatea motorului pe o suprafață plană. Asigurați-vă că ștecărul este scos
din priză.
2. Puneți paharul de măcinare pe o suprafață plană, cu gura în sus. Umpleți paharul
de măcinare cu ingredientele favorite (boabe de soia, cafea etc.) Aveți grijă să nu
depășiți o cantitate de 50 ml de ingrediente.
3. Fixați baza pentru paharul de măcinare pe gura paharului, rotindu-l în sensul
acelor de ceasornic.
4. Întoarceți cu susul în jos ansamblul astfel obținut și montați-l pe unitatea
motorului, asigurându-vă că săgeata de pe unitatea motorului se aliniază cu cea de
pe baza pentru pahar, apoi răsuciți baza pentru pahar în sensul acelor de ceasornic
pentru a fixa ansamblul.
5. Conectați ștecărul la priza de perete și rotiți selectorul de viteze la poziția dorită.
Setarea 1 indică cea mai mică viteză, iar setarea 12 indică viteza cea mai ridicată.
NOTĂ: Nu lăsați aparatul să funcționeze continuu mai mult de 30 de secunde.
Lăsați aparatul să se răcească timp de 3 minute între două cicluri continue de
funcționare.
6. După utilizare, scoateți ștecărul din priză. Pentru a scoate ansamblul paharului,
rotiți-l în sens contrar acelor de ceasornic.
7. Întoarceți cu susul în jos ansamblul paharului, țineți paharul cu o mână și rotiți cu
cealaltă mână baza pentru pahar, în sens contrar acelor de ceasornic, pentru a o
demonta.
Table of contents
Languages:
Other Heinner Mixer manuals

Heinner
Heinner HPM-8012X User manual

Heinner
Heinner HPM-1500XMC User manual

Heinner
Heinner HPM-L1000BL User manual

Heinner
Heinner HMBR-300W User manual

Heinner
Heinner CHARM HMB-350BG User manual

Heinner
Heinner HSM-350 User manual

Heinner
Heinner HPM-600BG User manual

Heinner
Heinner HPM-1500XMC-V2 User manual

Heinner
Heinner HMB-350 User manual

Heinner
Heinner HPM-600RD User manual