manuals.online logo
Brands
  1. Home
  2. •
  3. Brands
  4. •
  5. Helvex
  6. •
  7. Plumbing Product
  8. •
  9. Helvex 24-RHLI User manual

Helvex 24-RHLI User manual

Hola soy Fluxy, te
ayudaré a instalar
tu producto.
1-04-0183-5
Hi I'm Fluxy, I'll
help you to install
your product.
Coladera Rectangular Alargada de 60cm de una Boca, Desagüe de
Contorno Rectangular para Inserto Cerámico Máximo de 10mm. /
Rectangular elongated 60cm one-sided drain, Rectangular Contour
Drain for Ceramic Insert Maximum 10mm
[email protected]
Original Spare Parts:
Consultancy and Technical
01(55)53339431
01800 909 2020 01 (55) 53 33 94 00
Refacciones Originales:
Asesoría y Servicio Técnico:
Ext. 5068, 5815 y 5913
Service:
53 33 94 21
01 800 890 0594
[email protected]
Esta guía de instalación aplica al producto en cualquier acabado. / This installation
guide applies to the product in any finish.
Para disminuir el riesgo de lesiones o daños a la propiedad, lea todas las instrucciones antes de instalar el
producto. Utilice gafas de seguridad. En obras de construcción, instalación, modificación, ampliación y
reparación deben cumplir con el reglamento de construcción y obras de su localidad. El producto ilustrado
puede sufrir cambios de aspecto como resultado de la mejora continua a la que está sujeto.
Agradecemos su elección por los productos HELVEX.
Estamos seguros de que su confiabilidad por el producto excederá sus más altas expectativas, cuya
funcionalidad, estética, durabilidad, respaldo integral y alta calidad le otorgarán plena satisfacción por años,
reflejando el compromiso con la calidad, innovación y el medio ambiente que forman parte de Helvex.
To reduce the risk of injury or property damage, read all instructions. Before installing the product, please
remember to use safety glasses. Apply building normative for any construction, installation, alteration,
extension or repair. As result of continuous improvement, the product illustration may change in appearance.
ADVERTENCIA / WARNING
Thank you for choosing HELVEX products.
We are confident that the product reliability will exceed your maximum expectations. The functionality,
aesthetics, durability, quality and support will grant you full satisfaction for years, it is Helvex commitment to
the quality, innovation and the environment.
24-RHLI-60
24-RHLI-90
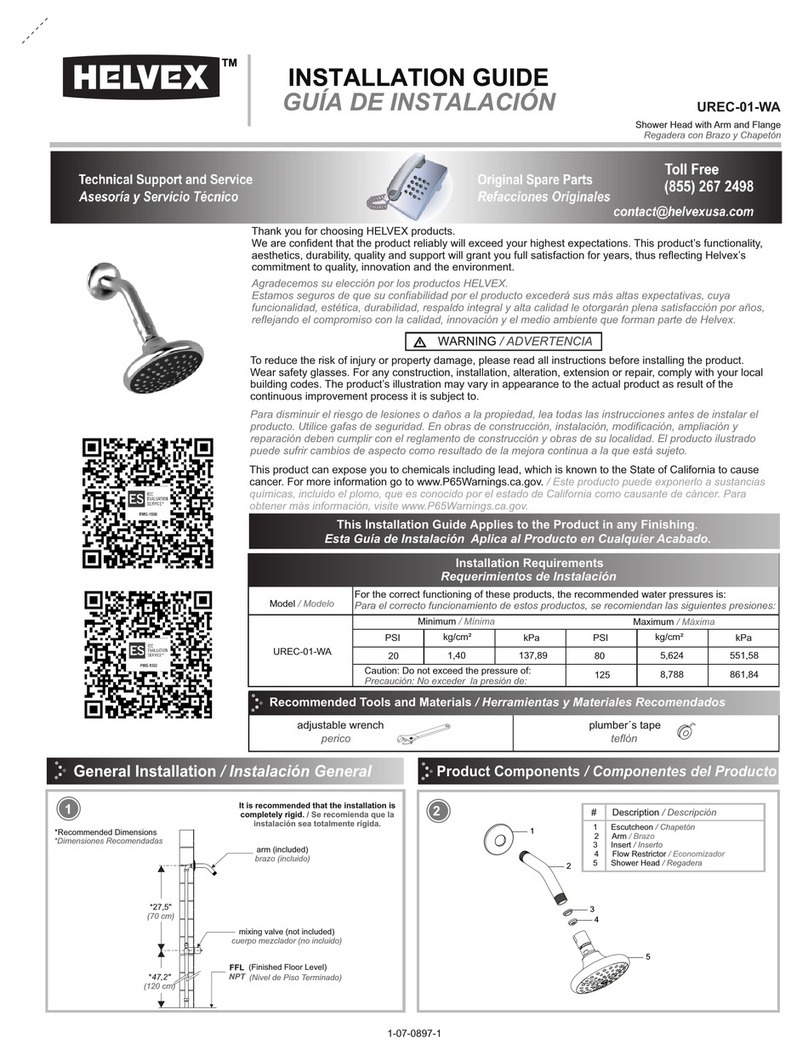
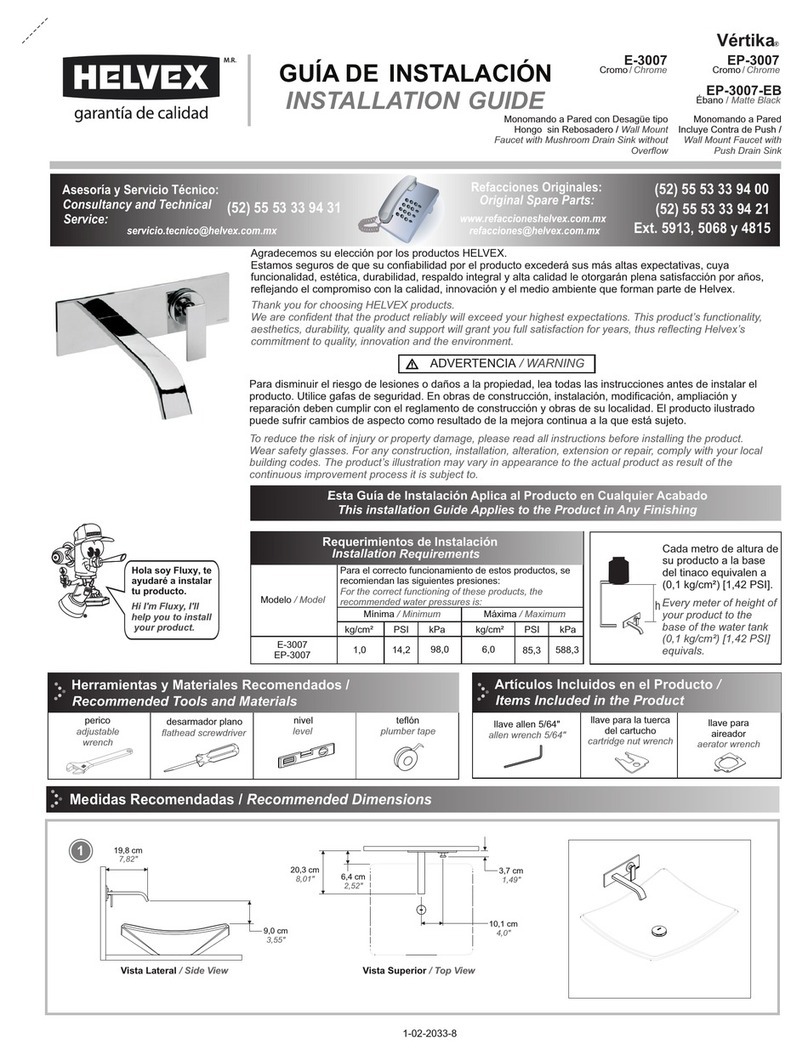
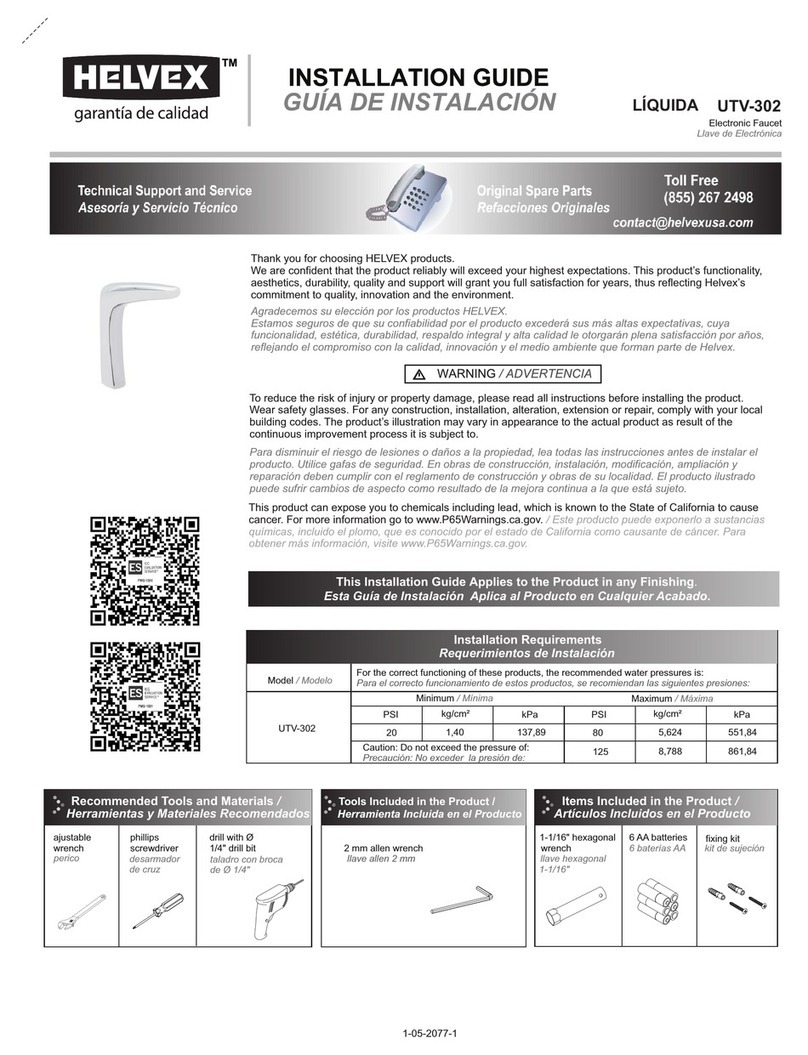
INSTALLATION GUIDE
GUÍA DE INSTALACIÓN
Relación
Altura Tinaco-Presión
Relation
Herramienta Incluida en su Producto / Tools Included in your Product
Herramienta Requerida / Required Tools
llave de nivelación
leveling wrench
cemento para PVC
PVC cement
llave inglesa
wrench
PVC
Recubrimiento de Instalación / Coating Installation
acabado final
finish adhesivo
adhesive
concreto
concrete
relleno
filling
ranura perimetral
peripheral groove
1
24-RHLI-60
24-RHLI-90
24-RHLI
Coladera Rectangular de una Boca, Desagüe de Contorno Rectangular
para Inserto Cerámico Máximo de 10mm. / Rectangular One-Sided
Strainer, Rectangular Contour Drain for Ceramic Insert Maximum 10mm.
24-RHLI
tezontle
volcanic stone
acabado final
finish
adhesivo
adhesive
concreto
concrete
relleno
filling
ranura perimetral
peripheral groove
NPT (nivel de piso terminado)
FFL (finished floor level)
tezontle
volcanic stone
24-RHLI-60 y 24-RHLI-90
24-RHLI
desfogue
venting
desfogue
venting
Coladera Rectangular Alargada de 90cm de una Boca, Desagüe de
Contorno Rectangular para Inserto Cerámico Máximo de 10mm. /
Rectangular elongated 90cm one-sided drain, Rectangular Contour
Drain for Ceramic Insert Maximum 10mm
Para el modelo 24-RHLI no se integra una charola independiente, ya que es parte del cuerpo de la coladera. Para los modelos 24-RHLI-60 y 24-RHLI-90 se integra
una charola independiente en acero inoxidable. / For the 24-RHLI model, an independent tray is not integrated, since it is part of the body of the strainer. For the
24-RHLI-60 and 24-RHLI-90 models, an independent stainless steel tray is integrated.
2
Verifique que la tuerca de ajuste esté enroscada a tope sin apretar,
en caso que no esté así, enrosque la tuerca de ajuste con la ayuda
de la llave de nivelación (incluida). / Check that the adjusting nut is
screwed loosely butt, if that is not so tighten the adjusting nut with
the help of leveling wrench (included).
Instalación General / Installation General
4Verifique el área donde será instalada la coladera, tomando en
cuenta su altura con respecto al nivel de piso terminado. / Check the
area where the drain is installed, taking into account their height
from the finished floor level.
Nivele como se muestra. / Align as shown.
Enrosque el adaptador o conector (no incluido) y conecte la
tubería. / Thread the adapter or connector (not included) and
connect tubing.
Retaque el plato con tezontle. / Plate with volcanic stone.
3
2
porta inserto
holder insert
llave de nivelación
leveling wrench
tuerca de ajuste
adjustment nut
*168 mm
*6,6"
*60 mm
*2,3"
NPT (nivel de piso terminado)
FFL (finished floor level)
concreto
concrete
Conexión: 2 - 11 ½ NPSM
Inlet Thread: 2-11 ½ NPSM
tubería sanitaria
(no incluida)
sanitary tubing
(not included)
adaptador o conector
(no incluido)
adapter or connector
(not included)
pegamento para
tuberia
glue for pipe
Utilice teflón en la unión roscada.
Using Teflon the threaded connection.
90°
90°
5
Retire el porta inserto con la llave de nivelación. / Remove the
insert holder with the leveling wrench.
tezontle
tezontle
67
Nota: Asegúrese de que no exista filtración antes de cubrir la coladera y la red sanitaria. / Note: Make
sure that there is no filtration before covering the strainer and the sanitary network.
volcanic
stone
volcanic
stone
3
/ Drain Installation
Mantenimiento / Maintenance
Rellene con tierra ó concreto al nivel indicado, de acuerdo a su
instalación. / Fill with soil and concrete at the level indicated
according to your installation.
Coloque el firme de concreto. / Place the concrete firm.
Coloque el acabado final con el adhesivo correspondiente. / Place
the finish with the adhesive corresponding
Corte el inserto y colóquelo con el adhesivo correspondiente, al
porta inserto. Posteriormente inserte el porta inserto en la coladera.
/ Cut the insert, place the appropriate glue, then insert the holder
into the strainer insert.
Depués de la colocación del relleno, considere el espesor del firme y del acabado final, para ajustar la altura de la contra rectangular, y así asegurar
que el Nivel de Piso Terminado (NPT) quede a paño del inserto. Para ajustar la altura, utilice la llave de nivelación (incluida) girando la tuerca de
ajuste. / After last fill placement, consider the thickness of the pavement and finish, to adjust the height of the counter rectangular, and thus ensure
that the Finished Floor Level (FFL) is a cloth insert. To adjust the height, using the leveling wrench (included) by turning the adjusting nut.
11
9
12
10
8
adhesivo
adhesive
porta inserto
insert holder
inserto
insert
porta inserto
con inserto
insert holder
with insert
relleno
filling concreto
concrete
NPT (nivel de piso terminado)
FFL (finished floor level)
concreto
concrete
adhesivo
adhesive
relleno
filling
tezontle
volcanic
stone
Nota: Modelo 24-RHLI: Utilizar inserto de 27 x 6 x 1 cm, Modelo 24-RHLI-60: Utilizar inserto de 58,5
x 6,1 x 1 cm, y Modelo 24-RHLI-90 : 88,5 x 6,1 x 1 cm . / ote: Model 24-RHLI: Uses a insert of 10,6 x N
2,36 x 0,39 inches, Model 24-RHLI-60: Uses a insert of 23,03 x 2,36 x 0,39 inches, and Model 24-
RHLI-90: 34,84 x 2,40 x 0,39 inches.
llave de
nivelación
wrench leveling
porta inserto
insert holder
Rango de Ajuste: 1.5 cm
Adjustment Range: 1.5 cm
relleno
filling
tuerca de ajuste
adjustment nut
Ajuste de Instalación / Installation Adjustment
Ajuste Máximo
Maximun Adjustment
5.5 cm
inserto
insert
NPT
FFL
Medida Recomendada
Measure Recommended
relleno
filling
4 cm contra rectangular
against rectangular
Recomendaciones de Limpieza / Cleaning Recommendations
In Guadalajara:
Contact:
Enter our free
training courses.
In Monterrey:
En la Ciudad de México:
In Mexico City:
En Monterrey: En Guadalajara:
01 55 53 33 94 00
Ext. 5804, 5805 y 5806 (0133) 36 19 01 13
Comunícate:
Participa en nuestros
cursos gratuitos
de capacitación.
(0181) 83 33 57 67
(0181) 83 33 61 78
Posibles Causas y Soluciones / Troubleshooting
Es muy importante seguir las siguientes instrucciones para conservar los
acabados de los productos HELVEX, con brillo y en perfecto estado:
1. Utilice únicamente agua y un paño limpio.
2. No utilice fibras, polvos, abrasivos, ni productos químicos.
3. No utilice objetos punzo-cortantes para limpiar los acabados.
4. Se recomienda realizar la limpieza de su producto diariamente.
Visite nuestras páginas www.helvex.com.mx para México y www.helvex.com
para el mercado Internacional
It is very important to follow the instructions below to preserve HELVEX products
finishes, shiny and in perfect condition:
1. Use only water and a clean cloth.
2. Do not use fibers, powders, abrasives, or chemicals.
3. Do not use sharp objects to clean the finish.
4. It is recommended to clean your product daily.
Visit our pages www.helvex.com.mx for Mexico and www.helvex.com
for the International market.
HELVEX, S. A. DE C. V. Calzada Coltongo # 293, Col. Industrial Vallejo, Del. Azcapotzalco, C. P. 02300, Ciudad de México.
4
Problema / Problem Causas / Causes Soluciones / Solutions
La ranura perimetral está tapada.
/ The circumferential groove is covered.
La trampa de sólidos está llena de basura y
sedimientos. / The solid trap is full of trash and sediment.
Limpie la ranura perimetral con un cepillo.
/ Clean the circumferential groove with a brush.
El desalojo de agua es
lento o nulo. / There is not
water evicted or it is slow.
Mantenimiento / Maintenance
14
franela
soft cloth
NOTA: Se recomienda realizar al menos un mantenimiento por año.
NOTE: It is recommended that at least one year maintenance.
trampa de sólidos
solids trap
Coloque la llave de nivelación (incluida) en la ranura del costado,
posteriormente haga palanca para retirar el porta inserto. / Pry with
the leveling wrench (included) or with a screwdriver to remove the
ceramic tile holder.
Retire el casquillo para lavarlo. Posteriormente limpie el fondo del
cuerpo de la coladera y arme nuevamente. / Remove the cap to
wash. Then wipe the bottom of the drainage body and assemble
again.
13
Colocar una franela en la
periferia de la coladera
para evitar dañarla. /
Place a softcloth on the
periphery of the drain to
avoid damage.
sello
hidráulico
seal
hydraulic
casquillo
cap
No se colocó el casquillo.
/ There is not cap.
El casquillo está saturado o sucio.
/ The cap is satured or dirty.
Coloque el casquillo (página 4, paso 14).
/ Place the cap (page 4, step 14).
Se regresan los
olores. / Bad odor.
Limpie el casquillo. /
Clean the cap.
Realice el mantenimiento (página 4, paso 13). /
See Maintenance (page 4, step 13).

This manual suits for next models

2

Other Helvex Plumbing Product manuals

Helvex TV-305 User manual

Helvex

Helvex TV-305 User manual

Helvex TH-062 User manual

Helvex

Helvex TH-062 User manual

Helvex Clasica 100 User manual

Helvex

Helvex Clasica 100 User manual

Helvex TV-302 User manual

Helvex

Helvex TV-302 User manual

Helvex Nuva TV-201 User manual

Helvex

Helvex Nuva TV-201 User manual

Helvex 282-H User manual

Helvex

Helvex 282-H User manual

Helvex INTEGRA UMO8-INN-01 User manual

Helvex

Helvex INTEGRA UMO8-INN-01 User manual

Helvex S-25 User manual

Helvex

Helvex S-25 User manual

Helvex ATR-1 User manual

Helvex

Helvex ATR-1 User manual

Helvex 444 User manual

Helvex

Helvex 444 User manual

Helvex Gourmet E-305 User manual

Helvex

Helvex Gourmet E-305 User manual

Helvex TZF NAO User manual

Helvex

Helvex TZF NAO User manual

Helvex Kubica E-84 User manual

Helvex

Helvex Kubica E-84 User manual

Helvex Maxima E-712 User manual

Helvex

Helvex Maxima E-712 User manual

Helvex Tritón VCG-2 User manual

Helvex

Helvex Tritón VCG-2 User manual
Helvex LIQUIDA UTV-302 Manual

Helvex

Helvex LIQUIDA UTV-302 Manual

Helvex Premier 15104 User manual

Helvex

Helvex Premier 15104 User manual

Helvex Kubica H-3006 User manual

Helvex

Helvex Kubica H-3006 User manual

Helvex 1342-H User manual

Helvex

Helvex 1342-H User manual

Helvex Nuva TV-203-C User manual

Helvex

Helvex Nuva TV-203-C User manual

Helvex 310-32 User manual

Helvex

Helvex 310-32 User manual

Helvex KUBICA E-776 User manual

Helvex

Helvex KUBICA E-776 User manual

Helvex MAGNA DX User manual

Helvex

Helvex MAGNA DX User manual

Helvex 185-19 User manual

Helvex

Helvex 185-19 User manual

Popular Plumbing Product manuals by other brands

Moen TS3512 Series instruction manual

Moen

Moen TS3512 Series instruction manual

KWC MIRANIT F5LT2025 Installation and operating instructions

KWC

KWC MIRANIT F5LT2025 Installation and operating instructions

hernest H200020 user manual

hernest

hernest H200020 user manual

Hansa ELECTRA Installation and maintenance guide

Hansa

Hansa ELECTRA Installation and maintenance guide

Brizo Siderna 85880 Series installation instructions

Brizo

Brizo Siderna 85880 Series installation instructions

newform SENSITIVE 66709E instructions

newform

newform SENSITIVE 66709E instructions

Hans Grohe Talis Select M51 300 1jet Instructions for use/assembly instructions

Hans Grohe

Hans Grohe Talis Select M51 300 1jet Instructions for use/assembly instructions

Sloan TRUFLUSH TRF1036-N installation instructions

Sloan

Sloan TRUFLUSH TRF1036-N installation instructions

Rohl PERRIN & ROWE U.3721X installation instructions

Rohl

Rohl PERRIN & ROWE U.3721X installation instructions

TLV JH7.2R-B instruction manual

TLV

TLV JH7.2R-B instruction manual

Villeroy & Boch EVANA LOOP & FRIENDS installation manual

Villeroy & Boch

Villeroy & Boch EVANA LOOP & FRIENDS installation manual

Moen 82244 Series Specifications

Moen

Moen 82244 Series Specifications

Harvia Sentiotec KASKI 240 Panorama Canopy Assembly instructions

Harvia

Harvia Sentiotec KASKI 240 Panorama Canopy Assembly instructions

Viega Multiplex Trio F manual

Viega

Viega Multiplex Trio F manual

Elkay EWMA7220SACC Specifications

Elkay

Elkay EWMA7220SACC Specifications

Kohler K-T9493 installation instructions

Kohler

Kohler K-T9493 installation instructions

Fir Italia FIRUnico NEW PLAYONE 90 85.8018.8 manual

Fir Italia

Fir Italia FIRUnico NEW PLAYONE 90 85.8018.8 manual

Akw Luda Installation

Akw

Akw Luda Installation

manuals.online logo
manuals.online logoBrands
  • About & Mission
  • Contact us
  • Privacy Policy
  • Terms and Conditions

Copyright 2025 Manuals.Online. All Rights Reserved.