Hilti DC-EX125 User manual

DC-EX125
Bedienungsanleitung 1– 4
Operating instructions 5– 8
Mode d’emploi 9–12
Istruzioni d’uso 13–16
Gebruiksaanwijzing 17–20
Manual de instruções 21–24
Manual de instrucciones 25–28
Brugsanvisning 29–32
Käyttöohje 33–36
Bruksanvisning 37–40
Bruksanvisning 41–44
Ο
Ο
δ
δ
η
η
γ
γ
ι
ι
ε
ε
ς
ς
χ
χ
ρ
ρ
η
η
σ
σ
ε
ε
ω
ω
ς
ς
45–48
Ръководство за
обслужване 49–52
Upute za uporabu 53–56
Instrukcja obsługi 57–60
Инструкция по
зксплуатации 61–64
Návod na obsluhu 65–68
Navodila za uporabo 69–72
Návod k obsluze 73–76
Használati utasítás 77–80
*334784*
334784
D
GB
F
I
NL
P
E
DK
SF
N
S
GR
BG
HR
PL
RUS
SK
SLO
CZ
H
Printed: 07.07.2013 | Doc-Nr: PUB / 5069489 / 000 / 00

1
0
10
20
햴
햵
햷햳
햹
햶
햷
햸햲
Printed: 07.07.2013 | Doc-Nr: PUB / 5069489 / 000 / 00

6
53
42
DC 125S
DC 125S
1
0
10
20
1
2
1
3
3
2
1
4
0
10
20
4
1
2
34
DC125S
DC125S
0
10
20
2
0
10
20
Printed: 07.07.2013 | Doc-Nr: PUB / 5069489 / 000 / 00

7
0
10
20
1
2
3
1
3
4
5
2
DC 125S
DC 125S
2
1
Printed: 07.07.2013 | Doc-Nr: PUB / 5069489 / 000 / 00

1
Allgemeine Hinweise
Vor allen Arbeiten an der Maschine und Haube zuerst
Stecker aus der Steckdose ziehen.
Die Zahlen verweisen jeweils auf Abbildungen. Die
Abbildungen zum Text finden Sie auf den ausfaltbaren
linken Umschlagseiten. Halten Sie diese beim Studium
der Anleitung geöffnet.
Inhalt Seite
Allgemeine Hinweise 1
Technische Daten 2
System-Montage 2
Werkzeug montieren 2
Tiefeneinstellung 2
Handgriff montieren 4
Werkzeugmontage 2
Zubehör 2
Sicherheitshinweise 3
Beschreibung
햲Arretier- und Öffnungsknopf für Haubenöffnung
햳Laufräder
햴Anschluss-Stutzen Hilti
햵Tiefenschnitt-Skala
햶Verbindungsstück
햷Schnittpositionierungsmarkierung
햸Gewindehülsen für Handgriff
햹Drehrichtungspfeile
DC-EX 125 Staubschutzhaube
Bitte lesen Sie auch die Bedienungsanleitung des
dazugehörenden Gerätes aufmerksam vor der ersten
Inbetriebnahme, um eine falsche Handhabung der
Maschine zu vermeiden.
Printed: 07.07.2013 | Doc-Nr: PUB / 5069489 / 000 / 00

2
System-Montage
Montage Anschluss-Stutzen:
Verbindungsstück 햶in die Staubsaug-Öffnung der Hau-
be stecken (schnappt ein). Anschluss-Stutzen auf Ver-
bindungsstück aufsetzen (drehbar).
Öffnen der Haube
■Arretier- oder Öffnungsknopf
auf Position 20 mm
stellen
und ganz aufdrehen.
■Fest auf Arretier- oder Öffnungsknopf drücken
,
Haube lässt sich öffnen
.
Montieren der Haube auf Gerät
■Spindelhals des Gerätes gegen die Federkraft in Posi-
tion (wie abgebildet) gegen die Schutzhaube drücken
.
■Nachdem die Aufnahme der Staubschutzhaube (mit
Codiernocken) in die richtige Position spürbar ein-
gerastet ist, kann die Haube durch gegenläufiges Ver-
drehen am Gerät fixiert und in die Endposition gestellt
werden
.
Werkzeuge montieren
■Spannflansch
auf Schleifspindel setzen, Dia-
manttrennscheibe
in der vorgegebenen Dreh-
richtung (Richtungspfeil) aufsetzen und Spannmut-
ter oder Kwik-Lock
aufschrauben und festziehen
(siehe Bedienungsanleitung Geräte).
■Staubhaube druch Zusammenklappen der beiden
Haubenteile schliessen
.
Tiefeneinstellung
■Gewünschte Tiefeneinstellung wählen und Arretier-
knopf
festschrauben
.
■Staubsauger anschliessen
.
Achtung:
Um ein selbständiges Öffnen der Haube zu verhindern,
muss der Arretierknopf vor Arbeitsbeginn immer fest-
geschraubt sein.
Handgriff montieren
■Der Handgriff kann beidseitig für Links- und Rechts-
händer in die dafür vorgesehenen Gewindehülsen ein-
geschraubt werden.
■Bei allen Arbeiten mit der Staubhaube muss der Sei-
tenhandgriff an der Haube montiert sein.
Werkzeugdemontage
■Haube öffnen (wie bei «Öffnen der Haube» beschrie-
ben).
■Diamant-Trennscheibe
durch Öffnen der Spann-
mutter oder Kwik-Lock
entfernen. Spannflansch
herausnehmen
.
■Entriegelungsknopf
am Spindelhals des Gerätes
drücken, Haube lässt sich vom Gerät durch Rechts-
drehung trennen
(siehe Piktogramm an Hauben-
schale).
Zubehör
Ausgerüstet mit: Haube DC-EX 125, Anschluss-Stutzen
für Hilti Sauger, Verbindungsstück für Anschluss-Stut-
zen Hilti, Bedienungsanleitung
Technische Daten
Gewicht: 0,8 kg
Abmessungen (L×B×H): 195×60×185 mm
Scheiben-∅: 125 mm
Drehbarer Anschluss-Stutzen für Hilti- und Standardsauger
Schnittpositionsmarkierung (für liniengenauen Schnittverlauf)
2 Laufräder für einfachen Vorschub
Printed: 07.07.2013 | Doc-Nr: PUB / 5069489 / 000 / 00

3
Sicherheitshinweise
Achtung:
Beim Gebrauch von Elektrowerkzeugen sind zum Schutz
gegen elektrischen Schlag, Verletzungs- und Brandge-
fahr, folgende grundsätzliche Sicherheitsmassnahmen
zu beachten.
Lesen und beachten Sie alle diese Hinweise, bevor Sie
dieses Elektrowerkzeug benutzen. Bewahren Sie die
Sicherheitshinweise gut auf!
■
1Halten Sie Ihren Arbeitsbereich in Ordnung. Unord-
nung im Arbeitsbereich kann Unfälle zur Folge haben.
■
2Berücksichtigen Sie Umgebungseinflüsse. Setzen Sie
Elektrowerkzeuge nicht dem Regen aus. Benützen Sie
Elektrowerkzeuge nicht in feuchter oder nasser Umge-
bung. Sorgen Sie für gute Beleuchtung. Benützen Sie
Elektrowerkzeuge nicht in der Nähe von brennbaren Flüs-
sigkeiten oder Gasen.
■
3Schützen Sie sich vor elektrischem Schlag. Vermei-
den Sie Körperberührung mit geerdeten Teilen, z.B. Roh-
ren, Heizkörpern, Herden, Kühlschränken.
■
4Halten Sie Kinder fern. Lassen Sie andere Personen
nicht das Elektrowerkzeug oder das Kabel berühren. Hal-
ten Sie andere Personen von Ihrem Arbeitsbereich fern.
■
5Bewahren Sie Ihre Elektrowerkzeuge sicher auf. Unbe-
nutzte Elektrowerkzeuge sollten an einem trockenen,
hochgelegenen oder abgeschlossenen Ort, ausserhalb
der Reichweite von Kindern, abgelegt werden.
■
6Überlasten Sie Ihre Elektrowerkzeuge nicht. Sie arbei-
ten besser und sicherer im angegebenen Leistungsbe-
reich.
■
7Benutzen Sie das Elektrowerkzeug nicht für solche
Zwecke, für die es nicht vorgesehen ist (z. B. Einspan-
nen von Bohrwerkzeugen oder Ähnliches, Einspannen
von Sägeblättern zur Holzbearbeitung etc.).
■
8Tragen Sie geeignete Arbeitskleidung! Tragen Sie kei-
ne weite Kleidung oder Schmuck, Sie könnten von beweg-
lichen Teilen erfasst werden. Bei Arbeiten im Freien sind
Gummihandschuhe und rutschfestes Schuhwerk emp-
fehlenswert. Tragen Sie bei langen Haaren ein Haarnetz.
■
9Tragen Sie eine Schutzbrille. Verwenden Sie bei stau-
berzeugenden Arbeiten eine Atemmaske.
■
10 Schliessen Sie die Staubabsaug-Einrichtung an. Wenn
Vorrichtungen zum Anschluss von Staubabzugs- und
auffangeinrichtungen vorhanden sind, überzeugen Sie
sich, dass diese angeschlossen und richtig benutzt wer-
den.
■
11 Verwenden Sie das Kabel nicht für Zwecke, für die es
nicht bestimmt ist. Tragen Sie das Elektrowerkzeug nie-
mals am Kabel. Benutzen Sie das Kabel nicht, um den
Stecker aus der Steckdose zu ziehen. Schützen Sie das
Kabel vor Hitze, Öl und scharfen Kanten.
■
12 Sichern Sie das Werkstück. Benutzen Sie Spannvor-
richtungen oder einen Schraubstock, um das Werkstück
festzuhalten. Es ist damit sicherer gehalten als mit Ihrer
Hand, und Sie haben ausserdem beide Hände zur Bedie-
nung des Elektrowerkzeugs frei. Spannen sie nie das
Elektrowerkzeug in den Schraubstock ein.
■
13 Vermeiden Sie abnormale Körperhaltung. Sorgen Sie
für sicheren Stand und halten Sie jederzeit das Gleich-
gewicht.
■
14 Pflegen Sie Ihre Werkzeuge mit Sorgfalt. Halten Sie
die Werkzeuge scharf und sauber, um besser und siche-
rer arbeiten zu können. Befolgen Sie die Wartungsvor-
schriften und die Hinweise über den Werkzeugwechsel.
Kontrollieren Sie regelmässig das Kabel des Elektro-
werkzeugs, und lassen Sie es bei Beschädigung von
einem anerkannten Fachmann erneuern. Kontrollieren
Sie Verlängerungskabel regelmässig und ersetzen Sie
sie, wenn sie beschädigt sind. Halten Sie Handgriffe
trocken und frei von Öl und Fett.
■
15 Ziehen Sie den Stecker aus der Steckdose, bei Nicht-
gebrauch des Elektrowerkzeugs, vor der Wartung und
beim Wechsel von Werkzeugen.
■
16 Lassen Sie keine Werkzeugschlüssel stecken. Über-
prüfen Sie vor dem Einschalten, dass Schlüssel und Ein-
stellwerkzeuge entfernt sind.
■
17 Vermeiden Sie unbeabsichtigten Anlauf. Tragen Sie
das an das Stromnetz angeschlossene Gerät nicht mit
dem Finger am Schalterdrücker. Vergewissern Sie sich,
dass der Schalter beim Einstecken des Steckers in die
Steckdose ausgeschaltet ist.
■
18 Verlängerungskabel im Freien. Verwenden Sie im Frei-
en nur dafür zugelassene und entsprechend gekenn-
zeichnete Verlängerungskabel.
■
19 Seien Sie aufmerksam. Achten Sie darauf, was Sie
tun. Gehen Sie mit Vernunft an die Arbeit. Benutzen Sie
das Elektrowerkzeug nicht, wenn Sie unkonzentriert sind.
■
20 Überprüfen Sie das Elektrowerkzeug auf eventuelle
Beschädigungen. Vor weiterem Gebrauch des Elektro-
werkzeugs müssen Schutzvorrichtungen oder leicht
beschädigte Teile sorgfältig auf ihre einwandfreie und
bestimmungsgemässe Funktion untersucht werden.
Überprüfen Sie, ob die beweglichen Teile einwandfrei
funktionieren und nicht klemmen, oder ob Teile beschä-
digt sind. Sämtliche Teile müssen richtig montiert sein
und alle Bedingungen erfüllen, um den einwandfreien
Printed: 07.07.2013 | Doc-Nr: PUB / 5069489 / 000 / 00
4
Betrieb des Elektrowerkzeugs zu gewährleisten. Beschä-
digte Schutzvorrichtungen und Teile müssen sachgemäss
durch eine anerkannte Fachwerkstatt repariert oder aus-
gewechselt werden, soweit nichts anderes in der Bedie-
nungsanleitung angegeben ist. Beschädigte Schalter
müssen beim Hilti Service ersetzt werden. Benutzen Sie
keine Elektrowerkzeuge, bei denen sich der Schalter
nicht ein- und ausschalten lässt.
■
21 Achtung: Benutzen Sie nur Original-Zubehör oder
Zusatzgeräte, die in der Bedienungsanleitung aufgeführt
sind. Der Gebrauch anderer Einsatzwerkzeuge und ande-
ren Zubehörs kann eine Verletzungsgefahr für Sie bedeu-
ten.
■
22 Lassen Sie Ihr Elektrowerkzeug durch eine Elektro-
fachkraft reparieren. Dieses Elektrowerkzeug entspricht
den einschlägigen Sicherheitsbestimmungen. Repara-
turen dürfen nur von einer Elektrofachkraft (Hilti Servi-
ce) ausgeführt werden. Es sind nur Originalersatzteile
zu verwenden; anderenfalls können Unfälle für den Betrei-
ber entstehen.
■
23 Beim Bearbeiten von leitfähigen Materialien kann sich
leitfähiger Staub im Inneren eines Elektrowerkzeuges
ansammeln und es kann in gefährlicher Wirkung Span-
nung nach aussen verschleppt werden, was zu einem
elektrischen Schlag führen kann. Solche Arbeiten sind
z.B. das Durchtrennen von Deckenarmierungseisen. Bei
solchen Anwendungen müssen die verwendeten Gerä-
te in engen Zeitintervallen von Fachkräften oder im Hilti-
Service hinsichtlich Isolationsfestigkeit oder Ansamm-
lung von leitfähigen Stäuben oder sonstigen leitfähigen
Ablagerungen überprüft werden.
■
24 Haube darf nur in Verbindung mit Diamant-Trenn-
scheiben und Trennscheiben für mineralische Unter-
gründe verwendet werden.
■
25 Kontrollieren Sie das Gerät, Haube oder Werkzeuge
auf eventuelle Beschädigungen. Ein vorgeschädigtes
Gerät, Haube oder Werkzeug darf nicht in Betrieb genom-
men werden.
Printed: 07.07.2013 | Doc-Nr: PUB / 5069489 / 000 / 00

5
General information
Always disconnect the supply cord plug from the mains
socket before doing any work on the electric tool and
hood.
The numbers refer to the illustrations. The illustrati-
ons can be found on the fold-out left-hand cover pages.
Keep these pages open while you read the operating
instructions.
Contents Page
General information 5
Technical data 6
Assembling the system 6
Fitting the connector 6
Depth adjustment 6
Fitting the side handle 6
Removing the disc 6
Items supplied 6
Safety precautions 7
Description
햲Knob for locking or opening the hood
햳Wheels
햴Hilti-type connector
햵Cutting depth scale
햶Connecting piece
햷Cutting position mark
햸Threaded sleeve for side handle
햹Arrow indicating direction of rotation
DC-EX 125 dust extraction hood
To avoid incorrect operation, please also carefully
read the operating instructions for the associated
electric tool before using the equipment for the first
time.
Printed: 07.07.2013 | Doc-Nr: PUB / 5069489 / 000 / 00

6
Assembling the system
Fitting the connector
Push the connecting piece 햶into the opening in the
dust extraction hood (engages with a click). Fit the connec-
tor to the connecting piece (pivotable).
Opening the extraction hood
■Bring the locking / opening knob
to the 20 mm
position
and unscrew it completely.
■Push the locking / opening knob down firmly
. The
hood can then be opened
.
Fitting the hood to the tool
■Press the spindle collar of the tool, against spring
pressure, into position in the dust extraction hood
as illustrated.
■When the dust extraction hood (opening has locating
lugs) has been felt to engage in the correct position,
the hood can be secured to the tool by turning it against
the direction of rotation and into its final position
.
Fitting the disc
■Place the clamping flange
on the spindle of the
electric tool and then fit the diamond cutting disc
,
observing the correct direction of rotation (indicated
by the arrow). Screw on and tighten the clamping nut
or Kwik-lock nut
. (Please refer to the operating
instructions for the electric tool.)
■Close the dust extraction hood by bringing the two
halves of the hood together
.
Depth adjustment
■Select the desired depth
and tighten the locking
knob
.
■Connect the dust extraction system
.
Caution
The locking knob must always be tightened securely
before beginning work in order to prevent the hood from
opening by itself.
Fitting the side handle
■The side handle can be screwed into the threaded
sleeves provided on either side, for use by left-han-
ded or right-handed persons.
■The side handle must always be fitted when the dust
extraction hood is in use.
Removing the disc
■Open the hood (as described at "Opening the hood").
■Remove the diamond cutting disc
by releasing and
unscrewing the clamping nut or Kwik-lock nut
.
Remove the clamping flange
.
■Press the release button
at the spindle collar of
the electric tool. The hood can then be removed from
the tool
by turning it to the right (please refer to
the symbol on the casing of the hood).
Items supplied
DC-EX 125 dust extraction hood, connector for Hilti
extraction system, connecting piece for Hilti-type connec-
tor, operating instructions
Technical data
Weight: 0.8 kg
Dimensions (l×w×h): 195×60×185 mm
Disc diameter: 125 mm
Pivoting connector for Hilti-type and other standard extraction systems
Cutting position mark (for cutting accurately to a line)
Two wheels for easy advance
Printed: 07.07.2013 | Doc-Nr: PUB / 5069489 / 000 / 00

7
Safety precautions
Caution
The following fundamental safety precautions must always
be observed when using electric tools/machines as pro-
tection against electric shock, the risk of injury and fire
hazards. Please read and take note of these precautions
before you use the tool/machine. Keep these safety pre-
cautions in a safe place!
■
1Keep your place of work clean and tidy. Disorder where
you are working creates a potential risk of accidents.
■
2Make allowance for influence from the surroundings.
Don’t expose your electric tools/machines to rain. Don’t
use electric tools/machines in damp or wet surroundings.
Make sure the work area is well lit. Don’t use electric tools/
machines near inflammable liquids or gases.
■
3Always protect yourself against electric shock. Never
touch grounding (earthing) parts e.g. pipes, radiators,
cookers, ovens, refrigerators.
■
4Keep children away. Don’t let other persons touch the
electric tool/machine or supply cord. Keep them away
from your work area.
■
5Keep your electric tool/machine in a safe place. Elec-
tric tools/machines not in use should be kept in a dry
locked-up place out of the reach of children.
■
6Don’t overload your electric tools/machines. You will
do your work better and safer in the specified perfor-
mance/rating range.
■
7Always use the right electric tool/machine for the job.
Don’t use underpowered tools/machines or attachments
for heavier duty jobs. Don’t use electric tools/ machines
for work and purposes for which they are not intended,
e.g. don’t use a hand-held circular saw to cut down trees
or cut up branches.
■
8Wear suitable clothing. Don’t wear loose clothing or
jewellery – they could be caught up in moving parts. When
working outside, the use of rubber gloves and non-slip
shoes is recommended. Wear a helmet or cap if you have
long hair.
■
9Always wear protective goggles. If work causes dust,
wear a mask as well.
■
10 Don’t use the supply cord for any other purpose. Don’t
carry the electric tool/ machine by the supply cord and
don’t pull the plug out of the socket/receptacle by pulling
the supply cord. Protect the cable from heat, oil and sharp
edges.
■
11 Secure the workpiece. Use a clamping device or vice
to hold the workpiece. It is secured more reliably in this
way than in your hand and you can then hold and oper-
ate your electric tool/machine with both hands.
■
12 Don’t bend over too far when working. Avoid an unusu-
al stance. Make sure that you are standing firmly and keep
your balance at all times.
■
13 Take good care of your electric tools/machines. Keep
the drill bits, insert tools etc. sharp and clean so that you
can do your work better, safer and more reliably. Observe
the cleaning and maintenance regulations and the instruc-
tions for changing drill bits, insert tools etc. Check the
supply cord regularly and have it renewed by a recognized
specialist if it is damaged. Check the extension supply
cord regularly and, if it is damaged, replace it. Keep grips
and side handles dry and free from oil or grease.
■
14 Always pull out the plug from the mains if the electric
tool/machine is not in use, prior to cleaning and mainte-
nance work and when changing a drill bit, saw blade or
insert tools of any kind.
■
15 Never leave a key in place. Always check before switch-
ing on that the key or adjusting tools have been removed.
■
16 Avoid any unintentional start-up. Never carry a plugged-
in electric tool/machine with your finger on the switch.
Always make sure that the switch is off when plugging
the electric tool/machine into the main electric supply.
■
17 If an extension supply cord is used outside, only use
one which has been approved for the purpose and is cor-
respondingly marked.
■
18 Be attentive at all times. Keep your eye on your work.
Remain in a sensible frame of mind and don’t use the elec-
tric tool/machine if you cannot concentrate completely.
■
19 Check your electric tool/machine for damage. You must
check the safety devices or damaged parts carefully for
perfect functioning in keeping with the intended purpose
before using the electric tool/machine further. Check
whether the moving parts function properly, whether they
aren’t sticking, whether any parts are broken, whether all
other parts work properly and are fitted correctly, and
make sure that all other conditions which can influence
operation and running of the electric tool/machine are as
they should be. Damaged guards and protective devices
and parts must be repaired properly by an authorized ser-
vice workshop or replaced provided that nothing else is
stated in the operating instructions. Damaged switches
must also be replaced in the recognized service work-
shop. Never use electric tools/machines which cannot be
switched on and off by the switch.
■
20 Caution ! For your own safety’s sake, only use acces-
sories and attachments which are specified in the oper-
ating instructions or in the respective catalogue. The use
of accessories or insert tools or attachments other than
those specified in the operating instructions can result in
personal injury to you.
Printed: 07.07.2013 | Doc-Nr: PUB / 5069489 / 000 / 00

8
■
21 Only have repairs carried out by recognized electrical
specialists. This electric tool/machine complies with respec-
tive safety regulations. Repairs may only be carried out
by an electrical specialist otherwise an accident hazard
for the operator can exist.
■
22 Connect dust extraction equipment. If devices are pro-
vided for the connection of dust extraction and collection
facilities ensure these are connected and properly used.
■
23 When working on electrically conductive materials,
conductive dust may collect inside an electric tool, caus-
ing leakage of electric voltage and a possible risk of elec-
tric shock. Work of this kind, for example, includes grind-
ing cast iron, chiselling or other operations using impact
tools on solid metal, overhead drilling in metal and, under
certain conditions, drilling through steel reinforcement in
concrete ceilings. Electric tools or machines used for appli-
cations of this kind must be inspected at regular, short
intervals by a recognised specialist or at a Hilti service
workshop in order to ensure that no hazardous deposits
of conductive dust are present inside the tool and to con-
firm the integrity of the tool’s electrical insulation.
■
24 The dust extraction hood may be used only in con-
junction with diamond cutting discs and abrasive cut-
ting discs for mineral materials.
■
25 Check the tool, the dust extraction hood and the disc
for possible damage. A damaged tool, dust extraction
hood or disc must not be used.
Printed: 07.07.2013 | Doc-Nr: PUB / 5069489 / 000 / 00

Hilti = registered trademark of Hilti Corp., Schaan W 2352 1201 10-Pos. 1 1 Printed in Liechtenstein © 2001
Right of technical and programme changes reserved S. E. & O.
334784/B
*334784*
Hilti Corporation
FL-9494 Schaan
Tel.: +423 / 234 2111
Fax: +423 / 234 29 65
www.hilti.com
Printed: 07.07.2013 | Doc-Nr: PUB / 5069489 / 000 / 00

Table of contents
Languages:
Other Hilti Vacuum Cleaner manuals

Hilti
Hilti VCD50L User manual

Hilti
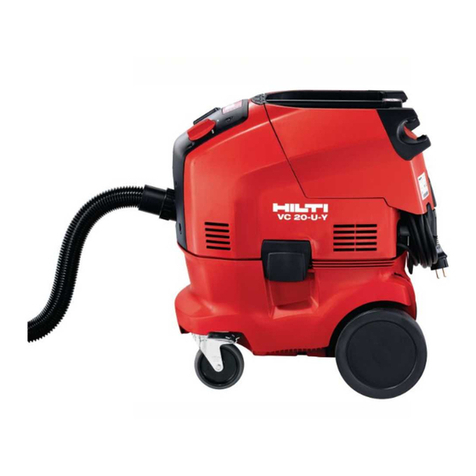
Hilti VC 20-U-Y User manual

Hilti
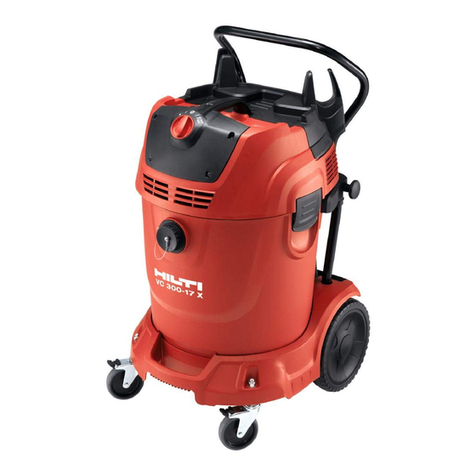
Hilti VC 300-17 X User manual

Hilti
Hilti VC 20M-X User manual

Hilti
Hilti VC 20 User manual

Hilti
Hilti VC 60-W User manual

Hilti
Hilti NURON VC 75-1-22 User manual

Hilti
Hilti TE DRS-S User manual

Hilti
Hilti VC 40 User manual

Hilti
Hilti NURON VC 4LX-22 User manual

Hilti
Hilti VC 20M-X User manual

Hilti
Hilti VC 300-20-W User manual

Hilti
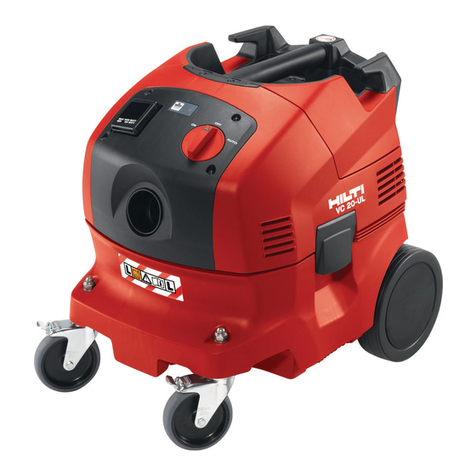
Hilti VC 20-U User manual

Hilti
Hilti VC 20-U User manual

Hilti
Hilti VC 5-A22 User manual

Hilti
Hilti NURON VC 4LX-22 User manual

Hilti
Hilti VC 20-U User manual

Hilti
Hilti VC 20?U User manual

Hilti
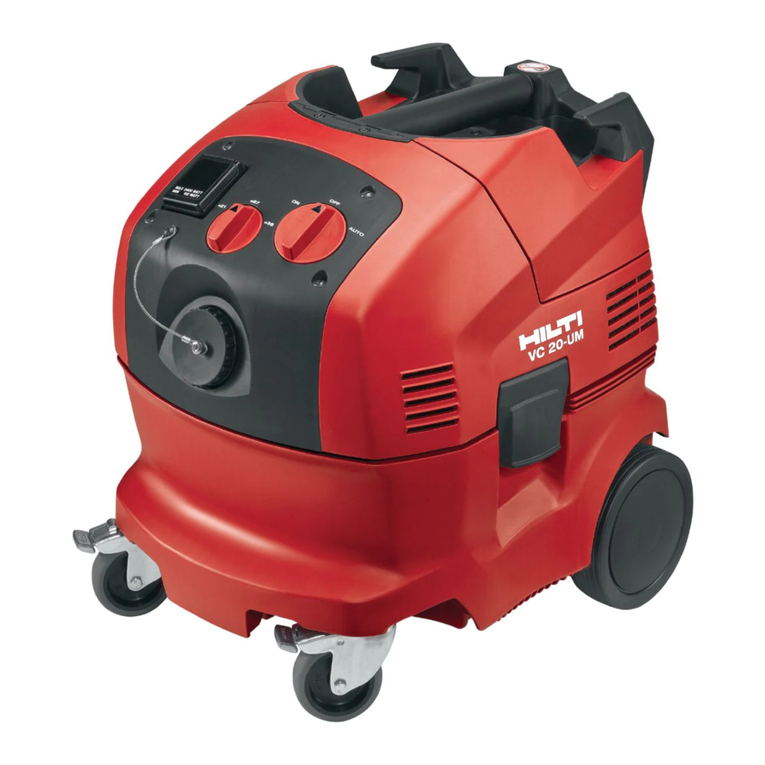
Hilti VC 20-UM User manual

Hilti
Hilti VC 300-17 X User manual