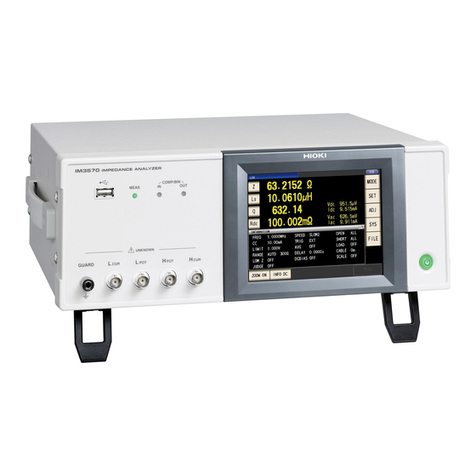
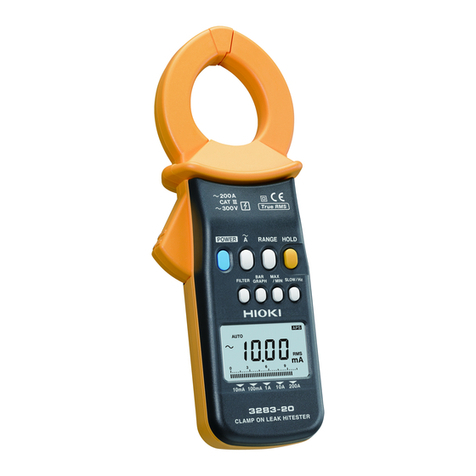
Hioki CM4142-20 User manual

EN
EN
Instruction Manual
Aug. 2019 Revised edition 1
CM4141A961-01 19-08H
CM4141
CM4142
AC CLAMP METER
Instruction Manual
Aug. 2019 Revised edition 1
CM4141A961-01 19-08H
CM4141
CM4142
AC CLAMP METER


Operating Precautions
WARNING
Your instrument can be used to measure voltages in excess of 1000 V
DC if and only if both of the following conditions are satisfied:
1. The circuit under measurement is isolated from the commercial
power grid.
2. The circuit under measurement is isolated from ground.
e.g.: when measuring the no-load voltage of an ungrounded PV panel
Do not use the instrument with circuits whose terminal-to-ground voltage
exceeds 1000 V. Doing so may result in electric shock.
CM4141A961-01


i
6
5
4
3
2
1
Index
Contents
Introduction.....................................................................................................1
Notations ........................................................................................................2
Verifying Package Contents ...........................................................................4
Options (sold separately)................................................................................5
Usage Notes...................................................................................................6
1 Overview 11
1.1 Product Overview and Features......................................................... 11
1.2 Part Names ........................................................................................ 12
2 Making Measurements 13
2.1 Inspection Before Measurement ........................................................ 13
2.2 Current Measurement ........................................................................ 14
Manual Hold /Auto Hold...................................................................... 15
Switching the range............................................................................18
MAX value/MIN value/AVG value/PEAK value................................... 19
Filter Function.....................................................................................20
Rush current (AC INRUSH)................................................................21
2.3 Other Measurement Functions...........................................................22

ii
Contents
2.4 Backlight /Auto Power Save (APS)..................................................... 26
2.5 Power-on Option Table.......................................................................27
2.6 Bluetooth®Communications (only for model CM4142) ......................29
3 Specications 35
3.1 GeneralSpecications .......................................................................35
3.2 Inputspecications/Measurementspecications ...............................37
3.3 Accuracy Table ...................................................................................44
4 Repairs,Inspections,andCleaning 59
4.1 Troubleshooting..................................................................................59
4.2 Error display ....................................................................................... 61
4.3 Insert/Replace Batteries.....................................................................62
4.4 Cleaning .............................................................................................64
Index 65
WarrantyCerticate

1
Introduction
Thank you for purchasing the Hioki CM4141, CM4142 AC Clamp Meter. To obtain maximum
performance from the instrument over the long term, be sure to read this manual carefully and
keep it handy for future reference.
Read the separate document “Operating Precautions” carefully before using the instrument.
Target audience
This manual has been written for use by individuals who use the product in question or who teach
others to do so. It is assumed that the reader possesses basic electrical knowledge (equivalent
to that of someone who graduated from the electrical program at a technical high school).
Trademark
•Bluetooth®is a registered trademark of Bluetooth SIG, Inc.(USA). The trademark is used by
HIOKI E.E. CORPORATION under license.
•Android, Google Play, and Google Chrome are trademarks of Google, Inc.
• IOS is a registered trademark of Cisco Systems, Inc. and/or its afliates in the United States
and certain other countries.
•iPhone, iPad, iPad miniTM, iPad Pro, and iPod touch are trademarks of Apple Inc.
•The App Store is a service mark of Apple Inc.
•Any other products and company names are generally either trade names, registered
trademarks or trademarks of respective companies.

2
Notations
Notations
Concerning Safety
In this document, the risk seriousness and the hazard levels are classied as follows.
DANGER
Indicates an imminently
hazardous situation that will
result in death or serious injury to
the operator.
IMPORTANT
Indicates information related to
the operation of the instrument or
maintenance tasks with which the
operators must be fully familiar.
WARNING
Indicates a potentially hazardous
situation that may result in death
or serious injury to the operator.
Indicates prohibited actions.
CAUTION
Indicates a potentially hazardous
situation that may result in minor
or moderate injury to the operator
or damage to the instrument or
malfunction.
Indicates an action that must be
performed.
Symbols Afxed to the Instrument
Indicates cautions and hazards. Refer to the “Usage Notes” (p.6) section of the instruction
manual and the included “Operating Precautions” for more information.
Indicates that the instrument may be connected to or disconnected from a live conductor.

3
Notations
Screen display
The instrument screen displays the alphanumeric characters as follows.
1 2 3 4 5 6 7 8 9 0
A B C D E F G H I J K L M N O P Q R S T U V W X Y Z A different display is used in the case
below.
: Wiring break detected
Other
Indicates a buzzer sound (either intermittent or continuous).
Accuracy
We dene measurement tolerances in terms of f.s. (full scale), rdg. (reading) and dgt. (digit) values with the
following meanings:
f.s. (maximum display value/range)
The maximum displayable value. This is usually the name of the currently selected range.
rdg. (displayed value)
The value currently being measured and displayed on the measuring instrument.
dgt. (resolution)
The smallest displayable unit on a digital measuring instrument, i.e., the input value that causes
the digital display to show a “1” as the least-signicant digit.

4
Verifying Package Contents
Model CM4141 or CM4142
AC Clamp Meter
Model L9207-10 Test Lead
9243 graber L4937 マグネットアダプ
タ
L4934 小ワニグチ
マグネ付ストラップ
L9207-10
DM4910 熱電対
DT4911TestLead
DT4912TestLead
L4930 接続ケーブル
L4931renketu
L4931 延長ケーブル
L4932(+9207-10cap)
L4933 コンタクトピン
L4935 ワニ口
L4936 バスバー
Model C0203 Carrying Case
LR03 Alkaline battery ×2
Instruction Manual*
Operating Precautions (0990A907)
Precautions Concerning Use of
Equipment that Emits Radio Waves (only
for model CM4142)
* Instruction manuals may also be available in other languages.
Please visit our website at http://www.hioki.com

5
Options (sold separately)
C0203 Carrying Case
9243 graber L4937 マグネットアダプ
タ
L4934 小ワニグチ
マグネ付ストラップ
L9207-10
DM4910 熱電対
DT4911TestLead
DT4912TestLead
L4930 接続ケーブル
L4931renketu
L4931 延長ケーブル
L4932(+9207-10cap)
L4933 コンタクトピン
L4935 ワニ口
L4936 バスバー
9243 graber L4937 マグネットアダプ
タ
L4934 小ワニグチ
マグネ付ストラップ
L9207-10
DM4910 熱電対
DT4911TestLead
DT4912TestLead
L4930 接続ケーブル
L4931renketu
L4931 延長ケーブル
L4932(+9207-10cap)
L4933 コンタクトピン
L4935 ワニ口
L4936 バスバー
9243 graber L4937 マグネットアダプ
タ
L4934 小ワニグチ
マグネ付ストラップ
L9207-10
DM4910 熱電対
DT4911TestLead
DT4912TestLead
L4930 接続ケーブル
L4931renketu
L4931 延長ケーブル
L4932(+9207-10cap)
L4933 コンタクトピン
L4935 ワニ口
L4936 バスバー
9243 graber L4937 マグネットアダプ
タ
L4934 小ワニグチ
マグネ付ストラップ
L9207-10
DM4910 熱電対
DT4911TestLead
DT4912TestLead
L4930 接続ケーブル
L4931renketu
L4931 延長ケーブル
L4932(+9207-10cap)
L4933 コンタクトピン
L4935 ワニ口
L4936 バスバー
9243 graber L4937 マグネットアダプ
タ
L4934 小ワニグチ
マグネ付ストラップ
L9207-10
DM4910 熱電対
DT4911TestLead
DT4912TestLead
L4930 接続ケーブル
L4931renketu
L4931 延長ケーブル
L4932(+9207-10cap)
L4933 コンタクトピン
L4935 ワニ口
L4936 バスバー
9243 graber L4937 マグネットアダプ
タ
L4934 小ワニグチ
マグネ付ストラップ
L9207-10
DM4910 熱電対
DT4911TestLead
DT4912TestLead
L4930 接続ケーブル
L4931renketu
L4931 延長ケーブル
L4932(+9207-10cap)
L4933 コンタクトピン
L4935 ワニ口
L4936 バスバー
9243 graber L4937 マグネットアダプ
タ
L4934 小ワニグチ
マグネ付ストラップ
L9207-10
DM4910 熱電対
DT4911TestLead
DT4912TestLead
L4930 接続ケーブル
L4931renketu
L4931 延長ケーブル
L4932(+9207-10cap)
L4933 コンタクトピン
L4935 ワニ口
L4936 バスバー
9243 graber L4937 マグネットアダプ
タ
L4934 小ワニグチ
マグネ付ストラップ
L9207-10
DM4910 熱電対
DT4911TestLead
DT4912TestLead
L4930 接続ケーブル
L4931renketu
L4931 延長ケーブル
L4932(+9207-10cap)
L4933 コンタクトピン
L4935 ワニ口
L4936 バスバー
9243 graber L4937 マグネットアダプ
タ
L4934 小ワニグチ
マグネ付ストラップ
L9207-10
DM4910 熱電対
DT4911TestLead
DT4912TestLead
L4930 接続ケーブル
L4931renketu
L4931 延長ケーブル
L4932(+9207-10cap)
L4933 コンタクトピン
L4935 ワニ口
L4936 バスバー
9243 graber L4937 マグネットアダプ
タ
L4934 小ワニグチ
マグネ付ストラップ
L9207-10
DM4910 熱電対
DT4911TestLead
DT4912TestLead
L4930 接続ケーブル
L4931renketu
L4931 延長ケーブル
L4932(+9207-10cap)
L4933 コンタクトピン
L4935 ワニ口
L4936 バスバー
L4933 Contact Pin Set *6
L4934 Small Alligator Clip Set *5
L4935 Alligator Clip Set *2
9243 Grabber Clip *3
L4936 Bus Bar Clip Set *4
L4937 Magnetic Adapter Set *3
L4932 Test Pin Set *1
L9207-10 Test Lead *1
L4930 Connection Cable Set *2
(Length: 1.2 m)
L4931 Extension Cable Set *2
(Length: 1.5 m, with the coupling
connector)
9243 graber L4937 マグネットアダプ
タ
L4934 小ワニグチ
マグネ付ストラップ
L9207-10
DM4910 熱電対
DT4911TestLead
DT4912TestLead
L4930 接続ケーブル
L4931renketu
L4931 延長ケーブル
L4932(+9207-10cap)
L4933 コンタクトピン
L4935 ワニ口
L4936 バスバー
DT4910 Thermocouples (K)
L4938 Test Pin Set *7
L4939 Breaker Pin Set *4
9804 Magnetic Adapter *8
*1: CAT IV 600 V/ CAT III 1000 V/ CAT II 1000 V *5: CAT III 300 V/ CAT II 600 V
*2: CAT IV 600 V/ CAT III 1000 V *6: 33 V AC/ 70 V DC
*3: CAT III 1000 V *7: CAT III 600 V/ CAT II 600 V
*4: CAT III 600 V *8: CAT IV 1000 V

6
Usage Notes
Usage Notes
Follow these precautions to ensure safe operation and to obtain the full benets of the various
functions. Read the separate document “Operating Precautions” carefully before using the
instrument. Ensure that your use of the product falls within the specications not only of the
instrument itself, but also of any accessories, options, batteries, and other equipment being
used.
DANGER
•To prevent an electric shock, do not touch any areas beyond the barrier
while the instrument is in use.
See: “Part Names” (p.12)
•The maximum measurement current varies with the frequency, and the
current that can be measured continuously is limited. Operating the
instrument at less than this limitation is referred to as derating. Do not
measure currents in excess of the derating curve. Doing so may result in
instrument damage or malfunction, a re, or burn due to sensor heating.
•Never apply a voltage to the instrument when the resistance, continuity
check, diode check, capacitance, or temperature functions are selected.
Damage to the instrument can cause bodily injury. To avoid electrical
accidents, turn off the circuit before measuring it.

7
Usage Notes
DANGER
•To prevent an electric shock, conrm that the white portion (insulation layer)
inside the cable is not exposed. If a color inside the cable is exposed, do not
use the cable.
WARNING
Do not allow the instrument to get wet, and do not take measurements with wet
hands. This may cause an electric shock. (This precaution does not apply to
insulated conductors.)
To prevent an electric shock, do not exceed the lower of the ratings shown on
the instrument and test leads.
CAUTION
Do not place any foreign object between the jaws or any insert foreign
object into the gap of the sensor head. Doing so may worsen the
performance of the sensor or the opening-closing operation of the
sensor head.

8
Usage Notes
CAUTION
Avoid dropping or jarring the instrument, which could damage the jaw,
adversely affecting measurement.
IMPORTANT
Clamp the instrument around only one conductor. The instrument will
not be able to make a measurement if you clamp it around two or
more wires together, regardless of whether they are part of a single-
phase or three-phase circuit.

9
Usage Notes
Test Lead
WARNING
To prevent an electric shock, when measuring the voltage of a power line use a
test lead that satises the following criteria:
•Conforms to safety standards IEC61010 or EN61010
•Measurement category III or IV
•Its rated voltage is higher than the voltage to be measured
The optional test leads provided for the instrument conform to the safety
standard EN61010. Use a test lead in accordance with its dened measurement
category and rated voltage.
•To prevent a short-circuit accident, be sure to use the test leads with the
sleeves attached when performing measurements in the CAT III and CAT IV
measurement categories.
•If the sleeves are removed during measurement, stop the measurement.
CAUTION
The cable is hardened in freezing temperatures. Do not bend or pull it to avoid tearing
its shield or cutting cable.

10
Usage Notes
Model L4937, 9804 Magnetic Adapter Set (optional)
DANGER
P
ersons wearing electronic medical devices such as a pacemaker should not
use the Magnetic Adapter Set. Such persons should avoid even proximity to the
Magnetic Adapter Set, as it may be dangerous. Medical device operation could be
compromised, presenting a hazard to human life.
CAUTION
•Do not subject the Magnetic Adapter Set to mechanical shock, for example, due to
dropping it. Shock can cause it to be chipped or cracked.
•Do not use the Magnetic Adapter Set in locations where it may be exposed to
rainwater, dust, or condensation. In those conditions, the Magnetic Adapter Set
may be decomposed or deteriorated. The magnet adhesion may be diminished. In
such case, the instrument may not be hung in place and may fall.
•Do not bring the Magnetic Adapter Set near magnetic storage device such as
oppy disks, magnetic cards, pre-paid cards, or magnetized tickets. Doing so may
corrupt and may render them unusable. Furthermore, if the Magnetic Adapter
Set is brought near precision electronic equipment such as PCs, TV screens, or
electronic wrist watches, they may fail.

11
1
1Overview
1.1 Product Overview and Features
Measurement function list
Temperature
Capacitance, diode
Continuity check, resistance
AUTO V, AC voltage, DC voltage,
AC+DC voltage
AC current
This instrument is a clamp meter that can
perform true RMS measurement of current
simply by clamping it around a circuit. In
addition to current, it provides voltage
measurement, frequency measurement, rush
current measurement, resistance measurement,
diode measurement, capacitance measurement,
and temperature measurement.
Model CM4142 also provide Bluetooth®
communications functionality, allowing
measurement data to be monitored and logged
from a mobile device.
1 Overview

12
Overview
1.2 Part Names
Front Rear
(CM4141)
7
9
5
1
2
8
12
3
11
4
10
6
1Operation grip
2Jaw open/closed mark
(The jaws are open if the mark is not
showing.)
3SHIFT key
(Selects function indicated in blue lettering.)
4Jaw (p.14)
5Barrier
6Serial number (The serial number consists of
9 digits. The rst two (from the left) indicate
the year of manufacture, and the next two
indicate the month of manufacture.)
7Rotary switch
8HOLD key
9LCD
10 Battery cover
11 Operation keys
12 Measurement terminals

13
2
2Making Measurements
2.1 Inspection Before Measurement
Check if there is any damage to the instrument occurred during storage or shipping and
verify that instrument operates normally before using it. If you nd any damage, contact your
authorized Hioki distributor or reseller.
Check item
The battery cover is closed and its screw has
been securely tightened.
There is no damage to the test lead
insulation, and neither the white sheathing nor
metal conductor inside the wire are exposed.
There is no foreign matter on the
measurement terminals. (p.12)
The instrument is neither damaged nor cracked.
The test leads are not broken.
OK
NO NONO
OK NO NO NO
1 Ωor less
No indicators are missing.
(All lit up)
2 Making Measurements

14
Current Measurement
2.2 Current Measurement
Turn the rotary switch.
1
e.g.: 3P4W (3-phase, 4-wire) circuit
breaker (AC current measurement)
2
Clamp the instrument around a conductor.
3
(AC A)
+Hz
(Frequency)
Hz
(Frequency)
Frequency detection range of AC current
3 A or more (60.00 A range)
30 A or more (600.0 A range)
200 A or more (2000 A range)
Range (p.18)
Default setting is auto range.
Press the RANGE key to switch to manual
range.
Maximize measurement precision by positioning the wire on the
center side of the area mark.
Jaw center
(maximum
precision)
Area mark
This manual suits for next models
2
Table of contents
Other Hioki Measuring Instrument manuals
Popular Measuring Instrument manuals by other brands

Solartone Metrology
Solartone Metrology WIGAUGE User and installation manual

TPS
TPS WP-80M manual

Niigata seiki
Niigata seiki GDCS-150F user manual

Setra Systems
Setra Systems Power Patrol Operator's guide

MindWare Technologies
MindWare Technologies MindWare Mobile product manual

Crowcon
Crowcon CellarSafe Installation and operating instructions