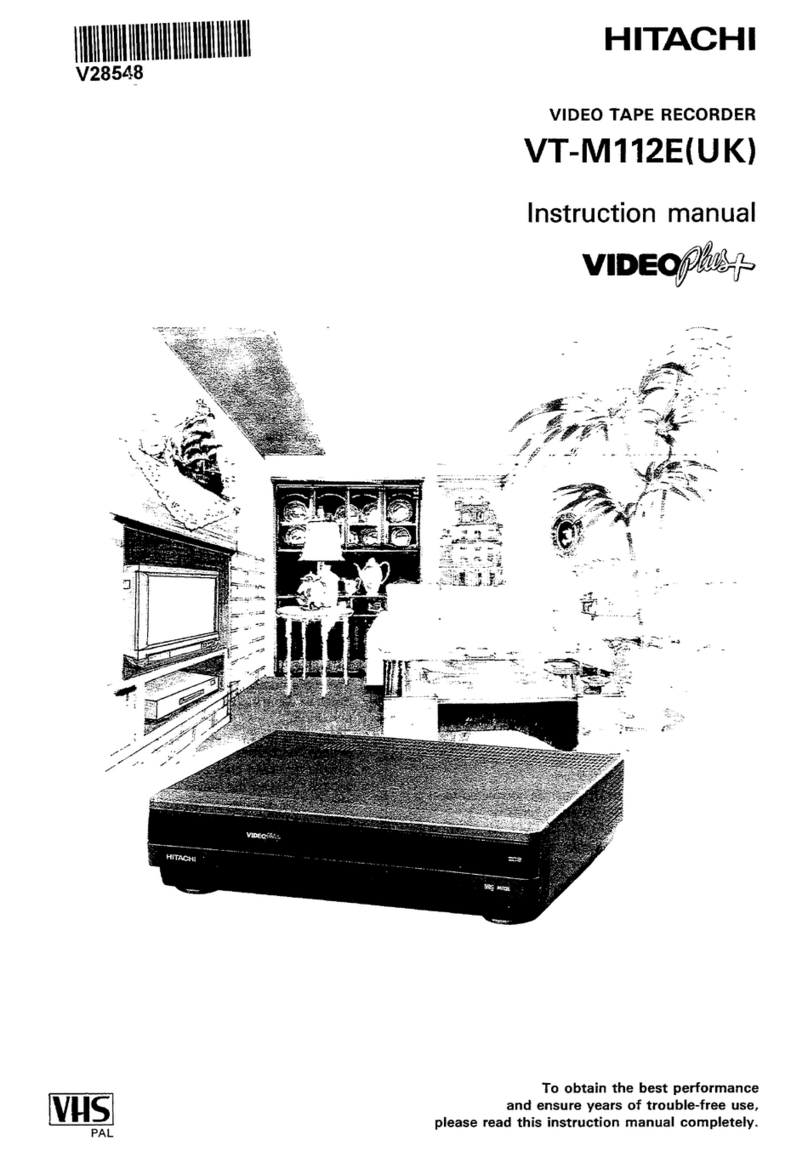
Hitachi ShowView VT-M331E(CT) User manual

ENGLISH
HITACHI
VIDEO
TAPE
RECORDER
VT-M331E(CT)
VT-M335E(VPS)
SHOWVIEW
Photo
VT-M335E
(VPS)
Instruction
manual
To
obtain
the
best
performance
and
ensure
years
of
trouble-free
use,
please
read
this
instruction
manual
completely.
e
ShowView
is
a
trademark
applied
for
by
Gemstar
Development
Corp.
ShowView
system
is
manufactured
under
licence
from
Gemstar
Development
Corporation.
PAL
P
4708425
©
Hitachi,
Ltd.
1994
KS-H
(Y)

INFORMATION
FOR
YOUR
SAFETY
Please
read
the
following
instructions
carefully
before
using
this
VTR.
Mains
supply:
AC
230
V,
50
Hz
only
AC
230
V,
50
Hz
e
The
Operate
button
_
located
on
the
front
of
the
VTR
switches
the
VTR
on
and
off,
leaving
the
clock/
timer
facility
unaffected.
e
As
to
the
indication
of
the
Operate
button,
“I”
shows
ON
and
“”
shows
electical
power
standby.
e
The
Operate
button
is
secondarily
connected
and
does
not
separate
the
apparatus
from
the
mains
supply
in
the
switched-off
position.
On
safety
e
Donot
remove
panel
covers
by
unscrewing.
There
are
no
user
serviceable
parts
inside.
Refer
all
servicing
to
qualified
service
personnel.
e
Should
any
solid
object
or
liquid
fall
into
the
cabinet,
remove
the
mains
lead
and
have
it
checked
by
qualified
personnel
before
operating
it
any
further.
e
To
disconnect
the
mains
lead,
pull
out
the
plug
itself.
Never
pull
the
lead.
e
If
the
unit
is
to
be
left
unattended
for
a
long
period
and
it
is
not
intended
to
use
the
timer
recording
function,
it
is
recommended
that
the
VTR
be
switched
off
and
the
plug
removed.
If
you
intend
to
record
during
your
absence,
remember
there
is
no
necessity
for
the
TV
receiver
to
be
switched
on.
This
product
is
manufactured
to
comply
with
the
radio
interference
requirements
of
EEC
Directive
76/889/EEC
&
82/499/EEC,
87/308/
EEC.
Note:
It
is
permissible
to
record
television
programmes
only
in
the
event
that
third
party
copyrights
and
other
rights
are
not
violated.
Notes
on
colour
broadcasting
systems
1.
This
unit
can
receive
programmes
which
are
broadcast
on
the
B/G-SECAM
system,
and
record
and
play
back
the
programmes
in
black-and-white.
.
When
the
cassette
recorded
in
above
1
is
played
back
on
a
SECAM
or
PAL
recorder,
a
black
and
white
picture
will
be
obtained.
.
When
a
cassette
recorded
on
a
SECAM
recorder
or
a
SECAM
prerecorded
cassette
is
played
back
by
this
unit,
a
black
and
white
picture
will
be
obtained.
.
This
unit
cannot
be
used
in
France.
Please
use
a
SECAM
recorder
there.
WARNING:
To
prevent
fire
or
electric
shock,
do
not
expose
this
equipment
to
rain
or
moisture.
DIFFERENCE
The
VT-M335E
and
VT-M331E
have
completely
the
same
functions
except
that
the
VT-M335E
have
a
VPS
function
but the
VT-M331E
does
not.

REMOTE
OPERATION
This
tells
you
how
to
insert
batteries
into
the
remote
control
handset
and
how
to
operate
your
VTR
remotely.
Power
source
of
infrared
remote
control
handset
The
infrared
remote
control
handset
is
powered
by
two
batteries
(size
IEC
standard
R6).
The
life
of
the
batteries
is
about
a
year
although
it
depends
on
the
number
of
times
the
handset
is
used.
Replace
the
batteries
when
operation
is
not
possible
or
when
the
distance
becomes
too
small.
Remote
operations
To
operate
this
VTR
with
the
remote
control
handset,
set
the
VTR
1/VTR
2/TV
select
switch
on
the
handset
to
the
VTR
1
position,
then
point
it
at
the
receiver
on
the
front
of
the
VTR.
e
The
EJECT,©,
D>,
©&,@,L
and
©
buttons
can
control
your
VTR
even
if
the
VIR1/VTR2/TV
select
switch
is
in
the
TV
position.
VTR
1/VTR
2/TV
switch
The
remote
control
handset
provided
is
designed
to
operate
up
to
two
VT-M331E
or
VT-M335E
units
and
13
different
types
of
TVs.
e
Refer
to
page
16
when
using
the
handset
to
operate
the
TV.
e
For
dubbing
your
own
tapes,
as
an
example,
the
recording
VTR
and
play
back
VTR
can
be
controlled
by
a
single
handset.
However,
this
VTR
has
been
preset
to
be
controlled
as
the
VTR
1.
In
order
to
set
this
VTR
so
it
can
be
controlled
as
VTR
2,
follow
the
“REMOTE
CODE
1/2”
section
on
page
13.
PRE-TUNING
OF
BUILT-IN
TV
TUNER
This
VTR
incorporates
a
complete
TV
tuner
(just
like
your
normal
TV)
and
can
be
pre-tuned
to
receive
up
to
49
TV
programmes.
1
Turn
on
the
TV
and
the
VTR,
then
tune
the
TV
to
the
video
programme
number
as
described
on
page
4
of
the
QUICK
SETUP
GUIDE.
If
you
connect
the
VTR
and
TV
using
a
21-pin
Scart
connector
lead,
select
the
21-pin
Scart
input
of
the
TV.
2
Press
the
MENU
button.
The
menu
appears
on
the
TV
screen.
3
Press
the
button®.
The
menu
disappears
from
the
TV
screen
and
the
VTR’s
display
changes
to
the
channel
preset
display
4
Press
the
TV
PROG
button
to
select
the
programme
number
(one
of
01
through
49)
to
be
memorized.
We
recommend
you
to
set
the
programme
number,
ready
for
“ShowView”
timer
programming.
Notes:
.
e
See
“ShowView”
programming
on
page
7.
e
A
programme
number
which
has
already
been
preset
does
not
flash.
e
Programme
numbers
“01”
through
“49”
can
be
now
selected
consecutively
by
pressing
the
TV
PROG
button
(either
up
or
down).
In
this
case,
you
can
use
any
number
except
for
“25”
through
“29”.
Programme
numbers
“25”
—
“29”
are
used
exclusively
for
“Pay
Television”
broadcasts.
5
Press
and
release
the
button
©)
or
@
to
start
searching
for
a
broadcast
TV
station.
@):
Searches
from
low
frequency
to
high
frequency.
€):
Searches
in
the
reverse
order.
Note:
Press
the
©
button;
stations
are
scanned
in
the
order
VHF
(2-12)
—
UHF
(21-69)
—
CATV
(S1-S41)
—
CATV(U1-U5);
the
colon
(:)
appears
when
scanning
CATV
stations.

6
Press
button
@)
to
store
it
on
this
programme
number
when
the
picture
from
the
station
to
be
preset
appears
on
the
TV
screen.
“__”
will
be
displayed
and
the
sound
will
come
on.
Note:
If
the
picture
appears
a
little
noisy
you
can
fine
tune
the
signal
after
storing
by
pressing
the
©
or
@
to
get
the
best
picture.
After
fine
tuning
for
the
best
picture
press
(@)
button
to
store
again.
7
Repeat
steps
4
through
6
for
other
stations.
8
After
having
completed
pre-tuning
to
all
stations,
press
the
MENU
button
twice.
VHF
(2-12),
UHF
(21-69)
&
CATV
Stations
Direct
Preset
Press
the
10
key
buttons
on
the
remote
control
handset
instead
of
the
procedure
described
in
step
5
to
preset
desired
VHF
and
UHF
stations.
To
preset
channel
22
in
programme
number
01,
for
example,
press
the
TV
PROG
button
to
display
the
programme
number
“ti:”
(in
step
4)
then
press
@
@
on
the
handset.
Then
press
(@)
button
to
store
again.
=
Press
the
ENTER/CATV
button,
then
press
@
©
in
this
order
to
preset
CATV
channel
18.
Eliminating
Unwanted
Preset
Stations
You
can
rearrange
the
desired
stations
by
eliminating
unwanted
preset
stations
for
programme
up/down
tuning.
1
Press
the
MENU
button,
and
then
@.
The
VTR
display
changes
to
the
channel
preset
display.
2
Press
the
TV
PROG
buttons
until
an
unwanted
station
is
found.
3
Press
the
COUNTER
0000
button.
The
programme
number
flashes,
indicating
that
the
station
has
been
erased
from
memory.
4
Repeat
steps
2
and
3
until
all
unwanted
stations
have
been
erased.
5
After
eliminating
them,
press
the
MENU
button
twice.
CASSETTE
TAPES
Only
use
video
cassettes
with
the
IVHS|
mark
in
this
VTR.
Insertion
Push
the
cassette
through
the
door
until
the
VTR
mechauism
pulls
it
into
the
compartment.
The
operate
automatically
turns
on
and
the
indicator
turns
on
when
the
cassette
is
in
place.
Removal
Press
the
EJECT
button
on
the
remote
control
handset
or
the
button
M/&
on
the
VTR.
The
cassette
will
come
partially
out
of
the
compartment
so
you
can
pull
it
out.
e
The
indicator
turns
off
when
the
cassette
is
ejected.
e
Cassette
can
be
ejected
with
the
operate
on
or
off.
Remember
that:
—
The
VTR
automatically
enters
the
play
back
mode
when
a
cassette
without
a
safety
tab
is
inserted.
—
The
VTR
automatically
ejects.
the
cassette
if
the
REC
or
REC/IRT
button
is
pressed
when
a
cassette
without
a
safety
tab
is
in
the
VTR.
—
Be
sure
to
check
the
safety
tab
before
inserting
a
cassette
for
the
above
reasons.
To
avoid
erasing
a
recording
Break
off
the
safety
tab
using
a
screwdriver
or
similar
tool
To
re-record
on
a
cassette
which
has
its
safety
tab
removed
Cover
the
hole
with
cellophane
tape

PLAY-BACK
Start
point:
Turn
the
TV
set
on
and
select
the
video
programme
number.
1
Insert
a
cassette.
Note:
When
a
cassette
(with
its
safety
tab
removed)
is
loaded,
play-back
starts
automatically.
2
Press
the
button.
During
play-back
you
can
use
the
following
features.
Still
play-back
Press
the
button
®
to
stop
the
picture
on
the
screen
during
play-back.
Press
the
button
again
to
reset
to
normal
play-
back.
If
the
screen
“jitters”
vertically,
this
can
be
improved
by
pressing
the
TRACKING
buttons.
Frame
advance
Press
the
button,
®
to
advance
the
picture
to
the
next
frame
during
still
play-back.
Pressing
and
holding
the
button
@)
advances
the
frames
continuously.
Slow
function
Press
the
SLOW
button
during
play-back,
and
the
tape
will
be
played
back
at
slow
speed.
Then
use
the
SLOW
SPEED
buttons
to
vary
the
play-back
speed.
Visual
search
Press
either
the
©
or
©
button
during
play-
back.
Pictures
can
be
viewed
at
high
speed
in
either
the
forward
or
reverse
direction.
Press
the
button
again
(or
press
the
button
[>
:)
to
return
to
normal
play-back.
Play-back
using
shuttle
ring
Use
of
the
shuttle
ring
allows
many
different
kinds
of
play-back
—
slow-motion
play,
normal
play,
double-speed
play,
forward
search,
reverse
play,
reverse
double-speed
play
and
reverse
search.
Note:
If
the
shuttle
ring
is
operated
in
the
stop
mode,
the
VTR
enters
the
fast
forward
or
rewind
mode.
The
shuttle
ring
is
turned
during
play-back
,
turning
the
ring
to
the
positions
indicated
gives
the
special
effects
indicated.
Release
your
hand
from
the
shuttle
ring
for
normal
play.
3
Press
either
the
button(lor
@/4
to
stop
play-back.
Notes:
e
If
there
is
a
noise
bar
on
the
picture
during
still
or
slow
motion
play,
press
the
SLOW
button
and
then
either
of
the
TRACKING
buttons
until
the
noise
is
reduced.
e
To
prevent
tape
damage,
the
VTR
will
switch
from
the
still/slow
mode
to
the
stop
mode
after
about
5
minutes.
Auto
Tracking
When
play-back
is
started,
the
auto
tracking
function
operates
and
adjusts
tracking
automatically
so
the
picture
is
optimized.
e
Auto
tracking
may
not
operate
correctly
when
the
tape
is
scratched
or
the
recorded
condition
is
poor.
In
this
case,
press
a
TRACKING
control
button
(VW
or
A)
to
adjust
tracking.
e
If
the
AUTO
TRACKING
button
is
pressed
after
operating
a
TRACKING
control
button
(¥
or
A),
auto
tracking
operates
again.
e
The
auto
tracking
function
does
not
operate
with
tapes
recorded
in
the
LP
mode.
Adjust
the
tracking
manually.

RECORDING
TV
PROGRAMMES
1
Insert
a
cassette.
Note:
Be
sure
to
check
that
the
safety
tab
is
not
missing
.
If
it
is
removed,
the
VTR
is
set
to
the
play-back
mode
automatically.
2
Select
the
programme
to
be
recorded
by
pressing
the
TV
PROG
buttons
or
two
number
buttons.
3
Press
the
REC
or
REC/IRT
button.
Now,
recording
starts.
If
you
want
to
avoid
recording
unwanted
material,
press
the
®
button.
Press
the
button
again
to
continue
recording.
To
prevent
tape
damage,
the
VTR
will
automatically
switch
from
record/pause
to
the
stop
mode
after
about
5
minutes.
4
After
the
recording
has
been
made
press
the
button
(j
or
M/4.
INSTANT
RECORDING
TIMER
(IRT)
1
Ensure
the
time
is
correct
in
the
VTR’s
display.
2
Start
recording
as
described
in
“RECORDING
TV
PROGRAMMES”.
3
To
start
the
IRT
recording
press
the
REC
or
RECART
button
again.
The
recording
time
is
then
indicated
in
the
display.
Press
the
REC
or
REC/IRT
button
until
you
select
the
required
recording
time,
the
time
changes
in
hours
and
minutes
in
the
following
sequence;
0:30, 1:00,
1:30,
2:00,
3:00,
4:00.
During
recording
the
remaining
time
is
displayed.
At
the
end
of
the
recording
time,
when
the
display
shows
0:00,
the
VTR
will
automatically
stop
recording.
To
stop
recording
during
IRT
Either,
press
the
OPERATE
button
and
then
stop
button
({_jor
M/4)
within
10
seconds;
or,
press
the
REC
or
REC/IRT
button
until
the
VTR’s
display
changes
from
recording
time
to
the
clock
time
and
then
press
the
stop
button[_Jor
a/s.

TIMER
RECORDING
The
built-in
24-hour
timer
permits
the
unattended
recording
of
up
to
8
preselected
programmes
within
a
period
of
1
year,
including
daily
and
weekly
programmes.
In
additional
to
the
conventional
timer
programming
procedure,
this
VTR
incorporates
a
new
programming
procedure
called
“ShowView”.
This
VTR
cannot
record
in
the
LP
mode.
When
tapes
recorded
in
the
LP
mode
are
played
back
the
picture
and
sound
may
not
be
normal.
However,
this
does
not
indicate
a
fault.
Please
see
auto
tracking
feature,
page
5.
1
Make
sure
that
the
clock
shows
the
present
time
correctly.
2
Insert
a
cassette.
Be
sure
to
check
that
the
record
safety
tab
is
not
missing.
If
the
safety
tab
is
missing,
recording
will
not
begin.
3
Programme
the
timer.
See
pages
7
to
11
for
details.
4
Press
the
OPERATE
button
(OFF).
To
interrupt
a
recording
after
it
starts
press
the
Operate
button
and
then
the
Stop
button
within
10
seconds.
If
a
cassette
with
its
safety
tab
snapped
off
is
inserted,
if
will
be
ejected
automatically
and
the
indicator
©
in
the
VTR's
display
will
start
flashing
when
operate
is
turned
off.
In
this
case,
insert
a
cassette
with
its
safety
tab
in
place
or
cover
the
hole
with
cellophane
tape.
Also,
if
a
cassette
is
not
loaded
in
the
VTR,
the
indicator
©
starts
flashing.
Programming
the
timer
This
VTR
incorporates
two
programming
procedures
for
timer
recording.
One
is
conventional
and
the
TV
programme
No.,
start
time,
stop
time,
recording
date,
etc..
must
be
input,
and
the
other
is
called
“ShowView”
and
up
to
9
digits
must
be
input.
Programming
the
timer
using
“ShowView”
Things
to
know
before
starting
programming.
e
To
find
the
“ShowView”
number,
look
in
the
TV
section
of
most
newspapers
or
TV
guide
magazines.
e
Check
time
and
date
are
correct.
e
You
have
about
one
minute
to
complete
_
each
step
of
the
procedure.
If
you
do
not
proceed
to
the
next
step
within
this
time,
all
entries
are
erased
and
you
must
start
again.
TRACKING
VTR
1/
VTR
2/
TV
1
Set
the
VTR1/VTR2/TV
select
switch
to
VTR1.
2
Press
the
SHOWVIEW
button.
3
Enter
the
“ShowView”
number
from
the
TV
guide
or
newspaper
etc.
for
the
programme
you
want
to
record,
by
using
the
number
buttons.

4
After
entering
the
“ShowView”
number,
press
the
ENTER/CATV
button.
The
programmed
details
appear.
Changing
the
TV
programme
Allocations
When
you
enter
the
“ShowView”
number,
the
programmed
details
will
appear
on
the
remote
display.
1.If
you
change
the
TV
programme
allocation,
_
press
the
CORRECT
button
once.
The
first
digit
of
the
TV
programme
number
starts
flashing.
2.Then
enter
the
correct
TV
programme
number.
3.Press
the
ENTER/CATV
button.
Now
the
programme
number
has
been
memorized.
Notes:
e
If
you
change
the
TV
programme
allocations
by
following
the
above
steps,
the
TV
programme
number
will
be
automatically
written
with
the
alternated
programme
number
when
you
programme
hereafter.
e
If
you
want
to
record
from
an
external
video
equipment
connected
to
the
Scart
socket,
press
the
TRANS/AUX
button
to
change
the
TV
programme
number
to
“L1”.
e
If
selecting
decoder
input,
select
25
to
29
(See
page
15).
If
you
wish
to
change
the
end
(OFF)
time,
press
the
TRACKING
button
A
or
V.
The
end
(OFF)
time
can
be
changed
by
up
to
60
minutes
in
10
minutes
intervals.
Notes:
e
Use
of
“ShowView”
numbers.
“ShowView”
numbers
only
record
programmes
at
the
times
shown
in
the
TV
guide.
The
VTR
timer
will
not
follow
the
TV
programme
if
the
time
is
changed
for
any
reason
(e.g.
delayed
due
to
a
previous
programme).
e
When
you
press
the
ENTER/CATV
button,
“VPS”
will
appear.
The
VPS
function
is
provided
only
with
the
VT-M335E.
If
you
do
not
want
to
use
this
function,
press
the
TV
PROG
(A)
button
to
switch
off
the
VPS
indicator.
Since
the
VT-M331E
does
not
have
the
VPS
function,
ignore
letters
“VPS”.
If
this
indicator
is
confusing,
press
the
TV
PROG
(A)
button
to
switch
it
off.
a
Be
5
Select
the
type
of
programme
you
want
to
record.
If
you
are
programming
the
timer
for
one
time
recording,
skip
this
step.
To
record
at
the
same
time
every
day
of
week
Press
the
7
(DLY/WKL)
button
once
to
display
all
days.
If
you
want
to
change
the
first
recording
date,
press
the
CORRECT
button
repeatedly
until
the
first
digit
of
day
starts
flashing.
(If
the
flashing
cursor
passes
the
first
digit
of
day,
press
the
CORRECT
button
repeatedly
again
until
the
flashing
cursor
reaches
the
first
digit
of
day.)
Then
select
the
first
recording
date
using
the
number
buttons.
To
record
on
a
specified
day
at
the
same
time
each
week
1.
Press
the
7
(DLY/WKL)
button
twice.
The
“WKL”
appears.
2.
Press
the
7
(DLY/WKL)
button
repeatedly
until
the
desired
day
of
the
week
you
want
to
record
appears.
6
Press
the
TRANS/AUX
button
to
transfer
the
programmed
details
to
the
VTR.
The
operate
may
be
on
or
off
when
transferring
the
programmed
details.
The
VTR
shows
the
timer
programme
number
for
a
few
seconds.
If
the
TV
is
turned
on
and
tuned
to
the
video
channel,
the
programmed
details
appear
on
the
TV
screen
for
a
few
seconds.

7
Press
the
CLOCK
button
to
switch
the
display
panel
back
to
the
clock/calendar
display.
8
if
you
want
to
programme
other
event,
repeat
steps
1
to
7.
9
To
activate
the
VTR’s
timer
and
make
a
recording
at
the
preselected
time,
be
sure
to
‘
press
the
OPERATE
button
(OFF).
.
Of
course
a
cassette
which
has
an
intact
safety
tab
must
be
inserted.
Operating
notes:
If
you
have
entered
a
wrong
number
in
step
3.
“Error”
will
appear
on
the
remote
display
when
the
ENTER/CATV
button
is
pressed.
in
this
case,
enter
the
correct
number
again.
e
If
the
TRANS/AUX
button
is
pressed
when
all
the
programme
numbers
that
the
VTR
can
store
are
occupied,
a
“FULL”
indication
will
appear
in
the
display
on
the
VTR
and
the
information
.
transferred
will
be
rejected.
e
See
page
11
for
recalling
and
clearing
the
-
programming
from
the
VTR
memory
and
for
programme
priority.
Programming
the
timer
without
using
“Show
View”
Things
to
know
before
starting
programming
e
While
you
are
programming
the
timer,
the
display
panel
on
the
handset
will
prompt
you
through
the
procedure.
e
Always
press
“0”
before
a
single-digit
channel,
hour
and
minute
etc.
e
You
have
about
one
minute
to
complete
each
step
of
the
procedure.
If
you
do
not
proceed
to
the
next
step
within
this
time,
all
entires
are
erased
and
you
must
start
again.
e
You
can
correct
an
error
in
the
programme
any
time
before
the
last
step
by
pressing
the
CORRECT
button
repeatedly
until
the
digit
to
be
corrected
flashes
and
then
enter
the
correct
digit.
e
Check
time
and
date
are
correct.
TRANS/
AUX
PROG
1
Set
the
VTR
1/VTR
2/TV
select
switch
to
VTR
1.
2
Press
the
PROG
button.
Note:
When
you
press
the
PROG
button,
“VPS”
will
appear.
The
VPS
function
is
provided
only
with
the
VT-M335E.
If
you
do
not
want
to
use
this
function,
press
the
TV
PROG
(A)
button
to
switch
off
the
VPS
indicator.
Since
the
VT-M331E
does
not
have
the
VPS
function,
ignore
letters
“VPS”.
If
this
indicator
is
confusing,
press
the
TV
PROG
(4)
button
to
switch
it
off.
3
Select
the
TV
programme
number
to
be
recorded.
;
For
example,
press
04
for
TV
station
4.

To
record
video
and
audio
signals
from
external
equipment
via
the
Scart
socket
on
the
back
of
the
VTR,
or
VIDEO
IN/AUDIO
IN
sockets
on
the
front
of
the
VTR
press
the
TRANS/AUX
button
so
that
“L1”
is
displayed
in
the
display
panel
in
place
of
a
programme
number.
When
you
press
the
TRANS/AUX
button,
“L1”
or
“L2”
will
appear.
Ignore
“L2”
because
it
is
not
concerned
with
recording
in
this
model.
Note:
If
selecting
decoder
input,
select
25
to
29
(see
page
15).
4
Select
the
start
time.
For
example,
press
1
6
0
0
for
16:00
(4:00
p.m.).
0:00
for
midnight
12:00
for
noon
5
Select
the
stop
time.
For
example,
press
1
8
0 0
for
18:00
(6:00
p.m.).
6
Select
the
date
for
recording.
To
record
on
a
single
day
up
to
one
year
ahead.
For
example,
press
1
7 0
9
to
begin
recording
on
the
17th
of
september.
To
record
at
the
same
time
every
day
of
the
week
Select
the
first
recording
date
using
the
number
buttons.
Then
press
“7”
[DLY/WKL]
button
once
to
display
all
days.
To
record
on
a
specified
day
at
the
same
time
each
weak
Press
the
“7”
[DLY/WKL]
button
repeatedly
until
the
desired
day
of
the
week
you
want
to
record
appears.
7
Now,
programming
has
been
completed
to
record
one
event.
Press
the
TRANS/AUX
button
while
aiming
the
handset
at
the
receiver
on
the
VTR.
The
operate
may
be
on
or
off
when
transferring
the
programmed
details.
The
VTR
shows
the
timer
programme
number
for
a
few
seconds.
lf
the
TV
is
turned
on
and
tuned
to
the
video
programme
number,
the
programmed
details
appear
on
the
TV
screen
for
a
few
seconds.
8
Press
the
CLOCK
button
to
switch
the
display
panel
on
the
handset
back
to
the
clock/
calendar
display.
9
If
you
want
to
programme
other
programmes,
repeat
steps
2
to
8.
10
To
activate
the
VTR's
timer
and
make
a
recording
at
the
preselected
time,
be
sure
to
press
the
OPERATE
button
(OFF).
Of
course
a
cassette
which
has
an
intact
safety
tab
must
be
inserted.
Operating
Notes:
e
If
your
timer
programme
has
a
TV
programme
channel
number
that
you
have
not
preset
in
the
VTR,
“Err”
is
displayed
on
the
VTR
display
when
you
try
to
transfer
this
programme
to
the
VTR.
In
this
case,
correct
the
channel
then
transfer
the
data
to
the
VTR
again.
e
If
the
TRANS/AUX
button
is
pressed
when
all
the
programme
numbers
that
the
VTR
can
store
are
occupied,
a
“FULL”
indication
will
appear
in
the
display
on
the
VTR
and
the
information
transferred
will
be
rejected.
=H

VPS
(Video
Programme
System)
FUNCTION
(only
for
VT-M335E(VPS))
Recalling
and
clearing
the
programme
The
VT-M335E
(VPS)
incorporates
the
VPS
from
the
VTR’s
memory
function.
a
SS
if
the
VTR
is
tuned
to
a
TV
station
transmitting
a
VPS
signal,
the
VTR
automatically
takes
any
delay,
earliness
or
extension
of
the
programme
into
account
and
can
record
the
specified
programme.
For
example,
assume
that
you
programme
the
timer
for
a
football
game
on
station
8
from
19:00
to
20:45
on
Saturday
and
the
football
game
which
is
broadcast
is
changed
to
21:00
to
23:00,
the
VPS
function
works
and
the
VTR
records
the
football
game
automatically
from
21:00
to
23:00.
When
the
VTR
is
tuned
to
a
station
transmitting
a
“VPS
signal,
“VPS”
automatically
appears
in
the
display
of
the
VTR.
Programming
the
timer
for
unattended
recording
automatically
turns
on
the
VPS
function.
1
Turn
on
the
VTR
and
TV
Be
sure
that
the
TV
is
set
to
the
video
programme
number.
2
Press
the
MENU
button.
The
OSD
menu
appears
on
the
TV
screen.
3
Press
the
“1”
button
(PROGRAMME
REVIEW).
The
TV
screen
will
display
the
information
you
entered
for
the
lowest
programme
number
for
10
seconds.
Press
“1”
again
if
you
want
to
view
the
next
programme
information
immediately.
NO.
1
NOTES:
TV
CHANNEL
04
1.
To
switch
off
the
VPS
function,
press
the
@16:00
+
18:00
VPS
button
once
during
programming
of
the
timer
so
the
“VPS”
display
disappears.
DATE
17/08/94
SAT
“1
¢NENT
Pressing
the
button
again
turns
VPS
on.
Soret
©
been
ED
2.
Always
programme
the
timer
for
one
TV
programme
to
record
the
programme
with
the
VPS
function
turned
on.
If
you
programme
the
timer
for
a
football
game
and
a
movie
on
4
To
clear
a
programme,
press
the
“0”
button
when
the
programme
information
you
want
to
clear
is
displayed.
One
event
timer
programme
data
is
erased
from
the
VTR’s
memory
when
the
timer
recording
is
finished,
but
daily
and
weekly
programmes
remain
in
the
VTR’s
memory
even
after
the
timer
recording
is
finished.
When
you
finish
reviewing
the
programmes,
press
the
MENU
button
to
switch
off
the
on-
screen
display.
-~11-—
station
3
sequentially
from
10:00
to
14:00
for
example,
only
the
football
game
will
be
recorded
but
the
movie
will
not.
In
this
case,
programme
the
timer
with
the
VPS
off
or
input
the
other
programme
using
another
programme
number
to
turn
the
VPS
function
on
again.
.
When
the
VTR
is
tuned
to
a
station
transmitting
a
VPS
signal
but
the
signal
conditions
are
poor,
“VPS”
will
disappear
from
the
display.
In
this
case,
programme
the
timer
with
VPS
turned
off.
If
you
programme
the
timer
with
VPS
turned
on,
the
VPS
function
does
not
operate
normally.

SPECIAL
CHARACTERISTICS
Linear
time
counter
Press
the
COUNT/CLOCK
button
to
select
the
linear
time
counter
display.
Every
time
the
button
is
pressed,
it
changes
the
VTR’s
display
between
the
clock
time
display
and
time
counter
display.
Counter
memory
function
This
is
useful
if
there
is
a
section
of
tape
you
want
to
view
immediately
after
recording
or
if
you
want
to
return
to
the
same
point
several
times.
1.
Start
recording
or
playing
back
a
tape.
2.
Press
the
COUNT/CLOCK
button
to
display
the
time
counter
in
the
VTR’s
display.
3.
At
the
point
where
you
want
play-back
to
start,
reset
the
tape
counter
to
“0:00:00”
by
pressing
the
0000
button.
.
Continue
to
play
or
record.
.
Press
the
button
(_]
or
M/&
when
recording
or
play-back
finishes.
6.
Press
the
button@).
The
tape
will
stop
automatically
at
approximately
the
“0:00:00”
position.
oof
Automatic
rewind
The
VTR
automatically
rewinds
the
tape
when
the
end
of
tape
is
reached.
To
prevent
accidental
erasure,
the
VTR
does
not
rewind
the
tape
during
timer
recording.
Rewind
shut
off
Sa
-
If
the
OPERATE
or
[Le}button
is
pressed
during
the
rewind
operation,
the
operate
will
be
turned
off
automatically
after
the
tape
has
been
completely
rewound.
if
the
time
counter
is
turned
on,
the
VTR
will
stop
rewinding
and
switch
off
at
the
specified
position.
Mode
lock
function
Press
the
CORRECT
button
and
button
number
6
on
the
remote
control
handset
simultaneously.
The
VTR
mode
is
locked
and
“t
71”
appears
in
the
VTR
display
and
also
“(_
)”
is
displayed
on
the
TV
screen.
When
the
VTR
operating
mode
is
locked,
the
VTR
accepts
remote
control
operations
but
it
does
not
accept
any
operations
from
the
buttons
on
the
VTR.
To
release
the
VTR
lock,
press
the
CORRECT
button
and
button
“6”
at
the
same
time
again
or
press
the
OPERATE
button
on
the
handset.
Tape
remaining
display
function
When
you
start
playback,
recording,
fast
forward
or
rewind
with
the
OSD
turned
on,
the
remaining
time
appears
on
the
TV
screen
as
shown
on
the
right
for
approx.
5
seconds.
:
Index
function
The
cassette
tape
may
be
recorded
using
the
tape
indexing
feature
for
rapid
location
of
any
section.
1
Press
the
INDEX
button
when
a
cassette
is
loaded
and
the
VTR
is
in
the
stop
mode.
BCOUNTER
GO-TO
TIME
-i--
@INDEX
‘<>.
me
ESTART
“INDEX
«END
2
Press
the
button
@
or
@.
The
tape
will
be
rewound
or
fast
forwarded
until
an
index
mark
is
detected.
3
When
the
VTR
has
located
an
index
mark,
it
will
enter
the
play-back
mode
for
approximately
15
seconds.
4
When
you
see
the
programme
you
want
to
watch,
press
the
button
[>
to
start
play-back.
The
INDEX
indicator
will
disappear
from
the
TV
screen.
COUNTER
GO-TO
function
The
VTR
will
automatically
run
from
anywhere
on
the
tape
(either
forward
or
backward)
for
a
certain
time
using
the
time
counter.
1
Press
the
INDEX
button
when
a
cassette
is
loaded
and
the
VTR
is
in
the
stop
mode.
2
Press
the
number
buttons
(0
to
9)
to
enter
the
amount
of
time
(hours
and
minutes)
you
want
to
run
the
tape
(either
forwards
or
backwards).
BCOUNTER
GO-TO
TIME
0:25
25
<<)
oe
START
*0000°
«CLEAR
“
TNDEN*
+E
ND
Then
press
the
button
©)
to
run
the
tape
forwards
or
the
button
©
to
run
the
tape
backwards.
3
The
VTR
will
automatically
fast
forward
or
rewind
the
tape
to
locate
the
point
on
the
tape
you
have
chosen,
and
begin
playing
back
the
tape.
ee
eee

MENU
FEATURES
Pressing
the
MENU
button
will
show
you
various
displays.
1
Turn
on
the
operate
switches
of
the
VTR
and
the
TV,
then
set
the
TV
to
the
video
programme
number.
2
Point
the
remote
control
handset
at
the
receiver
on
the
front
of
the
VTR.
Press
the
MENU
button.
The
menu
will
appear
on
the
TV
screen.
Press
a
numeric
button
to
select
the
required
display.
Refer
to
the
procedure
shown
below.
Checking
(reviewing)
the
programme
information
Press
“1”.
The
TV
screen
will
display
the
information
you
entered
for
the
lowest
programme
number
for
10
seconds.
Language
selection
You
can
change
the
language
of
the
messages
displayed
on
the
TV
screen,
1.
Press
“3”.
2.
Press
the
numeric
button
corresponding
to
the
language
you
want.
DEMO
(OSD
demonstration)
Press
“4”.
The
picture
demonstrating
the
OSD
effects
are
each
displayed
for
about
10
seconds.
OSD
[0]
or
[-]
Press
“5”
to
change
the
On-Screen
Display
setting.
[O]:
Whenever
you
change
the
mode,
the
new
mode
is
automatically
displayed
on
the
TV
screen
for
a
few
seconds.
{[-]:
The
OSD
will
be
switched
off
and
nothing
will
be
displayed
on
the
TV
screen
even
when
the
DISP
button
is
pressed.
RENTAL
PLAY
[0]
or
[-]
Press
“6”
to
change
the
Rental
Play
setting.
[O]:
The
VTR
will
automatically
start
play-back
when
a
cassette
with
its
safety
tab
removed
is
inserted
into
the
VTR.
Then
the
VTR
will
enter
the
rewind
mode
when
the
tape
reaches
its
end
or
when
the
VTR
plays
a
non-recorded
section
for
approximately
30
seconds.
After
rewinding
the
tape
to
its
beginning,
the
VTR
will
eject
the
cassette
and
turn
the
operate
off.
[-]:
The
rental
play
feature
is
switched
off.
ENDLESS
PLAY
[0]
or
[-]
Press
“7”
to
change
the
Endless
Play
setting.
[O]:
You
can
play
the
tape
from
the
beginning
to
the
end
repeatedly.
While
in
the
endless
play
mode,
you
can
perform
still
play,
frame
advance,
visual
search,
etc.,
however,
this
does
not
mean
the
endless
play
feature
is
switched
off.
[+4]:
The
endless
play
feature
is
switched
off.
REMOTE
CODE
[1]
or
[2]
Press
“8”
to
change
the
Remote
Code
setting.
[1]:
Your
VTR
will
respond
to
the
“VTR
1”
position
on
the
handset.
[2]:
Your
VTR
will
respond
to
the
“VTR
2”
position
on
the
handset.
The
VTR
will
only
respond
to
the
remote
code
setting
[1]
or
[2]
you
have
selected.
If
you
select
[2],
you
must
set
the
VTR
1/VTR
2/TV
switch
on
the
handset
to
the
“VTR
2”
position
before
the
VTR
will
respond
to
the
handset.
43

EDITING
Recording
VTR
Tape
Dubbing
1
Connect
the
second
video
equipment
to
this
VTR
as
shown
above.
(Refer
to
the
manual
of
second
video
equipment
for
connection.)
In
this
case,
the
TV
must
be
connected
to
the
RF
OUT
terminal
of
this
VTR.
For
tape
dubbing,
you
can
also
connect
the
playback
VTR
to
the
VIDEO
IN
and
AUDIO
IN
sockets
on
the
front
of
the
VTR
instead
of
the
Scart
socket.
If
a
VIR
is
connected
to
the
Scart
socket
in
this
state,
you
will
not
be
able
to
see
the
picture
or
hear
the
sound
from
the
VTR
connected
to
the
Scart
socket.
2
insert
a
blank
cassette
into
the
VTR
for
recording,
and
the
source
cassette
into
the
play-back
VTR.
3
Press
the
TRANS/AUX
button
to
select
the
“L1”
position
if
you
use
this
VTR
as
a
recorder.
Note:
When
the
VIDEO
IN
and
AUDIO
IN
sockets
are
used,
press
the
TRANS/AUX
button
to
select
the
“L1”
position
after
connecting
a
VTR
to
them.
4
Press
the
REC
button
on
the
recording
VIR
and
Play
on
the
piay-back
VTR.
ll
To
RF
OUT
5
To
edit
out
unwanted
material,
press
the
Pause
button
on
the
recording
VTR
while
it
is
recording
at
the
appropriate
time.
Press
the
Pause
button
again
to
resume
recording.
6
To
end
tape
dubbing,
press
both
Stop
buttons.
Synchro
Editing
Synchro
edit
makes
tape
copying
easy
by
connecting
two
compatible
VTR’s
with
the
optional
synchro
edit
cable.
1
Connect
the
second
VTR
to
this
VTR
as
shown
above.
After
that,
when
this
VTR
is
used
as
the
recording
VTR
connect
the
EDIT
IN/OUT
socket
of
this
VTR
to
the
SYNCHRO
OUT
socket
of
the
play-back
VTR.
If
this
VTR
is
used
as
the
play-back
VTR,
connect
the
EDIT
IN/OUT
socket
of
this
VTR
to
the
SYNCHRO
IN
or
CAMERA
PAUSE
socket
of
the
recording
VTR.
2
Press
the
TRANS/AUX
button
to
select
the
“L1”
position.
3
Insert
the
cassette
that
you
want
to
copy
in
the
play-back
VTR.
Locate
the
place
on
the
tape
you
want
to
begin
copying
and
set
the
VTR
to
the
play-pause
mode.
—~14-—

4
Place
a
cassette
with
its
safety
tab
intact
in
the
recording
VTR.
Set
the
recording
VTR
to
the
recording-pause
mode.
5
Press
the
Pause
button
on
the
play-back
VTR
to
start
copying
the
tape.
Both
VTRs
will
start
together.
6
Press
the
Pause
button
on
the
play-back
VTR
again
when
you
want
to
interrupt
copying
the
tape.
Both
VTRs
will
enter
the
pause
mode.
7
If
the
next
segment
you
want
to
copy
is
located
at
some
distance
away
on
the
tape,
use
the
Fast
forward,
Rewind,
or
Play
button
on
the
play-back
VTR
to
locate
the
place
on
the
tape
you
want
to
begin
copying
again.
Then
set
the
play-back
VTR
to
the
play-pause
mode.
Press
the
Pause
button
again
and
both
VTRs
will
begin
copying.
8
Press
the
Stop
buttons
on
both
VTRs
when
you
are
finished.
OPERATING
THE
VTR
WHEN
A
“PAY
TELEVISION”
DECODER
IS
CONNECTED
Connect
the
TV,
VTR
and
“Pay
Television”
decoder
and
then
preset
the
“Pay
Television”
programme
frequency
into
the
VTR
tuner.
1
Turn
on
the
power
of
the
TV,
VTR
and
decoder.
2
Perform
steps
1
—
4
in
“Pre-tuning
of
built-in
TV
tuner’
on
page
3
to
select
one
of
station
numbers
25
—
29.
3
Press
buttons
@
—
©®
of
the
remote
control
to
select
the
number
of
the
“Pay
Television”
programme
which
you
want
to
memorize
in
the
station
number.
4
Perform
steps
6
—
8
on
page
4
to
memorize
the
number
of
the
“Pay
Television”
programme
in
the
station
number.
Now,
the
“Pay
Television”
programme
frequency
has
been
preset.
To
record
the
“Pay
Television”
programme
while
viewing
it
1.
Turn
on
the
power
of
the
TV
and
VTR.
2.
Set
the
TV
to
the
channel
for
VTR
(video
channel).
3.
Press
the
TV
PROG
button
of
the
VTR
to
select
the
“Pay
Television”
programme.
4.
Start
recording.
To
record
the
“Pay
Television”
programme
while
viewing
a
programme
other
then
the
“Pay
Television”
programme
1.
Turn
on
the
power
of
the
TV
and
VTR.
2.
Press
the
TV
PROG
button
of
the
VTR
to
select
the
“Pay
Television”
programme
3.
Press
the
TV
PROG
button
of
the
TV
to
select
the
programme
to
be
viewed.
4.
Start
recording.
S45
=

HOW
TO
OPERATE
YOUR
TV
BY
USING
THE
REMOTE
CONTROL
HANDSET
This
remote
control
handset
is
designed
to
operate
13
different
types
of
TV's.
You
must
first
programme
the
handset
to
match
the
remote
system
of
your
TV.
1
Install
the
batteries
in
the
handset.
2
Turn
on
your
TV.
3
Set
the
VTR
1/VTR
2/TV
select
switch
to
TV.
4
Press
the
OPERATE
and
CORRECT
buttons
at
the
same
time.
“O1
TV”
appears
in
the
display.
‘
Point
the
handset
towards
the
front
of
your
TV,
then
press
and
hold
down
the
Volume
(,
or
v)
button.
If
the
volume
of
the
sound
from
your
TV
changes,
your
TV
can
be
controlled
by
this
handset.
Press
the
CLOCK
button
to
clear
the
“O1
TV”
in
the
display.
The
buttons
on
the
handset
shown
below
will
now
control
your
TV.
If
your
TV
does
not
change
volume,
follow
the
next
procedure.
OPERATE
Button
e
Press
to
turn
on
your
TV.
e
Press
again
to
turn
off
your
TV.
TV
PROG
A/V
Buttons
e
Press
TV
PROG
(A
or
¥)
to
change
the
TV
programme
number.
~16-
5
Press
the
TRACKING
button
A.
“O02
TV”
appears
in
the
display.
6
Point
the
handset
towards
the
front
of
your
TV,
then
press
and
hold
down
the
Volume
(,
or
v)
button.
If
the
volume
of
the
sound
from your
TV
does
not
still
change,
press
the
TRACKING
A/¥
button
and
try
“O03
TV",
“O04
TV”...“14
TV”.
7
After
programming
the
TV
code
number,
press
»
the
CLOCK
button
to
return
to
the
normal
remote
display.
Most
buttons
on
the
handset
will
not
control
the
TV
unless
the
VTR
1/VTR
2/TV
select
switch
is
set
to
TV.
Be
sure
to
check
that
the
VTR
1/VTR
2/TV
select
switch
is
set
to
TV
when
you
control
your
TV.
Number
Buttons
0
—
9
e
Depending
on
the
type
of
TV,
these
buttons
can
either
control
the
TV
or
not.
Mute
Button
e
Press
the
Mute
button
to
quickly
reduce
the
volume
to
the
minimum
level
without
affecting
the
picture.
¢
To
restore
the
sound,
press
the
Mute
button
again.
Volume
~/v
Buttons
e
Press
Volume
a
to
increase
the
volume,
v
to
decrease.

010]
(07,
Gi)
am
U]
ae,
8)
|3)
=
a
lheKealM
Ace
(-toMmE-)el-Mat-(nelae(-4
VT-M331E(CT)
VT-M335E(VPS)
Dear
Hitachi
Customer,
Congratulations
on
your
choice
of
Hitachi
video
tape
recorder
(VTR).
Welcome
to
our
company-
wide
commitment
to
your
complete
satisfaction
and
viewing
enjoyment.
Before
using
your
Hitachi
VTR
for
the
first
time,
we
suggest
that
you
spend
a
few
minutes
reading
these
set-up
instructions.
Even
if
you
have
never
used
a
VTR
before,
you
can
get
your
VTR
connected
and
preset
quickly
by
following
this
quick
set-up
guide.
Contents
*
Accessories
SUPPlied
........cessesssecseseseeesseeees
1
©
Installation...
eeeeeessccerssssssecseessessssssessenseesevene
2-3
*
Setting
the
Video
Programme
Number
OM
NOUN
TV
esse
stasceseceascdscueseeStosoatsacendeutubcuvnveseeaesees
4
*
Setting
Your
Remote
Control
Handset..............
5
*
Pre-Tuning
the
Built
in
Tuner...
eeeeseeeeeseeee
6
VV4709521
©
Hitachi.
Ltd.
1994
Accessories
Supplied
Check
and
identify
the
accessories
supplied.
If
any
are
missing
or
appear
damaged,
contact
your
dealer
immediately.
‘O)
Aerial
cable
for
connecting
this
VTR
andaTV
@
Remote
Control
Handset
@
2
pcs.
Batteries
for
remote
control
handset
(R6)
@
Dust
preventive
cover
for
VIDEO
IN
and
AUDIO
IN
sockets
on
the
front
of
the
VIR

Aerial
Aerial
Lead
SCART
SOCKET
Using
a
suitable
lead
(not
provided)
this
socket
provides
a
connection
method
which
can
give
improved
picture
and
sound
quality.
See
instruction
manual
for
further
details.
To
Aerial
IN
Aerial
Cable
(Supplied)

VTR
Se
AC
Outlet
AC
230V,
50
Mains
Lead

Switch
on
at
the
mains
supply
socket.
Video
display
after
connecting
the
mains
supply
(Note:
The
VTR
will
be
in
the
standby
mode
at
this
stage.)
if
the
display
shows
as
in
step
4
(shows
TV
programme
number,
tape
speed
indicator
and
indicator),
press
the
button
on
the
VTR
once.
Switch
on
your
TV
and
select
an
unused
UHF
programme
number.
(Please
consult
your
TV
operating
guide
as
your
TV
may
have
a
special
VTR
programme
number
which
must
be
used.)
Note:
This
programme
number
will
be
your
VTR
programme
from
now
on.
Press
the
button
[>
(Note:
The
VTR
is
still
in
the
m2,
standby
mode)
and
“
i:
=
5+
”
appears
as
shown
in
the
display.
Tune
your
TV
(consult
your
TV
instruction
manual)
until
the
test
pattern
shown
appears.
The
correct
tuning
position
is
when
the
picture
is
clear.
Ensure
this
programme
is
stored
on
your
TV.
Press
the
button
[>
again,
the
test
pattern
will
disappear
and
the
VTR
will
now
come
out
of
the
stand
by
mode
into
the
operate
mode.
You
should
now
be
able
to
play-back
a
pre-
recorded
cassette.
Insert
the
cassette
as
shown.
If
the
safety
tab
is
removed
then
play-back
will
start
immediately,
if
not
press
the
button
[>
and
the
picture
will
appear
on
the
screen.
Safety
Tab
IMPORTANT:
Insert
the
cassette
squarely
into
the
VTR.
Push
the
cassette
until
the
machine
carries
the
cassette
in
itself.
Never
force
a
cassette
in
as
this
may
damage
the
mechanism.
This manual suits for next models
1
Table of contents
Other Hitachi Tape Deck manuals

Hitachi
Hitachi D-M1 MKII User manual

Hitachi
Hitachi D-3300M User manual

Hitachi
Hitachi D-E25 User manual

Hitachi
Hitachi D-909 User manual

Hitachi
Hitachi VT-M230EUK User manual

Hitachi
Hitachi D-X10 User manual

Hitachi
Hitachi VT-M112EUK User manual

Hitachi
Hitachi D-900BS User manual

Hitachi
Hitachi D-980U User manual
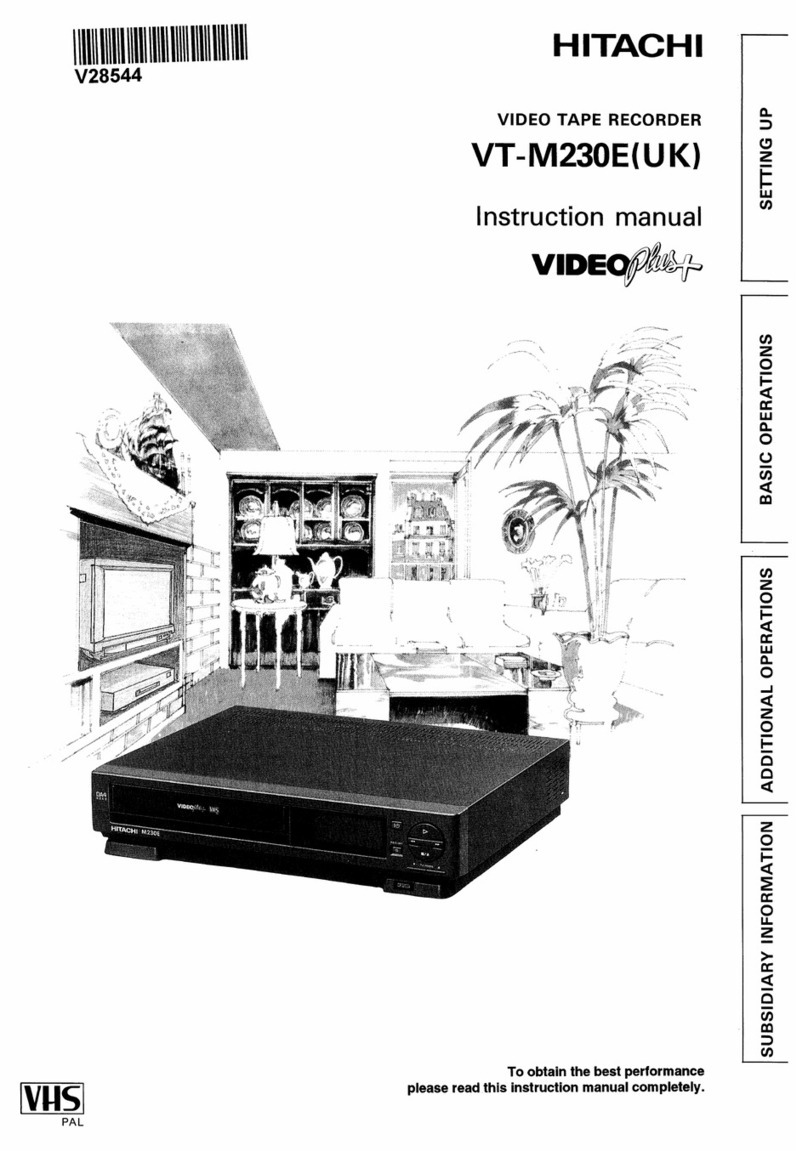
Hitachi
Hitachi D-980MU User manual