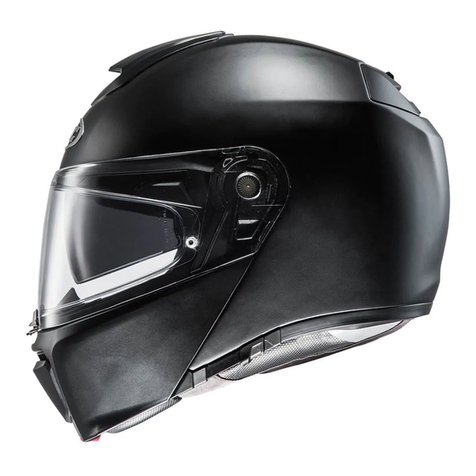
HJC RPHA 90S User manual


Specications / Spécications
21
English / Français
Deutsch / Español
Italian / Dutch
P. 2-10
P.11-19
P.20-28
Contents
English / Français
1
2
3
4
5
7
8
11
12
13
14
15
16
17
18
19
9
10
6
20
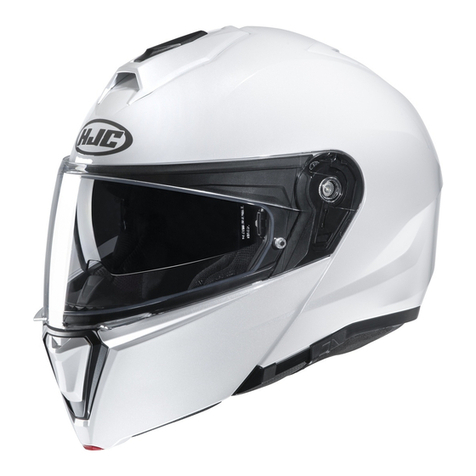
1. Outer shell
2. Rear venturi exhausts
3. Impact absorbent liner
4. Comfort liner
5. Rubber edge trim
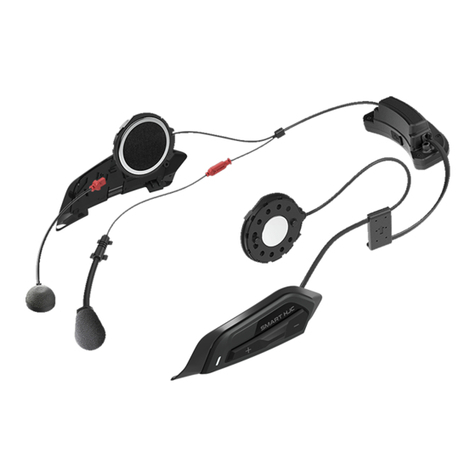
6. Bluetooth Cover
7. Sun shield (Sunlight lm) lever
8. Micro buckle
9. Chin strap
10. Modular chin bar
11. Chin bar lever
12. Front chin vent
13. Shield locking system
14. Breath deector
15. Anti-fog lens pins
16. Tool-less shield
17. Sun shield (Sunlight lm)
18. Eyeport Gasket
19. Shield Ratchet
20. Top Front Vent
1. Coque extérieure
2. Ventilation arrière
3. Calotte intérieure absorbant les chocs
4. Garniture intérieure
5. Joint
6. Cache Bluetooth
7. Levier du pare soleil
8. Boucle micrométrique
9. Jugulaire
10. Mentonnière
11. Bouton ouverture mentonnière
12. Aération mentonnière
13. Système de blocage de l'écran
14. cache nez
15. Fixation lm anti-buée
16. Ecran
17. Pare soleil
18 Joint de l’écran
19. Mécanisme de l’écran
20. Ventilation supérieure
OPEN
OPEN
CLOSE
CLOSE
Pour ouvrir
Pour ouvrir
Pour ouvrir
Fermeture
Fermeture
20
12
OPEN
OPEN
CLOSE
CLOSE
Pour ouvrir
Pour ouvrir
Pour ouvrir
OPEN
OPEN
Pour ouvrir
Pour ouvrir
Pour ouvrir
Fermeture
Fermeture
CLOSE
CLOSE
Fermeture
Fermeture
2
SMARTHJC
6

3 4
1. Move the slide lock to left to disengage. /
Poussez le loquet vers la gauche an de le débloquer.
2. Squeeze the tab and lift up the center latch. /
Pincez le loquet central et glissez-le vers le haut.
3. Open shield to the maximum open position. / Ouvrir l'écran au maximum de la position ouverture.
4.
Push the handle-locker to the open position. The shield will be automatically released out of base ratchet mechanism.
/ Placer le levier de fermeture en position ouverture. L'écran se retire automatiquement du mécanisme de xation.
1.
Align and insert the top of the shield guide into the plate-gear guide. / Alignez et insérez le haut des
points de xation de l'écran dans les points de xation du mécanisme de xation.
2. With the guides properly aligned, press the lower section of the shield into the plate-gear mechanism.
The locking tab should pop into position, locking the shield into place. / Les points de xation étant bien
alignés, appuyez la partie basse de l'écran dans le mécanisme de xation. Les pattes de xation doivent
s'encliqueter, xant ainsi l'écran.
Shield Installation / Installation de l’écran
Always check to make sure helmet pads are installed before using the helmet. A helmet with
missing or improperly installed pads may increase your risk of serious injury or death in an accident.
Pour rendre sûr le casque, toujours vérier que les garnitures sont installées avant de l’utiliser.
Un casque où il manque, ou si les garnitures sont mal installées, peut augmenter le risque
de dommages sérieux ou de mort lors d’un accident.
Shield Removal / Démontage de l’écran Warning!
Attention!
Attention!
21
3 4
1
Slide lock
Verrou
2
Center latch
Loquet central
Handle-locker
Handle-locker
Bouton de fermeture de l'écran
Bouton de fermeture de l'écran
OPEN
Pour ouvrir
OPEN
Pour ouvrir
English / Français
1. Grasp the crown pad fabric as close as possible to its plastic base and pull/pry away from the helmet.
Notice how the crown pad plastic section aligns with the shell plastic sleeve. This will help orient you
with the reinstallation. /
Saisir la garniture le plus près possible de la base en plastique, poussez/tirez vers
l’extérieur du casque. Notez que la garniture s’aligne avec la bande en plastique de la coque. Ceci vous aidera
lors de la réinstallation.
2. Repeat same at rear. /
Refaite la même chose à l’arrière.
Crown Pad Removal / Démontage garniture intérieure
1. Install the front section rst by aligning the plastic shell base and the crown pad plastic sleeve, ensuring
that the center and side holes are properly aligned. Press the crown pad plastic sleeve (center portion)
into the center of the channel which is built into the plasticshell base, working your way outward to each
side. / Installer en premier la partie frontale en alignant la coque plastique et la garniture frontale plastique
cliquetée en s’ assurant que les encoches du centre et des côtés soient correctement alignées. Appuyer la partie
frontale plastique (partie centrale) dans l’emplacement qui a été conçu à cet eet dans la coque en insérant
les encoches de chaque côté.
2. Align and snap the two rear snaps into place. / Alignez et pressez les 2 boutons pression arrière à leur place.
Crown Pad Installation / Installation de la garniture intérieure

5 6
1. Feed the chin strap through the opening in the cheek pad. / Insérer la sangle jugulaire á travers
l'ouverture de la garniture des joues.
2. Align and fully slide the cheek pad plastic plate between shell and EPS. / Alignez et glissez entièrement
la plaque plastiée de la mousse de joue entre la calotte et l’EPS.
3. Clip the cheek pad’s 3 small male snaps to the 3 female snaps xed on the shell interior. / Veuillez
assembler les 3 clips ensemble a l'intérieur de la calotte.
※Slide tab 'A' from the cheek pad
into the holder 'B'.(Repeat same
on opposite side)
Cheek Pad Installation / Installation mousse joue
Position of tap holder
Position of tap holder
Position du support de languette
Position du support de languette
※Faire glisser l'encoche "A" des
mousses joues dans le support
"B" (répeter la même opération
du côté opposé)
English / Français
Cheek Pad Removal / Démontage mousse de joue
There are 3 snaps holding the cheek pad in place. / Il y a trois lanières tenant la garniture des joues en place.
1. Separate the chin strap from the cheek pad's tube. / Séparer la jugulaire du protège jugulaire.
2. Gently pry the cheek pad away from the interior, releasing the snaps. / Tirer doucement la garniture
des joues de l'intérieur, enlever les laniéres.
3. Grasp the cheek pad near its center and gently pull it free from the chin strap. /
Prendre la garniture des joues
près de son centre et tirer doucement sur la sangle jugulaire.
3
3
B
B
A
A
1
1
How to install additional Chin Curtain /
Comment installer l'extension du cache menton
* This pad is attached in the interior of chin curtain
and it blocks the air coming in towards the neck.
/ Cette protection xée à l'intérieur du cache-menton
empêche l'entrée d'air.
If you install communication system speakers, please do not use the speaker pocket cover
Si vous installez des haut-parleurs, veuillez ne pas utiliser les couvres haut-parleurs
Speaker
Speaker Pocket
Speaker Pocket Cover
In use / En utilisation
Velcro
Velcro
How to install speaker pocket cover /
Comment installer des couvres haut-parleurs

7 8
Above illustration shows raised sun shield (sunlight film)
position. / L'illustration ci-dessous montre le pare-soleil
en position haute
Above illustration shows lowered sun shield (sunlight film)
position. / L'illustration ci-dessous montre le pare-soleil
en position basse
Warning!
■Try not to operate the sun shield(sunlight film) while riding as this may impair your vision and
may lead to an accident.
■DO NOT pull on the sun shield(sunlight film) when it is already down. The sun shield(sunlight film)
may be ejected and this will increase the risk of serious injury or death in the event of an accident.
■Do not attempt to adjust the sun shield(sunlight film) itself with your hands.
Always use the sun shield(sunlight film) lever.
■
DO NOT use sun shield(sunlight film) at night time. The sun shield(sunlight film) is only for day time use.
The sun shield(sunlight film) does not provide eye protection. When you use the sun shield(sunlight film)
be sure that the clear visor is also in closed position
Sun shield (Sunlight film) Operation /
Utilisation du pare soleil
Sun shield (Sunlight film) Removal /
Retrait du pare soleil
Sun shield (Sunlight film) Installation /
Installation du pare soleil
N’essayez pas de manipuler pare-soleil en roulant, car ceci pourrait altérer votre vision et provoquer un
accident.
Ne tirez pas sur pare-soleil lorsqu’il est déjà abaissé. Pare-soleil pourrait être éjecté et ceci augmenterait le
risque de blessures graves ou de mortalité en cas d’accident.
N’essayez pas d’ajuster pare-soleil avec vos mains.
Utilisez toujours le levier prévu à cet eet.
N’utilisez pas pare-soleil de nuit. Pare-soleil est uniquement prévu pour une utilisation de jour.
Pare-soleil n’assure pas la protection des yeux. Lorsque vous utilisez pare-soleil assurez-vous que l’écran
clair soit également en position fermée.
Attention!
Attention!
■
■
■
■
English / Français
1. While sunlight lm is in lower position, gently pull it until you see the top of the sunlight lm. /
Lorsque le pare-soleil est en position basse, tirez doucement jusqu'à ce que vous voyez le haut du pare soleil
2. Gently pull one side of the sunlight lm as arrow indicates (repeat same for other side). /
Tirez doucement un côté du pare-soleil comme spécié par les èches
(répétez l'opération de l'autre côté)
1. Insert sunlight lm tab 'A' into 'B' position.(Repeat same on opposite side) /
Insérer l'onglet "A" du pare-soleil dans la position "B"
(répétez l'opération du côté opposé).
※When installing the sunlight lm,
be sure to have it slided behind
the tap‘B’ holder.
2
A
B
B
Lever / Levier
Lever / Levier
※Lors de l'installation du pare-soleil,
s' assurer de l'avoir glissé derrière le
support "B"
Other HJC Motorcycle Accessories manuals
