HJC CL-15 User manual

£WARNING
CL
-15
OWNER'S
MANUAL
For
your
safety,
it
is
important
that
you
completely
read
the
owner's
manual
and
all
warning
labels.
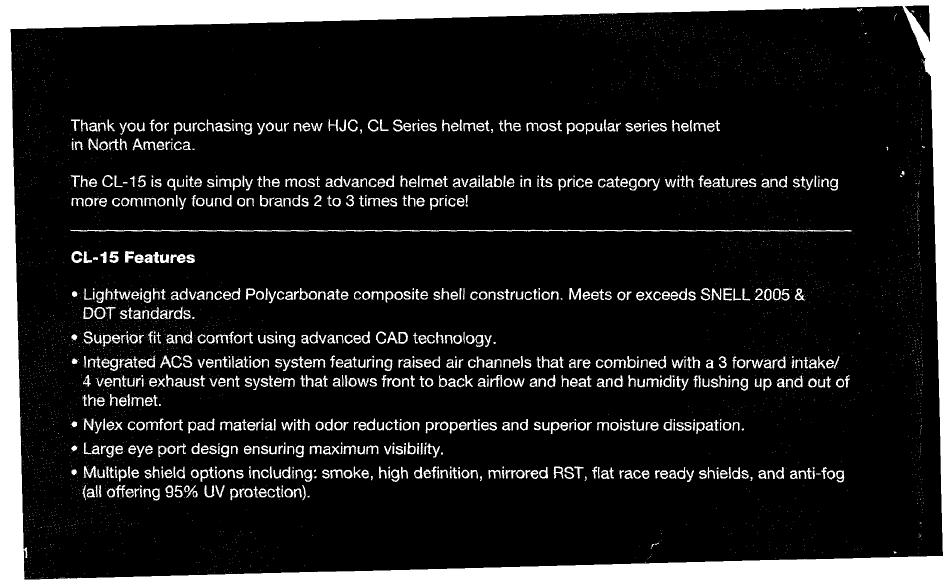
Thank
you
for
purchasing
your
new
HJC,
CL
Series
helmet,
the
most
popular
series
helmet
in
North
America.
The
CL
-I5
is
quite
simply
the
most
advanced
helmet
available
in
its
price
category
with
features
and
styling
more
commonly
found
on
brands
2
to
3
times
the
price!
CL
-15
Features
•
Lightweight
advanced
Polycarbonate
composite
shell
construction.
Meets
or
exceeds
SNELL
2005
&
DOT
standards.
•
Superior
fit
and
comfort
using
advanced
CAD
technology.
•
Irrtegrated
ACS
ventilation
system
featuring
raised
air
channels
that
are
combined
with
a
3
forward
intake!
4
venturi
exhaust
vent
system
that
allows
front
to
back
airflow
and
heat
and
humidity
flushing
up
and
out
of
the
helmet.
•
Nylex
comfort
pad
material
with
odor
reduction
properties
and
superior
moisture
dissipation.
•
Large
eye
port
design
ensuring
maximum
visibility.
•
Multiple
shield
options
including:
smoke,
high
definition,
mirrored
RST,
flat
race
ready
shields,
and
anti
-fog
(all
offering
95!
UV
protection).
Table
of
Contents
4
Important
Safety
Information
3
Selecting
the
Right
Helmet
4-6
Specifications
7
Using
Your
Helmet
Correctly
8-11
Inspect
Your
Helmet
10
Fasten
the
Retention
System
11
Maintaining
Your
Helmet
Correctly
12-20
Shell
Cleaning
12
Interior
Cleaning
13
Vent
Cleaning
13
Shield
Securing
System
13
Shield
Removal
14
Shield
Installation
15
Cheek
Pad
Removal
16
Cheek
Pad
Installation
17
Crown
Pad
Removal
18
Crown
Pad
Installation
19
Replacement
Parts
20
Helmet
Modifications
20
Storing
Your
Helmet
Correctly
21
Helmet
Replacement
22-23
Warranty
24
2

"
Important
Safety
Information
3
OWARNING
The
instructions
in
this
manual
are
designed
to
help
you
select
the
right
helmet,
wear
it
properly,
take
care
of
it,
and
know
when
to
replace
it.
Failure
to
follow
these
instructions
may
increase
your
risk
of
serious
injury
or
death
in
an
accident.
In
order
to
get
the
most
protection
possible
from
your
helmet,
you
should
always
do
the
following:
•
Wear
your
helmet
when
you
ride;
•
Handle
your
helmet
carefully
to
avoid
accidental
damage;
and
•
Ride
safely
-
do
not
take
risks
because
you
are
wearing
a
helmet.
Although
your
HJC
helmet
is
designed
to
reduce
or
prevent
some
injuries
when
worn,
no
helmet
can
protect
you
from
all
possible
or
foreseeable
impacts.
For
example,
your
helmet
cannot
protect
you
from
spinal
or
neck
injuries.
In
addition,
there
is
no
guarantee
that
your
helmet
will
prevent
injuries
to
the
area
of
your
head
that
is
covered.
i

Selecting
the
Right
Helmet
AWARNING
AWARNING
Never
buy
a
used
helmet
or
borrow
someone
else's
helmet.
Over
time
the
protective
foam
in
helmets
will
adjust
to
the
contours
of
a
user's
head.
A
used
or
borrowed
helmet
may
not
offer
as
much
protection
as
a
new
helmet.
Wearing
the
wrong
size
helmet
can
increase
your
risk
of
serious
injury
or
death
in
an
accident.
A
helmet
that
is
too
large
for
your
head
may
be
dislodged
or
knocked
off
in
an
accident.
To
select
the
right
size
helmet
for
your
head,
follow
these
instructions:
1.
Measure
your
head.
Wrap
a
tape
measure
around
your
head
about
one
inch
(2.5
cm)
above
your
eyebrows.
2.
Use
the
sizing
chart
to
select
the
helmet
size
that
corresponds
most
closely
to
your
head
measurement.
If
your
head
size
falls
between
two
helmet
sizes,
try
on
the
larger
helmet
first
and
then
the
smaller
size.
Sizing
Chart
XS
S
M
L
XL
XXL
XXXL
Hat
Size
65/8-63/4
67/8-7
71/8-71/4
73/8-71/2
75/8-73/4
77/8-8
81/8-81/4
Centimeter
53-54
55-56
57-58
59-60
61-62
63-64
65-66
Inch
207/8-21
1/4
215/8-22
221/2-227/8 231/4-235/8
24-243/8
243/4-251/4
255/8-26
4

3.
Try
on
the
helmet
by
grasping
both
chin
straps
to
pull
the
helmet
completely
onto
your
head,
ensuring
that
the
top
of
your
head
is
in
contact
with
the
top
of
the
helmet
interior.
4.
Check
for
a
proper
fit.
To
make
sure
your
helmet
is
the
right
size,
check
that:
•
The
helmet
inner
lining
fits
snugly
around
your
head.
•
The
top
pad
presses
firmly
on
your
head.
•
The
cheek
pads
contact
your
cheeks.
•
There
is
no
space
around
your
brow
under
the
inner
lining.
Test
this
by
trying
to
insert
your
fingers.
If
the
helmet
does
not
fit
snugly,
try
on
a
smaller
size.
5.
Check
your
field
of
vision
when
trying
on
a
helmet.
Some
helmets
may
obstruct
or
block
your
vision
when
looking
left,
right,
up,
or
down.
AWARNING
Always
make
sure
you
can
see
well
enough
to
safely
operate
your
motorcycle.
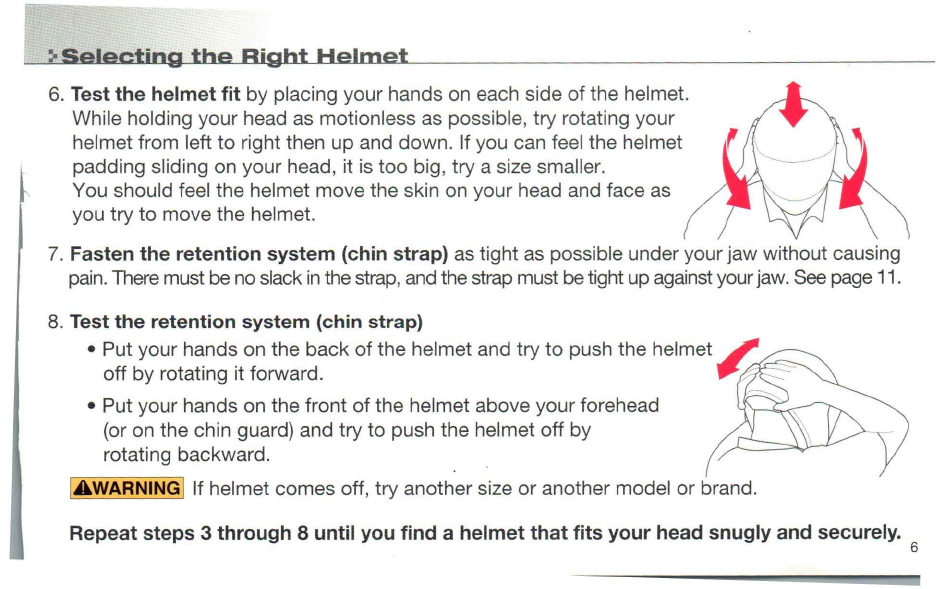
6.
Test
the
helmet
fit
by
placing
your
hands
on
each
side
of
the
helmet.
While
holding
your
head
as
motionless
as
possible,
try
rotating
your
helmet
from
left
to
right
then
up
and
down.
If
you
can
feel
the
helmet
padding
sliding
on
your
head,
it
is
too
big,
try
a
size
smaller.
You
should
feel
the
helmet
move
the
skin
on
your
head
and
face
as
you
try
to
move
the
helmet.
7.
Fasten
the
retention
system
(chin
strap)
as
tight
as
possible
under
your
jaw
without
causing
pain.
There
must
be
no
slack
in
the
strap,
and
the
strap
must
be
tight
up
against
your jaw.
See
page
11.
8.
Test
the
retention
system
(chin
strap)
•
Put
your
hands
on
the
back
of
the
helmet
and
try
to
push
the
helmet
off
by
rotating
it
forward.
•
Put
your
hands
on
the
front
of
the
helmet
above
your
forehead
(or
on
the
chin
guard)
and
try
to
push
the
helmet
off
by
rotating
backward.
If
helmet
comes
off,
try
another
size
or
another
model
or
brand.
AWARNING
Repeat
steps
3
through
8
until
you
find
a
helmet
that
fits
your
head
snugly
and
securely.
6

Specifications
1.
Outer
Shell
2.
Rear
Venturi
Exhausts
3.
Comfort
Liner
4.
Impact
Absorbent
Liner
5.
Rubber
Edge
Trim
6.
Chin
Strap
Snap
7.
Double
"D"
Ring
8.
Chin
Strap
9.
Side
Venturi
Exhausts
10.
Chin
Vent
(adjustable
multi
-stage)
11.
2
Stage
Face
Shield
12.
Shield
Retention
Button
13.
Eye
-port
Gasket
14.
Shield
Ratchet
15.
Top
Front
Vents
(adjustable
multi
-stage)
7
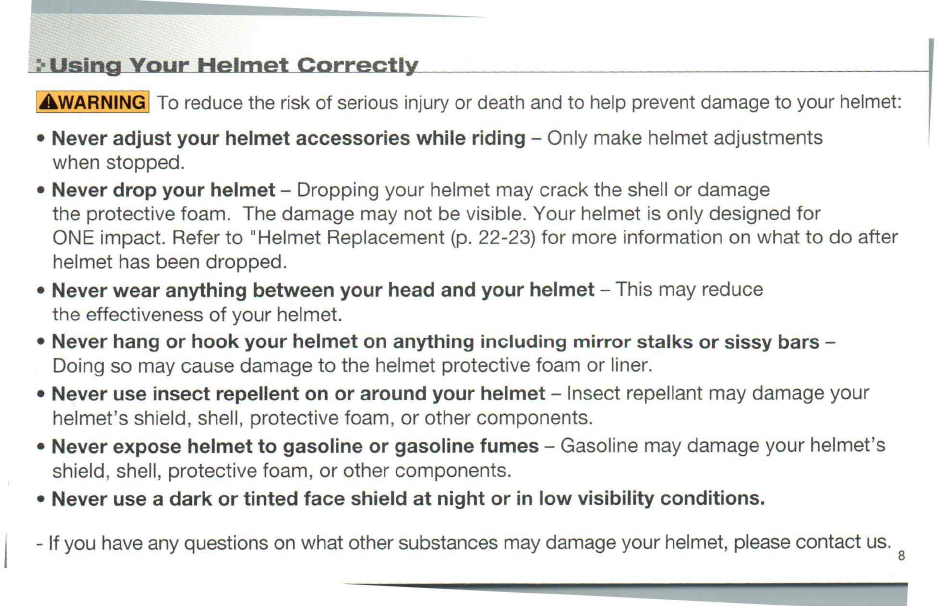
S~Using
Your
Helmet Correctly
AWARNING
To
reduce
the
risk
of
serious
injury
or
death
and
to
help
prevent
damage
to
your
helmet:
•
Never
adjust
your
helmet
accessories
while
riding
-
Only
make
helmet
adjustments
when
stopped.
•
Never
drop
your
helmet
-
Dropping
your
helmet
may
crack
the
shell
or
damage
the
protective
foam.
The
damage
may
not
be
visible.
Your
helmet
is
only
designed
for
ONE
impact.
Refer
to
"Helmet
Replacement
(p.
22-23)
for
more
information
on
what
to
do
after
helmet
has
been
dropped.
•
Never
wear
anything
between
your
head
and
your
helmet
-
This
may
reduce
the
effectiveness
of
your
helmet.
•
Never
hang
or
hook
your
helmet
on
anything
including
mirror
stalks
or
sissy
bars
-
Doing
so
may
cause
damage
to
the
helmet
protective
foam
or
liner.
•
Never
use
insect
repellent
on
or
around
your
helmet
-
Insect
repellant
may
damage
your
helmet's
shield,
shell,
protective
foam,
or
other
components.
•
Never
expose
helmet
to
gasoline
or
gasoline
fumes
-
Gasoline
may
damage
your
helmet's
shield,
shell,
protective
foam,
or
other
components.
•
Never
use
a
dark
or
tinted
face
shield
at
night
or
in
low
visibility
conditions.
-
If
you
have
any
questions
on
what
other
substances
may
damage
your
helmet,
please
contact
us.
8
sing
Your
Helmet Correctly
£WARNING
To
reduce
the
risk
of
serious
injury
or
death
and
to
help
prevent
damage
to
your
helmet:
•
Always
wear
eye
protection
-
If
you
are
not
using
a
helmet
with
a
face
shield,
always
wear
eye
protection
when
riding.
Always
lock
your
face
shield
in
place
when
you
are
riding.
•
Always
be
alert
for
sounds
-
Your
helmet
may
impair
your
hearing.
However,
your
helmet
is
not
a
form
of
hearing
protection.
•
Always
store
your
helmet
in
its
helmet
bag
when
not
in
use
to
help
reduce
accidental
surface
damage.
a
Usirsg
Your
Helmet
Correctly
u~
f
AWARNING
To
reduce
the
risk
of
serious
injury
or
death,
always
use
your
helmet
correctly.
Inspect
your
helmet
To
ensure
that
your
helmet
is
in
the
best
condition
to
maximize
your
protection,
always
inspect
your
helmet
for
damage
before
riding:
•
Check
the
shield
and
shield
ratchet
-
retighten
shield
ratchet
screws
if
necessary.
Be
sure
not
to
over
-tighten
any
screws.
Plastic
base
plate
screws
can
break
and
plastic
screws
can
strip
the
screw
sleeves
if
over
-tightened.
•
Check
for
helmet
damage.
If
your
helmet
is
damaged
or
cracked,
stop
using
it
immediately.
See
"Helmet
Replacement"
(pp.
22-23)
section
for
further
information.
If
your
helmet
has
been
dropped,
you
may
not
be
able
to
see
the
damage.
•
Check
for
worn
or
damaged
parts.
Plastic
components
may
wear
out
over
time.
If
you
find
worn
or
damaged
parts,
replace
them
or
purchase
a
new
helmet.
See
"Replacement
Parts"
(p.
20)
for
information
on
parts
replacement.
If
parts
fall
off
while
riding,
your
vision
may
be
blocked
which
could
cause
an
accident.
•
Check
the
retention
system
(chin
strap)
for
damage.
If
it
is
frayed
or
ripped,
replace
the
helmet.
•
Check
that
all
pads
are
in
place.
Both
of
the
cheek
pads
and
the
crown
pads
must
be
in
place.
AWARNING
11
Using
Your
Helmet
Correctly
Check
Your
Face Shield
If
your
face
shield
is
scratched
or
damaged
it
may
reduce
the
visibility
-replace
if
necessary.
Always
make
sure
you
can
see
well
enough
to
safely
operate
your
motorcycle.
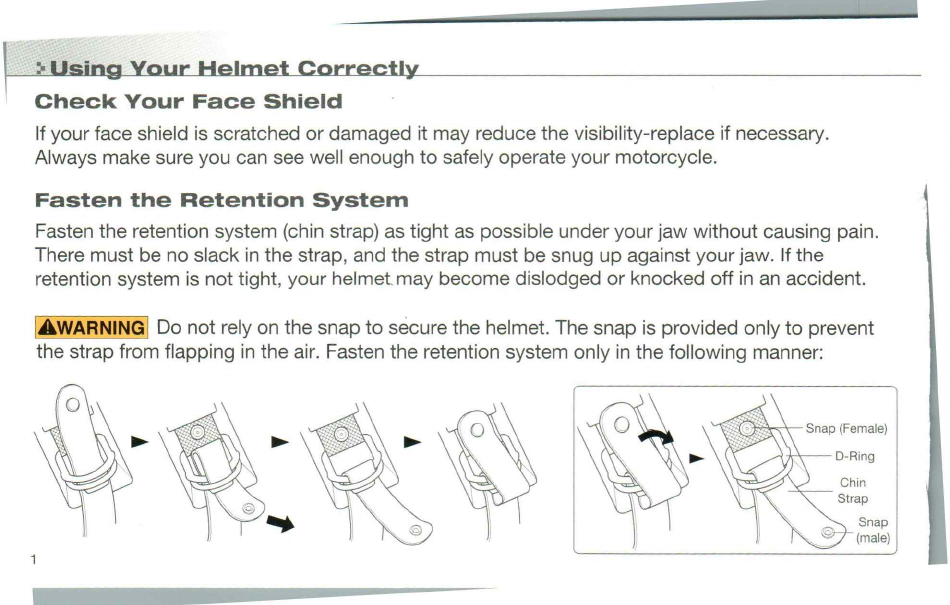
Fasten
the
Retention System
Fasten
the
retention
system
(chin
strap)
as
tight
as
possible
under
your
jaw
without
causing
pain.
There
must
be
no
slack
in
the
strap,
and
the
strap
must
be
snug
up
against
your
jaw.
If
the
retention
system
is
not
tight,
your
helmet
may
become
dislodged
or
knocked
off
in
an
accident.
AWARNING
Do
not
rely
on
the
snap
to
secure
the
helmet.
The
snap
is
provided
only
to
prevent
the
strap
from
flapping
in
the
air.
Fasten
the
retention
system
only
in
the
following
manner:
1
Maintaining
Your
Helmet
Correctly
Shell
Cleaning
£WARNINGi
Only
use
approved
methods
to
clean
the
helmet.
Using
other
unapproved
chemicals
or
methods
may
damage
the
helmet
shell
or
lining.
A
damaged
helmet
may
increase
your
risk
of
serious
injury
or
death
in
an
accident.
Glossy
Finish.
HJC
recommends
cleaning
your
helmet
with
products
designed
for
automotive
cleaning
and
polishing.
All
HJC
helmets
are
finished
with
an
automotive
type
base
coat/clear
coat
finish.
Rubbing
compounds
can
be
used
for
deep
cleaning
to
remove
many
scratches
and
scuffs.
Follow
the
product's
instructions
diligently.
Over
polishing
with
rubbing
compounds
can
cause
light
abrasions
which
may
dull
the
finish
of
your
helmet.
Stickers
and
decals
will
leave
adhesive
residue
when
removed.
To
remove
the
adhesive
residue,
use
alcohol
swabs.
Be
certain
to
immediately
wipe
away
the
excess
liquid
and
clean
the
area
with
soap
and
water
once
the
adhesive
residue
is
removed.
Do
not
use
excessive
pressure
while
rubbing
when
attempting
to
remove
the
adhesive
residue,
instead
use
multiple
light
treatments.
Non
-Glossy
Finish.
For
our
flat
finish
(non
-glossy)
helmets,
we
recommend
using
warm
water
and
mild
soap.
Use
multiple
treatments
for
heavier
dirt.
Do
not
use
excessive
pressure
or
rubbing
compounds
while
cleaning
the
surface
as
a
"glossy"
effect
could
be
created,
ruining
the
flat
finish
appearance.
1;
aintaining
Your
Helmet Correctly
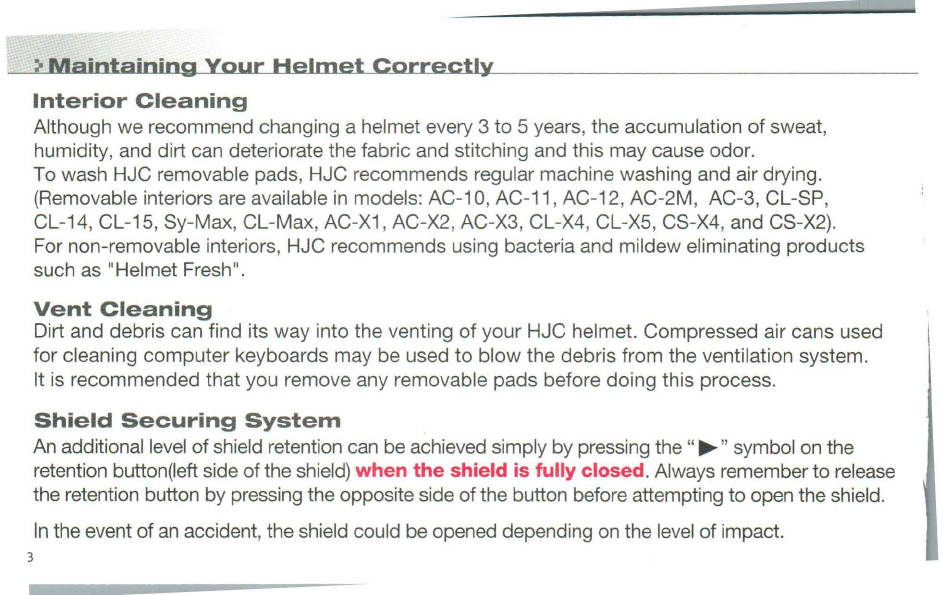
Interior Cleaning
Although
we
recommend
changing
a
helmet
every
3
to
5
years,
the
accumulation
of
sweat,
humidity,
and
dirt
can
deteriorate
the
fabric
and
stitching
and
this
may
cause
odor.
To
wash
HJC
removable
pads,
HJC
recommends
regular
machine
washing
and
air
drying.
(Removable
interiors
are
available
in
models:
AC
-10,
AC
-11,
AC
-12,
AC
-2M,
AC
-3,
CL
-SP,
CL
-14,
CL
-15,
Sy
-Max,
CL
-Max,
AC
-X1,
AC
-X2,
AC
-X3,
CL
-X4,
CL
-X5,
CS
-X4,
and
CS
-X2).
For
non
-removable
interiors,
HJC
recommends
using
bacteria
and
mildew
eliminating
products
such
as
"Helmet
Fresh".
Vent
Cleaning
Dirt
and
debris
can
find
its
way
into
the
venting
of
your
HJC
helmet.
Compressed
air
cans
used
for
cleaning
computer
keyboards
may
be used
to
blow
the
debris
from
the
ventilation
system.
It
is
recommended
that
you
remove
any
removable
pads
before
doing
this
process.
Shield
Securing System
An
additional
level
of
shield
retention
can
be
achieved
simply
by
pressing
the
"►"
symbol
on
the
retention
button(left
side
of
the
shield)
when
the
shield
is
fully
closed.
Always
remember
to
release
the
retention
button
by
pressing
the
opposite
side
of
the
button
before
attempting
to
open
the
shield.
In
the
event
of
an
accident,
the
shield
could
be
opened
depending
on
the
level
of
impact.
3
J
}
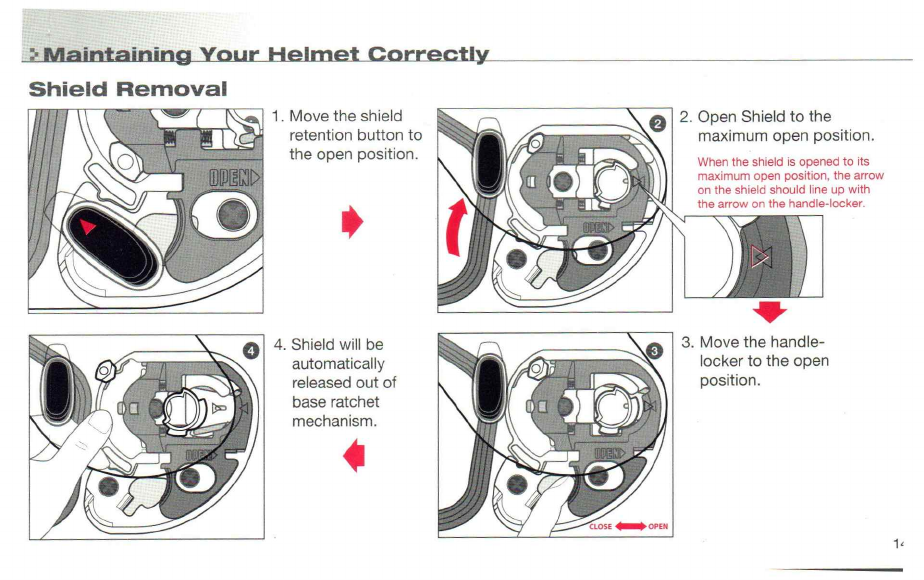
Shield
Removal
1.
Move
the
shield
retention
button
to
the
open
position.
4.
Shield
will
be
automatically
released
out
of
base
ratchet
mechanism.
2.
Open
Shield
to
the
maximum
open
position.
When
the
shield
is
opened
to
its
maximum
open
position,
the
arrow
on
the
shield
should
line
up
with
the
arrow
on
the
handle
-locker.
3.
Move
the
handle
-
locker
to
the
open
position.
1'

Maintaining
Your
Helmet Correctly
Shield
Installation
1.
Ensure
that
the
handle
-locker
is
in
the
open
position.
3.
With
the
guides
properly
aligned,
press
the
lower
section
of
the
shield
into
the
Plate
-Gear
mechanism.
The
locking
tab
should
pop
into
position,
locking
the
shield
into
place.
2.
Align
and
insert
the
top
of
the
shield
guide
into
the
plate
-
gear
guide.
Maintaining
Your
Helmet Correctly
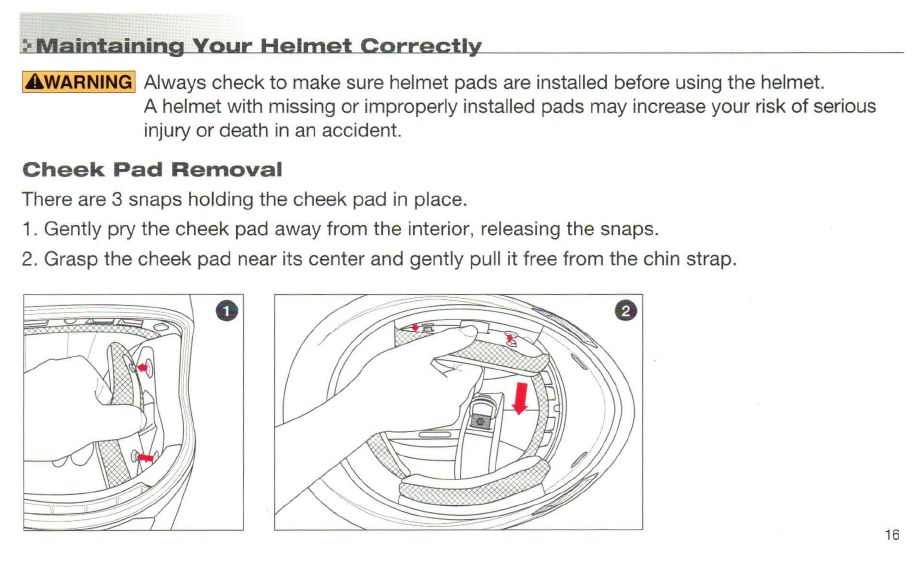
£WARNING]
Always
check
to
make
sure
helmet
pads
are
installed
before
using
the
helmet.
A
helmet
with
missing
or
improperly
installed
pads
may
increase
your
risk
of
serious
injury
or
death
in
an
accident.
Cheek
Pad
Removal
There
are
3
snaps
holding
the
cheek
pad
in
place.
1.
Gently
pry
the
cheek
pad
away
from
the
interior,
releasing
the
snaps.
2.
Grasp
the
cheek
pad
near
its
center
and
gently
pull
it
free
from
the
chin
strap.
16

Maintaining
Your
Helmet
Correctly
Cheek
Pad
Installation
1.
Feed
the
chin
straps
through
the
openings
in
the
cheek
pad.
2.
Align
3
cheek
pad
snaps,
start
pressing
the
snaps
together
starting
with
either
of
the
two
rear
snaps
first.

r
Maintaining
Your
Helmet Correctly
Crown
Pad
Removal
The
crown
pad
area
is
composed
of
the
crown
pad,
a
front
plastic
snap
mount
system,
and
2
snaps
at
the
rear.
1.
Grasp
the
crown
pad
fabric
as
close
as
possible
to
its
plastic
base
and
pull/pry
away
from
the
helmet.
Notice
how
the
crown
pad
plastic
section
aligns
with
the
shell
plastic
sleeve.
This
will
help
orient
you
with
the
reinstallation.
2.
Gently
pry
the
crown
pad
fabric
away
from
the
interior,
releasing
the
snaps.
18

Maintaining
Your
Helmet Correctly
Crown
Pad
Installation
1.
Install
the
front
section
first
by
aligning
the
plastic
shell
base
and
the
crown
pad's
plastic
sleeve,
ensuring
that
the
center
and
side
holes
are
properly
aligned.
Press
the
crown
pad's
plastic
sleeve
(center
portion)
into
the
channel
built
into
the
plastic
shell
base,
working
your
way
to
each
side.
2.
Align
and
snap
the
two
rear
snaps
into
place.
is
Table of contents
Other HJC Motorcycle Accessories manuals


