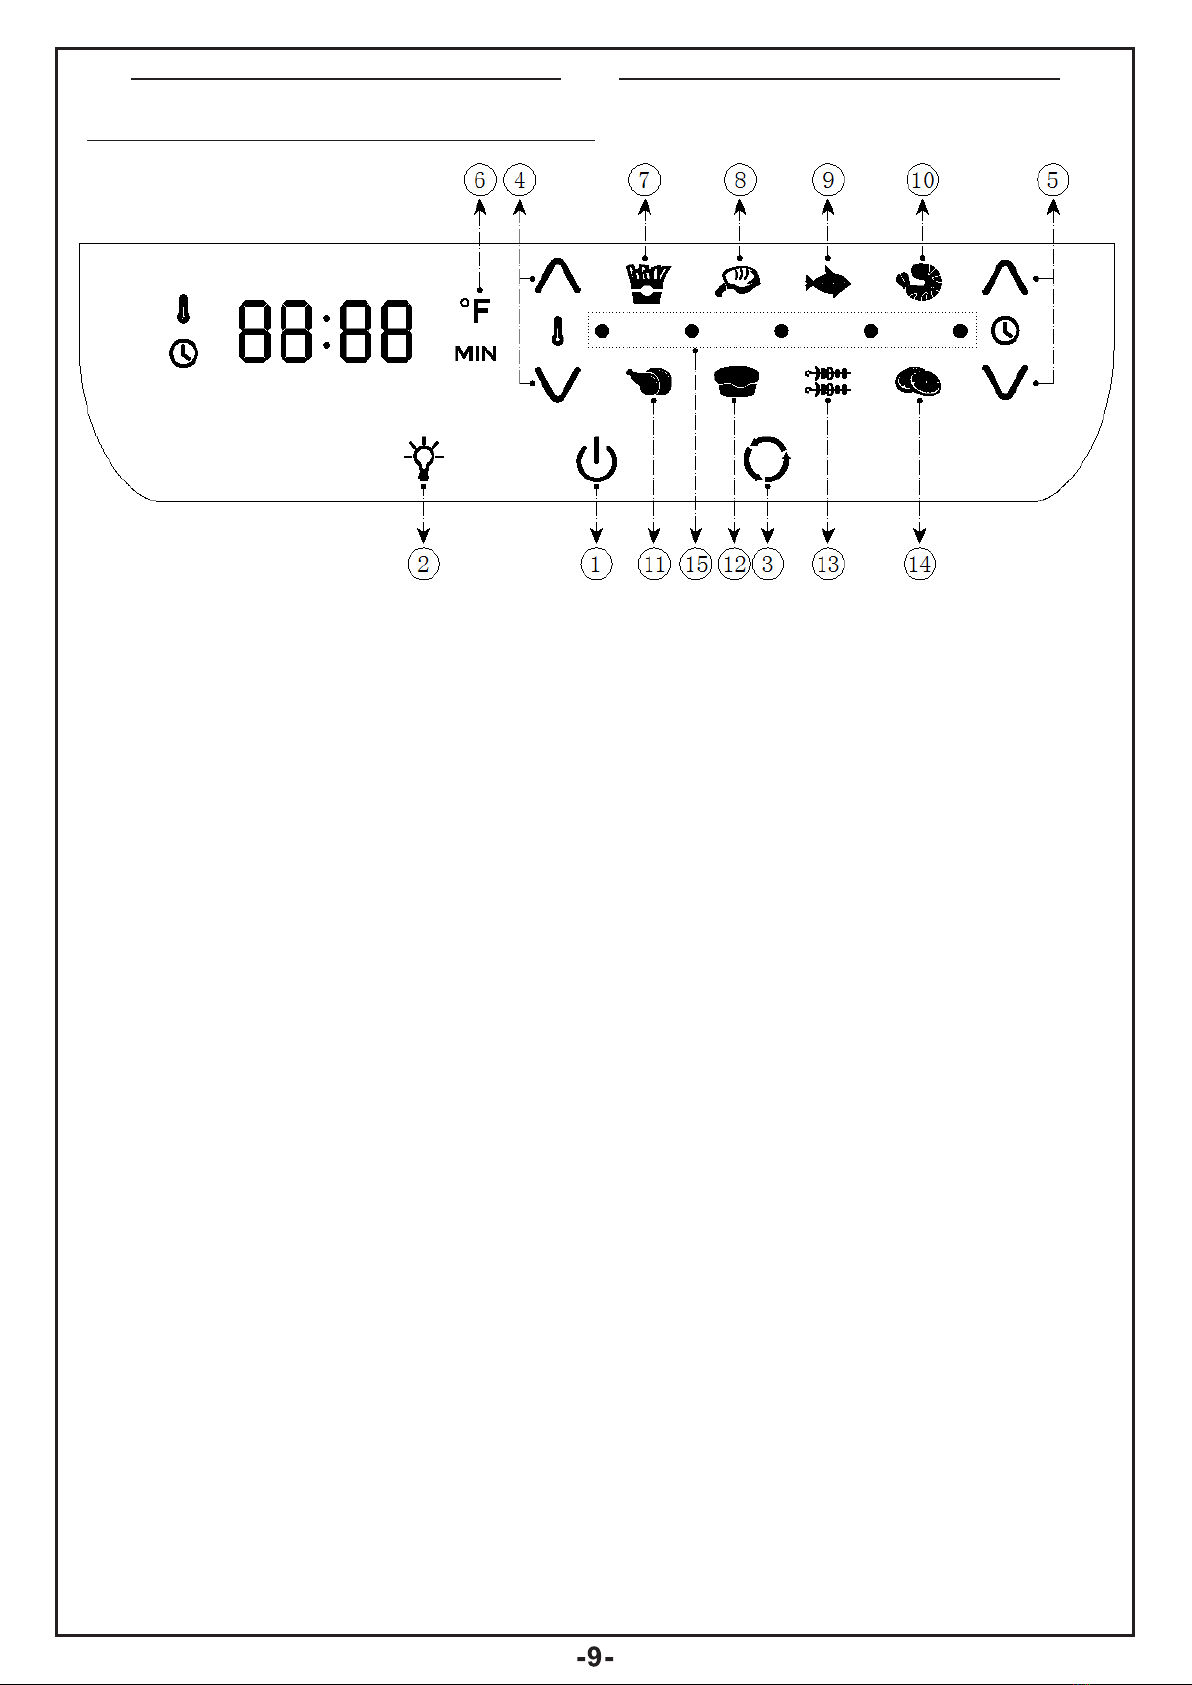
Using the Digital Control Panel
1.Power/Start-Stop Button-Once unit
is plugged in, the Power Button will
light up.
Selecting the Power Button once will
cause the full panel to be illuminated.
Selecting the Power Button
a second time will activate the cooking
process at the default temperature of
370°F(190°C) and time of 15
minutes. Selecting the Power Button
at any time during the cooking process
will shut down the Unit causing display
to go dark immediately and running
light to go dark within 20 seconds. The
fan will continue running for 20
seconds to "cool down" the Unit.
2.Internal Light-Selecting this button
will help you check cooking progress
while Unit is in operation.
NOTE: Opening the door during the
cooking process will pause the unit.
Internal light will illuminate if doors
open
3.Rotation Button-Select this button
when cooking anything using the
Rotisserie Mode. Function can be
used with any preset. The icon will
blink while in use.
4.Temperature Control Button-These
buttons enable you to raise or lower
cooking temperature by 5°F(15°C)
intervals starting from 150°F(65°
C)to 400°F(200°C).Dehydration is
from 90°F(30°C) to 170°F(75°C).
5.Time Control Button- These buttons
enable you to select exact cooking
time to the minute, from 1 to 60
minutes in all modes except when
dehydrating, which uses 30 minute
intervals and an operating time from 2
to 24 hours.
6.LED Digital Display-The Digital
Numeric Display will switch between
Temperature and Time Remaining
during the cooking process.
7-14. Cooking Presets-Selecting any
of these will set Time and
Temperature to a default setting for
that particular food. You may over-
ride these presets with Time and
Temperature Buttons. View presets
on the next page.
15.Running Lights-These lights will
blink in sequence while cooking is in
progress and continue blinking up to
20 seconds once you shut Unit down
EN