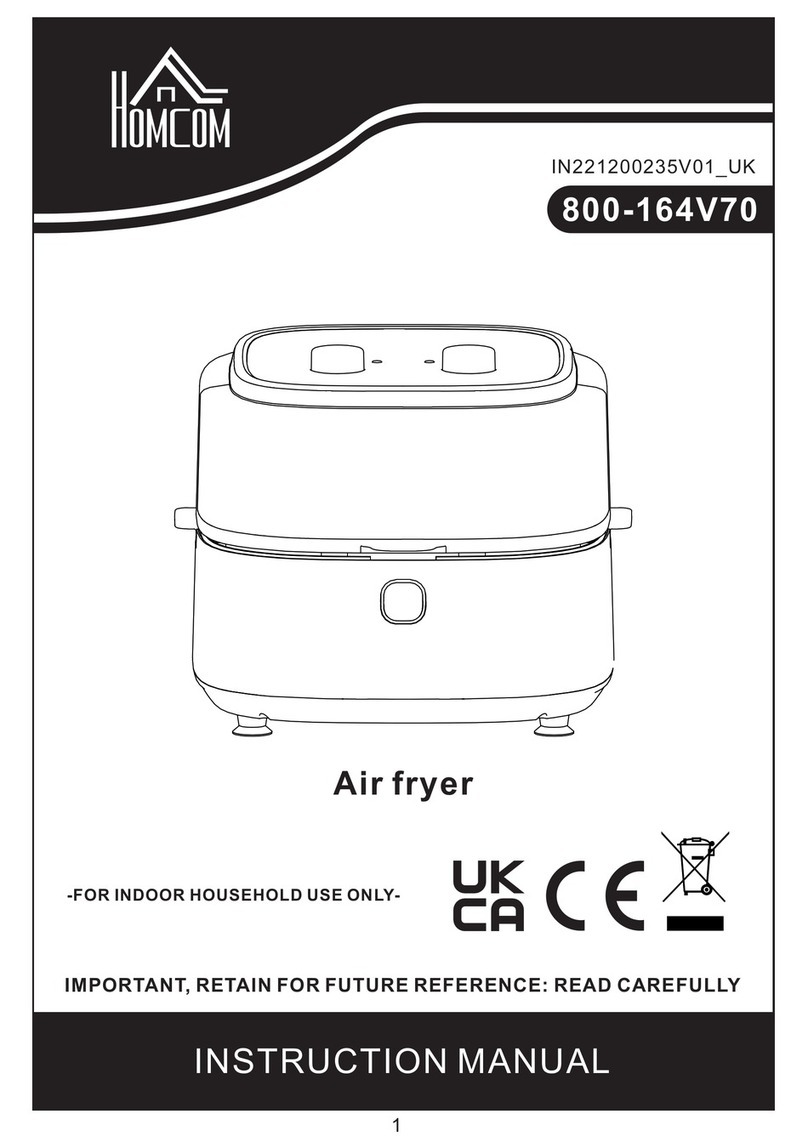
HOMCOM 800-174V70 User manual

ASSEMBLY INSTRUCTION
IN230700217V01_UK
800-174V70
DUAL BASKET DIGITAL AIR FRYER
INSTRUCTION MANUAL
HIC-AF-9001DG
* When using electrical appliances, always follow basic safety precautions.
Do not use the unit until you have read this manual thoroughly.
IMPORTANT, RETAIN FOR FUTURE REFERENCE: READ CAREFULLY

1
CONTENTS
Important Safeguards .................................................................................................2
Parts ..........................................................................................................................3
Understanding your appliance ....................................................................................4
Before First Use..........................................................................................................4
Function Buttons ........................................................................................................5
Operating Buttons ......................................................................................................5
Cooking in Your Dual Basket Air Fryer .........................................................................6
Cooking in a Single Zone ............................................................................................7
Air broil.......................................................................................................................7
Air Fry ........................................................................................................................8
Roast..........................................................................................................................8
Bake...........................................................................................................................8
Reheat .......................................................................................................................8
Keep Warm ................................................................................................................9
Fries...........................................................................................................................9
Bacon.........................................................................................................................9
Wings........................................................................................................................10
Dehydrate .................................................................................................................10
Cleaning Your Dual Basket Air Fryer...........................................................................10
Storage Your Dual Basket Air Fryer ...........................................................................10
Helpful Tips ...............................................................................................................11
Troubleshooting Guide ..............................................................................................10
Guarantee and Services............................................................................................10

2
IMPORTANT SAFEGUARDS
HOUSEHOLD USE ONLY. READ ALL INSTRUCTIONS.
When using electrical appliances, always follow basic safety precautions, including the
following:
WARNING
1. This appliance can be used by persons with reduced physical, sensory or mental
capabilities or lack of experiences if they have been instructed on the use of the
appliance. They must understand the hazards involved.
2. Keep the appliance and its cord out of the reach of children. Children MUST NOT use
this appliance. Closely supervise children when near this appliance.
3. Children must not play with this appliance.
4. NEVER use an electrical socket below the counter.
5. NEVER connect this appliance to an external timer switch or separate remote control
system.
6. When using this appliance, keep at least six inches of space above and on all sides of
the appliance, ensuring air circulates properly.
7. To avoid the risk of electric shocks, DO NOT immerse the cord, plugs or appliance in
water or other liquids. Only use the basket provided to cook.
8. Regularly inspect the appliance and power cord. DO NOT use the appliance with a
damaged power cord or plug. If the appliance malfunctions or has been damaged in
any way, stop using it immediately and contact customer service.
9. DO NOT use an extension cord. A short cord is used, so children cannot grab it or
become entangled. It also reduces the risk of people tripping over the cord.
10. Ensure the appliance is properly assembled before use.
11. While the unit is operating, DO NOT cover the air intake vent or air outlet. This could
result in uncooked food, cause the appliance to overheat or cause damage.
12. Before placing the basket into the main unit, clean and dry the basket and unit with a
soft cloth.
13. This appliance is for household use only. DO NOT use this appliance for anything
other than its intended use. DO NOT use it in moving vehicles or boats. DO NOT use
outdoors. Misuse can cause injury or damage.
14. Place the appliance on a stable, level and dry surface. DO NOT move the appliance
when in use.
15. DO NOT place the appliance on the edge of a counter when in use.
16. DO NOT use accessory attachments, which are not recommended or sold by the
manufacturer. DO NOT place accessories in a microwave, in any type of oven or on
a ceramic cooktop, electric coil, gas burner range or outdoor grill. Accessory
attachments, which are not recommended by the manufacturer, can cause a fire,
electric shock and injury to persons.
17. ALWAYS ensure the basket is properly closed before operating.
18. DO NOT use the appliance without the basket installed.
19. DO NOT use this appliance for deep frying.
20. Keep the appliance away from hot surfaces, hot gases, electric burners and heated
ovens.
21. Prevent food from touching the heating elements. DO NOT overfill when cooking.
Overfilling can cause property damage or personal injury.
22. NEVER place items on top of this appliance.
23. Socket voltages can vary, affecting the performance of your product. To prevent
possible illness, use a thermometer to ensure your food is cooked to the
recommended temperature..
3
24. Should the unit emit black smoke, unplug it immediately. Wait for the smoke to stop
before removing any cooking accessories.
25. The appliance surface is covered with stainless steel. DO NOT touch the surface
whilst in use.
26. DO NOT touch hot surfaces. Appliance surfaces are hot during and after use. To
prevent burns or personal injury, always use protective hot pads or insulated oven
mitts. Always use available handles.
27. Take extreme caution when the appliance contains hot food. Improper use can result
in personal injury.
28. The appliance must be connected with a grounded socket, ensuring that it is inserted
correctly.
29. Spilled food can cause serious burns. Keep this appliance and cord away from
children. DO NOT let the cord hang over the edges of tables or touch hot surfaces.
30. During the cooking process, the basket and crisper plate become extremely hot.
Avoid physical contact when removing the basket and plate from the appliance.
Once removed, place the basket or plate on a heatresistant surface. DO NOT touch
accessories during or immediately after cooking.
31. Children must not clean or perform maintenance on this appliance.
32. To disconnect, press the power button to turn the unit off, then unplug from the
socket. Before cleaning or disassembly, allow the appliance to cool down
completely.
33. DO NOT clean with metal scouring pads. Pieces can break off the pad and touch
electrical parts – this can cause an electric shock.
34. During its first use, the unit may emit smoke. This is normal – the smoke will
disappear within a few minutes.
35. Please refer to the ‘ Cleaning & maintenance’ section for maintaining your appliance
PARTS
Air Intake Vent
Control Panel
Air Outlet
(Located on back) Main Unit

4
Crisper Plates
(One for each zone) Baskets
(One for each basket)
UNDERSTANDING YOUR APPLIANCE
BEFORE FIRST USE
1. Remove and discard any packaging material, promotional labels and tape from the
unit.
2. Remove all accessories from the package and read this manual carefully. Pay
particular attention to operational instructions, ‘warnings’ and ‘important safeguards’
to avoid injury or property damage.
3. Wash the baskets and crisper plates in hot, soapy water, then rinse and dry
thoroughly.
4. Clean the inside and outside of the product with a damp cloth, then dry thoroughly.
5. This appliance uses air-heating technology. Never pour oil or fat into the fryer.
1. Power button: Press to turn the appliance on and off. When the appliance is plugged
in, the power button will light up. Pressing the button once will illuminate the full panel
– the digital screen will show ‘On’. Holding the power button for three seconds will
shut off the appliance.
2. Temperature control buttons: Allows you to raise or lower the cooking temperature by
5°C.
3. Time control buttons: Allows you to select an exact cooking time to the minute.
4. Start/Pause: After selecting the temperature and time, press this button to start
cooking. To pause the cooking, first, select the zone you would like to pause, then
press the 'Start/Pause' button.
5. Air broil: Add the crispy finishing touch to meals or melt toppings.
AIR BROIL AIR FRY ROAST BAKE SMART
FINISH
REHEAT KEEP
WARM
MATCH
COOK
FRIES BACON WINGS DEHYDRATE
Function Buttons

5
COOKING PRESETS
Preset Button Cooking Chart
Menu Default
TEMP
Default TIME
(One
Basket/Two
Basket)
TEMP
Range
TIME
Range
200 °C
190 °C
105 °C
175 °C
95 °C
205 °C
190 °C
205 °C
65 °C
20mins
15mins
15mins
15mins
30mins
15mins
6mins
25mins
6hours
150-205°C
120-205°C
105-205°C
130-200°C
65-95°C
75-205°C
75-205°C
75-205°C
40-90°C
1 - 60 mins
1 min - 4 hrs (5 mins)
1 - 60 mins
1 - 60 mins
1 - 60 mins
1 - 60 mins
1 - 12hrs (15 mins)
1 min - 4 hrs (5 mins)
30min - 8hrs (15 mins)
AIR BROIL
6. Air fry: Use this function to give your food extra crispiness and crunch – little to no oil
needed.
7. Roast: Use this function for tender meats and more.
8. Bake: Make baked treats and desserts.
9. Reheat: Warm your leftovers, providing a crispy result.
10. Keep warm: Use this function to keep your food warm after cooking.
11. Chips: Use this function to cook chips.
12. Bacon: Use this function to cook bacon.
13. Wings: Use this function to cook chicken wings.
14. Dehydrate: Use this function to dehydrate meats, fruits and vegetables, providing a
healthy snack.
15. Smart finish: Automatically syncs the cooking times on both zones, ensuring they
finish at the same time, even if they have different cooking times.
16. Match cook: ‘Zone 2’ settings will match with ‘Zone 1’, so you can cook a larger
amount of the same food or cook different foods using the same function,
temperature and time.
Note:
Standby mode: If there is no interaction with the control panel for five minutes, the unit
will enter standby - only the power button will light up.
OPERATING BUTTONS
1) Controls the output for the basket on the left.
2) Controls the output for the basket on the right.
TEMP arrows: Before or during cooking, use the up and down arrows to adjust the
cooking temperature.
TIMER arrows: Before or during cooking, use the up and down arrows to adjust the
cooking time in any function.
10mins 205-230°C 1 - 30 mins230 °C
AIR FRY
ROAST
BAKE
REHEAT
KEEP WARM
FRIES
BACON
WINGS
DEHYDRATE

6
* NOTE: Air broil cannot be used in both zones at the same time.
NOTE: Default settings are for reference only. Food ingredients differ in source, size,
shape and brand. We cannot guarantee that these are the best settings for your
ingredients. The fast air change technology provides renewed heating inside the
appliance immediately - pulling the basket out of the unit during operation will hardly
affect the cooking process.
NOTE: If the dual basket air fryer starts with a cold boot, the cooking time should be for
three minutes longer.
COOKING IN YOUR DUAL BASKET AIR FRYER
SMART FINISH
When foods have different cooking times, temperatures or functions, you can get them
to finish at the same time. Follow these steps:
1. Place ingredients in the baskets, then place the baskets into the unit.
2. Press 'SMART FINISH' - Zone 1 will remain illuminated. Select the desired cooking
function. Use the TEMP arrows to set the temperature and use the TIME arrows to set
the time.
3. Select Zone 2, then select the desired cooking function (AIR BROIL is not available
for Zone 2). Use the TEMP arrows to set the temperature and use the TIME arrows to
set the time.
NOTE: Air broil can only be used in Zone 1.
NOTE: You can select a different function for Zone 2.
4. Then press the START/PAUSE button to begin cooking in the zone with the longest
time. The other zone will display 'HOLD'. The unit will activate the second zone when
both zones have the same time remaining.
NOTE: Some food ingredients require overturning when cooking. To overturn, hold the
handle and pull out the basket from the product, then turn the ingredients. After that,
slide the basket back into the unit. When you pull out the basket from the product, the
screen displays 'Stop'.
NOTICE: When using for the first time, adjust the temperature to 200 °C and let the unit
run for 30 minutes without food inside.
5. When cooking is complete, the unit will beep three times and 'End' will appear on the
display. The motor will stop working after 20 seconds. When the unit stops, 'On'
appears on the display.
6. Remove ingredients by tipping them out or using tongs/utensils. DO NOT place the
drawer on top of the unit.
MATCH COOK
To cook a larger amount of the same food or cook different foods using the same
function, temperature, and time:
1. Place ingredients in the baskets, then insert baskets into the unit.
2. Press the 'MATCH COOK' button and select a desired cooking function (air broil is not
available with this function). Use the 'TEMP' arrows to set the temperature. Use the
'TIME' arrows to set the time. The two screens will display the same temperature at
the same time.
3. Press 'START/PAUSE' to begin cooking in both zones.
NOTE: Some ingredients need overturning during the cooking process. To overturn
the ingredients, hold the handle and pull out the basket from the product, then turn the
ingredients. After that, slide the basket back into the unit. When you remove the
basket, the two screens will display 'Stop'.
4. When cooking is complete, the unit will beep three times and 'End' will appear on the

7
display. The motor will stop working after 20 seconds. When the unit stops, 'On' will
appear on the display.
5. Remove ingredients by tipping them out or using tongs/utensils. DO NOT place the
drawer on top of the unit.
NOTE: Air broil cannot be used in 'Match Cook' mode.
Starting both zones at the same time, but ending at different times:
1. Select zone 1, then select the desired function. Use the TEMP arrows to set the
temperature. Use the TIME arrows to set the time.
2. Select zone 2, then select the desired function. Use the TEMP arrows to set the
temperature. Use the TIME arrows to set the time. Note: Air broil is not available in
Zone 1.
3. Press the 'START/PAUSE' button to begin cooking in both zones.
4. When cooking is complete in one zone, the unit will beep three times and 'End' will
appear on the display. The motor will stop working after 20 seconds and 'On' will
appear on the zone display.
5. Remove ingredients by tipping them out or using tongs/utensils, then wait for the
ingredients in the other basket to finish cooking.
PAUSING BOTH ZONES AT THE SAME TIME
1. To pause the time in the 'SMART FINISH' mode or to pause both zones in dual
cooking, press the 'START/PAUSE' button.
2. To resume cooking, press the 'START/PAUSE' button again.
PAUSING A SINGLE ZONE DURING DUAL ZONE COOKING
1. To pause the time in a single zone while both zones are running, select the zone you
want to pause, then press the 'START/PAUSE' button. To pause one zone whilst both
zones are running, select the zone you want to pause, then press the 'START/PAUSE'
button.
2. To resume cooking, press the 'START/PAUSE' button again.
CANCEL OPERATION
In any mode, press the ‘START/PAUSE’ button, then press the power button to cancel a
programme. The unit will stop working and ‘On’ will appear on the display.
COOKING IN A SINGLE ZONE
To turn on the unit, plug the power cord into a wall outlet, then press the power button.
Air broil
Note: Air broil cannot be used in both zones at the same time.
1. Place the crisper plate into the basket, then add the ingredients into the basket and
place the basket into the unit.
2. The unit will default to Zone 1 (to use Zone 2, select Zone 2). Select 'air broil'.
3. Use the TEMP arrows to set the desired temperature.
4. Use the TIME arrows to set the time up to 30 minutes (each press adds/subtracts one
minute).
5. Press the ‘START/PAUSE’ button to begin cooking.
6. When cooking is complete, the unit will beep three times and ‘End’ will appear on the
display. The motor will stop working after 20 seconds. When the unit stops, ‘On’ will
appear on the display. Remove ingredients by tipping them out or using
tongs/utensils.

8
Air fry
1. Place the crisper plate into the basket, then add the ingredients into the basket and
place the basket into the unit.
2. The unit will default to Zone 1 (to use Zone 2, select Zone 2). Select 'air fry'.
3. Use the TEMP arrows to set the desired temperature.
4. Use the TIME arrows to set the time up to 30 minutes (each press adds/subtracts one
minute).
5. Press the ‘START/PAUSE’ button to begin cooking.
NOTE: During cooking, you can remove the basket and shake or toss ingredients for
even crisping. To overturn ingredients, hold the handle and pull out the basket from the
product, then turn the ingredients. After that, slide the basket back into the unit. When
you pull out the basket from the product, the screen will show 'Stop'.
6. When cooking is complete, the unit will beep three times and ‘End’ will appear on the
display. The motor will stop working after 20 seconds. When the unit stops, ‘On’ will
appear on the display. Remove ingredients by tipping them out or using
tongs/utensils.
Roast
1. Install the crisper plate into the basket (optional), then place the ingredients into the
basket and insert it back into the unit.
2.The unit will default to Zone 1 (to use Zone 2, select Zone 2). Select 'ROAST'.
3. Use the TEMP arrows to set the desired temperature.
4. Use the TIME arrows to set the time up to four hours (each press adds/subtracts five
minutes).
5. Press the 'START/PAUSE' button to begin cooking.
6. When cooking is complete, the unit will beep three times and ‘End’ will appear on the
display. The motor will stop working after 20 seconds. When the unit stops, ‘On’ will
appear on the display. Remove ingredients by tipping them out or using
tongs/utensils.
Bake
1. Install the crisper plate into the basket (optional), then place the ingredients into the
basket and insert it back into the unit.
2. The unit will default to Zone 1 (to use zone 2 , select Zone 2). Select 'BAKE'.
NOTE: To convert recipes from a traditional oven, reduce the temperature by 5°C.
3. Use the TEMP arrows to set the desired temperature.
4. Use the TIME arrows to set the timer up to four hours (each press adds/subtracts five
minutes).
5. Press the 'START/PAUSE' button to begin cooking.
6. When baking is complete, the unit will beep three times and ‘End’ will appear on the
display. The motor will stop working after 20 seconds. When the unit stops, ‘On’ will
appear on the display. Remove ingredients by tipping them out or using
tongs/utensils.
Reheat
1. Install the crisper plate into the basket (optional), then place the ingredients into the
basket and insert it back into the unit.
2. The unit will default to Zone 1 (to use Zone 2 instead, select Zone 2). Select
'REHEAT'.
3. Use the TEMP arrows to set the desired temperature.
4. Use the TIME arrows to set the timer up to one hour (each press adds/subtracts one
minute).

9
5. Press the START/PAUSE button to begin reheating.
6. When reheating is complete, the unit will beep three times and ‘End’ will appear on
the display. The motor will stop working after 20 seconds. When the unit stops, ‘On’
will appear on the display. Remove ingredients by tipping them out or using
tongs/utensils.
Keep Warm
1. Install the crisper plate into the basket (optional), then place the ingredients into the
basket and insert it back into the unit.
2. The unit will default to Zone 1 (to use Zone 2, select Zone 2). Select 'KEEP WARM'.
3. Use the TEMP arrows to set the desired temperature.
4. Use the TIME arrows to set the timer up to eight hours (each press adds/subtracts 15
minutes).
5. Press the 'START/PAUSE' button to begin this function.
6. When this function is complete, the unit will beep three times and ‘End’ will appear on
the display. The motor will stop working after 20 seconds. When the unit stops, ‘On’
will appear on the display. Remove ingredients by tipping them out or using
tongs/utensils.
Fries
1. Install the crisper plate into the basket, then place the ingredients into the basket and
insert it back into the unit.
2. The unit will default to Zone 1 (to use Zone 2, select Zone 2). Select 'FRIES'.
3. Use the TEMP arrows to set the desired temperature.
4. Use the TIME arrows to set the timer up to one hour (each press adds/subtracts one
minute).
5. Press the 'START/PAUSE' button to begin cooking.
NOTE: During cooking, you can remove the basket and shake or toss ingredients for
even crisping. To overturn ingredients, hold the handle and pull out the basket from the
product, then turn the ingredients. After that, slide the basket back into the unit. When
you pull out the basket from the product, the screen will show 'Stop'.
6. When cooking is complete, the unit will beep three times and ‘End’ will appear on the
display. The motor will stop working after 20 seconds. When the unit stops, ‘On’ will
appear on the display. Remove ingredients by tipping them out or using
tongs/utensils.
Bacon
1. Install the crisper plate into the basket, then place the ingredients into the basket and
insert it back into the unit.
2.The unit will default to Zone 1 (to use Zone 2, select Zone 2). Select 'BACON'.
3. Use the TEMP arrows to set the desired temperature.
4. Use the TIME arrows to set the timer up to one hour (each press adds/subtracts one
minute).
5. Press the 'START/PAUSE' button to begin cooking.
6. When cooking is complete, the unit will beep three times and ‘End’ will appear on the
display. The motor will stop working after 20 seconds. When the unit stops, ‘On’ will
appear on the display. Remove ingredients by tipping them out or using
tongs/utensils.

10
Wings
1. Install the crisper plate into the basket, then place the ingredients into the basket and
insert it back into the unit.
2.The unit will default to Zone 1 (to use Zone 2 instead, select Zone 2). Select 'WINGS'.
3. Use the TEMP arrows to set the desired temperature.
4. Use the TIME arrows to set the timer up to one hour (each press adds/subtracts one
minute).
5. Press the 'START/PAUSE' button to begin cooking.
6. When cooking is complete, the unit will beep three times and ‘End’ will appear on the
display. The motor will stop working after 20 seconds. When the unit stops, ‘On’ will
appear on the display. Remove ingredients by tipping them out or using
tongs/utensils.
Dehydrate
1. Place a single layer of ingredients in the basket. Then install the crisper plate in the
basket on top of the ingredients. Finish by placing another layer of ingredients on the
crisper plate.
2. The unit will default to Zone 1 (to use Zone 2, select Zone 2). Select 'DEHYDRATE'.
The default temperature will appear on the display.
3. Use the TEMP arrows to set the desired temperature.
4. Use the TIME arrows to set a timer between 1-12 hours (each press adds/subtracts
15 minutes).
5. Press the 'START/PAUSE' button to begin dehydrating.
6. When cooking is complete, the unit will beep three times and ‘End’ will appear on the
display. The motor will stop working after 20 seconds. When the unit stops, ‘On’ will
appear on the display. Remove ingredients by tipping them out or using
tongs/utensils.
CLEANING YOUR DUAL BASKET AIR FRYER
Clean the unit thoroughly after each use.
Non-sticking painted coat covers the inside of the baskets, crisper plates and product.
Do not use kitchen wares or abrasive cleaning material for cleaning - this will damage
the coating.
1. Unplug the appliance and let it cool down completely. Take out the baskets, allowing
the unit to cool down faster.
2. Use a damp cloth to clean the outside parts of the appliance.
3. Clean the baskets or the bottom of the baskets with hot water, detergent and a non-
abrasive sponge. Add the hot water and detergents into the baskets together. Place
the crisper plates into the baskets, allowing them to soak for 10 minutes.
4. Clean the inside of the product with hot water and a non-abrasive sponge.
5. Use a cleaning brush to clean the heating components, removing any remaining food
residue.
6. Clean the air inlet opening and air outlet opening with a clean brush.
Note: If food residue is stuck on the crisper plates or baskets, place them in a sink filled
with warm, soapy water and allow them to soak.
STORING YOUR DUAL BASKET AIR FRYER
1. Ensure the appliance is cool, then clean and dry all parts before storing.
2. Never store the dual basket air fryer while hot or wet.
3. Put the clean crisper plates into each fryer basket, then place the fryer baskets into
the appliance.
4. Store the appliance in its box or in a clean, dry place.

11
HELPFUL TIPS
1. For consistent browning, make sure ingredients are arranged in an even layer on the
bottom of the basket with no overlapping. If ingredients are overlapping, make sure to
shake them halfway through cooking.
2. Temperature and time can be adjusted during cooking. Press the 'START/PAUSE'
button, select the zone you want to adjust, then press the TEMP arrows to adjust the
temperature or the TIME arrows to adjust the time. After that, press the
'START/PAUSE' button again.
3. To convert recipes from a traditional oven, reduce the temperature by 5°C. Check
food frequently to avoid overcooking.
4. Occasionally, the fan from the air fryer will blow lightweight foods around. To stop this,
secure foods (like the top slice of bread on a sandwich) with wooden toothpicks.
5. The crisper plates elevate ingredients in the baskets, allowing air to circulate under
and around ingredients for even, crisp results.
6. After selecting a cooking function, you can press the 'START/PAUSE' button to begin
cooking immediately. The unit will run at the default temperature and time.
7. For best results with fresh vegetables and potatoes, use at least one tablespoon of
oil. Add more oil as desired to achieve the preferred level of crispiness.
8. For best results, check progress throughout cooking and remove food when it is at the
desired level of brownness. We recommend using an instant-read thermometer to
monitor the internal temperature of food.
9. For best results, remove food directly after the cooking time is complete to avoid
overcooking.
REPLACEMENT PARTS
To order additional parts and accessories, you can contact the manufacturer or
customer service centre.
FAQs
How do I adjust the temperature or time while using a single zone?
When a single zone is running, press the 'START/PAUSE' button, then adjust the time or
temperature by pressing the up/down arrows.
How do I adjust the temperature or time while using both zones?
Press the 'START/PAUSE' button, select the desired zone, then use the TEMP arrows to
adjust the temperature or the TIME arrows to adjust the time.
Can I cook different foods in each zone and not worry about cross-contamination?
Yes, both zones are self-contained with separate heating elements and fans.
How do I pause or stop one zone when using both zones?
Select the zone you want to pause or stop, then press the START/PAUSE button.
Are the baskets safe to put on my countertop?
The baskets will heat up during cooking. Use caution when handling them and place
them on heat-safe surfaces only. DO NOT place the baskets on the top of the unit.
When should I use the crisper plate?
Use the crisper plate when you want food to come out crispy. The plate elevates the food
in the basket, allowing air to flow under and around it, cooking ingredients evenly.

12
Why didn't my food cook fully?
Make sure the basket is fully inserted during cooking. For consistent browning, make
sure ingredients are arranged in an even layer on the bottom of the basket with no
overlapping. Shake the basket to toss ingredients for even crispiness.
Why is my food burned?
For best results, check progress throughout cooking and remove food when it's at the
desired level of brownness. Remove food immediately after the cooking time is
complete to avoid overcooking.
Why do some ingredients blow around when air frying?
Occasionally, the fan from the air fryer will blow lightweight foods around. Use wooden
toothpicks to secure loose lightweight food (e.g. the top slice of bread on a sandwich).
Can I air fry wet, battered ingredients?
Yes, but use the proper breading technique. It is important to coat foods first with flour,
egg, then with bread crumbs. Press breading firmly onto the battered ingredients, so
crumbs won't be blown away because of the fan.
Why did the display screen go black?
The unit is in standby mode. Press the power button to turn it back on.
Why is the unit beeping?
The food is done cooking.
Why is there an 'E' message on the display screen?
The unit is not functioning properly. Please contact the manufacturer or its service
agent.
Guarantee and Services
If you require services or repairing, or have any doubt, you can contact your local
customer centre. If there is no customer centre near your location, you can contact the
supplier.
If you have any questions, please contact our customer care center.
Our contact details are below:
0044-800-240-4004
enquiries@mhstar.co.uk
IMPORTER ADDRESS:
MH STAR UK LTD
Unit 27, Perivale Park,
Horsenden lane South
Perivale, UB6 7RH
MADE IN CHINA

13
MONTAGEANWEISUNGEN
IN230700217V01_DE
800-174V70
DIGITALE HEISSLUFTFRITTEUSE MIT
ZWEI KÖRBEN BEDIENUNGSANLEITUNG
HIC-AF-9001DG
* Beachten Sie bei der Verwendung von Elektrogeräten immer die
grundlegenden Sicherheitsmaßnahmen. Verwenden Sie das Gerät erst dann,
wenn Sie dieses Handbuch sorgfältig gelesen haben.
WICHTIG! SORGFÄLTIG LESEN UND FÜR SPÄTER NACHSCHLAGEN
AUFBEWAHREN

14
INHALT
Wichtige sicherheitsvorkehrungen ............................................................................15
Teile .........................................................................................................................17
Ihr gerät verstehen ...................................................................................................17
Vor der ersten verwendung .......................................................................................17
Funktionstasten ........................................................................................................18
Bedienungstasten .....................................................................................................19
Garvoreinstellungen .................................................................................................19
Garen in ihrer doppelkorb-heißluftfritteuse ................................................................20
Garen in einer einzigen zone .....................................................................................21
Luft-grillen ................................................................................................................21
Heissluftfrittieren ......................................................................................................22
Braten ......................................................................................................................22
Backen .....................................................................................................................22
Aufwärmen ...............................................................................................................22
Warmhalten ..............................................................................................................23
Pommes ...................................................................................................................23
Speck .......................................................................................................................23
Flügel .......................................................................................................................24
Dörren ......................................................................................................................24
Reinigung ihrer doppelkorb-heißluftfritteuse ..............................................................24
Aufbewahrung ihrer doppelkorb- heißluftfritteuse ......................................................25
Hilfreiche tipps .........................................................................................................25
Austauschteile .........................................................................................................25
Anleitung zur fehlersuche .........................................................................................26
Garantie und serviceleistungen .................................................................................27

15
WICHTIGE SICHERHEITSVORKEHRUNGEN
NUR FÜR DIE VERWENDUNG IM HAUSHALT. LESEN SIE ALLE ANWEISUNGEN
DURCH.
Beachten Sie bei der Verwendung von Elektrogeräten immer die grundlegenden
Sicherheitsmaßnahmen, einschließlich der folgenden:
WARNUNG
1. Dieses Gerät kann von Personen mit eingeschränkten körperlichen, sensorischen
oder geistigen Fähigkeiten oder mangelnder Erfahrung verwendet werden, wenn sie
in die Verwendung des Geräts eingewiesen wurden. Sie müssen die damit
verbundenen Gefahren verstehen.
2. Bewahren Sie das Gerät und sein Kabel außerhalb der Reichweite von Kindern auf.
Kinder DÜRFEN dieses Gerät NICHT verwenden. Beaufsichtigen Sie Kinder genau,
wenn sie sich in der Nähe dieses Geräts aufhalten.
3. Kinder dürfen nicht mit diesem Gerät spielen.
4. Verwenden Sie NIEMALS eine Steckdose unterhalb der Theke.
5. Schließen Sie dieses Gerät NIEMALS an eine externe Zeitschaltuhr oder ein
separates Fernbedienungssystem an.
6. Achten Sie bei der Verwendung dieses Geräts darauf, dass oberhalb und an allen
Seiten des Geräts mindestens Sechs Zoll Platz ist, damit die Luft gut zirkulieren kann.
7. Um das Risiko eines Stromschlags zu vermeiden, tauchen Sie das Kabel, den
Stecker oder das Gerät NICHT in Wasser oder andere Flüssigkeiten. Verwenden Sie
zum Garen nur den angegebenen Korb.
8. Überprüfen Sie das Gerät und das Stromkabel regelmäßig. Verwenden Sie das Gerät
NICHT mit einem beschädigten Stromkabel oder Stecker. Wenn das Gerät nicht
richtig funktioniert oder in irgendeiner Weise beschädigt wurde, stellen Sie die
Verwendung sofort ein und wenden Sie sich an den Kundendienst.
9. Verwenden Sie kein Verlängerungskabel. Es wird ein kurzes Kabel verwendet, damit
Kinder es nicht greifen oder sich darin verheddern können. Außerdem wird so die
Gefahr verringert, dass Personen über das Kabel stolpern.
10. Vergewissern Sie sich vor der Verwendung, dass das Gerät richtig
zusammengebaut ist.
11. Decken Sie während des Betriebs des Geräts NICHT die Lufteinlassöffnung oder
den Luftauslass ab. Dies könnte dazu führen, dass die Lebensmittel nicht gar
werden, das Gerät überhitzt oder beschädigt wird.
12. Reinigen und trocknen Sie den Korb und das Gerät mit einem weichen Tuch, bevor
Sie den Korb in das Hauptgerät einsetzen.
13. Dieses Gerät ist nur für die Verwendung im Haushalt bestimmt. Verwenden Sie
dieses Gerät NICHT für einen anderen als den vorgesehenen Zweck. Verwenden
Sie es NICHT in fahrenden Fahrzeugen oder Booten. Verwenden Sie das Gerät nicht
im Freien. Falsche Verwendung kann zu Verletzungen oder Schäden führen.
14. Stellen Sie das Gerät auf eine stabile, ebene und trockene Oberfläche. Bewegen Sie
das Gerät nicht, wenn es unter Verwendung ist.
15. Stellen Sie das Gerät während der Verwendung NICHT auf die Kante einer
Arbeitsplatte.
16. Verwenden Sie KEINE Zubehörteile, die nicht vom Hersteller empfohlen oder
verkauft werden. Stellen Sie das Zubehör NICHT in eine Mikrowelle, in einen Ofen
oder auf ein Cerankochfeld, einen Elektroherd, einen Gasherd oder einen
Außengrill. Zubehörteile, die nicht vom Hersteller empfohlen werden, können einen
Brand, einen Stromschlag und Verletzungen von Personen verursachen.
17. Vergewissern Sie sich IMMER, dass der Korb vor dem Betrieb richtig geschlossen
ist.

16
18. Verwenden Sie das Gerät NICHT, wenn der Korb nicht installiert ist.
19. Verwenden Sie dieses Gerät NICHT zum Frittieren.
20. Halten Sie das Gerät von heißen Oberflächen, heißen Gasen, Elektrobrennern und
beheizten Öfen fern.
21. Achten Sie darauf, dass die Lebensmittel nicht mit den Heizelementen in Berührung
kommen. Überfüllen Sie das Gerät beim Garen NICHT. Eine Überfüllung kann zu
Sach- oder Personenschäden führen.
22. Stellen Sie NIEMALS Elemente auf das Gerät.
23. Die Spannungen der Steckdosen können variieren und die Leistung Ihres Geräts
beeinträchtigen. Um Krankheiten vorzubeugen, verwenden Sie ein Thermometer,
um sicherzustellen, dass Ihre Speisen bei der empfohlenen Temperatur gegart
werden.
24. Sollte das Gerät schwarzen Rauch ausstoßen, ziehen Sie sofort den Netzstecker.
Warten Sie, bis der Rauch aufhört, bevor Sie das Garzubehör entfernen.
25. Die Oberfläche des Geräts ist mit rostfreiem Stahl abgedeckt. Berühren Sie die
Oberfläche während der Verwendung NICHT.
26. Berühren Sie keine heißen Oberflächen. Die Oberflächen des Geräts sind während
und nach der Verwendung heiß. Zur Vermeidung von Verbrennungen oder
verletzungen, verwenden Sie immer Topflappen oder isolierte Ofenhandschuhe.
Verwenden Sie immer die verfügbaren Griffe.
27. Seien Sie äußerst vorsichtig, wenn das Gerät heiße Lebensmittel enthält. Eine
unsachgemäße Verwendung kann zu Verletzungen führen.
28. Schließen Sie das Gerät an eine geerdete Steckdose an und vergewissern Sie sich,
dass diese korrekt eingesteckt ist.
29. Verschüttete Lebensmittel können schwere Verbrennungen verursachen. Halten Sie
das Gerät und das Kabel von Kindern fern. Lassen Sie das Kabel NICHT über die
Tischkanten hängen und berühren Sie keine heißen Oberflächen.
30. Während des Garvorgangs werden der Korb und die Frittierplatte extrem heiß.
Vermeiden Sie Körperkontakt, wenn Sie den Korb und die Platte aus dem Gerät
nehmen. Stellen Sie den Korb oder die Platte nach dem Herausnehmen auf eine
hitzebeständige Oberfläche. Berühren Sie das Zubehör NICHT während oder
unmittelbar nach dem Garen.
31. Kinder dürfen dieses Gerät nicht reinigen oder Wartungsarbeiten daran durchführen.
32. Um das Gerät vom Stromnetz zu trennen, drücken Sie die Ein-/Aus-Taste, um das
Gerät auszuschalten, und ziehen Sie dann den Stecker aus der Steckdose. Lassen
Sie das Gerät vor der Reinigung oder Demontage vollständig abkühlen.
33. Nicht mit Scheuerschwämmen aus Metall reinigen. Teile können von der Unterlage
abbrechen und elektrische Teile berühren - dies kann zu einem Stromschlag führen.
34. Bei der ersten Verwendung kann das Gerät Rauch abgeben. Das ist normal - der
Rauch wird innerhalb weniger Minuten verschwinden.
35. Informationen zur Wartung Ihres Geräts finden Sie im Abschnitt 'Reinigung und
Wartung'.

17
TEILE
Lufteinlassöffnung
Bedienfeld
Luftauslass
(befindet sich auf der
Rückseite)
Hauptgerät
Frittierplatten
(Eine für jede Zone) Körbe
(Einer für jeden Korb)
IHR GERÄT VERSTEHEN
VOR DER ERSTEN VERWENDUNG
1. Entfernen Sie jegliches Verpackungsmaterial, Werbeetiketten und Klebeband von
dem Gerät und entsorgen Sie es.
2. Nehmen Sie alle Zubehörteile aus der Verpackung und lesen Sie dieses Handbuch
sorgfältig durch. Achten Sie besonders auf die Bedienungsanweisungen,
′Warnhinweise′ und ′wichtige Sicherheitsvorkehrungen′, um Verletzungen oder
Sachschäden zu vermeiden.
3. Waschen Sie die Körbe und Gitterroste in heißem Seifenwasser, spülen Sie sie dann
ab und trocknen Sie sie gründlich.
4. Reinigen Sie das Gerät innen und außen mit einem feuchten Tuch und trocknen Sie
es anschließend gründlich ab.
5. Dieses Gerät verwendet die Technologie der Lufterhitzung. Füllen Sie niemals Öl
oder Fett in die Fritteuse.

18
1. Ein-/Aus-Taste: Drücken Sie diese Taste, um das Gerät ein- und auszuschalten.
Wenn das Gerät eingesteckt ist, leuchtet die Ein-/Aus-Taste auf. Wenn Sie die Taste
einmal drücken, leuchtet das gesamte Modul auf - auf dem digitalen Display erscheint
'Ein'. Wenn Sie die Ein-/Aus-Taste drei Sekunden lang gedrückt halten, schaltet sich
das Gerät aus.
2. Tasten für die Temperaturregelung: Ermöglicht es Ihnen, die Gartemperatur um 5 °C
zu erhöhen oder zu senken.
3. Tasten für die Zeitsteuerung: Hiermit können Sie die Garzeit auf die Minute genau
einstellen.
4. Start/Pause: Nach der Auswahl von Temperatur und Zeit drücken Sie diese Taste, um
das Garen zu starten. Um das Garen zu unterbrechen, wählen Sie zunächst die Zone,
die Sie unterbrechen möchten, und drücken dann die Taste 'Start/Pause'.
5. Luft-Grillen: Geben Sie Mahlzeiten den knusprigen letzten Pfiff oder lassen Sie
Toppings schmelzen
6. Frittieren: Verwenden Sie diese Funktion, um Ihre Speisen besonders knusprig zu
machen - mit wenig bis gar keinem Öl.
7. Braten: Verwenden Sie diese Funktion für zartes Fleisch und mehr.
8. Backen: Bereiten Sie gebackene Leckereien und Desserts zu.
9. Aufwärmen: Wärmen Sie Ihre Reste auf und erreichen Sie ein knuspriges Ergebnis.
10. Warmhalten: Verwenden Sie diese Funktion, um Ihre Speisen nach dem Garen
warm zu halten.
11. Pommes: Verwenden Sie diese Funktion, um Pommes zuzubereiten.
12. Speck: Verwenden Sie diese Funktion, um Speck zu braten.
13. Hähnchenflügel: Verwenden Sie diese Funktion, um Hähnchenflügel zu braten.
14. Dörren: Verwenden Sie diese Funktion, um Fleisch, Obst und Gemüse zu dörren
und so einen gesunden Snack vorzubereiten.
15. Smartes Finish: Synchronisiert automatisch die Garzeiten beider Zonen und sorgt
dafür, dass sie zur gleichen Zeit fertig werden, auch wenn sie unterschiedliche
Garzeiten haben.
16. Abgeglichenes Garen: Die Einstellungen von 'Zone 2' werden mit denen von 'Zone 1'
abgeglichen, so dass Sie eine größere Menge desselben Lebensmittels garen oder
verschiedene Lebensmittel mit derselben Funktion, Temperatur und Zeit zubereiten
können.
Luft-Grillen Heissluftfrittieren Braten Backen
Smartes
finish
Aufwärmen Warmhalten
Abgeglichenes
garen
Pommes Speck Flügel Dörren
FUNKTIONSTASTEN

19
GARVOREINSTELLUNGEN
Gartabelle mit Voreinstelltaste
Menü Standard
TEMP
Standard ZEIT
(Ein Korb /
Zwei Körbe)
TEMP-Bereich ZEIT-Bereich
200 °C
190 °C
105 °C
175 °C
95 °C
205 °C
190 °C
205 °C
65 °C
20Minuten
15Minuten
15Minuten
15Minuten
30Minuten
15Minuten
6Minuten
25Minuten
6Stunden
150-205°C
120-205°C
105-205°C
130-200°C
65-95°C
75-205°C
75-205°C
75-205°C
40-90°C
1 - 60 Minuten
1 Minute - 4 Stunden
(5 Minuten)
1 - 60 Minuten
1 - 60 Minuten
1 - 60 Minuten
1 - 60 Minuten
1 - 12 Stunden
(15 Minuten)
1 Minute - 4 Stunden
(5 Minuten)
30Minuten - 8 Stunden
(15 Minuten)
LUFT-
GRILLEN
Hnweis:
Standby-Modus: Wenn Sie fünf Minuten lang nicht auf das Modul drücken, schaltet das
Gerät in den Standby-Modus - nur die Ein-/Aus-Taste leuchtet.
BEDIENUNGSTASTEN
1) Steuert den Ausgang für den Korb auf der linken Seite.
2) Steuert den Ausgang für den Korb auf der rechten Seite.
TEMP-Pfeile: Verwenden Sie vor oder während des Garens die Pfeile nach oben und
unten, um die Gartemperatur einzustellen. TIMER-Pfeile: Verwenden Sie vor oder
während des Garens die Auf- und Abwärtspfeile, um die Garzeit in jeder Funktion
einzustellen.
10Minuten 205-230°C 1 - 30 Minuten230 °C
HEISSLUFTF
RITTIEREN
BRATEN
BACKEN
AUFWÄRMEN
WARMHALTEN
POMMES
SPECK
FLÜGEL
DÖRREN
* HINWEIS: Das Luft-Grillen kann nicht in beiden Zonen gleichzeitig verwendet werden.
HINWEIS: Die Standardeinstellungen dienen nur als Referenz. Die Lebensmittel
unterscheiden sich in Bezug auf Herkunft, Größe, Form und Marke. Wir können nicht
garantieren, dass dies die besten Einstellungen für Ihre Zutaten sind. Die Technologie
des schnellen Luftwechsels sorgt für eine sofortige erneute Erwärmung im Inneren des
Geräts - wenn Sie den Korb während des Betriebs aus dem Gerät ziehen, wird der
Garvorgang kaum beeinträchtigt.
HINWEIS: Wenn die Doppelkorb-Heißluftfritteuse mit einem kalten Start beginnt, sollte
die Garzeit drei Minuten länger sein.
This manual suits for next models
1
Table of contents
Languages:
Other HOMCOM Fryer manuals

HOMCOM
HOMCOM 800-172V70 User manual

HOMCOM
HOMCOM 800-114V70 User manual

HOMCOM
HOMCOM 800-120V80 User manual

HOMCOM
HOMCOM 800-124V70 Manual

HOMCOM
HOMCOM 800-117 User manual

HOMCOM
HOMCOM 800-164V70 User manual

HOMCOM
HOMCOM 800-166V70 User manual

HOMCOM
HOMCOM 800-148V70 User manual

HOMCOM
HOMCOM 800-119V70 Datasheet

HOMCOM
HOMCOM 800-169V70 User manual