HOMCOM 800-147V70 User manual

ASSEMBLY INSTRUCTION
INcsb089_UK_DE_ES
800-147V70_800-147V90
IMPORTANT, RETAIN FOR FUTURE REFERENCE: READ CAREFULLY
AIR FRYER INSTRUCTION MANUAL
FRITTEUSE GEBRAUCHSANWEISUNG
FREIDORA DE AIRE MANUAL DE INSTRUCCIONES
Rating voltage/Nennspannung/Tensión nominal:
220-240V~ 50-60Hz
Power/Leistung/Potencia:1350W

2
Read this booklet thoroughly before using and keep for future reference.
CONTENTS
IMPORTANT SAFEGUARDS.........................................................................3
SAVE THESE INSTRUCTIONS......................................................................4
KNOW YOUR AIR FRYER.............................................................................5
OPERATING INSTRUCTIONS.......................................................................6
CARE & MAINTENANCE...............................................................................7
GUIDE.........................................................................................................7
ENVIRONMENT FRIENDLY DISPOSAL.........................................................8
-EN-

3
IMPORTANT SAFEGUARDS:
When using electrical units, basic safety precautions should always be followed
including the following:
1. Do not touch the hot surface.
2. To prevent electric shock, do not immerse the power cord, plug or the machine
in water or other liquids.
3. Ensure small children are supervised when using or near this appliance.
4. Unplug the from the socket when not in use and before cleaning. Ensure the
appliance has cooled down before putting on or taking off parts.
5. It is not recommended to use other accessories except the ones provided for
this machine – using other parts could damage the appliance.
6. Not suitable for outdoor use.
7. Do not let the power cord hang on the edge of the table or touch hot surfaces.
8. Do not place on hot gas, on or near electric burners or in heated places.
9. Take extra care when moving equipment containing hot oil or other hot liquids.
10. To disconnect, switch the timer off, turn the thermostat to the end and unplug
the appliance.
11. Do not place this equipment on a wall. There should be at least 76mm free at
the back of the appliance. Do not place any objects on top of the device.
12. During the frying process, hot steam is released from the air outlet – keep
hands and face away. When removing the frying pan basket from the device,
be careful of steam and high temperatures.
13. Make sure that ingredients prepared in this equipment are golden yellow, not
dark or brown. Remove residue.
WARNING
Please immediately unplug and send unit to our customer
service department if other problems with the appliance occur.
Accessories:
The frying pan and basket can become very hot during the cooking process.
During and after cooking, do not touch the accessories – wait until they have
completely cooled down. Hold the frying pan only by the handle and be careful
when removing these items from the device. When handling potentially hot
accessories, please wear oven gloves or pot pads. Before cleaning, let all items
cool down completely.
Do not use this machine except for its intended purpose.
Note: Place the device on a level, flat and stable surface. This device is for
ordinary household use only. It is not intended for commercial use. This
appliance is not to be used in motels, bed and breakfasts and other residential
environments.

4
SAVE THESE INSTRUCTIONS
1. Do not place the equipment near flammable materials, heating equipment or in
a humid environment.
2. The height of the ingredients placed in the fryer should meet the instructions
listed in the 'Operation Instructions'.
3. Do not use other parts not specifically designed for the air fryer.
4. Do not put other cooking pots into the basket. Do not replace any parts with
other containers.
5. If lots of smoke arises from the ventilation holes when in use, please unplug
immediately and contact customer service.
6. Do not move the device during operation. Only after the air fryer has completely
cooled down should you move it.
7. Do not block the vents.
8. If there are any problems during the operation, necessary repair services must
be authorised by the manufacturer.
9. Do not disassemble the equipment or replace any parts by yourself.
10. Do not use metal utensils on the coated frying pan basket, as this will damage
the surface.
11. If the power cord is damaged, do not use the device.
12. When the equipment is running or cooling down, please keep out of the reach
of small children.
13. Keep hands and face away from vents or places where heat or steam is
emitted.
14. Clean the appliance before using.
15. When heating for the first time, some smoke will arise from the equipment.
CAUTION
* Always put the ingredients to be fried in the basket to prevent
direct contact with the heating components.
* Do not cover the air inlet and outlet while the appliance is on.
* Do not pour oil into the fry pan – this is a fire hazard.
* Never touch the inside of the appliance while it is operating.

5
KNOW YOUR AIR FRYER
PARTS DESCRIPTON
1: Knob: Adjust temperature, time and ON/OFF.
2: Temperature/time button: Select the temperature or time to be adjusted.
3: Function button: Select the function you need.
4: Digital display: Shows working time and temperature.
5: Exhaust: Exhaust hot air (steam).
6: Grill: Place cooking food.
7: Fryer: Oil and food residue - easy to clean.
1
2
3
4
5
6
7

6
OPERATING INSTRUCTIONS
Before Use:
1. Remove all packaging.
2: Remove glue and labels on the appliance.
3: Clean the basket and fry pan thoroughly with hot water, a nonabrasive sponge
and a mild dish detergent or in the dishwasher – use the top rack only.
4: Wipe the inside and outside of the appliance with a wet cloth. Do not immerse
the appliance in water.
Note: This appliance uses hot air. Do not fill the basket with oil.
Operation Preparation:
1. Place the appliance on a level, even, and stable heat-resistant surface.
2. Place the fry pan (including the fry pan basket) into the air fryer.
3. Plug the appliance into a standard wall socket. The power plug is included in
the package.
Note: Do not cover or block the vent located on top of the air fryer. Doing so can
prevent proper ventilation and will affect the cooking results.
Operation function
Adjust temperature:
Step 1: Plug in the appliance, press the ON/OFF button, select the function you
want, adjust the time and temperature - press the START button to begin using.
Shaking Food:
When the time reaches 2/3 of the preset time, a SHAKE prompt will appear - the food
needs to be shaken during the cooking process.
To properly shake the food, hold the handle, remove the fry pan from the appliance
and shake. Once the food has been adequately shaken, slide the fry pan back into
the air fryer.

7
CARE & MAINTENANCE
Cleaning:
Clean the appliance after every use or in between a large number of batches.
The basket and the fry pan have a non-stick coating. Do not use metal utensils or
harsh abrasives when cleaning as this can damage the coating.
* Unplug the appliance and make sure it cools completely.
Note: Remove the fry pan and place on a heat-resistant surface to cool the
appliance quicker.
* Use a damp cloth to wipe the outside of the appliance.
* Clean the basket and inside components with a nonabrasive sponge, hot water
and mild detergent.
Note: If you place the fry pan into the dishwasher, use the top rack only.
Tip: If there is residual food in the basket, add some hot water and let it soak
separately for about 10 minutes for easier cleaning.
Clean the inside of the appliance with a nonabrasive sponge and hot water.
Once cooled completely, clean the heating components with a soft cleaning brush
to remove any lingering food.
Storage:
Unplug the appliance and let it cool down completely.
Make sure that all the parts are clean and dry.
Push the power cord into the storing capsule.
Fix the cord by inserting it into the cord fixing unit.
IMPORTANT:
Do not immerse unit in water or attempt to cycle through dishwasher. The outer
surface may be cleaned by wiping carefully with a damp cloth or sponge. Make
sure the unit has cooled completely prior to cleaning.
GUIDE
NO. Food Type Temperature
(℃)Time
(min)
Time
(max) Weight
(g) Additional
Frozen fries
Shrimp
Bread
Drumstick
Steak
Fish
1
2
3
4
5
6
200℃
160℃
160℃
180℃
180℃
200℃
15-20min
8-12min
20-30min
20-25min
8-12min
10-15min
25
15
30
30
15
20
300-800g
300-500g
300-500g
500-800g
500g
500-800g

8
ENVIRONMENT FRIENDLY DISPOAL
You can help protect the environment!
Please remember to respect the local regulations: hand in the non-
working electrical equipment to an appropriate waste disposal centre.

9
Lesen Sie diese Broschüre vor dem Gebrauch gründlich durch und
bewahren Sie sie zum späteren Nachschlagen auf.
INHALT
WICHTIGE SICHERHEITSVORKEHRUNGEN...............................................10
BEWAHREN SIE DIESE ANWEISUNGEN AUF..............................................11
LERNEN SIE IHRE HEISSLUFTFRITTEUSE KENNEN..................................12
BETRIEBSANLEITUNG..............................................................................13
PFLEGE UND WARTUNG............................................................................14
ANLEITUNG...............................................................................................14
UMWELTFREUNDLICHE ENTSORGUNG.....................................................15
-DE-

10
WICHTIGE SICHERHEITSMASSNAHMEN:
Bei der Verwendung von Elektrogeräten sollten Sie immer die grundlegenden
Sicherheitsmaßnahmen, einschließlich der folgenden, treffen:
1. Berühren Sie nicht die heiße Oberfläche.
2. Um einen Stromschlag zu vermeiden, dürfen Sie das Stromkabel, den Stecker
oder die Maschine nicht in Wasser oder andere Flüssigkeiten tauchen.
3. Stellen Sie sicher, dass kleine Kinder beaufsichtigt werden, wenn sie dieses Gerät
benutzen oder in der Nähe sind.
4. Ziehen Sie den Stecker aus der Steckdose, wenn Sie es nicht benutzen und bevor
Sie es reinigen. Stellen Sie sicher, dass das Gerät abgekühlt ist, bevor Sie Teile
anbringen oder abnehmen.
5. Es wird nicht empfohlen, anderes Zubehör als das für diese Maschine
vorgesehene zu verwenden – die Verwendung anderer Teile könnte das Gerät
beschädigen.
6. Nicht für die Verwendung im Freien geeignet.
7. Lassen Sie das Stromkabel nicht über die Tischkante hängen und oder heiße
Oberflächen berühren.
8. Stellen Sie es nicht auf heißes Gas, auf oder in die Nähe von elektrischen
Brennern oder an beheizte Orte.
9. Seien Sie besonders vorsichtig, wenn Sie Geräte mit heißem Öl oder anderen
heißen Flüssigkeiten bewegen.
10. Um es zu trennen, schalten Sie die Zeitschaltuhr aus, drehen Sie den
Thermostat zum Ende und ziehen Sie den Netzstecker des Geräts.
11. Stellen Sie das Gerät nicht an eine Wand. An der Rückseite des Geräts sollte ein
Freiraum von mindestens 76 mm vorhanden sein. Stellen Sie keine Gegenstände
auf das Gerät.
12. Während des Frittiervorgangs tritt heißer Dampf aus dem Luftauslass aus –
halten Sie Hände und Gesicht fern. Achten Sie beim Herausnehmen des
Frittierkorbs aus dem Gerät auf den Dampf und die hohen Temperaturen.
13. Stellen Sie sicher, dass die in diesem Gerät zubereiteten Zutaten goldgelb und
nicht dunkel oder braun sind. Entfernen Sie Rückstände.
WARNUNG
Bitte ziehen Sie sofort den Netzstecker und senden Sie das
Gerät an unseren Kundendienst, wenn andere Probleme mit
dem Gerät auftreten.
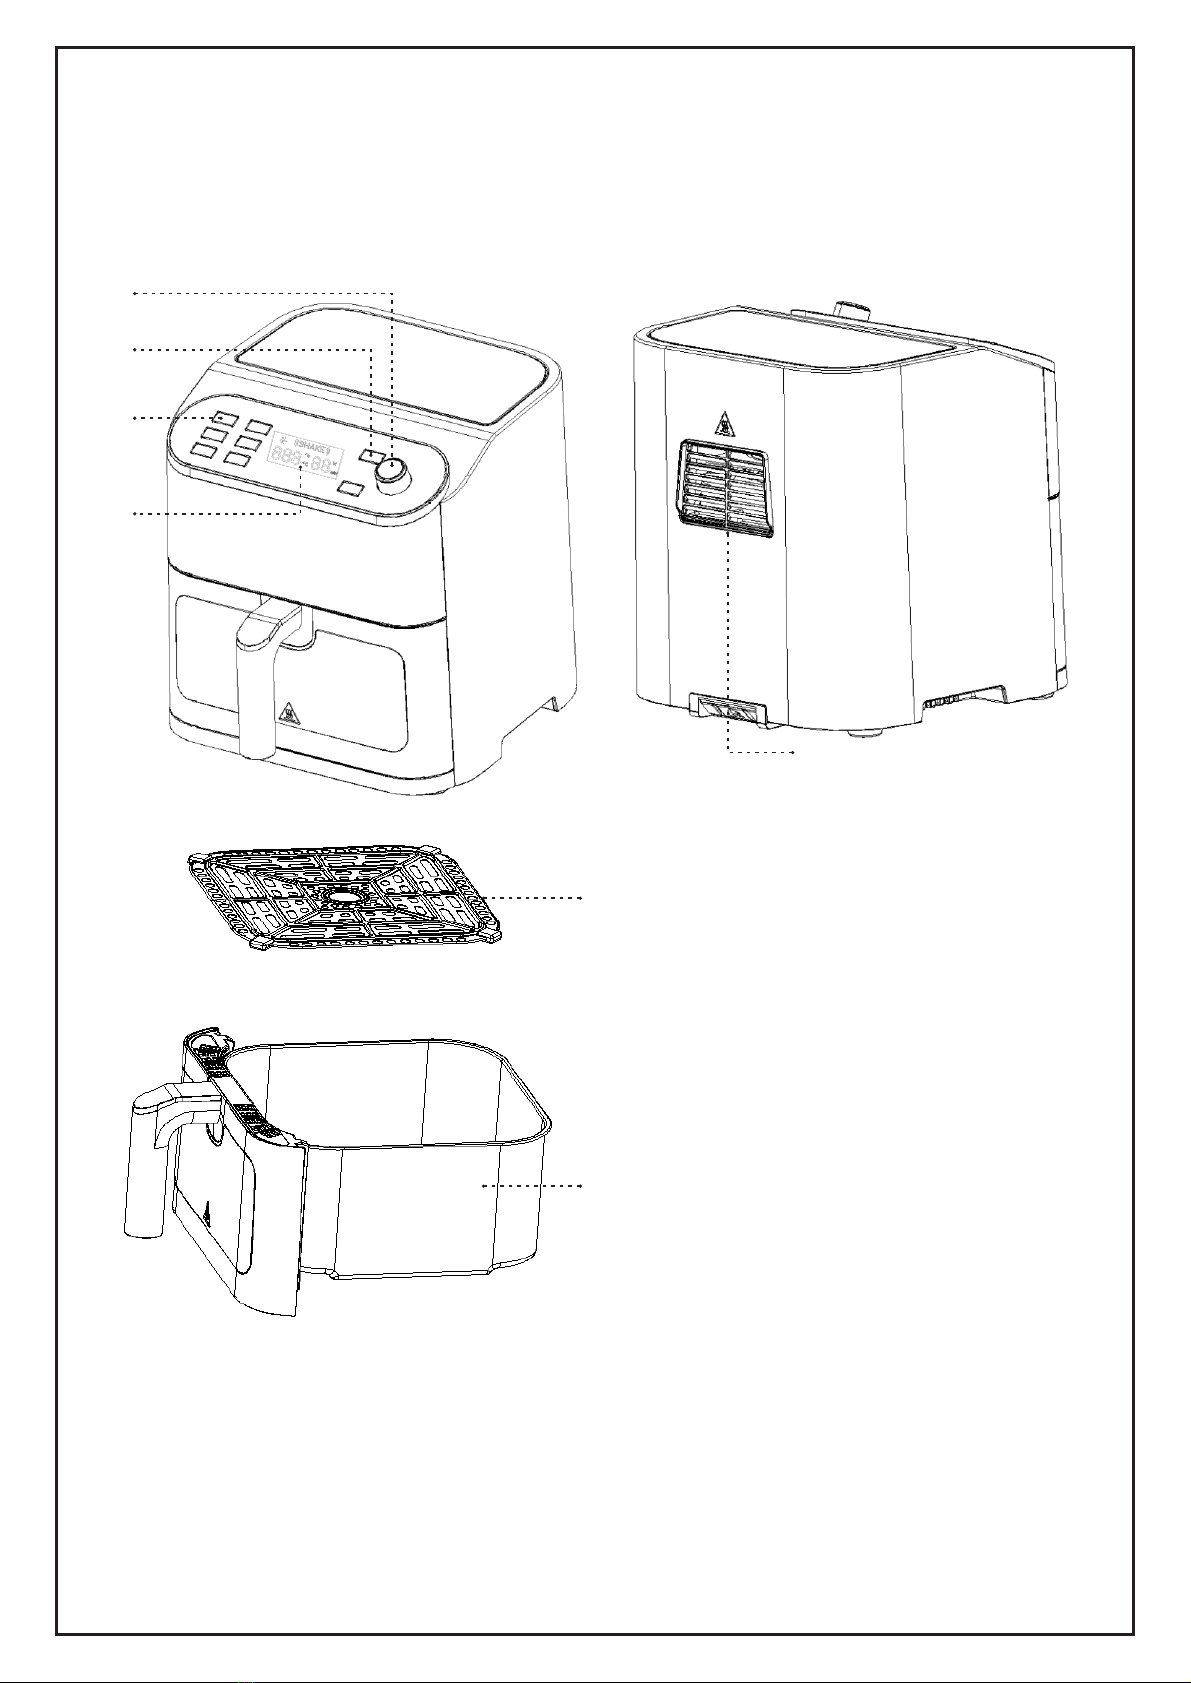
Zubehör:
Die Frittierpfanne und der Korb können während des Garvorgangs sehr heiß
werden. Berühren Sie das Zubehör während und nach dem Garen nicht – warten
Sie, bis es vollständig abgekühlt ist. Fassen Sie die Frittierpfanne nur am Griff an
und seien Sie vorsichtig, wenn Sie diese Teile aus dem Gerät nehmen. Tragen
Sie bei der Handhabung von potenziell heißem Zubehör Ofenhandschuhe oder
Topflappen. Lassen Sie alle Teile vor der Reinigung vollständig abkühlen.

11
BEWAHREN SIE DIESE ANWEISUNGEN AUF
1. Stellen Sie das Gerät nicht in der Nähe von brennbaren Materialien, Heizgeräten
oder in einer feuchten Umgebung auf.
2. Die Höhe der in die Heißluftfritteuse eingelegten Zutaten muss den in der
‛Bedienungsanleitung' aufgeführten Anweisungen entsprechen.
3. Verwenden Sie keine anderen Teile, die nicht speziell für die Heißluftfritteuse
bestimmt sind.
4. Geben Sie kein anderes Kochgeschirr in den Korb. Ersetzen Sie keine Teile durch
andere Behälter.
5. Wenn während des Betriebs viel Rauch aus den Lüftungsöffnungen aufsteigt,
ziehen Sie bitte sofort den Stecker und wenden Sie sich an den Kundendienst.
6. Bewegen Sie das Gerät während des Betriebs nicht. Bewegen Sie sie erst, wenn
die Heißluftfritteuse vollständig abgekühlt ist.
7. Blockieren Sie nicht die Lüftungsöffnungen.
8. Sollten während des Betriebs Probleme auftreten, müssen notwendige
Reparaturen vom Hersteller autorisiert werden.
9. Nehmen Sie das Gerät nicht auseinander und tauschen Sie keine Teile selbst aus.
10. Verwenden Sie keine Metallgegenstände auf dem beschichteten Frittierkorb, da
dies die Oberfläche beschädigt.
11. Wenn das Stromkabel beschädigt ist, darf das Gerät nicht benutzt werden.
12. Wenn das Gerät in Betrieb ist oder abkühlt, halten Sie es bitte außerhalb der
Reichweite von kleinen Kindern.
13. Halten Sie Hände und Gesicht von Lüftungsöffnungen oder Stellen, an denen
Hitze oder Dampf austritt, fern.
14. Reinigen Sie das Gerät vor dem Gebrauch.
15. Beim ersten Aufheizen wird etwas Rauch aus dem Gerät aufsteigen.
VORSICHT
* Legen Sie die zu frittierenden Zutaten immer in den Korb, um
einen direkten Kontakt mit den Heizelementen zu vermeiden.
* Decken Sie den Luftein- und -auslass nicht ab, wenn das Gerät
eingeschaltet ist.
* Schütten Sie kein Öl in die Frittierpfanne - es besteht
Brandgefahr.
* Berühren Sie niemals das Innere des Geräts, während es in
Betrieb ist.
Verwenden Sie diese Maschine nur für ihren vorgesehenen Zweck.
Hinweis: Stellen Sie das Gerät auf eine ebene, flache und stabile Fläche. Dieses
Gerät ist nur für den normalen Hausgebrauch bestimmt. Es ist nicht für den
gewerblichen Gebrauch bestimmt. Dieses Gerät darf nicht in Motels,
Frühstückspensionen und anderen Wohnumgebungen verwendet werden.

12
LERNEN SIE IHRE HEISSLUFTFRITTEUSE KENNEN
TEILEBESCHREIBUNG
1
2
3
4
5
6
7
1: Drehknopf: Einstellen von Temperatur, Zeit und EIN/AUS.
2: Taste Temperatur/Zeit: Wählen Sie die einzustellende Temperatur oder Zeit.
3: Funktionstaste: Wählen Sie die gewünschte Funktion.
4: Digitale Anzeige: Zeigt Betriebszeit und Temperatur an.
5: Abluft: Ableitung von Heißluft (Dampf).
6: Grill: Zum Auflegen von Gargut.
7: Fritteuse: Öl und Essensreste - leicht zu reinigen.

13
BETRIEBSANLEITUNG
Vor der Verwendung:
1. Entfernen Sie alle Verpackungen.
2: Entfernen Sie Kleber und Etiketten am Gerät.
3: Reinigen Sie den Korb und die Frittierpfanne gründlich mit heißem Wasser, einem
nicht scheuernden Schwamm und einem milden Spülmittel oder im Geschirrspüler –
verwenden Sie nur den oberen Einschub.
4: Wischen Sie die Innen- und Außenseite des Geräts mit einem feuchten Tuch ab.
Tauchen Sie das Gerät nicht in Wasser ein.
Hinweis: Dieses Gerät arbeitet mit Heißluft. Füllen Sie den Korb nicht mit Öl.
Betriebsvorbereitung:
1. Stellen Sie das Gerät auf eine ebene, gleichmäßige und stabile hitzebeständige
Fläche.
2. Setzen Sie die Frittierpfanne (einschließlich des Frittierkorbs) in die
Heißluftfritteuse ein.
3. Schließen Sie das Gerät an eine normale Wandsteckdose an. Der Netzstecker ist
in der Verpackung enthalten.
Hinweis: Decken Sie die Lüftungsöffnung an der Oberseite der Heißluftfritteuse nicht
ab und blockieren Sie sie nicht. Andernfalls kann eine ordnungsgemäße Belüftung
verhindert und das Garergebnis beeinträchtigt werden.
Betriebsfunktionen
Temperatur einstellen:
Schritt 1: Schließen Sie das Gerät an, drücken Sie die EIN-/AUS-Taste, wählen Sie
die gewünschte Funktion, stellen Sie die Zeit und die Temperatur ein und drücken
Sie zur Inbetriebnahme die Taste START
Lebensmittel schütteln:
Wenn die Zeit 2/3 der voreingestellten Zeit erreicht hat, erscheint die Aufforderung
SCHÜTTELN - das Gargut muss während des Garvorgangs geschüttelt werden.
Um das Gargut richtig zu schütteln, halten Sie den Griff fest, nehmen Sie die
Frittierpfanne aus dem Gerät und schütteln Sie sie. Sobald das Gargut ausreichend
geschüttelt wurde, schieben Sie die Frittierpfanne wieder in die Heißluftfritteuse.

14
PFLEGE UND WARTUNG
Reinigung:
Reinigen Sie das Gerät nach jedem Gebrauch oder zwischen einer großen Anzahl
von Chargen.
Der Korb und die Frittierpfanne sind antihaftbeschichtet. Verwenden Sie zur
Reinigung keine Metallgegenstände oder scharfe Scheuermittel, da dies die
Beschichtung beschädigen kann.
* Ziehen Sie den Netzstecker des Geräts und lassen Sie es vollständig abkühlen.
Hinweis: Nehmen Sie die Frittierpfanne heraus und stellen Sie sie auf eine
hitzebeständige Oberfläche, damit das Gerät schneller abkühlt.
* Wischen Sie die Außenseite des Geräts mit einem feuchten Tuch ab.
* Reinigen Sie den Korb und die Innenteile mit einem nicht scheuernden Schwamm,
heißem Wasser und einem milden Reinigungsmittel.
Hinweis: Wenn Sie die Frittierpfanne in den Geschirrspüler stellen, verwenden Sie
nur den oberen Einschub.
Tipp: Wenn sich im Korb Essensreste befinden, fügen Sie etwas heißes Wasser
hinzu und lassen Sie den Korb etwa 10 Minuten lang separat einweichen, um die
Reinigung zu erleichtern.
Reinigen Sie das Innere des Geräts mit einem nicht scheuernden Schwamm und
heißem Wasser.
Nachdem es vollständig abgekühlt ist, reinigen Sie die Heizelemente mit einer
weichen Reinigungsbürste, um eventuelle Essensreste zu entfernen.
Lagerung:
Ziehen Sie den Netzstecker des Geräts und lassen Sie es vollständig abkühlen.
Stellen Sie sicher, dass alle Teile sauber und trocken sind.
Schieben Sie das Stromkabel in die Aufbewahrungskapsel.
Befestigen Sie das Kabel, indem Sie es in die Kabelhalterung stecken.
WICHTIG:
Tauchen Sie das Gerät nicht in Wasser ein und versuchen Sie nicht, es im
Geschirrspüler zu reinigen. Die Außenfläche kann durch vorsichtiges Abwischen mit
einem feuchten Tuch oder Schwamm gereinigt werden. Stellen Sie sicher, dass das
Gerät vor der Reinigung vollständig abgekühlt ist.
ANLEITUNG
Nr. Lebensmittel
Typ Temperatur
(℃)Zeit
(max.)
Time
(max) Gewicht
(G) Zusätzlich
Gefrorene
Pommes frites
Garnelen
Steak
FISCH
1
2
3
4
5
6
200℃
160℃
160℃
180℃
180℃
200℃
15-20min
8-12min
20-30min
20-25min
8-12min
10-15min
25
15
30
30
15
20
300-800g
300-500g
300-500g
500-800g
500g
500-800g
BrotHühnerkeule

15
UMWELTFREUNDLICHE ENTSORGUNG
Sie können helfen, die Umwelt zu schützen!
Bitte denken Sie daran, die örtlichen Vorschriften zu beachten: Geben
Sie die nicht mehr funktionierenden Elektrogeräte bei einer
geeigneten Entsorgungsstelle ab.

16
Lea todo este manual cuidadosamente antes de utilizarla y guárdelo
para las referencias futuras.
CONTENIDO
CONSIDERACIONES IMPORTANTES..........................................................17
GUARDAR ESTAS INSTRUCCIONES..........................................................18
CONOCER SU FREIDORA DE AIRE ............................................................19
INSTRUCCIONES DE OPERACIÓN .............................................................20
CUIDADO Y MANTENIMIENTO....................................................................21
GUÍA..........................................................................................................21
ELIMINACIÓN AMIGABLE CON EL MEDIO AMBIENTE..............................22
-ES-

17
CONSIDERACIONES IMPORTANTES:
Al utilizar los aparatos eléctricos, siempre debe seguir las precauciones básicas de
seguridad, incluidas las siguientes:
1. Nunca toque la superficie caliente.
2. Por motivo de evitar descargas eléctricas, no sumerja el cable de alimentación, el
enchufe o la freidora de aire en agua u otros líquidos.
3. Asegúrese de que los niños pequeños estén supervisados cuando alguien utilice
la freidora de aire o cerca de ella.
4. Desenchufe la freidora de aire de la toma de corriente cuando no esté en uso y
antes de limpiarla. Asegúrese de que la freidora de aire se haya enfriado antes de
colocar o quitar las piezas.
5. No se recomienda utilizar otros accesorios que no sean los proporcionados para
esta freidora de aire; de lo contrario, podría causar daños a la freidora de aire.
6. No es adecuada para uso en exteriores.
7. Nunca deje que el cable de alimentación cuelgue del borde de la mesa ni toque
ninguna superficie caliente.
8. No coloque la freidora de aire sobre gas caliente, sobre o cerca de una estufa
eléctrica o en un lugar calentado.
9. Tenga especial cuidado al mover los equipos que contengan aceite u otros
líquidos calientes.
10. Para desconectar la freidora de aire, apague el temporizador, gire el termostato
hasta el final y desenchúfela.
11. No coloque esta freidora de aire en la pared. Debe haber al menos 76 mm de
espacio libre en la parte trasera de la freidora de aire. No coloque ningún objeto
encima de ella.
12. Durante el proceso de fritura, la salida de aire liberará vapor caliente; mantenga
las manos y la cara alejadas. Al retirar la cesta de la sartén de la freidora de aire,
tenga cuidado con el vapor y las altas temperaturas.
13. Asegúrese de que los ingredientes preparados en esta freidora de aire sean de
color amarillo dorado, no de oscuros ni marrones. Quite residuo en la freidora de
aire.
ADVERTENCIA
Desenchufe la freidora de aire de inmediato, y envíela a
nuestro departamento de servicio al cliente si ocurren otros
problemas con la freidora de aire.
Accesorios:
La sartén y la cesta se calientan mucho durante el proceso de cocción. Durante y
después de la cocción, nunca toque los accesorios; espere hasta que se hayan
enfriado por completo. Sujete solo el asa de la sartén y tenga cuidado al retirar
estos accesorios de la freidora de aire. Cuando tenga que tocar los accesorios
que puedan estar calientes, use los guantes para horno o almohadillas para
ollas. Antes de limpiar la freidora de aire, deje que todos los accesorios se hayan
enfriado por completo.

18
GUARDAR ESTAS INSTRUCCIONES
1. Nunca coloque la freidora de aire cerca de los materiales inflamables, equipos de
calefacción o en ambientes húmedos.
2. La altura de la pila de ingredientes colocados en la freidora de aire debe cumplir
con las instrucciones descritas en las “Instrucciones de operación”.
3. No utilice otras piezas que no estén diseñadas específicamente para la freidora
de aire.
4. No coloque otras ollas en la cesta. No reemplace ninguna pieza con otros
recipientes.
5.Al utilizar la freidora de aire, si sale mucho humo de los orificios de ventilación,
desenchúfela de la fuente de alimentación de inmediato, y póngase en contacto
con el servicio al cliente.
6. No mueva la freidora de aire cuando está funcionando. Solo puede moverla
después de que la freidora de aire se haya enfriado por completo.
7. No bloquee las rejillas de ventilación.
8. Si hay algún problema al operar la freidora de aire, se deben pedir los servicios de
reparación necesarios autorizados por el fabricante.
9. No desmonte la freidora de aire ni reemplace ninguna pieza usted mismo.
10. No utilice los utensilios metálicos en la cesta de la sartén revestida, de lo
contrario, podría causar daños a la superficie.
11. Si el cable de alimentación está dañado de alguna manera, no utilice la freidora
de aire.
12. Cuando la freidora de aire esté funcionando o enfriándose, manténgala alejada
de los niños pequeños.
13. Mantenga las manos y la cara alejadas de las rejillas de ventilación o los lugares
que emitan calor o vapor.
14. Limpie la freidora de aire antes de utilizarla.
15. Al utilizar la freidora de aire por primera vez, producirá algo de humo.
PRECAUCIÓN
* Siempre coloque los ingredientes a freír en la cesta para
evitar el contacto directo con los elementos calefactores.
* No cubra la entrada de aire ni la salida de aire cuando la
freidora de aire esté encendida.
* No vierta aceite en la sartén, lo que es un peligro de
incendio.
* Nunca toque el interior de la freidora de aire cuando está
funcionando.
No la utilice excepto para los fines distintos a los previstos.
Nota: Coloque la freidora de aire sobre una superficie nivelada, plana y estable.
Solo es adecuada para uso doméstico normal. No está diseñada para uso
comercial. No debe utilizar esta freidora de aire en moteles, entornos de cama y
desayuno y otros entornos residenciales.

19
CONOCER SU FREIDORA DE AIRE
DESCRIPCIÓN DE LAS PIEZAS
1
2
3
4
5
6
7
1: Perilla: Ajusta la temperatura, tiempo y ON/OFF.
2: Botón de temperatura / tiempo: Elige la temperatura o el tiempo a ajustar.
3: Botón de función: Elige la función que necesita.
4: Pantalla digital: Muestra el tiempo de funcionamiento y la temperatura.
5: Escape: Escapa de aire caliente (vapor).
6: Parrilla: Coloca los alimentos a cocinar.
7: Freidora: Residuos de aceite y alimentos - Fácil de limpiar.

20
INSTRUCCIONES DE OPERACIÓN
Antes del uso:
1. Quite todo el embalaje.
2: Quite las pegatinas y las etiquetas de la freidora de aire.
3: Limpie bien la cesta y la sartén con agua caliente, esponja no abrasiva y
detergente suave para platos o límpielas en el lavavajillas; Utilice la rejilla
superior únicamente.
4: Limpie el interior y el exterior de la freidora de aire con un paño húmedo. No la
sumerja en agua.
Nota: Esta freidora de aire utiliza aire caliente. No llene la cesta con aceite.
Preparación de la operación:
1. Coloque la freidora de aire sobre una superficie nivelada, uniforme, estable y
resistente al calor.
2. Coloque la sartén (incluida la cesta de la sartén) en la freidora de aire.
3. Enchufe la freidora de aire a una toma de corriente estándar. El enchufe de
alimentación está incluido en el paquete.
Nota: No cubra ni bloquee las rejillas de ventilación ubicadas en la parte superior de
la freidora de aire. Hacerlo obstaculizará la ventilación adecuada y afectará el efecto
de cocción.
Función de operación
Ajustar la temperatura:
Paso 1: Enchufe la freidora de aire, presione el botón de “ENCENDIDO /
APAGADO”, elija la función como desea, ajuste el tiempo y la temperatura; presione
el botón de “INICIAR” para que empieza a funcionar.
Sacudir los alimentos:
Cuando el tiempo de cocción llega a 2/3 del tiempo preestablecido, aparecerá un
mensaje de “SHAKE (Sacudir)”: Se necesita sacudir los alimentos durante el
proceso de cocción.
Para sacudir los alimentos de forma correcta, sujete el asa, retire la sartén de la
freidora de aire y sacúdala. Después de sacudir los alimentos lo suficiente, deslice la
sartén en la freidora de aire.
This manual suits for next models
1
Table of contents
Languages:
Other HOMCOM Fryer manuals

HOMCOM
HOMCOM 800-164V70 User manual

HOMCOM
HOMCOM 800-120V80 User manual

HOMCOM
HOMCOM 800-114V70 User manual

HOMCOM
HOMCOM 800-148V70 User manual

HOMCOM
HOMCOM 800-125V70 Datasheet

HOMCOM
HOMCOM 800-119V70 Datasheet

HOMCOM
HOMCOM 800-094V70 User manual

HOMCOM
HOMCOM 800-120V70 User manual

HOMCOM
HOMCOM 800-172V70 User manual

HOMCOM
HOMCOM 800-092 User manual