manuals.online logo
Brands
  1. Home
  2. •
  3. Brands
  4. •
  5. Home Styles
  6. •
  7. Indoor Furnishing
  8. •
  9. Home Styles 88 5180 15 User manual

Home Styles 88 5180 15 User manual

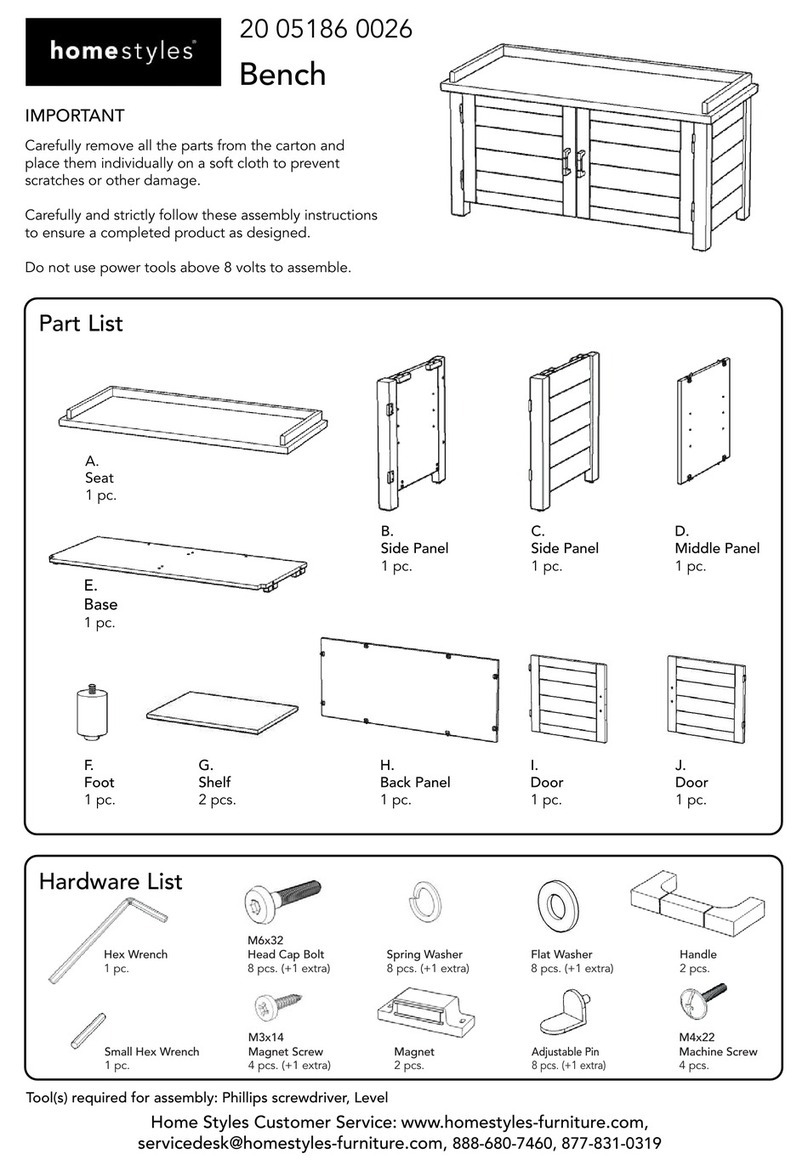
Hardware List
Part List
Home Styles Customer Service: www.homestyles-furniture.com,
[email protected], 888-680-7460, 877-831-0319
Tool(s) required for assembly: Phillips screwdriver, Level
88 5180 15
Executive Desk
IMPORTANT
Refer to the last page(s) of these
instructions for drawer assembly.
Carefully remove all the parts from the carton and
place them individually on a soft cloth to prevent
scratches or other damage.
Carefully and strictly follow these assembly instructions
to ensure a completed product as designed.
Do not use power tools above 8 volts to assemble.
Hex Wrench
1 pc.
Small Hex Wrench
1 pc.
Cam Lock Screw
8 pcs. (+1 extra)
Cam Lock
8 pcs. (+4 extra)
M3x32
Wood Screw (long)
6 pcs. (+1 extra)
M3x16
Wood Screw (short)
8 pcs. (+1 extra)
M3x10
Wood Screw
for Hinge
6 pcs. (+1 extra)
M6x32
Head Cap Bolt
21 pcs. (+1 extra)
M4x38
Machine Screw
4 pcs.
A.
Top
1 pc.
B.
Side Frame
1 pc.
C.
Side Frame
1 pc.
D.
Front Frame
1 pc.
E.
Front Frame
1 pc.
J.
Stretcher
1 pc.
L.
Keyboard
1 pc.
K.
Keyboard
1 pc.
M.
Drawer
2 pcs.
F.
Front Rail
1 pc.
G.
Back Panel
1 pc.
I.
Divider
1 pc.
H.
Divider
1 pc.
Knob
4 pcs.
M3x25
Wood Screw
16 pcs. (+1 extra)
Flat Washer
21 pcs. (+1 extra)
Spring Washer
21 pcs. (+1 extra)
Assembly Instructions 2/5
IMPORTANT
Use a soft cloth between these parts and the floor.
Do not use power tools above 8 volts to assemble.
The unit must be level to work properly. Use the included adjustable levelers to level.
Keep Hex Wrench in a safe place as the bolts may need to be tightened up in the future. Cam Lock Screw
G
D
E
STEP 1
Insert Cam Lock Screws into
pre-drilled holes of Front Frames
(D), (E) and Back Panel (G).
(See Figure 1)
Figure 1 D
E
F
STEP 2
Attach Front Frames (D) and (E)
to Front Rail (F) with Wood Screws (long).
(See Figure 2)
Figure 2
Figure 3
STEP 3
Attach Dividers (H) and (I) to unit
with Cam Locks. (See Figure 3)
Attach Back Panel (G) to
unit with Cam Locks.
G
H
I
Wood Screw (long)
Cam Lock
Assembly Instructions 3/5
STEP 4
Attach Side Frame (B) to unit with Flat Washers,
Spring Washers, Head Cap Bolts. (See Figure 4)
Attach Stretcher (J) to unit with Wood Screw (long). (See Figure 5)
Attach Side Frame (C) to unit with Flat Washers,
Spring Washers, Head Cap Bolts and Wood Screw (long).
Figure 4
Spring Washer
Wood Screw (long)
Head Cap Bolt
Flat Washer
J
B
C
Figure 5
A
Spring Washer
Head Cap Bolt
Flat Washer
STEP 5
Place Top (A) upside down on a soft cloth.
Attach unit to Top (A) with Flat Washers, Spring Washers and Head Cap Bolts.
Assembly Instructions 4/5
K
L
STEP 6
Attach Keyboard (L) to Keyboard (K)
with Wood Screws for Hinge.
Attach Knobs to Keyboard
with Machine Screws.
(See Figure 6)
Figure 6
STEP 7
Turn unit over to its’ upright position.
Slide Keyboard and Drawers (M) into place.
Level unit by adjusting the adjustable levelers on the bottom of legs.
(See Figure 7)
MM
M
Figure 7
Wood Screw
for Hinge
Part List
Assembly Instructions 5/5
Drawer (M)
STEP 1
Attach Drawer Front (M1) and Drawer
Back (M2) to Drawer Side (M3) with
Wood Screws.
Attach Drawer Side (M4) to unit with
Wood Screws.
Roller at back
STEP 2
Slide Drawer Bottom (M5) into the grooves
of Drawer Sides (M3) and (M4) until it meets
Drawer Front (M1).
Attach Drawer Bottom (M5) to unit with
Wood Screws (short).
STEP 3
Attach Knob with Machine Screw.
M5.
Drawer Bottom
2 pcs.
M1.
Drawer Front
2 pcs.
M2.
Drawer Back
2 pcs.
M3.
Drawer Side
2 pcs.
M4.
Drawer Side
2 pcs.
M1
M2
M3
M4
M1
M2
M3
M4
M5
NEVER
use glass cleaners on
finished furniture. Ammonia
chemically attacks the finish.
allow liquids to remain on furniture.
Absorption causes parts to warp
and split and finishes to delaminate.
NEVER
CARE INSTRUCTIONS
Do not use rubber
based placemats.
PREVENT
DISCOLORING
Do not use commercial
waxes and polishes.
PREVENT
YELLOWING
Do not place hot
objects on surface.
PREVENT
FINISH DAMAGE
Do not write
directly on surface.
PREVENT
MARKING
Do not use power tools
above 8 volts to assemble.
PREVENT
CRACKING
Do not place
in direct sunlight.
PREVENT
FADING
with a soft cloth moistened
in lukewarm soap and water.
Buff with a dry clean cloth.
CLEAN
Home Styles will provide replacements free of charge for missing or damaged hardware or parts within 30 days of
purchase. Digital images of the defective parts may be required. If the product was not purchased from an authorized
retail affiliate, Home Styles is under no obligation to provide replacement parts. Parts are not available for fully assembled
items nor are parts available for sale. Replacements for missing or damaged hardware or parts may be requested at:
www.homestyles-furniture.com/customer-service/replacement-parts
Home Styles Customer Service: www.homestyles-furniture.com,
[email protected], 888-680-7460, 877-831-0319

Other Home Styles Indoor Furnishing manuals

Home Styles 20 08000 0089 User manual

Home Styles

Home Styles 20 08000 0089 User manual

Home Styles 20 08001 0089 User manual

Home Styles

Home Styles 20 08001 0089 User manual

Home Styles 4528-95 User manual

Home Styles

Home Styles 4528-95 User manual

Home Styles Floral Blossom 88 5558 83 User manual

Home Styles

Home Styles Floral Blossom 88 5558 83 User manual

Home Styles 88 5560 37 User manual

Home Styles

Home Styles 88 5560 37 User manual

Home Styles 2001-08-FB02 User manual

Home Styles

Home Styles 2001-08-FB02 User manual

Home Styles 20 05618 0080 User manual

Home Styles

Home Styles 20 05618 0080 User manual

Home Styles 6652-53 User manual

Home Styles

Home Styles 6652-53 User manual

Home Styles 88 5080 06 User manual

Home Styles

Home Styles 88 5080 06 User manual

Home Styles 20 08001 0095 Quick start guide

Home Styles

Home Styles 20 08001 0095 Quick start guide

Home Styles 88 5650 49 User manual

Home Styles

Home Styles 88 5650 49 User manual

Home Styles 20 09001 007C User manual

Home Styles

Home Styles 20 09001 007C User manual

Home Styles 20 05420 94Q1 User manual

Home Styles

Home Styles 20 05420 94Q1 User manual

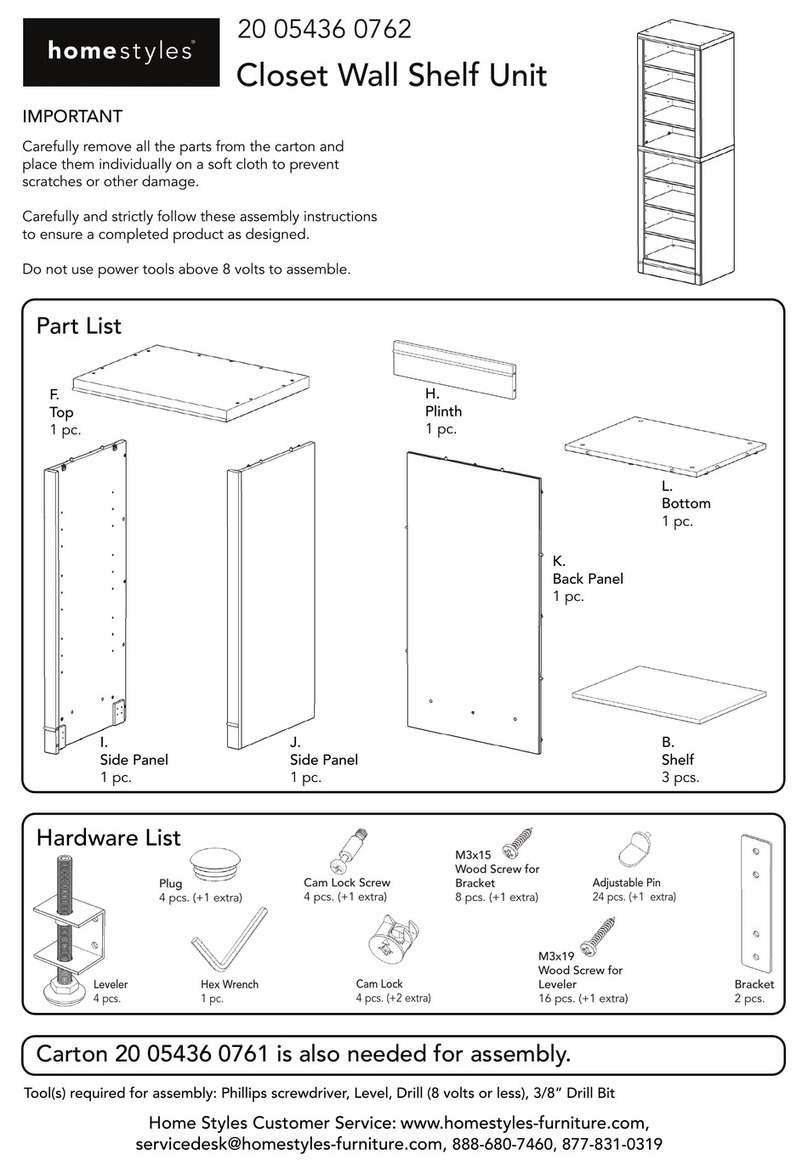
Home Styles Closet Wall Shelf Unit 20 05520 0762 User manual

Home Styles

Home Styles Closet Wall Shelf Unit 20 05520 0762 User manual

Home Styles 5033-89 User manual

Home Styles

Home Styles 5033-89 User manual

Home Styles Nantucket Hutch User manual

Home Styles

Home Styles Nantucket Hutch User manual

Home Styles Oak Hill Hutch 88 5050 65 User manual

Home Styles

Home Styles Oak Hill Hutch 88 5050 65 User manual

Home Styles 88 5053 16 User manual

Home Styles

Home Styles 88 5053 16 User manual

Home Styles Storage Island 88 5530 942 User manual

Home Styles

Home Styles Storage Island 88 5530 942 User manual

Home Styles 88 5560 30 User manual

Home Styles

Home Styles 88 5560 30 User manual

Home Styles 20 05170 0016 User manual

Home Styles

Home Styles 20 05170 0016 User manual

Home Styles 88 5519 302 User manual

Home Styles

Home Styles 88 5519 302 User manual

Home Styles 20 08000 0080 User manual

Home Styles

Home Styles 20 08000 0080 User manual

Home Styles 5543 26 User manual

Home Styles

Home Styles 5543 26 User manual

Popular Indoor Furnishing manuals by other brands

Accentrics Home DS-D419-002A manual

Accentrics Home

Accentrics Home DS-D419-002A manual

VABCHES D8L232BS01 manual

VABCHES

VABCHES D8L232BS01 manual

Sealey apiccombo2 instructions

Sealey

Sealey apiccombo2 instructions

Alvin WorkMaster WM48-3-XB Assembly instructions

Alvin

Alvin WorkMaster WM48-3-XB Assembly instructions

Rauch M2696 Assembly instructions

Rauch

Rauch M2696 Assembly instructions

Royalcraft Wentworth WENFIXCOMP-WS Assembly instructions

Royalcraft

Royalcraft Wentworth WENFIXCOMP-WS Assembly instructions

Argos Luna hygena 457/7553 Assembly lnstructions

Argos

Argos Luna hygena 457/7553 Assembly lnstructions

Loll Designs SALMELA LUSSI ASSEMBLY INSTRUCTIONS & PRODUCT INFO

Loll Designs

Loll Designs SALMELA LUSSI ASSEMBLY INSTRUCTIONS & PRODUCT INFO

Rauch M1770 Assembly instructions

Rauch

Rauch M1770 Assembly instructions

Kettler HUC31409C quick start guide

Kettler

Kettler HUC31409C quick start guide

SAFAVIEH COUTURE Teresa SFV8717A quick start guide

SAFAVIEH COUTURE

SAFAVIEH COUTURE Teresa SFV8717A quick start guide

Benel Wonder user guide

Benel

Benel Wonder user guide

Sanus DFAV30 Assembly manual

Sanus

Sanus DFAV30 Assembly manual

Pegasus Arcadia ARAA2534 Specification sheet

Pegasus

Pegasus Arcadia ARAA2534 Specification sheet

Bell'O KC3456 Assembly

Bell'O

Bell'O KC3456 Assembly

Norstone Saeby manual

Norstone

Norstone Saeby manual

Demeyere 210794 - 00 Assembly instructions

Demeyere

Demeyere 210794 - 00 Assembly instructions

Boahaus 2305 Assembly instructions

Boahaus

Boahaus 2305 Assembly instructions

manuals.online logo
manuals.online logoBrands
  • About & Mission
  • Contact us
  • Privacy Policy
  • Terms and Conditions

Copyright 2025 Manuals.Online. All Rights Reserved.