manuals.online logo
Brands
  1. Home
  2. •
  3. Brands
  4. •
  5. Home Styles
  6. •
  7. Indoor Furnishing
  8. •
  9. Home Styles Bedford 88 5531 952 User manual

Home Styles Bedford 88 5531 952 User manual

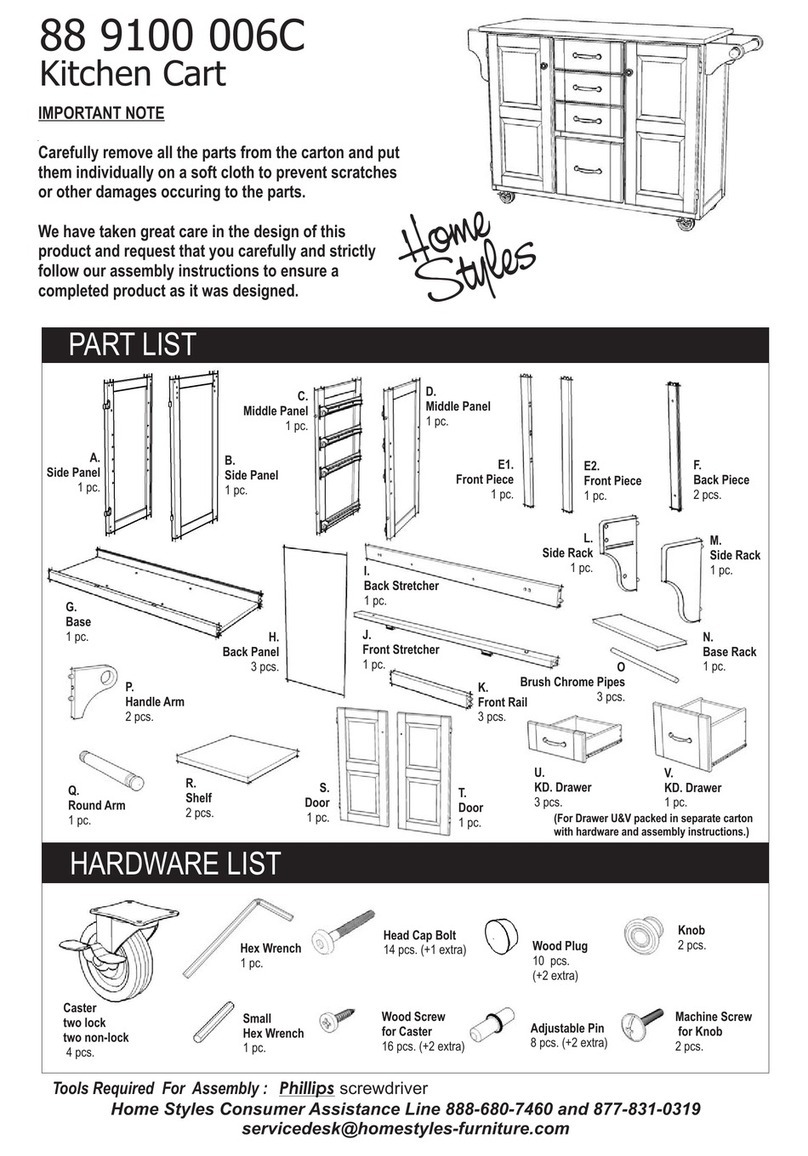
PART LIST
IMPORTANT NOTE
Carefully remove all the parts from the carton and put
them individually on a soft cloth to prevent scratches
or other damages occuring to the wood parts.
We have taken great care in the design of this
product and request that you carefully and strictly
follow our assembly instructions to ensure a
completed product as it was designed.
Tools Required For Assembly : Phillips screwdriver
Home Styles Consumer Assistance Line 888-680-7460 and 877-831-0319
[email protected]
88 5531 952
HARDWARE LIST
Casual Attire For Today's Home
Bedford
B.
Side Panel
1 pc.
C.
Side Panel
1 pc.
A.
Top
1 pc.
D.
Middle Panel
1 pc.
E.
Middle Panel
1 pc.
F.
Front Stretcher
1 pc.
Hex Wrench
1 pc.
Caster
two lock
two non-lock
4 pcs.
Small
Hex Wrench
1 pc.
Wood Screw
for Caster
16 pcs. (+1 extra)
Wood Screw (Long)
28 pcs. (+1 extra)
G2.
Front Rail
1 pc.
H.
Back Stretcher
2 pcs.
I.
Back Rail
2 pcs.
J.
Back Panel
2 pcs.
K.
Back Panel
1 pc.
L.
Shelf
4 pcs.
N.
Base
1 pc.
M.
Side Bar
2 pcs.
(
)
Drawers require assembly.
Please refer to the last pages
of these assembly instructions.
O.
Door
1 pc.
P.
Door
1 pc.
Q.
Drawer
2 pcs.
R.
Drawer
1 pc.
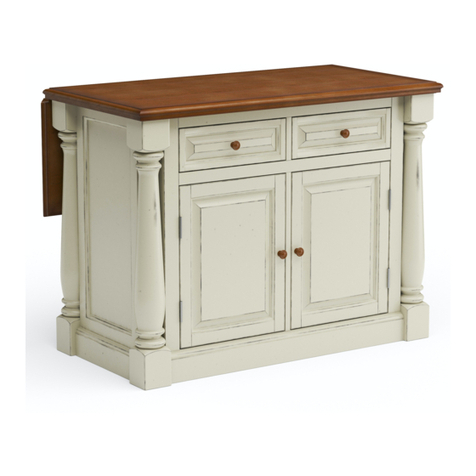
Kitchen Cart
G1.
Front Rail
1 pc.
Wood Screw
12 pcs. (+1 extra)
Head Cap Bolt
6 pcs. (+1 extra)
Head Cap Bolt (long)
2 pcs. (+1 extra)
Cam Lock Screw
15 pcs.(+1 extra)
Cam Lock
15 pcs.(+1 extra)
Adjustable Pin
16 pcs. (+2 extra)
Machine Screw
for Side Bar
4 pcs.
Pull Handle
5 pcs.
Machine Screw
for Pull Handle
5 pcs.
B
J
J
K
H
H
I
I
C
D
E
F
G1
G2
Cam Lock
Assembly Instructions 2/5
Cam Lock Screw
IMPORTANT
Do not tighten screws until each part is properly assembled.
You should keep Hex Wrench in a safe place as you may need to tighten up the Head Cap Bolts in the future.
STEP 1
Put Cam Lock Screws into the pre-drilled holes of Top (A), Side Panel (B), (C), Middle Panel (D),
(E), Base (N) and tighten.
BC
Attach Back Stretcher (H) to
Side Panel (B) using Cam Lock.
Attach Back Rails (I) to the unit and slide Back Panels (J) and (K) into position.
Attach Back Stretcher (H) to unit using Cam Lock.
Assemble Middle Panel (D), (E) and Front Rail (G1), (G2) using Cam Locks, then attach to unit.
Attach Front Stretcher (F) and Side Panel (C) to unit using Cam Locks.
STEP 2
DE
AN
Assembly Instructions 3/5
STEP 3
Attach Base (N) to unit with
Head Cap Bolts,
Head Cap Bolts (long) and
Cam Lock.
Attach the four Castors to
the pre drilled holes of legs
as shown.
Figure 2
Figure 1
N
M
M
Machine Screw for Side Bar
P
Q
A
O
Q
R
L
L
L
L
STEP 4
Attach Side Bars (M) to unit with
Machine Screws. (see Figure 1)
Place Top (A) onto the unit
with Head Cap Bolts
and Cam Locks.
Attach Door (O) and (P)
to the side panels by
sliding the door lift hinges
into the side panel hinges.
(see Figure 2)
Assemble Pull Handles to
Door (O) and (P) with
Machine Screws.(see Figure 3)
Insert Adjustable Pins into
side panels and middle panels
at the desired level.
Slide Shelf (L) into place.
Slide the Drawer (Q) and (R) into position.
Figure 3
Head Cap Bolt
Locking Caster
Wood Screw
Head Cap Bolt (long)
Adjustable Pin
Cam Lock
Cam Lock
Head Cap Bolt
Assembly Instructions 4/5
Figure 1
Figure 2
MAKE SURE ROLLER
IS ON THE BACK
Q2
Q2
Q2
Q3
Q3
Q3
Q4
Q4
Q4
Q5
Q5
Q1
Q1
Q1
Drawer (Q)
Part List
Q1.
Front Part
2 pcs.
Q5.
Base Part
2 pcs.
Q2.
Back Part
2 pcs.
Q3.
Side Part
2 pcs.
Q4.
Side Part
2 pcs.
Attach Q1 to Q3 and Q4, using
a and
wood screws ,
tighten halfway.
Attach Q2 to Q3 and Q4 using
wood screws ,
tighten halfway. (see Figure 1)
Phillips screwdriver
(4X)
(4X)
long
long
Insert wood screws (4X)
into the pre-drilled holes in Q5,
tighten screws. (see Figure 3)
short
Slide Q5 into the grooves in Q3
and Q4. Be sure to push Q5 all
the way forward so it meets Q1.
(see Figure 2)
STEP 1
STEP 2
STEP 3 Tighten all screws used in
drawer assembly.
Figure 3
Figure 4
Attach hardware pulls with
machine screws.
(see Figure 4)
STEP 4
Assembly Instructions 5/5
Figure 1
Figure 2
MAKE SURE ROLLER
IS ON THE BACK
R2
R2
R2
R3
R3
R3
R4
R4
R4
R5
R5
R1
R1
R1
Drawer (R)
Part List
R1.
Front Part
1 pc.
R5.
Base Part
1 pc.
R2.
Back Part
1 pc.
R3.
Side Part
1 pc.
Figure 3
Figure 4
Attach R1 to R3 and R4, using
a and
wood screws ,
tighten halfway.
Attach R2 to R3 and R4 using
wood screws ,
tighten halfway. (see Figure 1)
Phillips screwdriver
long
long
(6X)
(6X)
Insert wood screws (4X)
into the pre-drilled holes in R5,
tighten screws. (see Figure 3)
short
Attach hardware pulls with
machine screws.
(see Figure 4)
Slide R5 into the grooves in R3
and R4. Be sure to push R5 all
the way forward so it meets R1.
(see Figure 2)
STEP 1
STEP 2
STEP 3
STEP 4
Tighten all screws used in
drawer assembly.
R4.
Side Part
1 pc.

Other Home Styles Indoor Furnishing manuals

Home Styles Orleans Grey 88 5760 103 User manual

Home Styles

Home Styles Orleans Grey 88 5760 103 User manual

Home Styles 20 05663 0095 User manual

Home Styles

Home Styles 20 05663 0095 User manual

Home Styles 6652-53 User manual

Home Styles

Home Styles 6652-53 User manual

Home Styles 5182-26 User manual

Home Styles

Home Styles 5182-26 User manual

Home Styles Naples 88 5530 08 User manual

Home Styles

Home Styles Naples 88 5530 08 User manual

Home Styles 20 04411 0095 User manual

Home Styles

Home Styles 20 04411 0095 User manual

Home Styles 5910-501 User manual

Home Styles

Home Styles 5910-501 User manual

Home Styles 4512-95 User manual

Home Styles

Home Styles 4512-95 User manual

Home Styles Closet Wall Shelf Unit 20 05520 0762 User manual

Home Styles

Home Styles Closet Wall Shelf Unit 20 05520 0762 User manual

Home Styles 88 5531 13 User manual

Home Styles

Home Styles 88 5531 13 User manual

Home Styles 88 5601 81 User manual

Home Styles

Home Styles 88 5601 81 User manual

Home Styles 2000-202-FB80 User manual

Home Styles

Home Styles 2000-202-FB80 User manual

Home Styles 88 5219 95 User manual

Home Styles

Home Styles 88 5219 95 User manual

Home Styles Barnside 88 5516 13 User manual

Home Styles

Home Styles Barnside 88 5516 13 User manual

Home Styles 88 5133 20 User manual

Home Styles

Home Styles 88 5133 20 User manual

Home Styles 88 9001 006C User manual

Home Styles

Home Styles 88 9001 006C User manual

Home Styles 88502395 C User manual

Home Styles

Home Styles 88502395 C User manual

Home Styles 20 05523 0692 User manual

Home Styles

Home Styles 20 05523 0692 User manual

Home Styles 20 05507 0401 User manual

Home Styles

Home Styles 20 05507 0401 User manual

Home Styles Storage Island 20 08000 0912 User manual

Home Styles

Home Styles Storage Island 20 08000 0912 User manual

Home Styles Concrete Chic 88 5134 80 User manual

Home Styles

Home Styles Concrete Chic 88 5134 80 User manual

Home Styles French Countryside User manual

Home Styles

Home Styles French Countryside User manual

Home Styles Grayton 6730-21 User manual

Home Styles

Home Styles Grayton 6730-21 User manual

Home Styles 20 05436 0923 User manual

Home Styles

Home Styles 20 05436 0923 User manual

Popular Indoor Furnishing manuals by other brands

Next 783983 Assembly instructions

Next

Next 783983 Assembly instructions

Ronbow VENTO SIGNATURE Series Installation and care guide

Ronbow

Ronbow VENTO SIGNATURE Series Installation and care guide

TON P.O.V. 4M5 468 Assembly instructions

TON

TON P.O.V. 4M5 468 Assembly instructions

AEROMAT 75002 user guide

AEROMAT

AEROMAT 75002 user guide

Thomasville RENOVATIONS Bryant Park 3182 C04 Assembly instructions

Thomasville

Thomasville RENOVATIONS Bryant Park 3182 C04 Assembly instructions

VITRA Rayonnage Mural Assembly instructions

VITRA

VITRA Rayonnage Mural Assembly instructions

Next SPARKLE 766733 Assembly instructions

Next

Next SPARKLE 766733 Assembly instructions

Rapidline Deluxe Infinity Profile Leg Corner... Assembly instructions

Rapidline

Rapidline Deluxe Infinity Profile Leg Corner... Assembly instructions

Fisher-Price CMX43 manual

Fisher-Price

Fisher-Price CMX43 manual

American Standard Retrospect Collection 8711.000.002 Specifications

American Standard

American Standard Retrospect Collection 8711.000.002 Specifications

Lightolier Lytecaster 1088 specification

Lightolier

Lightolier Lytecaster 1088 specification

Lynk 421121 installation instructions

Lynk

Lynk 421121 installation instructions

Home affaire Johan 6710 Assembly instructions

Home affaire

Home affaire Johan 6710 Assembly instructions

Hillsdale Furniture 1864-010 quick start guide

Hillsdale Furniture

Hillsdale Furniture 1864-010 quick start guide

Cooper Lighting Metalux 232T8 specification

Cooper Lighting

Cooper Lighting Metalux 232T8 specification

Keter CHELSEA SET Assembly instructions

Keter

Keter CHELSEA SET Assembly instructions

Flexa 80-01401-1 Assembly instructions

Flexa

Flexa 80-01401-1 Assembly instructions

Williams-Sonoma OFFRAM BAR CABINET manual

Williams-Sonoma

Williams-Sonoma OFFRAM BAR CABINET manual

manuals.online logo
manuals.online logoBrands
  • About & Mission
  • Contact us
  • Privacy Policy
  • Terms and Conditions

Copyright 2025 Manuals.Online. All Rights Reserved.