manuals.online logo
Brands
  1. Home
  2. •
  3. Brands
  4. •
  5. Honeywell
  6. •
  7. Control Panel
  8. •
  9. Honeywell Silent Knight 5860 Technical manual

Honeywell Silent Knight 5860 Technical manual

5860/5860R
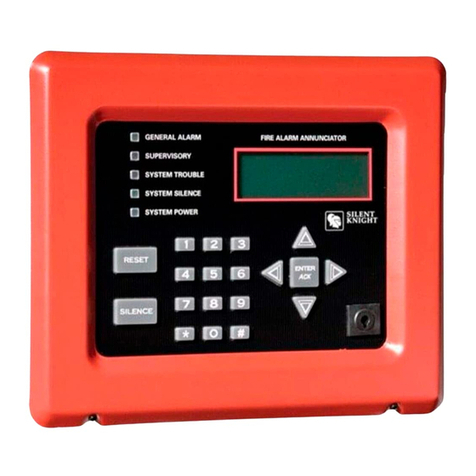
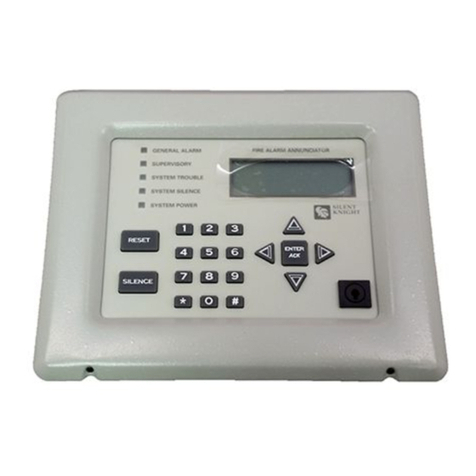
Remote Fire Annunciator
Product Installation Document
Document 151042:E 2/15/2022 ECN: 151062
1 Description
The 5860 (gray) and 5860R (red) are optional 4x20 remote annunciators
that can be surface or flush-mounted.
2 Compatibility
The 5860/R is compatible with Honeywell Silent Knight FACPs. For
more information, see the FACP Installation manual.
3 Specifications
4 Installing the 5860/R
5860/R installation involves the following steps:
1. Ensure power is turned off at the panel.
2. Mount the 5860/R in the desired location.
3. Connect the 5860/R to the panel (see Figure 5).
4. Use the DIP switches on the back of the 5860/R to assign an ID
number. See the FACP Manual for more details.
5. The new 5860/R module must be added to the system through
programming. The JumpStart®Auto-programming feature will add
the module automatically. Refer to the FACP Manual for more
information.
5 Mounting
The 5860/R comes from the factory fully assembled. You must disas-
semble it for mounting. To disassemble the annunciator, use a 5/64” hex
wrench to remove the set screws, located on the bottom of the annuncia-
tor bezel.
FIRE ALARM ANNUNCIATOR
Figure 1 5860/R Remote Annunciator
Parameter Value
Operating Voltage: 24 VDC
Current Standby: 58 mA
Alarm: 68 mA
Operating Temperature: 0° to 49° C (32° to 120° F)
1".25
(3.175cm)
6.44"
(16.35cm)
8"(20.64cm).125
7".375
(18.73cm)
1”
.25
(3.175cm)
Figure 2 Annunciator Dimensions
backbox bezel
side
view
5860/5860R Installation Document — P/N 151042:E 2/15/2022 2
5.1 Surface Mounting
The 5860/R can be mounted directly to a surface or can be attached to a
single, double, or four-square electrical box. Trim Ring Kit 5860TG
(gray) and 5860TR (red) available for use when surface mounting.
1. Drill holes in the surface to match the screw holes on the backbox.
Refer to Figure 4.20 for locations.
2. Fit the trim ring over the backbox, if used.
3. Attach the backbox to the wall using screws provided.
5.2 Flush-Mounting
1. Cut a hole in the sheet rock to the following dimensions: 8.25” W x
6.625” H. If an electrical box is used, the box must be 1.375” back
from face of wall to accommodate the annunciator.
2. Remove knockout holes as needed for wires.
3. Fit the annunciator backbox into the hole and stabilize with
mounting wires. Angle the mounting wires into the first hole past
the sheet rock. Secure the wires behind the screws as shown in
Figure 4. When all four wires are in place, the backbox should fit
snugly into the hole in the sheetrock.
4. After the annunciator wiring to the panel has been completed (refer
to Figure 4.22), replace the electronic assembly in the back box.
Place the bezel over the back box and tighten the set screws on the
bezel.
5.2.1 Flush-Mounting with an Electrical Box
The 5860/R annunciator can be used with the following types of electri-
cal boxes: 4S, single-gang, and double-gang.
If an electrical box is used, the box must be 1.375” back from the face of
the wall to accommodate the annunciator. Studs used with an electrical
box must be 2x4” (or larger).
6 Wiring Connections
Wire the 5860/R to the FACP as shown below.
Figure 3 Trim Ring for Surface-mounting
backbox
trim ring
Attach second set of wires to top of backbox.
Secure wires behind screw.
Insert wires at an angle into the
first holes past sheetrock.
Figure 4 Flush Mounting the Backbox
SBUS OUT
–+AB
SB SA S+ S-
ON
12345
Figure 5 SBUS Connections
5860/R
FACP SBUS
supervised,
power-limited,
Class B

This manual suits for next models

1

Other Honeywell Control Panel manuals

Honeywell DeltaNet FS90 User manual

Honeywell

Honeywell DeltaNet FS90 User manual

Honeywell GALAXY 16103 User manual

Honeywell

Honeywell GALAXY 16103 User manual

Honeywell Gamewell Flex 402 User manual

Honeywell

Honeywell Gamewell Flex 402 User manual

Honeywell Galaxy Dimension series User guide

Honeywell

Honeywell Galaxy Dimension series User guide

Honeywell MS-10UD Series User manual

Honeywell

Honeywell MS-10UD Series User manual

Honeywell AQ25A Series User manual

Honeywell

Honeywell AQ25A Series User manual

Honeywell Silent Knight 5860 Manual

Honeywell

Honeywell Silent Knight 5860 Manual

Honeywell Galaxy Dimension series Quick setup guide

Honeywell

Honeywell Galaxy Dimension series Quick setup guide

Honeywell TrolaTemp MABS EZ-2 Operation manual

Honeywell

Honeywell TrolaTemp MABS EZ-2 Operation manual

Honeywell Tuxedo Touch Wi-Fi Assembly instructions

Honeywell

Honeywell Tuxedo Touch Wi-Fi Assembly instructions

Honeywell Galaxy 2-44+ User manual

Honeywell

Honeywell Galaxy 2-44+ User manual

Honeywell SMX-AUS User manual

Honeywell

Honeywell SMX-AUS User manual

Honeywell HPZC10 Series User manual

Honeywell

Honeywell HPZC10 Series User manual

Honeywell Fire-Lite Alarms ACC-25/50 User manual

Honeywell

Honeywell Fire-Lite Alarms ACC-25/50 User manual

Honeywell Galaxy Flex User manual

Honeywell

Honeywell Galaxy Flex User manual

Honeywell nfs2-3030 User manual

Honeywell

Honeywell nfs2-3030 User manual

Honeywell NOTIFIER AM1000 Owner's manual

Honeywell

Honeywell NOTIFIER AM1000 Owner's manual

Honeywell Notifier RP-2001 User manual

Honeywell

Honeywell Notifier RP-2001 User manual

Honeywell DX Connexion Series User manual

Honeywell

Honeywell DX Connexion Series User manual

Honeywell Domonial CMI 800++ User guide

Honeywell

Honeywell Domonial CMI 800++ User guide

Honeywell MB-Secure 1000 User manual

Honeywell

Honeywell MB-Secure 1000 User manual

Honeywell NFS-3030 Installation and operating instructions

Honeywell

Honeywell NFS-3030 Installation and operating instructions

Honeywell Fire-Lite Alarms MRP-2001 User manual
Honeywell

Honeywell Fire-Lite Alarms MRP-2001 User manual

Honeywell MM3-MASTERTROL MM-3 Technical manual

Honeywell

Honeywell MM3-MASTERTROL MM-3 Technical manual

Popular Control Panel manuals by other brands

Elmes Electronic CB32G Installation and operation manual

Elmes Electronic

Elmes Electronic CB32G Installation and operation manual

Aritech 1X-E4 Series installation manual

Aritech

Aritech 1X-E4 Series installation manual

Ravel RE-900 Installation, commissioning & operating user manual

Ravel

Ravel RE-900 Installation, commissioning & operating user manual

HST HST-HP201-2AB product manual

HST

HST HST-HP201-2AB product manual

Philips RC9800I/00 Specification sheet

Philips

Philips RC9800I/00 Specification sheet

RGBlink CP 3072 user manual

RGBlink

RGBlink CP 3072 user manual

Global JUNIOR V4 Installation & commissioning manual

Global

Global JUNIOR V4 Installation & commissioning manual

BLUGUARD SmartBus P900-S32 Series user manual

BLUGUARD

BLUGUARD SmartBus P900-S32 Series user manual

BOON EDAM Tournex Instruction card

BOON EDAM

BOON EDAM Tournex Instruction card

DITEC 99 installation manual

DITEC

DITEC 99 installation manual

Roca CCE-205 Installation, assembly and operating instructions

Roca

Roca CCE-205 Installation, assembly and operating instructions

NAPCO X 255 - Programming instructions

NAPCO

NAPCO X 255 - Programming instructions

Conair FLX-128 Basic operation

Conair

Conair FLX-128 Basic operation

Aritech FP2000 User instruction manual

Aritech

Aritech FP2000 User instruction manual

Siemens 3RA6935-0A operating instructions

Siemens

Siemens 3RA6935-0A operating instructions

Emerson E2 Installation and operation manual

Emerson

Emerson E2 Installation and operation manual

Ness D8X Installation & programming manual

Ness

Ness D8X Installation & programming manual

auto maskin DCU 410 Installation and configuration manual

auto maskin

auto maskin DCU 410 Installation and configuration manual

manuals.online logo
manuals.online logoBrands
  • About & Mission
  • Contact us
  • Privacy Policy
  • Terms and Conditions

Copyright 2025 Manuals.Online. All Rights Reserved.