manuals.online logo
Brands
  1. Home
  2. •
  3. Brands
  4. •
  5. Honeywell
  6. •
  7. Control Panel
  8. •
  9. Honeywell Farenhyt Series Technical manual

Honeywell Farenhyt Series Technical manual

RA-1000/RA-1000R
Remote Fire Annunciator
Product Installation Document
Document 151154:F 2/15/2022 ECN: 151770
Farenhyt™ Series
1 Description
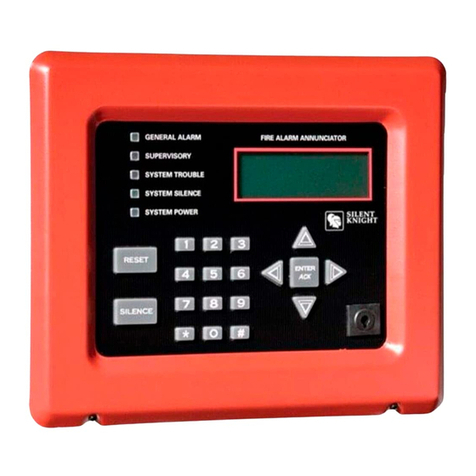
The RA-1000 (gray) and RA-1000R (red) are optional 4x20 remote
annunciators that can be surface or flush-mounted.
2 Compatibility
The RA-1000/R is compatible with Honeywell Farenhyt FACPs. For
more information, see the FACP Installation manual.
3 Specifications
4 Installing the RA-1000/R
RA-1000/R installation involves the following steps:
1. Ensure power is turned off at the panel.
2. Mount the RA-1000/R in the desired location.
3. Connect the RA-1000/R to the panel (see Figure 5).
4. Use the DIP switches on the back of the RA-1000/R to assign an ID
number. See the FACP Manual for more details.
5. The new RA-1000/R module must be added to the system through
programming. The JumpStart®Auto-programming feature will add
the module automatically. Refer to the FACP Manual for more
information.
5 Mounting
The RA-1000/R comes from the factory fully assembled. You must dis-
assemble it for mounting. To disassemble the annunciator, use a 5/64”
hex wrench to remove the set screws, located on the bottom of the
annunciator bezel.
FIRE ALARM ANNUNCIATOR
Figure 1 RA-1000/R Remote Annunciator
Parameter Value
Operating Voltage: 24 VDC
Current Standby: 58 mA
Alarm: 68 mA
Operating Temperature: 0° to 49° C (32° to 120° F)
1".25
(3.175cm)
6.44"
(16.35cm)
8"(20.64cm).125
7".375
(18.73cm)
1”
.25
(3.175cm)
Figure 2 Annunciator Dimensions
backbox bezel
side
view
RA-1000/RA-1000R Installation Document — P/N 151154:F 2/15/2022 2
5.1 Surface Mounting
The RA-1000/R can be mounted directly to a surface or can be attached
to a single, double, or four-square electrical box. Trim Ring Kit 5860TG
(gray) and 5860TR (red) are available for use when surface mounting.
1. Drill holes in the surface to match the screw holes on the backbox.
Refer to Figure 4.20 for locations.
2. Fit the trim ring over the backbox, if used.
3. Attach the backbox to the wall using screws provided.
5.2 Flush-Mounting
1. Cut a hole in the sheet rock to the following dimensions: 8.25” W x
6.625” H. If an electrical box is used, the box must be 1.375” back
from face of wall to accommodate the annunciator.
2. Remove knockout holes as needed for wires.
3. Fit the annunciator backbox into the hole and stabilize with
mounting wires. Angle the mounting wires into the first hole past
the sheet rock. Secure the wires behind the screws as shown in
Figure 4. When all four wires are in place, the backbox should fit
snugly into the hole in the sheetrock.
4. After the annunciator wiring to the panel has been completed (refer
to Figure 4.22), replace the electronic assembly in the back box.
Place the bezel over the back box and tighten the set screws on the
bezel.
5.2.1 Flush-Mounting with an Electrical Box
The RA-1000/R annunciator can be used with the following types of
electrical boxes: 4S, single-gang, and double-gang.
If an electrical box is used, the box must be 1.375” back from the face of
the wall to accommodate the annunciator. Studs used with an electrical
box must be 2x4” (or larger).
6 Wiring Connections
Wire the RA-1000/R to the FACP as shown below.
Figure 3 Trim Ring for Surface-mounting
backbox
trimring
Attach second set of wires to top of backbox.
Secure wires behind screw.
Insert wires at an angle into the
first holes past sheetrock.
Figure 4 Flush Mounting the Backbox
SBUS OUT
–+AB
SB SA S+ S-
ON
12345
Figure 5 SBUS Connections
RA-1000/R
FACP SBUS
supervised,
power-limited,
Class B

Other manuals for Farenhyt Series

10

This manual suits for next models

2

Other Honeywell Control Panel manuals

Honeywell Fire-Lite Alarms ES-200X User manual

Honeywell

Honeywell Fire-Lite Alarms ES-200X User manual

Honeywell NFS-3030 Installation and operating instructions

Honeywell

Honeywell NFS-3030 Installation and operating instructions

Honeywell Galaxy 18Galaxy Owner's manual

Honeywell

Honeywell Galaxy 18Galaxy Owner's manual

Honeywell NOTIFIER SFP-10UD Series User manual

Honeywell

Honeywell NOTIFIER SFP-10UD Series User manual

Honeywell AQ250 Series Operation manual

Honeywell

Honeywell AQ250 Series Operation manual

Honeywell Silent Knight 5860 Manual

Honeywell

Honeywell Silent Knight 5860 Manual

Honeywell AQ252 Series User manual

Honeywell

Honeywell AQ252 Series User manual

Honeywell Fire-Lite Alarms MRP-2001 User manual

Honeywell

Honeywell Fire-Lite Alarms MRP-2001 User manual

Honeywell THOR VM1 User manual

Honeywell

Honeywell THOR VM1 User manual

Honeywell Farenhyt Series User manual

Honeywell

Honeywell Farenhyt Series User manual

Honeywell Fire-Lite Alarms ES-1000X User manual

Honeywell

Honeywell Fire-Lite Alarms ES-1000X User manual

Honeywell Galaxy 2-44+ User manual

Honeywell

Honeywell Galaxy 2-44+ User manual

Honeywell Notifier ID50 Instruction sheet

Honeywell

Honeywell Notifier ID50 Instruction sheet

Honeywell CM737 Installation instructions

Honeywell

Honeywell CM737 Installation instructions

Honeywell Pro-Watch 7000 User manual

Honeywell

Honeywell Pro-Watch 7000 User manual

Honeywell Fire-Lite Alarms MS-9050UD User manual

Honeywell

Honeywell Fire-Lite Alarms MS-9050UD User manual

Honeywell AQ250 Series User manual

Honeywell

Honeywell AQ250 Series User manual

Honeywell Notifier RP-2001 User manual

Honeywell

Honeywell Notifier RP-2001 User manual

Honeywell NOTIFIER RP-2002C User manual

Honeywell

Honeywell NOTIFIER RP-2002C User manual

Honeywell Domonial CMI 800++ User guide

Honeywell

Honeywell Domonial CMI 800++ User guide

Honeywell T631A-C FARM-O-Stat User manual

Honeywell

Honeywell T631A-C FARM-O-Stat User manual

Honeywell Galaxy Flex User guide

Honeywell

Honeywell Galaxy Flex User guide

Honeywell NOTIFIER NFW-100X User manual

Honeywell

Honeywell NOTIFIER NFW-100X User manual

Honeywell NOTIFIER Pearl Installation guide

Honeywell

Honeywell NOTIFIER Pearl Installation guide

Popular Control Panel manuals by other brands

DMP Electronics XR550 series installation guide

DMP Electronics

DMP Electronics XR550 series installation guide

See Water Oil Smart OSD3P-30 Series Installation and operation manual

See Water

See Water Oil Smart OSD3P-30 Series Installation and operation manual

Electronic Devices Limited ED591 instruction manual

Electronic Devices Limited

Electronic Devices Limited ED591 instruction manual

Fabman Bridge FB-V2 user manual

Fabman

Fabman Bridge FB-V2 user manual

Electro ABD-4120 user manual

Electro

Electro ABD-4120 user manual

Chamberlain 882LMW user manual

Chamberlain

Chamberlain 882LMW user manual

tau MEC 1000 installation guide

tau

tau MEC 1000 installation guide

Chamberlain LiftMaster Professional CB22 Instructions and electrical set up

Chamberlain

Chamberlain LiftMaster Professional CB22 Instructions and electrical set up

IQRF VCP-QVGA-02 user guide

IQRF

IQRF VCP-QVGA-02 user guide

AUDAC DW5066/W User manual & installation guide

AUDAC

AUDAC DW5066/W User manual & installation guide

Garmin GPSMAP 8X10 owner's manual

Garmin

Garmin GPSMAP 8X10 owner's manual

FBII XL-2S Silver Hookup and installation instructions

FBII

FBII XL-2S Silver Hookup and installation instructions

CIAT AQUACIAT CALEO CONNECT TOUCH instruction manual

CIAT

CIAT AQUACIAT CALEO CONNECT TOUCH instruction manual

JCM Technologies ROLL868 DMR quick start guide

JCM Technologies

JCM Technologies ROLL868 DMR quick start guide

Frick QUANTUM LX AcuAir Operation

Frick

Frick QUANTUM LX AcuAir Operation

Lincoln Electric Guardian AD1387-87 Operator's manual

Lincoln Electric

Lincoln Electric Guardian AD1387-87 Operator's manual

DigiPower IPP-S Series installation guide

DigiPower

DigiPower IPP-S Series installation guide

GFA TS 971 Series Brief instructions

GFA

GFA TS 971 Series Brief instructions

manuals.online logo
manuals.online logoBrands
  • About & Mission
  • Contact us
  • Privacy Policy
  • Terms and Conditions

Copyright 2025 Manuals.Online. All Rights Reserved.