The Honeywell Trademark is used under license from Honeywell International Inc.
Honeywell International Inc. makes no representation or warranties with respect to this product.
This product is manufactured by Jasco Products Company LLC.
This Jasco product comes with a 2-year limited warranty. Visit www.byjasco.com for warranty details.
MADE IN CHINA/HECHO EN CHINA
©JASCO 2019 | 45183 | 07/22/19 v1
Jasco Products Company LLC.
10 E. Memorial Road
Oklahoma City, OK 73114
45183
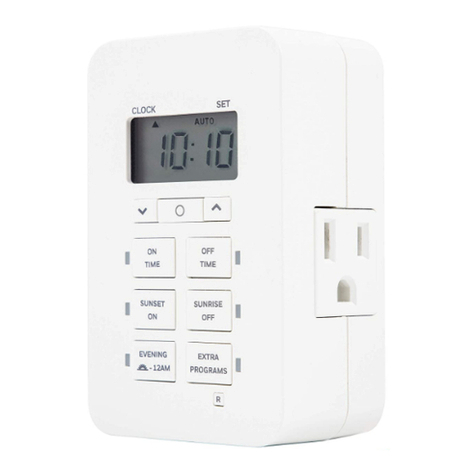
TEMPORIZADOR ENCHUFABLE PARA INTERIORES, DE 24 HORAS,
CON UN BOTÓN CONECTADO MEDIANTE UN CABLE DE 5 PIES
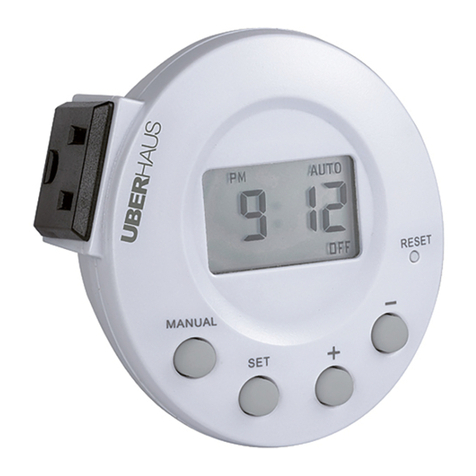
10:10
CLOCK COUNTDOWN
ON TIME
EVENING
5PM-12AM
ALL NIGHT
6PM-6AM COUNTDOWN
MORNING
5PM-8AM
OFF TIME
R
Declaración de conformidad del proveedor | Modelo #: 45183 | Jasco Products Co., 10 E. Memorial
Rd., Oklahoma City, OK 73114, www.byjasco.com
Este dispositivo cumple con las especificaciones del apartado 15 de las normas de la FCC y con
las especificaciones de las normas radioeléctricas (RSS) del Ministerio de Industria de Canadá
aplicables a aparatos exentos de licencia. El funcionamiento está sujeto a las siguientes dos
condiciones: (1) este dispositivo no debe provocar interferencia perjudicial, y (2) este dispositivo
debe aceptar toda interferencia que reciba, incluso la que pudiera causar un funcionamiento no
deseado.
NOTA DE LA FCC: El fabricante no se hace responsable de ninguna interferencia de radio o TV
ocasionada por modificaciones no autorizadas efectuadas a este dispositivo. Dichas modificaciones
podrían anular la autoridad del usuario para utilizar este dispositivo.
NOTA: Este equipo ha sido probado y cumple con los límites para aparatos digitales de Clase B
de conformidad con el apartado 15 de la normativa de la FCC. Estos límites están diseñados para
proveer protección razonable contra interferencias perjudiciales en instalaciones residenciales. Este
dispositivo genera, usa y puede irradiar energía de radiofrecuencias y, si no se instala y usa según las
instrucciones, puede provocar interferencia perjudicial a las radiocomunicaciones. No obstante, no
hay garantías de que no ocurrirá interferencia en una instalación en particular. Si este equipo genera
alguna interferencia perjudicial a la recepción de radio o televisión, lo que puede determinarse
encendiendo y apagando el equipo, se recomienda que el usuario intente corregir la interferencia
aplicando una o más de las siguientes medidas:
— Reoriente o reubique la antena receptora.
— Incremente la separación entre el equipo y el receptor.
— Conecte el dispositivo a un tomacorriente de un circuito diferente del circuito al que el receptor
está conectado.
— Consulte al distribuidor o a un técnico con experiencia en radio/televisión para solicitar
asistencia.
CAN ICES3(B)/NMB3(B)
125V~50/60Hz
15 A 1875 W Fines generales/carga resistiva
10 A 1250 W Tungsteno
1/2 HP
Funciona con bombillas atenuables LED, CFL, halógenas e incandescentes.
¿Preguntas? Comuníquese con nuestro Centro de atención al cliente con sede en EE. UU. al
18556988324, de lunes a viernes, de 7:00 a. m. a 8:00 p. m. CST (hora central estándar).
Para recibir el soporte técnico más actualizado sobre productos, accesorios, manuales en formato
digital (PDF), entre otros, visite www.byjasco.com/support
FCC/IC
ESPECIFICACIONES
10:10
CLOCK COUNTDOWN
ALL NIGHT
6PM-6AM COUNTDOWN
MORNING
5PM-8AM
OFF TIME
R
ON TIME
EVENING
5PM-12AM
10:10
CLOCK COUNTDOWN
EVENING
5PM-12AM
ALL NIGHT
6PM-6AM COUNTDOWN
MORNING
5PM-8AM
OFF TIME
R
ON TIME
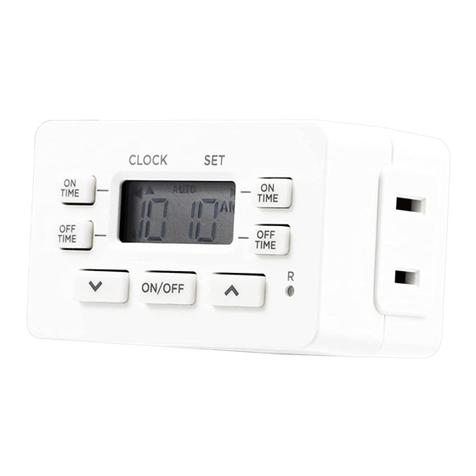
CÓMO PROGRAMAR LA HORA
1. Si no aparecen números en la pantalla, enchufe el temporizador
en un tomacorriente y deje que se cargue durante una hora.
Una vez cargado, presione el botón restablecer ( ) que se
encuentra en la esquina inferior derecha con un lápiz o un
mondadientes.
2. Use las flechas arriba ( ) y abajo ( ) para programar la hora
actual, teniendo en cuenta si es AM o PM.
Nota: Cuando el temporizador esté cargado, se puede desenchufar del
tomacorriente para programarlo con facilidad. Volver a enchufarlo al
tomacorriente al finalizar. El temporizador debe estar enchufado a la
corriente para que las luces testigo funcionen.
ESCOJA LA HORA DE ENCENDIDO/APAGADO QUE
DESEE
Presione el botón "ON TIME" (hora de encendido), y luego programe
la hora de encendido con las flechas arriba ( ) y abajo ( ). Si
programa la hora de encendido “ON TIME” antes de la hora actual, no
se encenderá hasta el próximo día a la hora programada.
Presione el botón "OFF TIME" (hora de apagado), y luego programe la
hora de apagado con las flechas arriba ( ) y abajo ( ).
Utilice el mando de ENCENDIDO (ON) / APAGADO (OFF) para
encender el temporizador si se requiere de inmediato.
Cuando utiliza los botones "on" (hora de encendido) y "off" (hora
de apagado), asegúrese de que la luz ámbar al lado del botón esté
encendida. La luz ámbar solo se encenderá si el temporizador está
enchufado en el tomacorriente de pared.
HORARIOS PROGRAMADOS
Existen tres programas preestablecidos que pueden activarse de
manera individual o simultánea. Elija entre los siguientes:
EVENING (noche) (de 5 p. m. a 12 a. m.)
MORNING (mañana) (de 5 a. m. a 8 a. m.)
TODA LA NOCHE (de 6 p. m. a 6 a. m.)
Cuando se selecciona un programa preestablecido o programado, se
encenderá una luz LED indicadora ámbar.
Si un horario preestablecido no satisface sus necesidades, puede
usar un horario de encendido/apagado personalizado para modificar
el preestablecido.
Ejemplo: Si usa “noche” (de 5 p. m. a 12 a. m.) y a “hora de apagado”
le asigna el valor de 10 p. m., se creará un horario de 5 p. m. a 10 p. m.
en el temporizador.
Puede elegir múltiples horarios predeterminados.
EL MODO DE CUENTA REGRESIVA
Presione EL BOTÓN DE cuenta regresiva "COUNTDOWN", y luego
use las flechas arriba ( ) y abajo ( ) para programar desde
1 minuto hasta 24 horas.
El último horario de cuenta regresiva fijado será el nuevo horario
predeterminado hasta que se cambie manualmente. En el modo de
cuenta regresiva, el tiempo comienza a correr cuando se presiona el
botón conectado.
Nota: Cuando se cambie el horario de verano, use las flechas arriba
() y abajo ( ) para ajustar la hora en una (1) hora.
BOTÓN DE MANDO CONECTADO
Si un programa configurado está en curso y el dispositivo está
encendido, presione el botón conectado para apagar dicho
dispositivo. Este permanecerá apagado hasta que comience el
siguiente programa configurado o se oprima de nuevo el botón.
Si un programa configurado está en curso y el dispositivo está
apagado, presione el botón conectado para encender dicho
dispositivo. Este permanecerá encendido hasta que finalice el
siguiente programa configurado o se oprima de nuevo el botón.
Si el modo de cuenta regresiva está activado, el dispositivo
permanece encendido durante el tiempo establecido o hasta que se
presiona de nuevo el botón conectado.
10:10
CLOCK COUNTDOWN
EVENING
5PM-12AM
ALL NIGHT
6PM-6AM
MORNING
5PM-8AM
OFF TIME
R
ON TIME
COUNTDOWN
RIESGO DE DESCARGA
ELÉCTRICA
•ENCHÚFELO DIRECTAMENTE
A UN TOMACORRIENTE
ELÉCTRICO
•NO UTILIZAR EN LUGARES
HÚMEDOS.
•SOLO PARA USO EN
INTERIORES.
•DESCONECTE EL
TEMPORIZADOR ANTES DE
LIMPIAR
•MANTENER FUERA DEL
ALCANCE DE LOS NIÑOS.
RIESGO DE INCENDIO
•NO UTILICE PARA
CONTROLAR APARATOS QUE
INCLUYAN RESISTENCIAS
ELÉCTRICAS (APARATOS DE
COCCIÓN, CALEFACTORES,
PLANCHAS, ETC.)
•NO SUPERAR LOS VALORES
NOMINALES ELÉCTRICOS.
ADVERTENCIA
NO DEVUELVA ESTE
PRODUCTO A LA TIENDA
¡PARE!
10:10
CLOCK COUNTDOWN
ON TIME
EVENING
5PM-12AM
ALL NIGHT
6PM-6AM COUNTDOWN
MORNING
5PM-8AM
OFF TIME
R
BOTÓN DE
RESTABLECER
