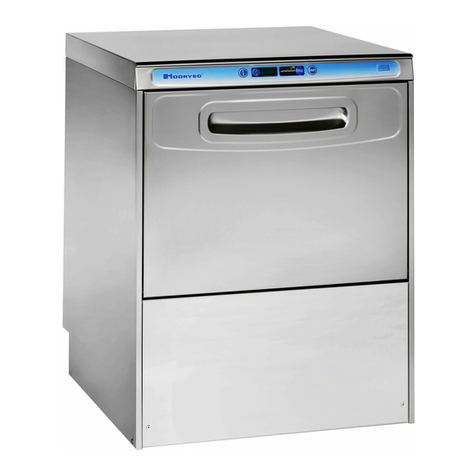
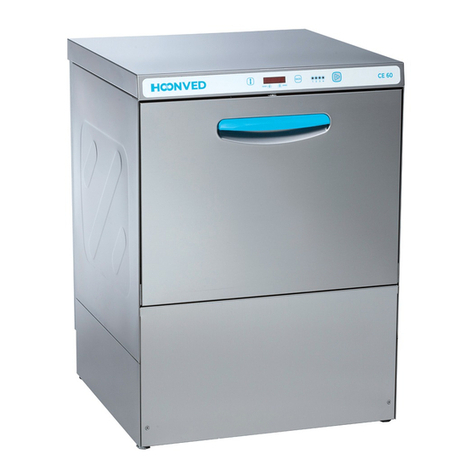
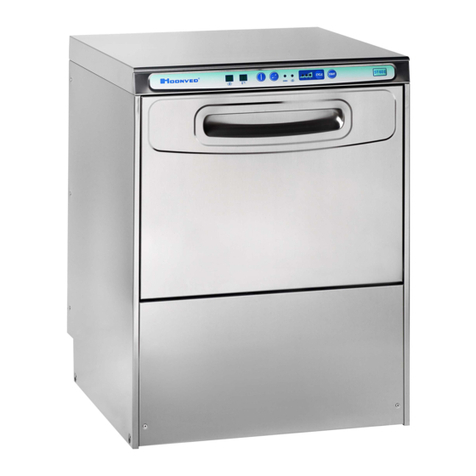
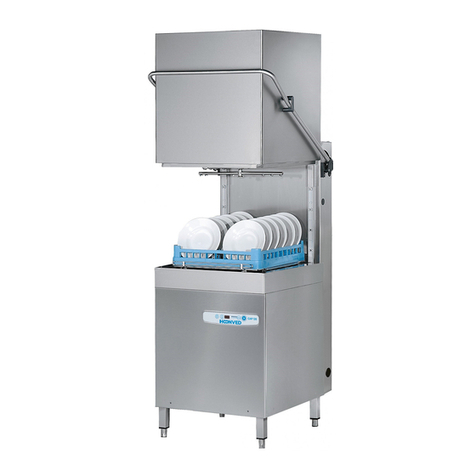
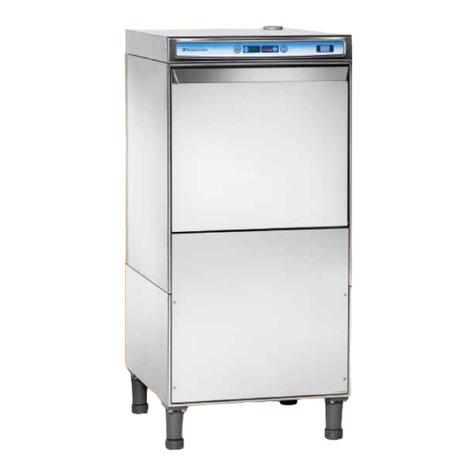
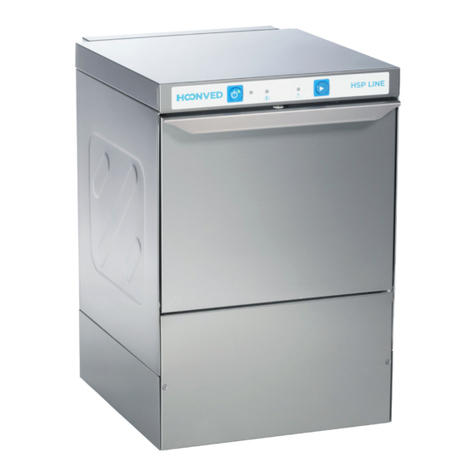
Hoonved AP 43 E Instruction Manual

AP 43 E
AP 48 E
AP 53 E
AP 60 E
FW 35 E
FW 40 E
FW 45 E
FW 50 E
Instructions for user
Ed. 10/2012

Via Ugo Foscolo, 1
21040 Venegono Superiore
Varese (Italy)
www.hoonved.com
DICHIARAZIONE DI CONFORMITÀ CE I
DECLARATION OF CONFORMITY CE GB
CE DECLARACION DE CONFORMIDAD
E
DECLARATION DE CONFORMITÉ CE FR
KONFORMITÄTSERKLÄRUNG CE
D
CE CONFORMITEITSVERKLARING NL
CE KONFORMITETSERKLÆRING
DK
Noi dichiariamo sotto la nostra esclusiva responsabilità che il prodotto:
The undersigned hereby declares under full responsability that the following product:
Declaramos bajo nuestra responsabilidad que el produeto:
Nous soussignées attestons sous notre entière responsabilité que le produit suivant:
Die unterzeichnete Fa. erklärt unter eigener Verantwortung, dass folgende Produkte:
Ondergetekende firma verklaart dat de:
Hermed erklæres at fØlgende produkter:
LAVASTOVIGLIE - DISHWASHER – LAVAVAJILLAS - LAVE-VASSEILLE - GESCHIRRSPÜLER -
VAATWASMACHINE - TALLERKENOPVASKEMASKINE -UNDERBANKDISKMASKIN
AP43E..., AP48E..., AP53E..., AP60E..., FW35E..., FW40E..., FW45E..., FW50E...,
al quale questa dichiarazione si riferisce, è conforme alle seguenti norme:
for which this declaration refers to in accordance to the following standards:
al que se refiere asta declaracciones de conformidad a las siguientes normas:
auquel se référe cette dèclaration,est conforme aux normes suivantes:
auf welche sich diese Erklärung bezieht, folgendem Standard entsprechen:
waarop deze verklaring betrekking heeft, volgens de standaard:
som er omfattet af denne erklæring, overholder fØlgende standarder:
EN 60335-1, EN 60335-2-58, EN 61000-3-2, EN 61000-3-3, EN 55014-1, EN 55014-2
in base a quanto previsto dalle Direttive CEE:
on the basis of what is foreseen by the Directives CEE:
en base a lo previsto en la directiva CEE:
selon ce qui est prevu par les Directives CEE:
aufgrund der vorgesehenen Richtlinien:
gebaseerd op de CE-richtlijnen:
iht. EU-direktiv:
2006/95/CE (LVD) - 2004/108/CE (EMC)
Decliniamo ogni responsabilità per sinistri a persone o a cose derivanti da manomissione da parte di terzi o da carenza di manutenzione o
riparazione.
We decline any responsability for injuries or damage derived from machine misuse, abuse by others or improper machine maintenance
or repairs.
Declinamos toda responsabilidad por sinostros a personas por la incorrecta manipulacion por parte de tercero e la carencia de
mantenimjento o reparaciòn.
Nous déclinons toute responsabilité pour sinistres à personnes ou à objetqui derivent de l'intervention de la part de tiers non specialistes
ou de carences de manutentionou reparation.
Wir lehnen jegliche Verantwortung für Schäden an Personen oder Dingen ab, die auf fehlerhaftes Eingreifen Dritter oder auf mängelhafte
Wartung oder Reparation zurückzuführen sind.
Wij zijn op geen enkele manier verantwoordelijk voor schade aan personen of materrialen welke voortvloeien uit onoordeelkundig
gebruik, reparatie dan onderhoud aan de machines door derden.
Vi frasiger os ethvert ansvar for skader opstàet son fØlge af fejlagtig anvendelse af maskinen, misbrug, eller utilstrækkeligt vedligehold
eller reparation.
_____09/02/2010_____
(Data emissione)
(Date of issue)
(Fecha de emisiòn)
(Date d'emission)
(Ausgabedatum)
(D.D)
(Udstedelsesdato)
Giuseppe RIENZI
DELEGATO ALLA SICUREZZA DEL PRODOTTO
__________________________________________
(Nome e firma o timbratura equivalente della persona autorizzata)
(Name signature or equivalent of authorized representative)
(Nombre y firma o equivalente de la persona autorizada)
(Nom et signature ou cachet de la personne autorisée)
(Name und Stempel der rechtskräftigen Person)
(Naam handtekening of equivalent van de rechtsgeldige vertegenwoordiging)
(Underskrift)
AP E.doc

3
cod. 37621
AP 43 E - FW 35 E
AP 48 E - FW 40 E
AP 53 E - FW 45 E
AP 60 E - FW 50 E
DISHWASHING MACHINE
The illustrations concerning these instructions are on the inside of the back cover
Mod.
C
C
III III IIII
CYCLE
START

4
ITA ......................................................................................... INFORMAZIONE AGLI UTENTI
Ai sensi dell’art. 13 del Decreto Legislativo 25 Luglio 2005, n.151 “Attuazione delle Direttive 2002/95/CE, 2002/96/CE e
2003/108/CE, relative alla riduzione dell’uso di sostanze pericolose nelle apparecchiature elettriche ed elettroniche, non
ché allo smaltimento dei riuti”
Il simbolo del cassonetto barrato riportato sulla targhetta matricola della lavastoviglie indica che il prodotto alla ne della propria
vita utile deve essere raccolto separatamente dagli altri riuti.
La raccolta differenziata della lavastoviglie giunta a ne vita è organizzata e gestita dal produttore.
L’utente che vorrà disfarsi della presente apparecchiatura dovrà quindi contattare il produttore e seguire il sistema che questo ha
adottato per consentire la raccolta separata dell’apparecchiatura giunta a ne vita.
L’adeguata raccolta differenziata per l’avvio successivo della lavastoviglie dimessa al riciclaggio, al trattamento e allo
smaltimento compatibile a livello ambientale, contribuisce ad evitare possibili effetti negativi sull’ambiente e sulla salute e
favorisce il reimpiego e/o riciclo dei materiali di cui è composta l’apparecchiatura.
Lo smaltimento abusivo del prodotto da parte del detentore comporta l’applicazione delle sanzioni amministrative previste dalla
normativa vigente.
ENG......................................................................................... INFORMATION FOR USERS
In accordance with the Directives 2002/95/EC, 2002/96/EC and 2003/108/EC on the restriction of the use of certain hazardous
substances in electrical and electronic equipment, and waste electrical and electronic equipment”
The “crossed out wheeled bin” symbol on the dishwasher serial number plate indicates that at the end of its useful life the product
must be collected separately from other waste.
Separate collection of dishwashers that have come to the end of their useful life is organised and managed by the distributor.
Therefore, any user wanting to dispose of this equipment must contact the distributor and use the system adopted by the latter to
allow separate collection of equipment which has reached the end of its useful life.
Suitable separate collection, followed by decommissioned dishwasher recycling, treatment and environmentally-sound disposal,
helps to avoid possible negative effects on health and the environment and promotes re-use and/or recycling of the materials of
which the equipment is made.
Owners who dispose of the product illegally will be liable to the administrative penalties envisaged by the regulations in force.
FRA .......................................................................INFORMATIONS DESTINÉES AUX UTILISATEURS
Conformément à les Directives 2002/95/CE, 2002/96/CE et 2003/108/CE, sur la réduction de l’utilisation de substances
dangereuses dans les appareils électriques et électroniques ainsi que sur l’élimination des déchets.”
Le symbole de la poubelle barrée reporté sur la plaquette du lave-vaisselle indique que le ramassage du produit à la n de sa vie
s’effectue séparément par rapport aux autres déchets.
Le tri différencié d’un lave-vaisselle arrivé à la n de sa vie est organisé et géré par le distributeur. L’utilisateur souhaitant se défaire
de son appareil doit donc contacter le distributeur et se conformer au système que celui-ci aura adopté pour permettre un ramassage
séparé de l’appareil.
Le tri différencié permettant d’entreprendre le recyclage du lave-vaisselle à éliminer, ainsi qu’un traitement et une élimination
compatible du point de vue environnemental contribuent à éviter les effets négatifs possibles sur l’environnement et sur la santé et
favorisent le réemploi et/ou le recyclage des matériaux constituant l’appareil.
Une élimination frauduleuse du produit par son propriétaire comporte l’application des sanctions administrative prévue par la
norme en vigueur.
TED .................................................................................... AUSKUNFT ZU DEN BENUTZERN
Gemäß der Richtlinien 2002/95/EG, 2002/96/EG und 2003/108/EG, zur Beschränkung der Verwendung gefährlicher Stoffe
in Elektro- und Elektronikgeräten, sowie über Elektro- und Elektronik-Altgeräte“
Das Symbol, das eine durchgestrichene Abfalltonne auf Rädern darstellt, bendet sich auf dem Datenschild der Spülmaschine und
bedeutet, dass das Altgerät im Zuge der Entsorgung getrennt gesammelt werden muss.
Die getrennte Sammlung der Spülmaschine als Elektro-Altgerät wird vom Vertreiber organisiert und abgewickelt.
Der Nutzer, der das betreffende Gerät entsorgen will, muss daher den Vertreiber kontaktieren und die Entsorgung gemäß dem
System vornehmen, das der Vertreiber gewählt hat, um die getrennte Sammlung der Altgeräte zu gewährleisten.
Die getrennte Sammlung der Alt-Spülmaschine ist eine Voraussetzung für die spezische Behandlung und das spezische Recycling
von Elektro- und Elektronik-Altgeräten und notwendig, um negative Auswirkungen auf Gesundheit und Umwelt zu vermeiden.
Ferner werden dadurch die Wiederverwendung und/oder das Recycling der Materialien, aus denen die Spülmaschine besteht,
gefördert. .
Die unsachgemäße Entsorgung des Geräts durch den Inhaber wird mit Verwaltungsstrafen gemäß dem geltenden Recht geahndet.
SPA .................................................................................INFORMACIÓN PARA LOS USUARIOS
Según las Directivas 2002/95/CE, 2002/96/CE y 2003/108/CE, sobre restricciones a la utilización de determinadas sustancias
peligrosas en aparatos eléctricos y electrónicos, y eliminación de residuos”
El símbolo del contenedor tachado reproducido en la placa del número de serie del lavavajillas indica que el producto debe ser
recogido por separado y no pueden eliminarse con el resto de residuos domésticos.
La eliminación por separado del lavavajillas al nal de su vida útil está organizada y gestionada por el distribuidor.
El usuario que desee desechar este aparato deberá ponerse en contacto con el distribuidor y respetar las modalidades que éste
ha adoptado para consentir su eliminación por separado al nal de su vida útil.
Una adecuada recogida selectiva del lavavajillas para su reciclaje, tratamiento y eliminación de manera respetuosa con el medio
ambiente contribuye a evitar posibles efectos negativos para el medio ambiente y la salud, y fomenta la reutilización y/o el reciclaje
de los materiales que lo componen.
La eliminación del producto de forma no autorizada dará lugar a la aplicación de las sanciones administrativas establecidas por las
normas vigentes.

5
La ditta costruttrice si riserva il diritto di apportare
modiche che si renderanno utili ai propri prodotti
senza comprometterne le caratteristiche essenziali.
The manufacturer reserves the right to modify the
products whenever necessary, without affecting their
main features.
Le constructeur se réserve le droit de modier ses
produits sans en compromettre les caractéristiques
essentielles.
Der Hersteller behält sich das Recht vor , seine Pro-
dukte abzüandern , falls es notwendig sei , ohne die
haupteigenschaften des Gerät zu wechseln.
La Firma constructora se reserva el derecho de modi-
carsus productossin comprometerlas características
esenciales.
ITA AVVERTENZA
Prima di procedere all'installazione, alla messa in funzione, alla regolazione e alle operazioni di manutenzione della lavastoviglie
Mod. AP/FW E, leggere attentamente il presente manuale.
In caso di guasto o cattivo funzionamento della macchina rivolgersi esclusivamente ad un centro tecnico autorizzato o diretta-
mente alla ditta HOONVED.
°
ENG IMPORTANT
Become thoroughly familiar with the contents of this manual before installing, setting up, adjusting and servicing dishwasher
machine Mod. AP/FW E.
Only contact an authorized technical center or HOONVED in the event of breakdowns or faulty machine operation.
FRA IMPORTANT
Lisez attentivement cette notice avant la mise en place, la mise en service, le réglage et les opérations d’entretien de la machine
lave-vaisselle Mod AP/FW E.
En cas de panne franche ou de dysfonctionnement de la machine, adressez-vous exclusivement à un service technique agréé
ou directement à la société HOONVED.
TED HINWEIS
Bevor man den Geschirrspüler Mod. AP/FW E installiert, in Betrieb nimmt, einstellt oder Wartungsarbeiten daran vornimmt, ist
dieses Handbuch aufmerksam durchzulesen.
Bei Betriebsstörungen der Maschine wenden Sie sich bitte ausschließlich an ein autorisiertes Kundendienst-Zentrum oder direkt
an Firma HOONVED.
SPA ATENCION
Antes de realizar la instalación, la puesta en marcha, los ajustes y las operaciones de mantenimiento de la máquina lavavasos
Mod. AP/FW E, lea atentamente este manual.
En caso de avería o de mal funcionamiento se dirija exclusivamente a un centro técnico autorizado o directamente a la empresa
HOONVED.

7
INDICE - INDEX - ÍNDICE
RAEE.................................................................... pag. 4
Avvertenza.......................................................... pag. 5
Important
Important
Hinweis
Advertencias
Dimensioni d'ingombro..................................... pag. 8
Overall dimensions
Dimensions d'encombrement
Platzbedarfmasse
Dimensiones máximas
Dati tecnici.......................................................... pag. 9
Technical data
Données techniques
Technischen daten
Datos técnicos
Descrizione comandi...........................................pag. 10
Decription of the controls
Description des commandes
Beschreibung der Bedienvorrichtungen
Descripción de los mandos
ITALIANO......................................................... Pagina 11
ENGLISH.......................................................... Page 26
FRANÇAIS....................................................... Page 41
DEUTSCH........................................................ Seite 56
ESPAÑOL........................................................ Página 71

8
DIMENSIONI DI INGOMBRO - OVERALL DIMENSIONS - DIMENSIONS D'ENCOMBREMENT
PLATZBEDARFSMASSE - DIMENSIÓNES
AP 43 E - FW 35 E 430 530 694 860 280
AP 48 E - FW 40 E 480 530 694 860 280
AP 53 E - FW 45 E 530 620 751 964 270
AP 60 E - FW 50 E 600 620 816 1030 330
Modello Model A B C D E
10
I II III IIII
START

9
Ciclo Breve-Short- Court-Kurzer-Corto = *152 sec.
Ciclo Medio-Medium -Moyen-Mittlerer-Medio = *182 sec.
Ciclo Lungo-Long -Long-Langer-Largo = *242 sec.
Ciclo Intensivo-Intensive-Intensif -Intensiver-Intensivo = *484 sec.
Capacità vasca
Tank capacity
Capacité de la cuve
Wannenkapazität
Capacidad tina
Alimentazione idrica
Water supply
Alimentation en eau
Wasseranschluß
Alimentacíon idrica
Capacità boiler
Boiler capacity
Cap. du chauffe-eau
Boilerkapazität
Capacidad hervidor
Resistenza boiler
Boiler heating elem.
Résistance chauffe-e.
Boilerheizwiderstand
Resistencia hervidor
AP 43 E-FW 35 E ø 28 mm 5° ÷ 40° C 20 ÷ 90 % 50° ÷ 60° C 80° ÷ 90° C - 6 l
AP 48 E-FW 40 E ø 28 mm 5° ÷ 40° C 20 ÷ 90 % 50° ÷ 60° C 80° ÷ 90° C - 6 l
AP 53 E-FW 45 E ø 31 mm 5° ÷ 40° C 20 ÷ 90 % 50° ÷ 60° C 80° ÷ 90° C - 7,5 l
AP 60 E-FW 50 E ø 31 mm 5° ÷ 40° C 20 ÷ 90 % 50° ÷ 60° C 80° ÷ 90° C - 7,5 l
Raccordo di scarico
Drain pipe tting
Raccord de vidange
Abwasseranschluß
Enlace de descarga
Umidità relativa
Relative humidity
Humidité relative
Relative Feuchte
Humedad relativa
Temper.di funz e stoc
Operat.and storage te
Tempér.de foncti.et st.
Betriebs- und Lagert.
Temperatura de funz.
Temperatura lavaggio
Wash temperature
Température de lav.
Spültemperatur
Temperatura de lav.
Temperatura risciac.
Rinse temperature
Température de rinç.
Klarspültemperatur
Temperatura de aclar.
DATI TECNICI-TECHNICAL DATA-DONNÈE TECHNIQUES
TECHNISCHE DATEN-DATOS TECNICOS
Peso netto
Net weight
Poids net
Reingewicht
Peso netto
Temp. max entrata ac.
Water inlet max. temp
Temp.max. entree eau.
Max. Temperatur-Wa.
Temper.màx.entrada a
Livello pressione acus.
Noise level
Niveau de pression s.
Schalldruckpegel
Nivel de presion acust.
Dimensioni cestello
Basket dimensions
Dimensions du panier
Korbgröße
Dimensiones cubeta
Peso macchina imball.
Weight of packed mac.
Poids de la machine e.
Gewicht der verp.Mas.
Peso de la maquina e.
AP 43 E-FW 35 E 2÷4 bar Ø 3/4"G 50° C < 70 dB (A) 350 x 350 mm 45 kg 51 kg
AP 48 E-FW 40 E 2÷4 bar Ø 3/4"G 50° C < 70 dB (A) 400 x 400 mm 49 kg 54 kg
AP 53 E-FW 45 E 2÷4 bar Ø 3/4"G 50° C < 70 dB (A) 450 x 450 mm 57 kg 66 kg
AP 60 E-FW 50 E 2÷4 bar Ø 3/4"G 50° C < 70 dB (A) 500 x 500 mm 61 kg 70 kg
AP 43 E-FW 35 E 24/20/15/7 400V 3N ~ 50/60Hz 5400 W 5000 W 225 W 400 W
AP 48 E-FW 40 E 24/20/15/7 400V 3N ~ 50/60Hz 5400 W 5000 W 225 W 400 W
AP 53 E-FW 45 E 24/20/15/7 400V 3N ~ 50/60Hz 6500 W 6000 W 500 W 500 W
AP 60 E-FW 50 E 24/20/15/7 400V 3N ~ 50/60Hz 6500 W 6000 W 500 W 500 W
Cons. acqua x ciclo
Water cons. per c.le
Cons. d’eau par c.le
Wass. pro Zyklus
Con. agua por ciclo
Durata ciclo
Cycle length
Durée du cycle
Zyklusdauer
Duracíon del ciclo
Produzione cestelli/ora
Output in baskets/hour
Débit paniers/
Produktion korbe/stun
Producción canastos/h
Potenza totale
Total power
Puissance totale
Gesamtleistung
Enlace total
Pompa lavaggio
Wash pump
Pompe de lavage
Spülpumpe
Bomba de lavado
Allacciamento elettrico
Electrical connection
Raccordement électriq
Stromversorgung
Alimentacion electrica
Resistenza vasca
Tank heating elem.
Résistance cuve
Wannenheizwiderst.
Resistencia tina
AP 43 E-FW 35 E 3,5 ÷ 4 l
AP 48 E-FW 40 E 3,5 ÷ 4 l
AP 53 E-FW 45 E 4 ÷ 5 l
AP 60 E-FW 50 E 5 ÷ 6 l
* (escluso risciacquo)
* (without rinsing)
* (sans rinçage)
* (ohne Klarspüler)
* (sin aclarado)

10
CRUSCOTTO COMANDI - CONTROL PANEL - PANNEAU DES COMMANDES
SCHALTBLENDE - PANEL DE MANDOS
Fig. 1
LEYENDA
Q1) Interruptor ON/OFF
LC1) Lámpara led ciclo CORTO (azul)
LC2) Lámpara led ciclo MEDIO (azul)
LC3) Lámpara led ciclo LARGO (azul)
LC4) Lámpara led ciclo LARGO (azul)
S9) Botón selecciòn CICLO
S3) Botón de Arranque CICLO (START)
SI) Botón selecciòn Temper. CALDERIN/CUBA
t1) Temperatura cuba (display)
t2) Temperatura boiler (display)
LEGENDA
Q1) Interruttore ON/OFF
LC1) Lampada led ciclo CORTO (azzurro)
LC2) Lampada led ciclo MEDIO (azzurro)
LC3) Lampada led ciclo LUNGO (azzurro)
LC4) Lampada led ciclo LUNGO (azzurro)
S9) Tasto selezione CICLO
S3) Tasto AVVIO CICLO (START)
SI) Pulsante Selezione temper. Boiler/Vasca
t1) Display temperatura vasca
t2) Display temperatura boiler
LEGEND
Q1) Line button ON/OFF
LC1) SHORT cycle led light (blue)
LC2) MEDIUM cycle led light (blue)
LC3) LONG cycle led light (blue)
LC4) LONG cycle led light (blue)
S9) CYCLE selection button
S3) START CYCLE button
SI) BOILER/TANK Temper. Selection button
t1) Tank temperature (display)
t2) Boiler temperature (display)
LEGENDE
Q1) Bouton de ligne ON/OFF
LC1) Lampe led cycle COURT (bleur clair)
LC2) Lampe led cycle MOYEN (bleur clair)
LC3) Lampe led cycle LONG (bleur clair)
LC4) Lampe led cycle LONG (bleur clair)
S9) Bouton de Sélection CYCLE
S3) Bouton de Démarrage CYCLE (START)
SI) Bouton Sélection Temp. surchauffeur/cuve
t1) Display temperature cuve
t2) Display temperature boiler
ZEICHENERKLÄRUNG
Q1) Schalter Ein-/Aus
LC1) Led Leuchte KURZER zyklus (lichtblau)
LC2) Led Leuchte NORMALER zyklus (lichtblau)
LC3) Led Leuchte LANGER zyklus (lichtblau)
LC4) Led Leuchte LANGER zyklus (lichtblau)
S9) Wahltaste ZYKLUS
S3) Taste ZYKLUS STARTEN
SI) Temperatur-Wahltaste BOILER/TANK
t1) Tankstemperature (display)
t2) Boilerstemperature (display)
Q1 SI t1/t2 S9 S3
LC1LC2LC3LC4
I II III IIII
START

27
Part 1: General description and safety device
Part 2: For the Operator
Part 3: For Authorized and Qualied
Technicians
PARTICULAR RECOMMENDATIONS
FOR THE OPERATOR
- Do not operate the machine without having become fully
familiar with the contents of this manual and without having
acquired a comprehensive knowledge of the specic tech-
niques and machine controls.
- Check that the area in which the machine is to be installed is
compatible with the dimensions of the machine itself before
installing this latter.
- If this machine is a ”built in” type , pay attention that the
housing and the furnishings nearby are suitable ones ,
i.e. they have not to suffer from exposure to steam that
may come out from the machine during its functioning
and especially during the opening of the door at each
washing cycle.
- Only use lifting and handling means that are suited to the
weight of the machine when this must be installed or removed
either completely or in part.
- Never allow unauthorized or unqualied personnel to start,
adjust, operate or repair the machine. Always refer to this
manual for the necessary operations.
- The mechanical parts and electrical/electronic components
situated inside the machine are protected by entirely closed
panels.
- Always ensure that the main switch has been set to the
“OFF” position before cleaning and/or servicing the machine.
This will disconnect the power source during the operator’s
intervention.
- The electrical powering system must be equipped with an
automatic release system prior to the main machine switch
and with a suitable grounding system that complies with all
the requisites established by industrial provisions for the
prevention of accidents.
- Always disconnect the power source if work must be carried
out on the main switch or in its vicinity.
- All inspections and maintenance operations requiring remo-
val of the safety guards are carried out under the complete
responsibility of the users.
These operations should therefore only be carried out by
specialized and authorized technical personnel.
- Make sure that none of the accident preventing safety de-
vices (barriers, guards, casings, microswitches, etc.) have
been tampered with and that they are all perfectly functional
before operating. These devices should be repaired if this is
not the case.
- Never remove the safety devices.
- To prevent personal risks, only use power tools that are
correctly connected to the grounding tap and that conform
to the national safety regulations.
- Never ever tamper with the electrical system or with any
other mechanism.
- Nevereverusethehands or unsuitable instruments to locate
leaks from pipes. Air, uids under pressure or irritants could
cause serious damage to both persons and/or property.
- Never use the hands instead of adequate tools when operating
the machine.
- Never use the hands or other objects to stop moving parts.
- PAY THE UTMOST ATTENTION TO THE DATA PLATES
AFFIXED TO THE MACHINE WHENEVER WORKING ON
THIS OR IN THEIR NEAR VICINITY.
- The user is obliged to keep all the data plates and stickers
in a legible condition.
- Never climb on to the door or on to the top of the machine.
- It is essential for the user to replace all data plates and
stickers that may have deteriorated for any reason or that
are not clearly visible, ordering new ones from the Spares
Service.
- Contact the person in charge of maintenance in the event of
malfunctions or damage to the machine components without
proceeding with further repairs.
- It is absolutely forbidden for anyone to use the machine for
purposes other than those explicitly established and docu-
mented. The machine must always be used in the ways, times
and places dictated by common sense and the laws in force
in each country, even when there are no specic provisions
to govern the sector in the particular country of use.
- Themanufacturerdeclinesallresponsibilityforaccidents
or damage to either persons or property as may arise
following failure to comply with either the relative safety
provisions or the instructions herein.
- These instructions, together with the provisions gover-
ningmachineinstallationandelectricalconnectionsform
an integral part of the Accident Preventing Industrial
regulations in force in each individual country.
- THESE SAFETY PROVISIONS INTEGRATEAND DO NOT
SUBSTITUTE THE SAFETY PROVISIONS LOCALLY IN
FORCE.
- NEVER ever make hurried or inaccurate repairs that
could jeopardize the correct operation of the machine.
- ALWAYSASK FOR HELP FROM SPECIALIZED PERSON-
NEL IN CASE OF DOUBT.
- ANY TAMPERING BY THE USER RELIEVES THE MA-
NUFACTURER FROM ALL LIABILITY, THE USER BEING
IN THIS CASE SOLELY RESPONSIBLE TOWARDS THE
COMPETENT ACCIDENT PREVENTION AUTHORITIES.
- The machine must not be used by people (chidren inclu-
ded) with reduced physical, sensory or mental abilities,
with lack of experience or acquaintance, unless they
could have a supervision or instruction concerning
the use of the machine, through the intermediation of a
person responsible for their safety.
- It is forbidden to clean the machine with water jets.
ENGLISH
Traslation from the original instructions
28
1.1 GENERAL DESCRIPTION.
The double-walled cabinet ensures improved energy
savings.
The tub interior is totally rounded and free from gaps whe-
re dirt could collect. The power ratings and researched
conformation of the washing and rinsing accessories offer
the utmost guarantee when it comes to washing results
and hygiene.
The double-walled structure is made of nely satin-nished
AISI 304 stainless steel. The lters and rinsing rods can be
easily removed for cleaning. Operation is totally automatic.
All internal components can be reached from the front
of the machine, thus making all maintenance operations
easy and economical to carry out.
1.2 TYPE OF USE AND IMPROPER USE
These machines have been designed and built to wash
crockery placed in special baskets and using detergent
and rinsing agent.
• Permitted crockery: glasses, teacups, coffee cups, sau-
cers, cutlery made of materials suitable for dishwashers
and of a size able to t into the basket and machine.
• Use of specic detergents and rinsing agents for in-
dustrial purposes normally available in the shops is
permitted.
ATTENTION
Any improper use of the machine relieves the manufacturer
from all and every responsibility for accidents or damage
to persons and property, also voiding all conditions of
guarantee.
1.3 TRANSPORT, SHIPMENT AND
STORAGE (Fig. 2)
- The machine is normally shipped in a cardboard box
closed by straps.
- When transporting the packed machine, use a lift truck
or transpallet, positioning the box on the relative forks.
ATTENTION
The machine must be sheltered from the weather when
shipped and stored.
1.4 INSPECTIONS ON ARRIVAL
When the machine arrives, check that the packaging is in
a perfect condition and that there is no visible damage.
If everything is in order, remove the packaging (unless
other instructions have been received from the manufac-
turer) and check that the machine is free from damage
caused by transport.
Now check whether there has been any damage to the
structure, crushing or breakages.
If damage or imperfections are discovered:
1 - Immediately notify the haulage contractor both by
phone and in writing by registered letter with return
receipt attached;
2 - Inform the manufacturer by registered letter (with return
receipt attached).
IMPORTANT
Notication of damage or faults must be immediate, in any
case within 3 days from the date on which the machine
is received.
1.5 UNPACKING (Figs 2-3-4)
Proceed in the following way in order to remove the packing:
1. Cut the straps (7) that hold the cardboard in place.
2. Remove the box (8) by lifting it upwards.
3. Remove the protective lm from the machine.
4. Remove the machine from the base by lifting it from
the lower part of the casing (Fig. 4).
5. All packing must be collected and not left within
children’s reach since it could become a source of
danger. The packing can be disposed of in the same
way as solid urban waste.
ATTENTION
Once the machine has been unpacked, NEVER ever use
the box containing the electrical components for lifting
purposes.
Lift the machine by raising it from the lower part of the
casing. Set it on the forks of a truck when transporting.
1.6 MACHINE IDENTIFICATION (Fig. 5)
- The serial number and machine data are stamped on
the data plate (9) afxed to the right part of the machine
itself.
IMPORTANT
Always state the model and serial number of the machine
when requesting technical assistance or ordering spare
parts.
1.7 DESCRIPTION OF THE SAFETY
DEVICES
• Models AP E/FW E are equipped with a safety mi-
croswitch that blocks the washing pump if the tub
access door is accidentally opened.
• The electrical parts are enclosed by panels locked by
screws.
• The machine is tted with an equipotential ground
conductor.
• Safety overow (21) to prevent water from spilling.
1.8 REFERENCE STANDARD
• The machine and its safety devices has been built in
compliance with the following standards:
• Essential safety requisites established by Directive
2006/95/CE (LVD) and 2004/108/CE (EMC).
•Essential requisites established by Directive 2002/95/
EEC (RoHS).
ENGLISH Part 1: General description and Safety devices

29
Part 1: General description and Safety devices ENGLISH
Part 2: For the operator
2.1.c Cycle selection
Press the “S9” or CYCLE button to select the washing
cycle required from the 4 different cycles available
(SHORT, MEDIUM, LONG, INTENSIVE) and speci-
cally:
LC 1: SHORT CYCLE = * 152 sec.
LC 2: MEDIUM CYCLE = * 182 sec.
LC 3: LONG CYCLE = * 242 sec.
LC 4: INTENSIVE CYCLE = * 484 sec.
* without rinsing
2.1.d STARTING UP THE WASHING CYCLE
2.1.d.1 STARTING UP THE WASHING CYCLE
MANUALLY
To start up the cycle MANUALLY, press and hold the
START “S3” button for approx. 2 sec.
The LEDs of the display will light on in sequence and the
message shown on the display will blink (indicating that
the cycle is underway) at the LED for the selected cycle
will FLASH (e.g., LC2);
2.1.d.2 STARTING UP THE WASHING CYCLE AUTO-
MATICALLY
To start up the cycle AUTOMATICALLY (by opening and
closing the door), you will need to change the cycle
start-up mode. Press and hold the START “S3” button
until the pre-selected cycle LED remains CONSTAN-
TLY LIT (approx. 10 sec.) and the washing cycle will
then start up AUTOMATICALLY when the door is
closed.
2.1.e Instructions during the washing cycle
2.1.e.1 Display information
1) During washing, the tank temperature is indicated and
the display LEDs light up in sequence.
2) During drip-drying, only the display LEDs light up.
LC1LC2LC3LC4
I II III IIII
2.1 AP/FW E WASHING PHASES
2.1.a Machine OFF
When the machine is switched OFF the display will read
“OFF”:
2.1.b Switching on and preparing the machine
To switch the machine on, press the “Q1” button. The
LED representing the last cycle selected wil
FLASH (LC1 - LC2 - LC3 - LC4).
ATTENTION
When switching on for the rst time, the LC2 light
will FLASH.
First the boiler then the tank will begin to ll automatically.
While the machine is lling up the display will read
“F2”.
Once lled, the water-heating elements will be activated,
rst in the boiler then in the tank.
The display will give the tank temperature;
IMPORTANT
It is advisable, when rst switching on, to wait until
the display reads 55°C.
WASHING OPERATION
ATTENTION
When items to be washed are encrusted with burnt
on matter, or a long time has passed between use and
washing, it is essential to carry out a pre-wash soak
using a suitable softening agent.
The use of hand-washing products is to be avoided
as they could produce foam inside the machine.
IPlace the basket of items to be washed inside the machine,
having rst removed any solid waste.
Display cycle underway LED
LED for pre-selected cycle
LC1 LC2 LC3 LC4
I II III IIII
LC1 LC2 LC3 LC4
I II III IIII
Display cycle underway LED
LC1 LC2 LC3 LC4
I II III IIII
Q1 SI t1/t2 S9 S3
LC1LC2LC3LC4
I II III IIII
START

30
ENGLISH Part 2: For the operator
3) During rinsing, the boiler temperature is indicated and
the display LEDs light up in sequence;
By pressing the START “S3” button again, a new washing
cycle will begin;
This machine guarantees rinsing at temperatures ideal
for hygienic purposes;
indeed, if this is not sufcient, the washing cycle is au
tomatically extended so as to provide the necessary
conditions for optimum rinsing at 85°C.
The waiting time required to attain optimum temperature
can extend to a maximum of 8 minutes.
2.1.e.2 Interrupting the cycle
1) It is possible to pause the washing cycle in case of
EMERGENCY, by opening the door;
the message “F1” will appear on the display;
normal operations will resume on closing the door.
2 ) The cycle will also be interrupted by SWITCHING
OFF the machine using the “Q1” button.
3) On switching the machine back on, the LED indicating
the last cycle selected will light up, and the alarm
message “A1” will appear on the display;
this will disappear when a new cycle is begun.
At the end of the washing cycle, take out the basket and
shake it gently so as to remove the last drops left on the
washed items.
Allow items to dry and remove them from the basket
with clean hands.
Store all items on hygienic and completely stable su
faces.
2.1.f Self-washing and Draining
At the end of the washing operations, TURN OFF the
machine pushing the “Q1” button .
Close the machine’s door, press the START button “S3”
(approx. 5 sec.)and keep it pressed until the message
“C1” appears on the display, then release the “S3”
button;
The self cleaning and draining cycle will start, co
rmed by the ashing Leds on the display, with the
activation of the drain pump; the end of the phase will
be conrmed by the appearing of the message “OFF”
on the display. Maximum duration 2 1/2 min
2.1.g Manual draining
It is possible to empty the tank by carrying out the
manual draining cycle, during which only the drainage
pump mains active.
ATTENTION
This cycle can only be carried out by leaving the machi
ne SWITCHED ON and the tank full of water.
Close the machine’s door and press the “S9” or CYCLE
button (approx. 5 sec.). Keep it pressed until the mes
sage “C2” appears on the display, then release the
“S9” or CICLE button;
The Drain cycle will start, conrmed by the ashing Leds
on the display; the end of the phase is conrmed by
the apearing of the message “OFF” on the display.
Maximum duration 1 min.
By pressing the “S9” or CYCLE button you can
interrupt the drainage cycle before the preset time
is up.
LC1 LC2 LC3 LC4
I II III IIII

31
ENGLISH
Part 2: For the operator
2.1.h Reading the TEMPERATURES
At any time, with the machine switched ON or OFF, by
pressing the “SI” button you can read, in sequence,
the REAL and PROGRAMMED temperatures for the
water in the tank (t1) and in the boiler (t2).
- Pressing the “SI” button once, the message “t1” will
be displayed.
-Pressing the “SI” button a second time, the REAL
temperature of the water in the tank will be di-
splayed;
- Pressing the “SI” button a third time, the PROGRAM-
MED temperature of the water in the tank (for the
selected cycle) will be displayed;
- Pressing the “SI” button a fourth time, the message
“t2” will be displayed, indicating the boiler;
- Pressing the “SI” button a fth time, the REAL tem-
perature of the water in the boiler will be displayed;
- Pressing the “SI” button a sixth time, the PRO-
GRAMMED temperature of the water in the boiler
(for the selected cycle) will be displayed;
- Pressing the “SI” button a seventh time, the machine
will return to its initial status.
ATTENTION
The operations listed above CANNOT BE CARRIED OUT
DURING A CYCLE.
2.1.i Switching off the washer at the end of the day
At the end of the working day SWITCH OFF the washer
by pressing the “Q1” button.
Switch off the mains switch feeding the machine and
close the water supply taps.
For any repairs, contact only assistance centres
authorised by the manufacturer.
WARNINGS DURING OPERATION
1) Ensure that the washing temperature remains at
approx. 55-60°C;
2) Avoid immersing bare hands in the detergent-lled
water; if this should happen, rinse immediately and
thoroughly with running water;
3) Use only anti-foaming detergents, specics for use
in industrial machines;
4) Deactivate the machine in case of break-down or
malfunction.
For any repairs, contact only assistance centres autho-
rised by the manufacturer, and insist on the use of
original parts.
5) In no case should you change the the original for-
mulations without rst consulting an authorised
assistance centre;
6) When the machine is operating, do not open the door
too rapidly.
7) Wash tank water should be changed at least twice a
day or according to daily wash requirements.
Failure to follow the above warnings may compromise
the safety of the washing machine.
Useful advice for better washing results
Any unsatisfactory results from washing can be seen
when traces of dirt are left on dishes or other items;
any water marks may be caused by insufcient rins-
ing.
In this case, ensure that the rinsing nozzles (27) are
clean and that there is pressure in the water system.
If there are traces of waste, ensure that:
- The lters (22) (23) are clean;
- the water temperature is around 55-60°C;
- items are correctly positioned in the basket;
- the washing nozzles are clean (26);
- the wash arms (24) (25) rotate freely.
LC1 LC2 LC3 LC4
I II III IIII
LC1 LC2 LC3 LC4
I II III IIII
LC1 LC2 LC3 LC4
I II III IIII
LC1 LC2 LC3 LC4
I II III IIII
LC1 LC2 LC3 LC4
I II III IIII
LC1 LC2 LC3 LC4
I II III IIII

32
ENGLISH Part 2: For the operator
2.2 CLEANING (Fig. 10)
2.2.a General information
Strict compliance with the maintenance instructions in this
section will keep your machine in a good working condition
and will notably reduce the need for repairs.
ATTENTION
If any machine component becomes faulty, FIRST CHECK
that all the instructions given in the previous paragraphs
have been complied with during use.
Repairs must be carried out immediately, as soon as the
fault occurs. This will prevent the trouble from becoming
worse and damaging other parts.
ATTENTION
Daily operations to carry out when work has ended, with
the machine OFF , the main circuit-breaker disconnected,
the water cocks off and the washing tub empty.
1. Thoroughly clean the inside parts of the machine.
2. Remove the suction protection (23).
3. Remove the lter (22) from the bottom of the machine
by releasing the overow (21).
4. Wash the lters under running water and t them cor-
rectly back in their housings.
ATTENTION
Frequently check and clean the spraying units, removing
them from their housings and eliminating any dirt and
fouling. The frequency with which this operation must be
carried out depends on the quantity of dirt or on the unsa-
tisfactory washing results. Never use corrosive products
like sodium hypochlorite (bleach) or hydrochloric acid, wire
wool or steel brushes to clean either the inside or outside
parts of the machine.
2.3. PREVENTION MAINTENANCE (Fig. 10)
The preventive maintenance operations must be carried
out with the machine OFF, the main circuit-breaker di-
sconnected, the water delivery cocks off and the washing
tub empty.
2.3.a Checking and cleaning the spray arms and
nozzles (Fig. 10)
Periodically check to make sure that the lower washing
arm and rinsing arm (24/25) and their relative nozzles are
not clogged (26/27).
Cleaning the lower/upper unit
1. Unscrew the ring nut (28) and lift the arm (24/25).
2. Wash the washing and rinsing arm.
If the nozzles (26/27) are clogged, unscrew them to
demount and clean, taking care to prevent the shape
of the nozzle from being deformed. After cleaning, t
the nozzles exactly back in their original positions.
3. Remount all parts by complying with the above instruc-
tions in reverse.
2.4 DESCALING
Where hard water is present lime scale deposits will
for in the machine and on dishes, which must, for re
sons of hygiene, be removed by descaling.
Advice on operation procedures and frequency for this
treatment are generally given by the detergent
supplier,who can provide suitable products.
In order to avoid damaging the machine, do not
exceed recommended doses, follow the detergent
producer’s directions scrupulously and, having
nished operations, rinse thoroughly.
2.5 TEMPORARY STOPPAGE
If the machine is to be left inactive for a period of
some weeks, it is advisable beforehand to load the
tank and run a few empty cycles with clean water then
drain, so as to avoid the formation of unpleasant
odours.
If necessary, repeat the process several times until the
water is still clean after washing.
If the stoppage is to be very long, it is advisable to
drain the water from the boiler and from the electric
pump.
2.6 DEMOLITION and DISPOSAL
When the machine is to be scrapped, drain the water
from the tank and from the boiler, as indicated in the
points above, and disconnect the machine from the
water and electricity supply networks, then dispose of
the components according to current regulations,
respecting national and local ecological and
environmental legislation, and taking care to separate
the parts as follows:
- metallic parts: body work, surfaces, panels, lters;
- electrical parts: motors, remote switches, micro-
switches, cabling;
- plastic parts: connectors, baskets;
- rubber parts: tubes, couplings
2.7 SCHEDULED MAINTENANCE
It is advisable to subject the machine to scheduled
maintenance every 6 months.
The producer declines all responsibility for any
printing errors contained in this booklet.
The instructions, drawings, tables and
everything else in this manual are of a con-
dential technical nature. For this reason, none
of the information may be either completely
or partially duplicated or disclosed to third
parties without prior written authorization
from HOONVED which is the sole proprietor
and which reserves the right to make any mo-
dications as may be considered necessary
without advance warning.

33
ENGLISH
Part 2: For the operator
SUMMARY TABLE of SUMMARY TABLE of
ALARM MESSAGES DISPLAYED OTHER MESSAGES DISPLAYED
MESSAGE DESCRIPTION
A1 Failure to COMPLETE CYCLE
A2 BOILER WATER overheating
A3 BOILER and/or TANK TEMPERATURE
PROBE broken or disconnected
A4 Lack of WATER in TANK
A5 BOILER failing to heat
H 1 RINSING WATER insufficient
temperature
H 2 NON-DRAINING of the TANK
H 3 WASHING WATER insufficient
temperature
SUMMARY TABLE of START BUTTON (S3)
MACHINE STATUS START BUTTON (S3)
Machine OFF
Preparing the machine
Machine on line but STAND/BY
CYCLE
OFF
RED
(light up)
GREEN
(light up)
DARK BLUE
(light up)
ALARM with Cycle in progress
(only A2/A3) PALE GREEN/BLUE
(alternating flashing)
ALARM with NO CYCLE ON
(only A2/A3) PALE GREEN
(flashing)
START
START
START
START
START
START
START
MESSAGE DESCRIPTION
F 1 DOOR OPEN
F 2 WATER FILLING in TANK
C 1 SELF WASHING and DRAINING cycle
C 2 MANUAL DRAINING cycle
OFF Machine SWITCHED OFF

TROUBLESHOOTING
PROBLEMS
The machine fails to turn on.
The machine does not ll with
water.
Insufcient washing.
Insufcient rinse.
CAUSES
Main switch disconnected.
Water cock shut.
Dirty ll pipe lter.
Rinsing nozzle clogged.
Overow pipe not well connected.
ALARM A4:
Lack of water in tank
MESSAGE F1:
Door Open
Clogged washing nozzles.
Dirty washing lter.
Clogged washing blade.
No detergent.
ALARM H3:
Insufcient wash temperature
ALARM A3:
Probe disconnected or interrupted
Insufcient washing conditions.
Clogged rinsing nozzles.
Clogged boiler by limestone.
Low main pressure
(less than 2 bar. - 200 Kpa).
Insufcient temperature.
Bad location of the nozzles or damaged
nozzles.
ALARM H1:
Insufcient rinse temperature
ALARM A3:
Probe disconnected or interrupted
ALARM A5:
Boiler heating failure
ALARM H2:
Non-draining of the tank.
SOLUTIONS
Turn on the switch.
Turn on the clock.
Detach the ll pipe (12 Fig. 6/7) and clean the lter.
Unscrew and clean the nozzles (27 Fig.10) under
running water.
Check the right con. of the over. pipe (21 Fig.10)
Check presence of water in system;
Switch machine off and back on
Check that the door is perfectly closed and/or the
machine is properly levelled
Clean the washing blade (26 Fig. 10).
Clean the lters (22 e 23 Fig. 10).
Remove and clean the balde (25 Fig. 10)
Add detergent and ll the dispenser.
Wait for tank to reach correct temperature
Contact Assistance Centre
Check the correct washing phase.
Unscrew and clean the nozzles (27 Fig. 10) under
running water.
Call after-sales service.
Wait pressure recovery or purchase a new pressu-
re pump.
Call after-sales service.
Check the right location of the nozzles and replace
damaged ones.
Wait for boiler to reach correct temperature
Contact Assistance Centre.
Check the cleaning of the draining water pipes
and/or the correct function of drain pump.

Fig. 5
16 11
Fig. 7
15
13 12
12
9
14
10
Type
R
S/N
IP
kW
V Hz
kW kW max.
A.
Pressione dinamica alimentazione idraulica
Pression dynamique arriveè d'eau
Dynamic pressure water supply
Dynamischer Druck Wassereinlauf
Pression Dinamica Alimentaction Hidrica
Pressione idraulica vapore saturo
Pression dynamique vapeur saturee
Dynamic pressure satured stream
Dynamischer Druck gesattlgter Dampf
Pression Dinamica Vapor Saturado
2 bar = 200kPa
2 bar = 200kPa
{
max
min
{
max
min
A.
Made
In Italy
56000
Mod.
Calda / Fredda
Chaude / Froid
Warm / Cold
Warm / Kald
Caliente / Fria
55° / 12° C
M
HOONVED S.r.l.
Via U. Foscolo, 1
Venegono Sup.re (VA) ITALY
Fig. 6

23
22
28
26
27
24
Fig. 10
25
AP 43E-AP 48E
FW 35E-FW 40E
AP 53E-AP 60E
FW 45E-FW 50E
23
21
22
25
28
26
27
24

92
HOONVED s.r.l.
Via U. Foscolo, 21040 - Venegono S. (VA) - ITALY
Tel. 0331 - 856111 - Fax. 0331 - 865223
www.hoonved.com
37621
This manual suits for next models
7
Table of contents
Other Hoonved Dishwasher manuals

Hoonved
Hoonved APS 43 Instruction Manual

Hoonved
Hoonved C81 Instruction Manual

Hoonved
Hoonved ED 650 E User manual

Hoonved
Hoonved HC Specification sheet

Hoonved
Hoonved AP43E Series Operating and installation instructions
Hoonved
Hoonved ED 550-CA 55 Instruction Manual

Hoonved
Hoonved CAP 10 E Specification sheet

Hoonved
Hoonved CR Series User manual

Hoonved
Hoonved ST 43 E Instruction Manual

Hoonved
Hoonved 53 BT Instruction Manual