manuals.online logo
Brands
  1. Home
  2. •
  3. Brands
  4. •
  5. Horizont
  6. •
  7. Power Supply
  8. •
  9. Horizont B12 User manual

Horizont B12 User manual

Instruction manual
Originalbetriebsanweisung
Notice d‘utilisation
trapper B12
Type 10616
ORIGINALBETRIEBSANLEITUNG
Elektrozaungerät
INSTRUCTION MANUAL
Electric Fencer
NOTICE D‘UTILISATION
Électricateur de clôture
INSTRUCCIONES DE SERVICIO
Valla eléctrica
MANUAL DE INSTRUÇÕES
Cerca Eléctrica
32 trapper B12
Fig. 1
Fig. 2
Fig. 3
60605
(Fig.5)
83283
83281
88128
605741
88128RT
60603
83306
60602
Fig. 5 Leiterplatte
circuit board
circuit imprimé
tarjeta electrónica
Type 60605
Fig. 4
Fig. 6
3a)
Solar
Batt.
54 trapper B12
DE Betriebsanweisung des Elektrozaungerätes "trapper B12"
in Verbindung mit den Errichtungs- und Sicherheitshinweisen für
Elektrozaungeräte SECURA ANIMAL oder SECURA SECURITY
(www.horizont.com/securaanimal oder www.horizont.com/securasecurity)
Das Weidezaungerät muss vor jedem Eingri󰀨 aus-
geschaltet werden!
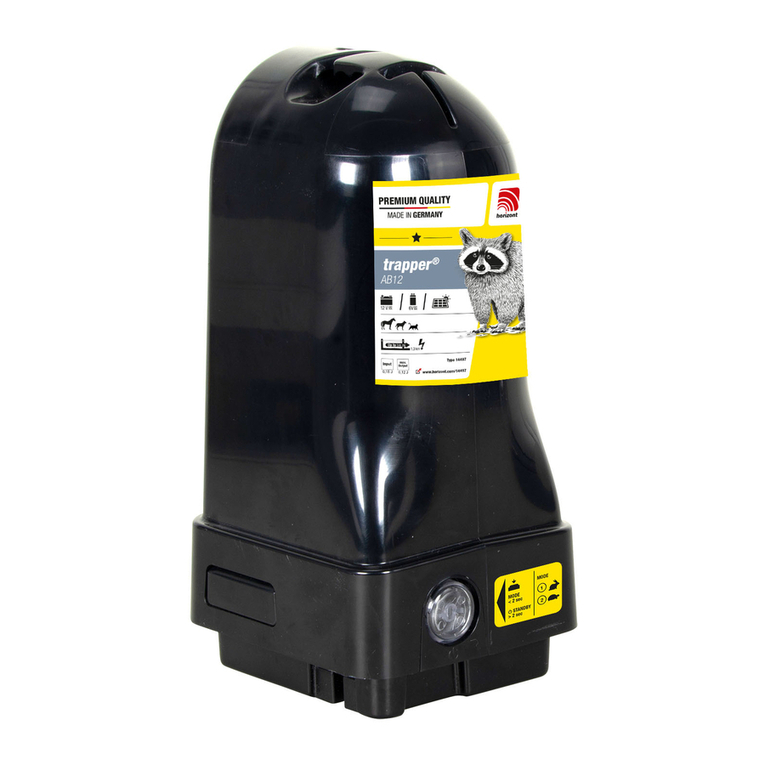
Das Elektrozaungerät ist geeignet zum Hüten von Haustieren, wie Kühen und Pferden.
Das Gerät kann mit 9V oder 12V Batterie betrieben werden. Das Gerät gibt im Rhythmus Hochspannungsimpulse an den
angeschlossenen Zaun ab. Diese Impulse sind in der Lage, die Isolation durch das Tierfell zu durchschlagen und ausrei-
chende Schreckimpulse zu erzeugen, wenn der Zaun ordnungsgemäß aufgebaut ist. Die Elektronik des Gerätes sorgt für
etwa konstante Impulswerte auch bei abfallender Batteriespannung.
Montage: Gerät an einer möglichst feuchten Stelle aufstellen, Zaun-und
Erdkabel anschließen, dabei den Erdpfahl soweit als möglich in den Boden
eintreten und evtl. zusätzlich einen ca. 1m langen Erdpfahl (1a) verwenden
(siehe Fig.1). Bei trockenem Boden und langem Zaun einen zusätzlichen
Erdleiter (2a) mit Zwischenerdern (2b) verlegen (siehe Fig. 2)
Betrieb: Gerät mit Drucktastenschalter (3a) einschalten (siehe Fig. 3) -
nach einigen Sekunden leuchtet im Fenster (3a) eine grüne LED im Rhyth-
mus der Impulse auf. Das Gerät gibt Impulse an den Zaun ab. Leuchtet
die LED nicht auf, ist entweder die Batterie leer oder es liegt ein Defekt im
Gerät vor.
Batteriewechsel (Fig.6): Gerät öffnen und Batterie wechseln, dabei auf
richtige Polarität der Anschlußkabel achten, rot an +. Danach Oberteil auf
das Unterteil aufsetzen und drücken, bis die seitlichen Schnappverbin-
dungen hörbar einrasten.
Vorschriften: Das Gerät entspricht den Sicherheits- und Funkentstörvorschriften für Elektrozaungeräte (CE- Zeichen).
SERVICE:
Reparaturen dürfen nur von qualizierten Personen durchgeführt werden.
Es sind nur die vom Hersteller vorgeschriebenen Ersatzbauteile zu verwenden.
TECHNISCHE ÄNDERUNGEN VORBEHALTEN!
EN Operating instruction for electric fence controller "trapper B12"
en relation avec les conseils de sécurité SECURA ANIMAL
ou SECURA SECURITY (www.horizont.com/securaanimal ou
www.horizont.com/securasecurity)
Energizer has to be turned OFF before any intervention!
The fence controller can contain domestic animals as cows and horses. It is supplied by a dry battery of 9 Volts or 12 Volts.
The controller delivers high voltage pulses into the connected fence with a sequence. The pulses are able to penetrate the
insulating hide of the animal and to provide shock pulses if the fence is orderly installed. The output pulses have constant
performance even if the battery voltage is decreasing.
Installation: Drive the ground rod until it stops into a wet place close to the
energizer. It is recommended to use an additional 1m rod (1a) under dry
conditions (see Fig. 1), and in case of long fences and dry conditions use an
additional ground wire (2a) with intermediate rods (2b) (see Fig. 2).
Opertation and control: Turn on with button (Fig.3 / 3a). After few seconds
a green LED is flashing with the pulses (see window 3a). The controller
gives pulse into the fence.
If there is no flashing either the battery is flat or there is a fault in the con-
troller.
Changing the battery (Fig.6): Separate the upper energizer unit from the
battery housing and change the battery - mind the right polarity, red to +.
Press the upper part onto the lower part and press until the snaps engage
with an audible click.
Standards: The energizer conforms to the european safety and EMC standards, it is CE marked.
SERVICE:
Repair is only to be made by qualied service personnel.
Only by the manufacturer commanded replacement parts must be used.
SUBJECT TO TECHNICAL ALTERATIONS !
76 trapper B12
FR Mode d'emploi de l'électrificateur "trapper B12"
en relation avec les conseils de sécurité SECURA ANIMAL
ou SECURA SECURITY (www.horizont.com/securaanimal ou
www.horizont.com/securasecurity)
L‘appareil de clôture électrique doit être coupé avant cha-
que intervention!
L’appareil pour clôture électrique est conçu pour la garde des animaux domestiques comme les vaches ou les chevaux.
Il sera alimenté par une batterie de 9V ou 12V. L’appareil délivre des impulsions de haute tension au rythme à la clôture
raccordée. Ces impulsions sont capables de traverser l’isolateur que représente la peau de l’animal et d’engendrer un ef-
fet de peur suffisant, lorsque la clôture est montée correctement. L’électronique de l’appareil veille à garder les impulsions
constantes, ainsi qu’à éviter les chutes de tension.
Montage: L’appareil doit être installé sur un endroit le plus humide possi-
ble, les câbles de la clôture et de terre connectés, en enfonçant le piquet
de maintien et celui de le terre aussi loin que possible dans le sol, et
éventuellement utiliser en plus un piquet de terre (1a) d’une longueur d’un
mètre (fig. 1).
(fig. 2) Par sol sec et clôture longue, on devra poser un conducteur de terre
supplémentaire (2a) avec des prises de terre intermédiaires (2b) (tous les
50 m) le long de la clôture.
Utilisation (fig. 3) : Allumer l’appareil avec le bouton poussoir (3a) – après
quelques secondes, une LED vert, dans la fenêtre (3a), clignote au rythme
des impulsions. L’appareil donne des impulsions à la clôture. Si la LED ne
clignote pas, la batterie est déchargée ou il y a un défaut dans l’appareil.
Changement de la batterie (Fig.6): Ouvrir l’appareil et changer la batte-
rie, respecter la bonne polarité en faisant attention au branchement des fils
(le rouge sur le +). Après cela, replacer la partie supérieure sur le boîtier
inférieur et presser jusqu’à l’enclenchement audible.
Conformité: L’appareil est conforme aux normes de sécurité et de radio
interférence pour les clôtures électriques, il porte la marque CE.
LA MAINTENANCE:
Les réparations ne doivent être faites que par des personnes qualiées.
Utiliser uniquement les pièces détachées et composants du fabricant.
SOUS RÉSERVE DE CHANGEMENTS TECHNIQUES!
PT Manual de instruções da cerca eléctrica "trapper B12"
em combinação com as indicações de implementação e de
segurança para cercas elétricas SECURA ANIMAL ou
SECURA SECURITY (www.horizont.com/securaanimal ou
www.horizont.com/securasecurity)
A vedação deve ser desligada antes da realização de qual-
quer intervenção!
Este aparelho destina-se à contenção de animais domésticos, tais como bovinos e equinos. É alimentada por uma pilha
seca de 9 Volts / 12 Volts. O aparelho transmite impulsos de alta voltagem ao cercado a que está ligado com um sequên-
cia. Estes impulsos são capazes de penetrar a pele isolada do animal e transmitirem choque, desde que a cerca esteja
devidamente instalada. Estes impulsos de saída mantém um desempenho constante, mesmo que a voltagem da pilha
reduza.
Instalação: Coloque a estaca de terra num local com humidade sufici-
ente para conseguir fazer um sistema de terra. Caso o terreno seja muito
seco aconselha-se a utilização de uma estaca de terra adicional com pelo
menos 1 metro de comprimento (1a) – ver fig. 1, e no caso de cercados
longos instalados em terrenos secos, aconselha-se igualmente a utilização
de um fio de terra (2a) com estacas intermédias (2b) separadas 50 metros
entre si – ver fig. 2.
Utilização e Controlo: Ligue o interruptor “ON” (3a) (ver fig. 3). Após al-
guns segundos poder-se-á notar uma luz intermitente, que pisca de acordo
com a transmissão dos impulsos (3a) (ver fig. 3). O controlador comanda a
transmissão dos impulsos para o cercado. Se não surgir esta luz intermi-
tente, então a pilha está sem carga ou existe uma falha no cercado.
Mudança da Pilha (Fig.6): Separe o topo do aparelho da caixa da pilha
e mude a pilha. Tenha em atenção se a polaridade está correcta. Volte a
colocar o topo do aparelho até ouvir um ligeiro “click”.
Standards: Este aparelho está em conformidade com as normas de segurança emanadas da União Europeia, tendo a
marca comprovativa de CE.
SERVIÇOS:
Os serviços de reparo devem ser realizados por pessoas certicadas.
Devem-se utilizar apenas peças de reposição do fabricante.
RESERVADO O DIREITO A ALTERAçÕES TÉCNICAS!
98 trapper B12
ES Instrucciones de servicio del dispositivo de valla eléctrica "trapper B12"
en combinación con las indicaciones de instalación y seguridad para
dispositivos de valla eléctrica SECURA ANIMAL o
SECURA SECURITY (www.horizont.com/securaanimal o
www.horizont.com/securasecurity)
¡La valla para pastos debe ser desconectada antes de la
intervención!
El dispositivo de valla eléctrica es apropiado para cuidar de animales domésticos como ganado vacuno y equino.
El dispositivo puede ser operado con batería de 9V o 12V. El dispositivo emite en un ritmo impulsos de alta tensión a la
valla conectada. Estos impulsos están en condiciones de atravesar el aislamiento de la piel del animal y generar sufici-
entes impulsos de sobresalto cuando la valla está correctamente instalada. La electrónica del dispositivo cuida de valores
de impulso casi constantes aún ante la caída de la tensión de la batería.
Montaje: Instalar el dispositivo en un punto en lo posible húmedo, conec-
tar la valla y el cable de puesta a tierra, en este caso introducir la varilla
de puesta a tierra lo más profunda en el suelo y emplear eventualmente
una varilla de puesta a tierra adicional de aprox. 1m (1a) (véase Fig. 1). El
suelos secos y vallados extensos tender un conductor de puesta a tierra
adicional (2a) con puestas a tierra intermedias (2b) (véase Fig. 2)
Servicio: Encender el dispositivo con el interruptor de pulsador (3a) (véase
Fig. 3); tras algunos segundos se enciende en la ventana (3a) el LED verde
al ritmo de los impulsos. El dispositivo envía impulsos al vallado. Si el LED
no se enciende, la batería está descargada o hay un defecto en el disposi-
tivo.
Cambio de batería (Fig.6): Abrir el dispositivo y sustituir la batería, en este
caso observar la polaridad correcta de los cables de conexión, rojo al +. A
continuación colocar la parte superior sobre la inferior y presionar, hasta
que las conexiones rápidas laterales encastren de forma audible.
Normas: El dispositivo corresponde a las normas de seguirdad y des parasitado para dispositivos de valla eléctrica
(símbolo CE).
SERVICIO:
Sólo personal de servicio cualicado puede efectuar las reparaciones.
Sólo se deben usar piezas de repuesto del fabricante.
¡MODIFICACIONES TÉCNICAS RESERVADAS!
1110 trapper B12
CEE: max. Zaunlänge | max. fence line length | longueur électrifée
distância do cerdcado | máxima longitud del vallado
max. 6 km max. 6 km
3
9 V 22 mA 22 mA 22 mA 22 mA 22 mA
12 V 15 mA 15 mA 15 mA 15 mA 15 mA
Input: 0,18 Joule
Technische Daten - technical data - données techniques - datos técnicos - Ficha técnica
Gewicht weight poids peso Peso ca. 1,5 kg
ohne Batterie without batterie sans pile sem pilha sin batería
~ 9000 V ~ 9000 V ~ 2000 V ~ 1600 V ~ 1300 V
attestation
APAVE 8680794-001-1/B
DE ACHTUNG:
Nicht an netzbetriebene Versorgung einschließlich Batterieladegeräte anschließen!
EN WARNING:
Do not connect to mains-operated equipment including battery chargers!
FR ATTENTION:
Ne pas relier à un appareil alimenté par le secteur, y compris à un chargeur de batterie!
ES ¡ATENCIÓN!
¡No conectar a una alimentación operada por red incluyendo cargadores de batería!
PT ATENÇÃO:
Não ligar à alimentação ligada diretamente à rede elétrica, incluindo carregadores de
bateria!
12
Instruction manual
Originalbetriebsanweisung
Notice d‘utilisation
85023 K- 07/19
horizont group gmbh
Animal Care
Homberger Weg 4-6
34497 KORBACH GERMANY
+49 (0) 56 31 / 5 65 - 1 00
+49 (0) 56 31 / 5 65 - 1 20
[email protected]
horizont.com
Website
Discover our website and find more products, highlights,
campaigns, movies, tips and more.
We look forward to your visit!
Entdecken Sie unsere Website und finden Sie weitere
Artikel, Highlights, Aktionen, Filme, Tipps uvm.
Wir freuen uns auf Sie!
www.horizont.com
Advisor electric fencing
Ratgeber „Weidezaun“ |
By means of our electric fence advisor you can receive
useful information about how to arrange a reliable
electric fence system.
Erhalten Sie in unserem Ratgeber „Weidezaun“ wert-
volle Informationen darüber, wie Sie Ihren Weidezaun
hütesicher konstruieren und aufbauen.
www.horizont.com/ACratgeberWeidezaun
Electric fencing catalogue
Weidezaun-Katalog |
horizont offers a comprehensive range of electric
fencing material. Please don´t hesitate to ask for a cata-
logue or have a look at our website to download it.
horizont bietet auch ein umfangreiches Sortiment an
Weidezaunbedarf – auf unserer Website können Sie den
Katalog downloaden oder kostenlos anfordern!
www.horizont.com/ACkataloge
All data is made subject to sentences mistakes and literal mistakes, subject to product changes and falsity.
Reprint, even in extracts and use of the pictures only with written permission by horizont group gmbh.
Alle Angaben erfolgen vorbehaltlich Satz- und Druckfehler. Preisänderungen, Produktänderungen und Irrtum
vorbehalten. Nachdruck, auch auszugsweise und Verwendung der Bilder nur mit schriftlicher Genehmigung der
horizont group gmbh.

This manual suits for next models

1

Other Horizont Power Supply manuals

Horizont birdy A User manual

Horizont

Horizont birdy A User manual

Horizont ranger AS120 User manual

Horizont

Horizont ranger AS120 User manual

Horizont FARMER AN15 User manual

Horizont

Horizont FARMER AN15 User manual

Horizont 10613 User manual

Horizont

Horizont 10613 User manual

Horizont hotshock ABN37 User manual

Horizont

Horizont hotshock ABN37 User manual

Horizont hotshock N500 User manual

Horizont

Horizont hotshock N500 User manual

Horizont SECURA User manual

Horizont

Horizont SECURA User manual

Horizont ranger AN2000 User manual

Horizont

Horizont ranger AN2000 User manual

Horizont ranger N420 User manual

Horizont

Horizont ranger N420 User manual

Horizont intelliSTOP N40 User manual

Horizont

Horizont intelliSTOP N40 User manual

Horizont ranger AN3000 User manual

Horizont

Horizont ranger AN3000 User manual

Horizont FARMER AS70 User manual

Horizont

Horizont FARMER AS70 User manual

Horizont farmer AN1000 Solar User manual

Horizont

Horizont farmer AN1000 Solar User manual

Horizont FARMER AS70 User manual

Horizont

Horizont FARMER AS70 User manual

Horizont ranger B User manual

Horizont

Horizont ranger B User manual

Horizont ranger N270 User manual

Horizont

Horizont ranger N270 User manual

Horizont farmer N100 User manual

Horizont

Horizont farmer N100 User manual

Horizont ranger AN2000 User manual

Horizont

Horizont ranger AN2000 User manual

Horizont TRAPPER AN8 User manual

Horizont

Horizont TRAPPER AN8 User manual

Horizont Hotshock A300 User manual

Horizont

Horizont Hotshock A300 User manual

Horizont Hotline Gemini 40 Operating and maintenance manual

Horizont

Horizont Hotline Gemini 40 Operating and maintenance manual

Horizont trapper N45 User manual

Horizont

Horizont trapper N45 User manual

Horizont S40 User manual

Horizont

Horizont S40 User manual

Horizont ranger B29 User manual

Horizont

Horizont ranger B29 User manual

Popular Power Supply manuals by other brands

RuiDeng RD6006 instructions

RuiDeng

RuiDeng RD6006 instructions

Pulsar GREEN POWER plus HADOC 3012C manual

Pulsar

Pulsar GREEN POWER plus HADOC 3012C manual

Hameg HM7042-5 Service manual

Hameg

Hameg HM7042-5 Service manual

DMP Electronics 505 Series installation guide

DMP Electronics

DMP Electronics 505 Series installation guide

Newport 0901 user guide

Newport

Newport 0901 user guide

Pulsar PSC12010 quick start guide

Pulsar

Pulsar PSC12010 quick start guide

Scame BE-W Series quick start guide

Scame

Scame BE-W Series quick start guide

Wiesenfield WIE-SFE-1200 user manual

Wiesenfield

Wiesenfield WIE-SFE-1200 user manual

Matsusada Precision EQ Series instruction manual

Matsusada Precision

Matsusada Precision EQ Series instruction manual

MFJ Enterprises MIGHTYLITE MFJ-4125 instruction manual

MFJ Enterprises

MFJ Enterprises MIGHTYLITE MFJ-4125 instruction manual

NAPCO NP-P3ASUP instructions

NAPCO

NAPCO NP-P3ASUP instructions

iseg CalPower EHQ 102M Operator's manual

iseg

iseg CalPower EHQ 102M Operator's manual

Voltech DC1000A User manal

Voltech

Voltech DC1000A User manal

HP HPJ3136A Installation and reference guide

HP

HP HPJ3136A Installation and reference guide

ENERMAX LIBERTY ECO 2 brochure

ENERMAX

ENERMAX LIBERTY ECO 2 brochure

Extreme Networks Alpine 3804 Installation note

Extreme Networks

Extreme Networks Alpine 3804 Installation note

Exsys EX-1125 user manual

Exsys

Exsys EX-1125 user manual

Pulsar SWS-60 user manual

Pulsar

Pulsar SWS-60 user manual

manuals.online logo
manuals.online logoBrands
  • About & Mission
  • Contact us
  • Privacy Policy
  • Terms and Conditions

Copyright 2025 Manuals.Online. All Rights Reserved.