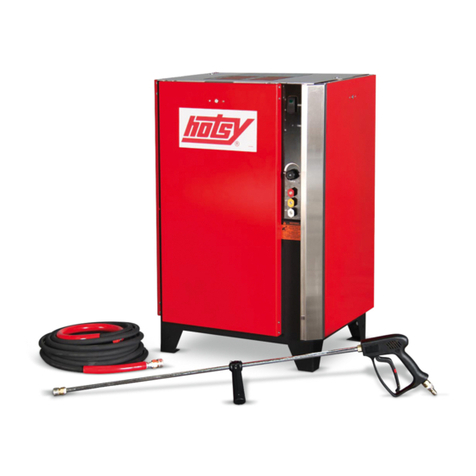
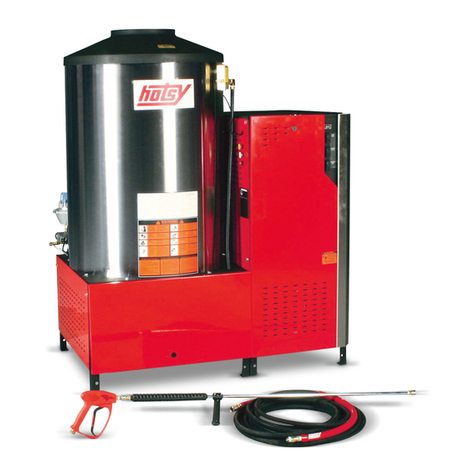
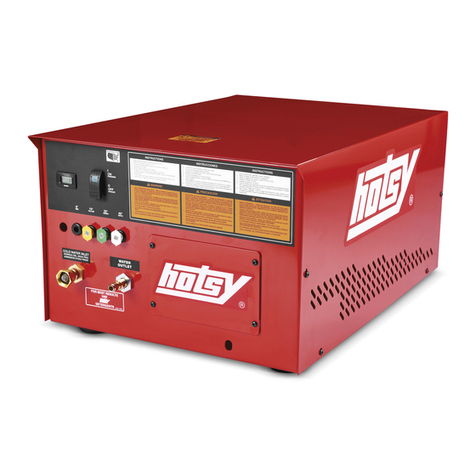
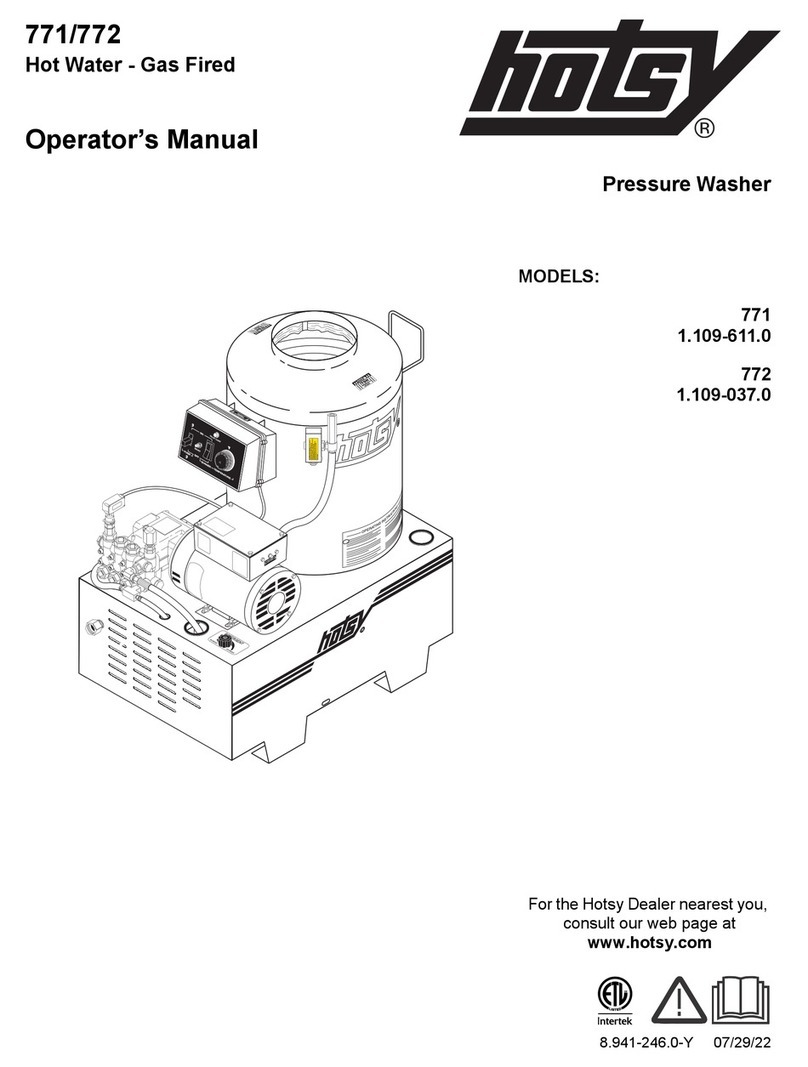
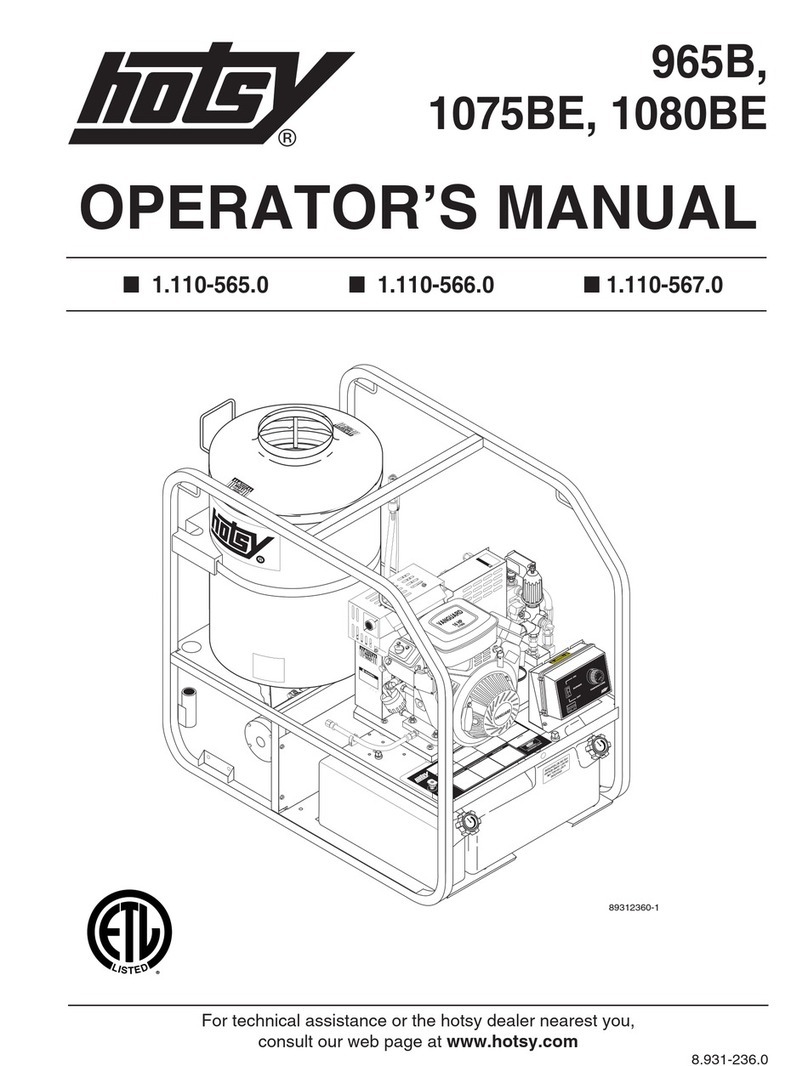
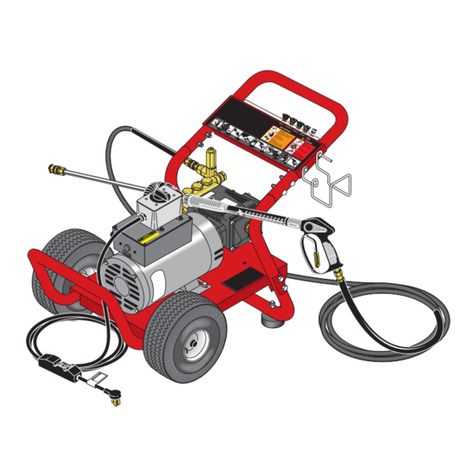
Hotsy 1830SS User manual

WARNING:
This product and accessories may contain a chemical known to the
State of California to cause cancer and birth defects or other
reproductive harm.
For more information about this regulation: www.P65Warnings.ca.gov 8.916-831.0-D 05/20/18
1800/5700 Series
Hot Water - Electric - Oil Fired
Operator’s Manual Stationary Pressure Washer
HONEYWELL
LOHI
CHAUD!
CHAUD!
MODELS: 1830SS
1.109-665.0
1833SS
1.109-666.0
5730SS
1.109-658.0
5733SS
1.109-659.0
For the Hotsy Dealer nearest you,
consult our web page at
www.hotsy.com

2MANUAL, OPERATOR, HOTSY, STAT ELECTRIC, OIL 8.916-831.0 - D
Machine Data Label
When ordering from your dealer, please provide the following:
Model Number: ________________Date of Purchase:_________
Machine Serial Number: ________________________________
Component Part Number: _______________________________
Description: __________________________________________
The model and serial numbers will be found on a decal attached to
the pressure washer. You should record both serial number and date
of purchase and keep in a safe place for future reference.
IMPORTANT
If the pressure washer demonstrates other symptoms or the corrective
actions listed do not correct the problem, contact the local authorized
Hotsy Service Center. The Hotsy Service Center can be identified by
visiting www.hotsy.com.

3
Table of Contents
Machine Data Label. . . . . . . . . . . . . . . . . . . . . . . . . .2
Table of Contents . . . . . . . . . . . . . . . . . . . . . . . . . . .3
How To Use This Manual . . . . . . . . . . . . . . . . . . . . .4
Safety
Introduction & Safety Information . . . . . . . . . . . . . . .5
IMPORTANT SAFETY INFORMATION . . . . . . . . . .6
Operations
Technical Specifications . . . . . . . . . . . . . . . . . . . . . .9
Component Identification . . . . . . . . . . . . . . . . . . . .10
Assembly Instructions. . . . . . . . . . . . . . . . . . . . . . .11
Installation Instructions . . . . . . . . . . . . . . . . . . . . . .12
Electrical . . . . . . . . . . . . . . . . . . . . . . . . . . . . . . . . .12
Venting . . . . . . . . . . . . . . . . . . . . . . . . . . . . . . . . . .12
Oil Burner . . . . . . . . . . . . . . . . . . . . . . . . . . . . . . . .13
Burner Air Adjustment: . . . . . . . . . . . . . . . . . . . . . .13
Fuel Pressure Adjustment: . . . . . . . . . . . . . . . . . . .13
Operation Instructions. . . . . . . . . . . . . . . . . . . . . . .14
Cleaning Techniques . . . . . . . . . . . . . . . . . . . . . . .15
Storage . . . . . . . . . . . . . . . . . . . . . . . . . . . . . . . . . .15
Maintenance
Pump. . . . . . . . . . . . . . . . . . . . . . . . . . . . . . . . . . . .16
Pump Motor . . . . . . . . . . . . . . . . . . . . . . . . . . . . . .16
Oil Burner . . . . . . . . . . . . . . . . . . . . . . . . . . . . . . . .16
Pressure Relief Valve . . . . . . . . . . . . . . . . . . . . . . .16
Unloader Valve . . . . . . . . . . . . . . . . . . . . . . . . . . . .16
Heating Coil . . . . . . . . . . . . . . . . . . . . . . . . . . . . . .16
Troubleshooting . . . . . . . . . . . . . . . . . . . . . . . . . . .17
MANUAL, OPERATOR, HOTSY, STAT ELECTRIC, OIL 8.916-831.0 - D

4
How To Use This Manual
This manual contains the following sections:
• How to Use This Manual
•Safety
• Operations
• Maintenance
The HOW TO USE THIS MANUAL section will tell you
how to find important information for ordering correct
repair parts.
Parts may be ordered from authorized dealers. When
placing an order for parts, the machine model and
machine serial number are important. Refer to the
MACHINE DATA box which is filled out during the
installation of your machine. The MACHINE DATA box
is located on the inside of the front cover of this manual.
The model and serial number of your machine is
located on the back of the machine.
The SAFETY section contains important information
regarding hazardous or unsafe practices of the
machine. Levels of hazards are identified that could
result in product damage, personal injury, or severe
injury resulting in death.
The OPERATIONS section is to familiarize the operator
with the operation and function of the machine.
The MAINTENANCE section contains preventive main-
tenance to keep the machine and its components in
good working condition. They are listed in this general
order:
•Pump
• Oil Burner
•HeatingCoil
• Troubleshooting
Model:
Date of Purchase:
Serial Number:
Dealer:
Address:
Phone Number:
Sales Representative:
MANUAL, OPERATOR, HOTSY, STAT ELECTRIC, OIL 8.916-831.0 - D

5
Safety
Introduction & Safety Information
Thank you for purchasing this Pressure Washer.
We reserve the right to make changes at any time
without incurring any obligation.
Owner/User Responsibility:
The owner and/or user must have an understanding of
the manufacturer’s operating instructions and warnings
before using this pressure washer. Warning information
should be emphasized and understood. If the operator
is not fluent in English, the manufacturer’s instructions
and warnings shall be read to and discussed with the
operator in the operator’s native language by the
purchaser/owner, making sure that the operator
comprehends its contents.
Owner and/or user must study and maintain for future
reference the manufacturers’ instructions.
The operator must know how to stop the machine
quickly and understand the operation of all controls.
Never permit anyone to operate the engine without
proper instructions.
SAVE THESE INSTRUCTIONS
This manual should be considered a permanent
part of the machine and should remain with it if
machine is resold.
When ordering parts, please specify model and
serial number. Use only identical replacement
parts.This machine is to be used only by trained
operators
MANUAL, OPERATOR, HOTSY, STAT ELECTRIC, OIL 8.916-831.0 - D

6
Safety
IMPORTANT SAFETY INFORMATION
WARNING: If you do not follow these instructions
exactly, a fire or explosion may result, causing
property damage, personal injury or loss of life.
AVERTISSEMENT: Si ces directives ne sont pas
suivies à la lettre, un incendie ou une explosion
pourrait survenir et entraîner des dommages à la
propriété, des lésions corporelles ou la mort.
WARNING: To reduce the risk of
injury, read operating instruc-
tions carefully before using.
AVERTISSEMENT:Pourréduirele
risque de blessures, lire atten-
tivement les instructions de
fonctionnement avant l'utilisa-
tion.
1.Read the owner's manual thor-
oughly. Failure to follow instruc-
tions could cause malfunction of the machine and
result in death, serious bodily injury and/or property
damage.
2. Know how to stop the machine and bleed pressure
quickly. Be thoroughly familiar with the controls.
3. Stay alert — watch what you are doing.
4. All installations must comply with local codes.
Contact your electrician, plumber, utility company or
the selling dealer for specific details.
WARNING: Must be plugged into properly wired
three hole grounded outlet that accommodates
plug on power cord. Failure to comply could result
in electrical shock
AVERTISSEMENT: Doit être raccordé dans une
sortie à trois trous mise à la masse et correctement
câblée qui peut accueillir une fiche sur un cordon
d'alimentation. Le non-respect de cette consigne
pourrait causer un choc électrique.
DANGER: Improper connection of the equipment-
grounding conductor can result in a risk of electro-
cution. Check with a qualified electrician or service
personnel if you are in doubt as to whether the
outlet is properly grounded. Do not modify the plug
provided with the product - if it will not fit the outlet,
have a proper outlet installed by a qualified electri-
cian. Do not use any type of adapter with this
product.
DANGER: Une mauvaise connexion du conducteur
de terre de l'équipement peut entraîner un risque
d'électrocution. Vérifier auprès d'un électricien
qualifié ou du personnel d'entretien si vous avez
des doutes quant à savoir si la sortie est
correctement mise à la masse. Ne pas modifier la
fiche fournie avec le produit - si elle n'entre pas
dans la sortie, faire installer une sortie appropriée
par un électricien qualifié. Ne jamais utiliser un
adaptateur avec ce produit.
DANGER: Keep wand, hose, and
water spray away from electric
wiring or fatal electric shock may
result.
AVERTISSEMENT: Garder la
lance, le boyau et le jet d'eau à
l'écart de tout câblage électrique
ou des chocs électriques mortels
pourraient survenir.
5. To protect the operator from electrical shock, the
machine must be electrically grounded.
It is the responsibility of the owner to connect this
machine to a UL grounded receptacle of proper
voltage and amperage ratings. Do not spray water
on or near electrical components. Do not touch
machine with wet hands or while standing in water.
Always disconnect power before servicing.
WARNING: Flammable liquids can create fumes
which can ignite, causing property damage or
severe injury.
AVERTISSEMENT: Des liquides inflammables
peuvent produire des vapeurs qui peuvent
s'enflammer, causant ainsi des dommages à la
propriété ou des blessures graves.
WARNING: Risk of explosion —
Do not Spray flammable liquids.
Operate only where open flame
or torch is permitted.
AVERTISSEMENT: Risque
d'explosion - Ne pas pulvériser
de liquides inflammables. Utiliser
uniquementdansdes endroits où
l'utilisation d'une flamme nue ou
d'une torche est permise.
WARNING: Risk of fire — Do not
add fuel when the product is
operating or still hot.
AVERTISSEMENT: Risque
d'incendie - Ne pas changer les
réservoirs pendant que le produit
est en marche ou encore chaud.
6.Oil burning appliances shall be
installed only in locations where
WARNING
READ OPERATOR’S
MANUAL THOROUGHLY
PRIOR TO USE.
OPERATIONS
SAFETY
MAINTENANCE
DANGER
KEEP WATER
SPRAY AWAY FROM
ELECTRICAL WIRING.
WARNING
RISK OF EXPLOSION:
IF GAS SMELL
PRESENT TURN OFF
SUPPLY
WARNING
RISK OF FIRE.
DO NOT ADD FUEL
WHEN OPERATING
MACHINE.
MANUAL, OPERATOR, HOTSY, STAT ELECTRIC, OIL 8.916-831.0 - D
7
Safety
combustible dusts and flammable gases or vapors
are not present. Do not store or use gasoline near
this machine.
7. Keep operating area clear of all persons.
WARNING: High pressure spray
can cause paint chips or other
particles to become airborne and
fly at high speeds. To avoid
personal injury, eye, hand and
foot safety devices must be worn.
AVERTISSEMENT: Un jet haute
pression peut écailler la peinture
ou provoquer l'émission d'autres
particules dans l'air et leur
projection à hautes vitesses. Pour éviter les lésions
corporelles, une protection des yeux, du visage,
des mains et des pieds doit être portée lors de l'util-
isation de cet équipement.
8. Wear properly rated eye protection such as safety
goggles or face shield while spraying.
(Safety glasses do not provide full protection.)
CAUTION: Hot discharge fluid. Do
not touch or direct discharge
stream at persons or animals.
ATTENTION: Liquide de décharge
chaud. Ne pas toucher ou
décharger directement le jet vers
des personnes ou des animaux
WARNING: This machine
produces hot water and must
have insulated components attached to protect the
operator.
AVERTISSEMENT: Cette machine produit de l'eau
chaude et doit comporter des composants isolés
attachés pour protéger l'opérateur.
WARNING: Risk of injury. Hot
surfaces can cause burns. Use
only designated gripping areas of
spray gun and wand. Do not
place hands or feet on non-
insulated areas of the pressure
washer.
AVERTISSEMENT: Risque de
blessures. Les surfaces chaudes
peuvent causer des brûlures.
Utiliser uniquement les zones de prise désignées
du pistolet pulvérisateur et de la lance. Ne pas
placer les mains ou les pieds sur des endroits non
isolés de la laveuse à pression.
9. To reduce the risk of injury, close supervision is
necessary when a machine is used near children.
Do not allow children to operate the pressure
washer. This machine must be attended during
operation.
WARNING: Grip cleaning wand
securely with both hands before
starting. Failure to do this could
result in injury from a whipping
wand.
AVERTISSEMENT: Agripper la
lance de nettoyage avec les deux
mains avant de commencer. Le
non-respect de cette consigne
pourrait mener à des blessures
causées par le mouvement violent de la lance.
10. Never make adjustments on machine while in
operation.
11. Be certain all quick coupler fittings are secured
before using pressure washer.
WARNING: High pressure
developed by these machines will
cause personal injury or
equipment damage. Keep clear of
nozzle. Use caution when oper-
ating. Do not direct discharge
stream at people or animals or
severe injury or death will result.
AVERTISSEMENT: La haute
pression générée par ces
machines causera des lésions corporelles ou des
dommages à l'équipement. Se tenir à l'écart de la
buse. Faire preuve de prudence lors de l'utilisation.
Ne pas décharger directement le jet vers des
personnes ou des animaux, car cela risquerait de
causer des blessures graves ou même la mort
WARNING: Protect machine from
freezing.
AVERTISSEMENT: Protéger la
machine contre le gel.
12.To keep machine in best
operating conditions, it is important
you protect machine from freezing.
Failure to protect machine from
freezing could cause malfunction of
the machine and result in death, serious bodily
injury, and/or property damage. Follow storage
instructions specified in this manual.
13. Inlet water must be clean fresh water and no hotter
then 90°F.
WARNING
USE PROTECTIVE
EYE WEAR
AND CLOTHING
WHEN OPERATING
THIS EQUIPMENT.
WARNING
HOT DISCHARGE FLUID:
DO NOT TOUCH OR
DIRECT DISCHARGE
STEAM AT PERSONS
OR ANIMALS.
WARNING
RISK OF INJURY.
HOT SURFACES
CAN CAUSE BURNS
WARNING
TRIGGER GUN KICKS
BACK — HOLD WITH
BOTH HANDS
WARNING
RISK OF INJECTION
OR SEVERE INJURY
TO PERSONS. KEEP
CLEAR OF NOZZLE.
WARNING
PROCTECT FROM
FREEZING
MANUAL, OPERATOR, HOTSY, STAT ELECTRIC, OIL 8.916-831.0 - D
8
Safety
DANGER: Risk of asphyxiation.
Use this product only in a well
ventilated area.
DANGER: Risque d'asphyxie.
Utiliser ce produit uniquement
dans un endroit bien ventilé.
14.Avoid installing machines in
small areas or near exhaust fans.
Adequate oxygen is needed for
combustion or dangerous carbon
monoxide will result.
15. Manufacturer will not be liable for any changes
made to our standard machines or any compo-
nents not purchased from us.
16. The best insurance against an accident is precau-
tion and knowledge of the machine.
WARNING: Be extremely careful
when using a ladder, scaffolding
or any other relatively unstable
location. The cleaning area
should have adequateslopes and
drainage to reduce the possibility
of a fall due to slippery surfaces.
AVERTISSEMENT: Faire preuve
d'une extrême prudence au
moment d'utiliser une échelle,
des échafaudages ou toute autre surface relative-
ment instable. La zone de nettoyage doit avoir une
pente et un drainage adéquats pour réduire la
possibilité d'une chute due à une surface glissante.
17. Do not overreach or stand on unstable support.
Keep good footing and balance at all times.
18. Do not operate this machine when fatigued or
under the influence of alcohol, prescription medica-
tions, or drugs.
19. Follow the maintenance instructions specified in
the manual.
20. Never expose a spark or flame where there may be
unburned gas present.
21. This product incorporates parts that produce
sparks and therefore when located in a garage, it
should be in a room or enclosure provided for the
purpose, or should be 18” or more above the floor.
Install on non combustible flooring and have a 36”
minimum working clearance.
22. Do not allow acids, caustic or abrasive fluids to
pass through the pump.
23. Never run pump dry or leave spray gun closed
longer than 1-2 minutes.
WARNING: If connection is made
to portable water supply, a back
flow device must be provided.
AVERTISSEMENT: Si une
connexion est établie avec un
approvisionnement en eau
potable, un dispositif de protec-
tion contre le retour d'eau doit
être fourni.
WARNING: Do not spray machine
or any people, animals or elec-
trical parts.
AVERTISSEMENT: Ne pas
vaporiser sur la machine ou les
gens, les animaux ou les pièces
électriques.
Follow the maintenance instructions
specified in the manual.
Suivre les instructions d'entretien
spécifiées dans le manuel.
DANGER
RISK OF
ASPHYXIATION.
USE THIS PRODUCT
ONLY IN A WELL
VENTILATED AREA.
WARNING
RISK OF INJURY
FROM FALLS WHEN
USING LADDER.
WARNING
IF CONNECTED
TO A POTABLE
WATER SUPPLY,
PROTECT AGAINST
BACKFLOW.
WARNING
DO NOT SPRAY
MACHINE OR ANY
PEOPLE, ANIMALS OR
ELECTRICAL PARTS.
MANUAL, OPERATOR, HOTSY, STAT ELECTRIC, OIL 8.916-831.0 - D
9
Operations
Technical Specifications
Model # Pump Volume
@ Pump Head
Pump
Pressure at
Pump Head Burner Type Machine
Voltage
Total
Machine
Amperage
Motor
Amps Machine
Weight
1830SS 6.0 GPM / 360
GPH 3000 PSI Fuel Oil Fired
550,872 BTU/Hr. 230VAC/
60Hz/3Ph 35 Amps 38 Amps 825Lbs
1833SS 6.0 GPM / 360
GPH 3000 PSI Fuel Oil Fired
550,872 BTU/Hr. 460VAC/
60Hz/3Ph 21 Amps 19 Amps 825Lbs
5730SS 7.8 GPM / 480
GPH 3000 PSI Fuel Oil Fired
720,603 BTU/Hr. 230VAC/
60Hz/3Ph 44 Amps 50 Amps 1,020Lbs
5733SS 7.8 GPM / 480
GPH 3000 PSI Fuel Oil Fired
720,603 BTU/Hr. 460VAC/
60Hz/3Ph 23 Amps 25 Amps 1,020Lbs
Model # Shipping
Weight Exhaust
Stack Size Machine Dimensions
1830SS 1070 Lbs 10” L 51” X W 31” X H 54”
1833SS 1070 Lbs 10” L 51” X W 31” X H 54”
5730SS 1471 Lbs 12” L 51” X W 31” X H 54”
5733SS 1471 Lbs 12” L 51” X W 31” X H 54”
MANUAL, OPERATOR, HOTSY, STAT ELECTRIC, OIL 8.916-831.0 - D

10
Operations
Component Identification
HONEYWELL
LOHI
CHAUD!
CHAUD!
Burner
Exhaust Vent
Chemical Valve
Pump Switch
High
Pressure
Nozzle
Wand
High
Pressure
Hose
Detergent Bucket
(not included)
Pressure Relief
Valve
Burner Switch
Fresh Water
Inlet
Garden Hose
(not included)
Trigger
Gun
Thermostat
MANUAL, OPERATOR, HOTSY, STAT ELECTRIC, OIL 8.916-831.0 - D

11
Operations
Assembly Instructions
Unpacking
Unpack carefully. Wear safety glasses or goggles while
unpacking, assembling, or operating pressure washer.
If there are missing components or hidden damage,
immediately contact carrier concerning discrepancies.
1. Remove the two bolts that secure the pressure
washer to the pallet.
2. Remove pressure washer from pallet.
Parts Included
• Pressure Washer
• Pressure Hose
•Wand
• Trigger Gun
• Hose Hangers (2 Ea.)
• Operating Instructions and Parts Manual
• Oil Burner Manual
Tools Required
• 10" Adjustable Wrenches (2 Ea.)
• Teflon Tape
Pressure Hose, Trigger Gun and Wand
1. When assembling, use teflon tape on all plumbing
connections to prevent leakage.
2. Install the pressure hose on the pressure washer
as shown.
3. Assemble wand components as shown.
NOTE: The pressure nozzle is not to be installed at
this time.
4. Install garden hose adapter on float tank as shown.
5. Make sure all plumbing connections are tight.
MANUAL, OPERATOR, HOTSY, STAT ELECTRIC, OIL 8.916-831.0 - D
Pressure Hose
Quick
Disconnect
Wand
Trigger Gun
Pressure Hose
Garden Hose
(Not Included)

12
Operations
Installation Instructions
Getting Started
IMPORTANT: Proper initial installation of
equipment will assure more satisfactory perfor-
mance, longer service life, and lower maintenance
cost.
IMPORTANT: The use of a back flow preventer on
the water supply hose is recommended and may be
required by local code.
The pressure washer should be run on a level surface
and in a protected area where it is not readily influ-
enced by outside forces such as strong winds, freezing
temperatures, rain, etc.The pressure washer should be
located to assure easy access for filling of fluids, adjust-
ments and maintenance. Normal precautions should be
taken by the operator to prevent moisture from
reaching the pressure washer. It is recommended that
a partition be made between the wash area and the
pressure washer to prevent direct spray from the wand
from coming in contact with the pressure washer.
Moisture reaching the equipment will reduce the
pressure washer’s service life. All installations must
comply with the local codes covering such installations.
Electrical
WARNING: Make sure all switches and controls are
in the OFF position prior to connecting electrical
supply.
AVERTISSEMENT: S'assurer que tous les
commutateurs et tous les contrôles se trouvent en
position d'arrêt avant de raccorder l'alimentation
électrique.
WARNING: DO NOT stand in water while
connecting and disconnecting electrical supply.
AVERTISSEMENT: NE PAS se tenir debout dans
l'eau au moment de brancher ou de débrancher
l'alimentation électrique.
CAUTION: Hazard of electric shock - More than one
disconnect switch is required to disconnect all
power.
ATTENTION: Risque de choc électrique. - Plus d'un
sectionneur est requis pour débrancher toutes les
sources d'alimentation.
CAUTION: Use copper conductors only.
ATTENTION: Utiliser des conducteurs en cuivre
seulement.
IMPORTANT: Consult local building codes for exact
electrical requirements. Licensed contractors may
be required.
This machine is designed for connection to an overload
protected grounded circuit. It is recommended this
circuit be protected by a UL approved ground fault
circuit interrupter (GFCI).An electrical disconnect must
be provided in this circuit. All wiring must be of proper
voltage and amperage rating and conform to applicable
codes. A hole has been provided in the control box for
attachment of 1 inch electrical conduit.
For proper operation the motor rotation is to be counter-
clockwise as viewed looking towards the rear of the
motor (opposite pump attachment). If the rotation is
incorrect, interchange any two of the power supply
connections to reverse rotation.
Venting
DANGER: DO NOT run machine indoors or in an
enclosed area without proper ventilation, as
exhaust fumes may be hazardous to your health.
DANGER: DO NOT operate machine in areas where
flammable vapors (gasoline, solvents, etc.) may be
present, as this machine may ignite the vapors.
CAUTION: All venting must be in accordance with
applicable federal and state laws, and local ordi-
nances. This machine is not to be connected to a
type B gas vent. Consult local heating contractors.
Power In
MANUAL, OPERATOR, HOTSY, STAT ELECTRIC, OIL 8.916-831.0 - D
13
Operations
If the pressure washer is to be used in an enclosed area,
a flue must be installed to vent burner exhaust to the
outside atmosphere. Be sure the flue is the same size as
the burner exhaust vent on the pressure washer lid. Poor
draft will cause the pressure washer to soot and not
operate properly. When selecting the location for installa-
tion, beware of poorly ventilated locations or areas where
exhaust fans may cause an insufficient supply of oxygen.
Proper combustion can only be obtained when there is a
sufficient supply of oxygen available for the amount of
fuel being burned. If it is necessary to install the machine
in a poorly ventilated area, outside fresh air may have to
be piped to the burner and a fan installed to bring suffi-
cient air into the machine. Locate the pressure washer
so that the flue will be as straight as possible and
protrude through the roof at a proper height and location
to provide adequate draft. The burner air setting must be
adjusted after installation of vent and set to a #2 or better
smoke spot on the Bacharach scale.
This operator's manual indicates this machine is to be
vented through the ceiling using straight pipe or 45°
elbows. It also discourages the use of any 90° venting
elbows which restrict air flow through the burner causing
poor burner conditions.
It is important that the licensed contractor consult local
building codes. Hotsy can only make recommendations
and the selection of the venting must take into account
the type of roof or wall material it contacts which could
change the vent requirement for compliance with local
building codes
Oil Burner
Burner Air Adjustment:
The oil burner on this machine is preset for operation at
altitudes below 500 feet. If operated at higher altitudes, it
may be necessary to adjust the air band for a #1 or #2
smoke spot on the Bacharach scale.
To adjust, start machine and turn burner ON. Loosen two
locking screws found on the air band and close air band
until black smoke appears from burner exhaust vent.
Note air band position. Next, slowly open the air band
until white smoke just starts to appear. Turn air band
halfway back to the previously noted position. Tighten
locking screws.
For higher altitudes, the air band opening may need to
be increased; for lower altitude, the air band may need to
be decreased.
For higher humidity, the air band opening may need to be
increased; for lower relative humidity, the air band may
need to be decreased.
For higher ambient temperatures the air band opening
may need to be increased; for lower ambient tempera-
tures, the air band opening may need to be decreased.
Adjust to your operating location's environment as-
needed for best smoke spot and performance compliant
with local, state, and federal regulations.
CAUTION: If white smoke appears from burner
exhaust vent during start-up or operation, discon-
tinue use and readjust air bands.
NOTE: If a flue is installed, have a professional
serviceman adjust your burner for a #1 or #2 smoke
spot on the Bacharach scale.
It is recommended that the oil burner be serviced yearly
or as needed. Contact your local service center.
Fuel Pressure Adjustment:
To adjust fuel pressure, First install a pressure gage into
the port just after the pump fuel exit. Turn the adjusting
screw (located at the regulator port) clockwise to
increase, and counterclockwise to decrease. Do not
exceed 200 psi or lower the pressure below 130 PSI,
when checked at the post-pump pressure port.
The fuel pressure may need to be adjusted due to
altitude. For every 500 ft altitude above sea level, the
boiling point of water goes down 1 °F. At high altitude
environments, this boiling point change may require the
heat input to be lowered so the water input does not turn
to steam earlier than at the factory settings and activate
the pressure sensors and pressure relief equipment
when the unit is operated and much higher altitudes from
factory settings or local dealer site settings. Check with
your dealer before making local site fuel pressure adjust-
ments.
Also, as ambient temperature changes seasonally, the
fuel temperature in the feed tank and air temperature
inlet can impact fuel flow. In more extreme temperatures,
this local-site adjustment may also require different fuel
nozzles for fuel inlet temperatures that are at seasonal
extremes (higher or lower) in locations where the
temperature changes are beyond moderate tempera-
tures of between 40°F and 90°F. Colder temperatures
will make for a thicker flow and less fine a fuel spray
while hotter temperatures will make for a thinner flow a
more fine spray with the same nozzle. Consider alternate
nozzle configurations from the baseline factory-supplied
nozzle for operating in such temperature extremes if
performance is not meeting needs with air band and fuel
pressure settings alone.
NOTE: When changing fuel pump, a by-pass plug
must be installed in return line port or fuel pump will not
prime.
MANUAL, OPERATOR, HOTSY, STAT ELECTRIC, OIL 8.916-831.0 - D
14
Operations
Operation Instructions
Before Starting
1. Read all manuals provided with this pressure
washer. Become familiar with location and function
of all operating and safety controls.
2. Check pump oil level.
WARNING: Check hoses, fittings, wand, trigger gun
and fuel connections daily for signs of wear, cracks
and looseness, and replace as required.
AVERTISSEMENT: Vérifier les boyaux, les
raccords, le pistolet à gâchette et les connexions
de carburant pour la présence de traces d'usure,
de fissures et de desserrement; remplacer au
besoin.
3. Connect water supply hose to the garden hose
connector located on the float tank. The water
faucet and supply hose must be capable of
providing a minimum of 8.0 gallons per minute
(GPM).
4. Fill oil burner fuel tank. Use kerosene, #1 grade
home heating oil, #1 or #2 diesel fuel. DO NOT
USE GASOLINE, CRANKCASE OIL DRAININGS,
OR WASTE OIL.
5. If detergents are to be used, only use detergents
intended for pressure washers. Follow instructions
on the detergent container.
IMPORTANT: Before installing nozzle on initial
start-up, turn on the water supply and pump switch
and allow water to run from the end of the wand
until clear to prevent the nozzle from clogging.
IMPORTANT: If the pressure washer has not been
used for an extended period of time, remove the
nozzle from the end of the wand and turn on water
supply and pump switch. Allow water to run from
the end of the wand until clear.
6. Install the proper pressure nozzle on end of wand
for your cleaning needs.
IMPORTANT: The trigger gun provided with this
pressure washer is equipped with a manual trigger
lock to prevent accidental operation of the trigger
gun. The trigger lock should be used whenever the
trigger gun is not in use.
To Start
DANGER: DO NOT point wand or trigger gun at
yourself or at any person or animal. Bodily injury
may result from water under high pressure.
DANGER: NE PAS pointer la lance ou le pistolet
pulvérisateur dans votre direction ou la direction
d'une autre personne ou d'un animal. L'eau sous
haute pression peut causer des lésions corporelles.
WARNING: Wear eye, ear, hand, foot and skin protec-
tion at all times while operating pressure washer.
AVERTISSEMENT: Porter une protection des yeux,
des mains, des pieds et de la peau en tout temps en
utilisant la laveuse à pression.
IMPORTANT: The water must be turned on before
starting. Running the pump dry will cause damage
and void warranty.
IMPORTANT: DO NOT allow the machine to run with
trigger of the trigger gun released for more than
5 minutes at any one time or damage to pump may
occur.
1. Turn ON water supply.
2. Hold wand firmly, release trigger of trigger gun and
press pump start switch. Squeeze trigger of trigger
gun and allow air to purge from system.
3. If HOT water is desired, adjust the thermostat to the
proper temperature and turn burner switch ON. The
burner will light immediately with a small puff of
smoke. You may need to initially adjust your burner
for peak performance. See Oil Burner section under
Installation. If smoke continues, refer to the Oil
Burner Manual (P/N 783879) provided with this
pressure washer. When the trigger of the trigger gun
is released or when the thermostat temperature
setting is reached, the burner will automatically turn
off.
To Stop
1. If detergents were used, draw clear water through
the detergent inlet line to purge detergent. Failure to
do so may clog detergent metering valve.
2. If burner was used, turn OFF burner switch and
allow pump to run cold water through coil for several
minutes.
MANUAL, OPERATOR, HOTSY, STAT ELECTRIC, OIL 8.916-831.0 - D
Manual Trigger Lock
Pressure Nozzle

15
Operations
3. Press pump STOP switch.
4. Turn water supply OFF.
5. Squeeze trigger of trigger gun to relieve system
pressure.
Cleaning Techniques
Pre-rinse cleaning surface with fresh water. Place
detergent suction tube directly into cleaning solution and
apply to surface at low pressure (for best results, limit
your work area to sections approximately 6 feet square
and always apply detergent from bottom to top). Allow
detergent to remain on surface 1-3 minutes. Do not allow
detergent to dry on surface. If surface appears to be
drying, simply wet down surface with fresh water. If
needed, use brush to remove stubborn dirt. Rinse at high
pressure from top to bottom in an even sweeping motion
keeping the spray nozzle approximately 1 foot from
cleaning surface. Use overlapping strokes as you clean
and rinse any surface. For best surface cleaning action
spray at a slight angle.
Recommendations:
• Before cleaning any surface, an inconspicuous
area should be cleaned to test spray pattern and
distance for maximum cleaning results.
• If painted surfaces are peeling or chipping, use
extreme caution as pressure washer may
remove the loose paint from the surface.
• Keep the spray nozzle a safe distance from the
surface you plan to clean. High pressure wash a
small area, then check the surface for damage. If
no damage is found, continue to pressure
washing.
CAUTION - Never use:
• Bleach, chlorine products and other corrosive
chemicals
• Liquids containing solvents (i.e., paint thinner,
gasoline, oils)
• Tri-sodium phosphate products
• Ammonia products or acid-based products
ATTENTION: Ne jamais utiliser :
• Eau de Javel, produits à base de chlore et autres
produits chimiques corrosifs
• Liquides contenant des solvants (c.-à-d. diluant à
peinture, essence, huiles, etc.)
• Produits à base de tripolyphosphate de sodium
• Ammoniac ou produits à base d'acide
These chemicals will harm the machine and will damage
the surface being cleaned.
Rinsing
It will take a few seconds for the detergent to clear.Apply
safety latch to spray gun. Select and install desired high
pressure nozzle. NOTE: You can also stop detergent
from flowing by removing detergent siphon tube from
bottle.
Storage
DANGER: DO NOT store flammable liquids (gaso-
line, diesel fuel, solvents, etc.) near pressure washer,
or in non-ventilated areas.
DANGER: Ne pas entreposer de liquides
inflammables (essence, mazout, pétrole, solvants,
etc.) à proximité de la laveuse à pression ou dans
des endroits non ventilés.
Protect from freezing by storing in a heated area, or by
flushing the system with antifreeze (use an automotive
engine antifreeze or windshield washer solvent to anti-
freeze). To flush the system fill the float tank with anti-
freeze and remove pressure nozzle from wand. Start the
machine and allow it to run until antifreeze flows from the
end of the wand. Place end of wand into float tank and
circulate the antifreeze through system for several
minutes. Squeeze and release the trigger of the trigger
gun several times to antifreeze the unloader system.
Also draw antifreeze through the detergent inlet line to
antifreeze the detergent system. For added protection
after antifreezing, disconnect the pressure hose from
machine and remove the coil drain plug. After coil has
drained, replace pressure hose and coil drain plug. If the
pressure washer is not to be used for an extended length
of time, it is recommended that the system be flushed
with antifreeze for rust protection.
Maintenance
WARNING: Unauthorized machine modification or
use of non-approved replacement parts may cause
personal injury and/or property damage and will void
the manufacturer warranty.
AVERTISSEMENT: Une modification non autorisée
de la machine ou l'utilisation de pièces de rechange
non approuvées peut causer des lésions corporelles
et/ou des dommages à la propriété, et annulera la
garantie du fabricant.
MANUAL, OPERATOR, HOTSY, STAT ELECTRIC, OIL 8.916-831.0 - D
16
Maintenance
Pump
Lubrication: To lubricate pump, use 10W-40 non-
detergent oil for pump crankcase. Crankcase must be
filled to center of sight glass window found on the rear of
the pump. During the break-in-period, make sure the oil
is changed after the first 25 hours of operation. After that,
replace oil every 3 months or 300 hours of operation,
whichever comes first.
Proper Pump Care:
•DO NOT pump acids.
•DO NOT allow pump to run dry.
• Winterize if storing in freezing temperatures,
refer to Storage for details.
• Use a water softener on the water system if
known to be high in mineral content.
• Use only high quality detergents and follow man-
ufacturer’s mix recommendations.
• Flush the system with clear water immediately
after using detergent solutions.
• Clean filter screen on detergent inlet line periodi-
cally.
• Flush the pressure washer system with anti-
freeze if storing for an extended period of time,
refer to Storage to details.
Pump Motor
Inspect the pump motor at regular intervals. The exterior
of the motor should be kept free of dirt, oil, grease, water,
etc. Keep all ventilation openings free from debris. If the
motor is equipped with grease fittings, lubricate the
motor after every 1000 hours of operation with Chevron
SRI #2 lubricant or equivalent. If the motor is not
equipped with grease fittings, the pump motor bearings
are permanently lubricated and will not require any addi-
tional lubrication.
Oil Burner
Refer to Oil Burner Manual provided with this pressure
washer for recommended maintenance.
Pressure Relief Valve
WARNING: The relief valve on this pressure washer
has been factory set and sealed and is a field nonad-
justable part. Tampering with the factory setting may
cause personal injury and/or property damage, and
will void the manufacturer warranty.
AVERTISSEMENT: La soupape de décharge sur cette
laveuse à pression a été réglée en usine, puis
scellée, et est une pièce non réglable. L'altération du
paramètre de l'usine pourrait causer des lésions
corporelles et/ou des dommages à la propriété, et
annulera la garantie du fabricant. Ce dispositif de
sécurité doit être inspecté et testé une fois par
année.
NOTE: This valve must be inspected and tested
annually by a certified Hotsy technician.
Unloader Valve
WARNING: The unloader valve on this pressure
washer has been factory set and sealed and is a field
nonadjustable part. Tampering with the factory
setting may cause personal injury and/or property
damage, and will void the manufacturer warranty.
AVERTISSEMENT: La soupape de décompression
sur cette laveuse à pression a été réglée en usine,
puis scellée, et est une pièce non réglable. L'altéra-
tion du paramètre de l'usine pourrait causer des
lésions corporelles et/ou des dommages à la
propriété, et annulera la garantie du fabricant.
Burner Fuel Filter (Oil fired models only)
Drain any water which has accumulated in fuel filter
and clean or replace filter element as needed.
Heating Coil
Coil Descaling: In hard water areas, scale buildup
within the heating coil will occur. Scale deposits will
decrease the water temperature rise and may eventu-
ally clog the heating coil. Contact your local service
center when descaling is needed.
Coil Desooting: Poor grades of fuel oil or inadequate
combustion air will cause heavy soot buildup on the
outside surface of the heating coil. These deposits will
insulate the coil. This will restrict the air flow through
the coil, further aggravating the soot buildup. Contact
your local service center when desooting is needed.
MANUAL, OPERATOR, HOTSY, STAT ELECTRIC, OIL 8.916-831.0 - D
Oil Fill

17
Maintenance
Troubleshooting
SYMPTOM POSSIBLE CAUSES CORRECTIVE ACTION
PRESSURE
WASHER WILL
NOT RUN
Pump switch in OFF position Place switch in ON position.
Power supply disconnected Connect power supply.
Fuse blown or circuit breaker
tripped in electrical supply line Replace fuse or reset circuit breaker. Use only circuits
of adequate capacity.
Motor circuit overload tripped Allow sufficient time for motor to cool down. Place
pump switch in ON position.
PRESSURE
WASHER RUNS
BUT WON’T SPRAY
Trigger of trigger gun released Squeeze trigger.
Water supply not turned on Open water supply valve.
Clogged pressure nozzle Clean pressure nozzle opening.
Inlet water screen clogged Check screen and clean if necessary.
Pump sucking air Fill the detergent container and check for loose hose
clamps or fittings.
LOW SPRAY
PRESSURE
AT NOZZLE
Inadequate water supply Fully open faucet. Check for kinked or damaged
hose. Use 5/8" minimum hose. Check for debris
clogging inlet screen.”
Partially clogged or damaged
pressure nozzle Clean or replace.
Air being drawn through
detergent inlet line Refill detergent container. Ensure that pick-up screen
is fully immersed.
UNEVEN SPRAY
PATTERN Partially clogged or damaged
pressure nozzle Clean or replace.
PRESSURE
WASHER WILL
NOT PRODUCE
HOT WATER
Burner switch in OFF position Place switch in ON position.
Inadequate fuel supply Check fuel supply.
Pump switch turned off Pump must be running before burner will light.
MACHINE
SMOKES
WHILE
BURNER UNIT
IS RUNNING
OR
UNIT SMOKES AT
COLD-START
ONLY WHEN
BURNER
IS OFF
Improper fuel or water in fuel Drain tank and replace contaminated fuel
Fuel pressure is low <140 psi for
burner Adjust fuel pump pressure to specifications
Burner nozzle is plugged or dirty Replace nozzle. Check parts breakdown
for nozzle size
Burner nozzle spray pattern is
faulty Replace nozzle. Check parts breakdown
for nozzle size
Heavy accumulation of soot on
coils and burner assembly Remove coils and burner assembly,
clean thoroughly Call local dealer
Misaligned electrode setting Realign electrodes to specifications
Obstruction in smoke stack Check for insulation blockage or other
foreign objects
Low engine RPM Increase RPM to correct specs. See serial plate
Fuel Pressure is too high for clean
burn (fuel PSI above 140 and
below 200) and smokes when
burner is off
Reduce fuel pressure PSI/Increase air band set for
cleaner without max water heat loss
MANUAL, OPERATOR, HOTSY, STAT ELECTRIC, OIL 8.916-831.0 - D
8.916-831.0 • Printed in U.S.A.
If youneed SERVICE on your pressure washer, contact your local Hotsy
dealer or visit www.Hotsy.com. Smart phone usersscan the code below to
link directly to the Service Request page.
T
o REGISTER your pressure washer, please visit our W
arranty Registration
page at www.hotsy.com/WarrantyRegistration.aspx or scan the code
below with your smart phone.
This manual suits for next models
3
Table of contents
Other Hotsy Pressure Washer manuals

Hotsy
Hotsy 1424SS User manual

Hotsy
Hotsy 981SS Service manual

Hotsy
Hotsy ET-301109D User manual

Hotsy
Hotsy 1710 Service manual

Hotsy
Hotsy 558 User manual

Hotsy
Hotsy 965B Series User manual

Hotsy
Hotsy 1200 Series User manual

Hotsy
Hotsy BXA-252739 User manual

Hotsy
Hotsy 771 Service manual

Hotsy
Hotsy 800 Series User manual

Hotsy
Hotsy 965SS User manual

Hotsy
Hotsy 555 HE Service manual

Hotsy
Hotsy 965B Series User manual

Hotsy
Hotsy 560SS Service manual

Hotsy
Hotsy 1075BE CAL User manual

Hotsy
Hotsy 1710 SS User manual

Hotsy
Hotsy PCA3-27324 User manual

Hotsy
Hotsy 555SS Service manual

Hotsy
Hotsy 790SS Service manual

Hotsy
Hotsy 5700 Series User manual