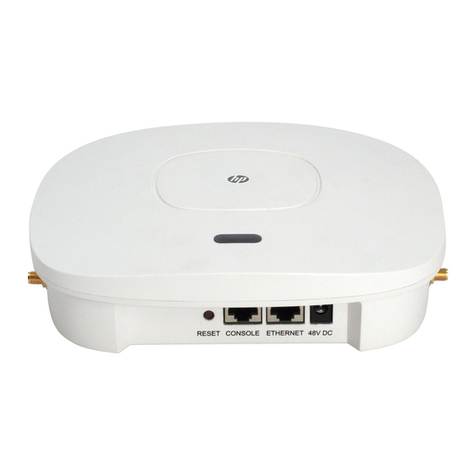
HP ProCurve MSM317 User manual

ProCurve 5400zl Switches
Installation and Getting Started Guide
Power over Ethernet
Installation and Getting Started Guide for HP HP ProCurve MSM317 Access Device
HP ProCurve MSM317 Access Device
Installation and Getting Started Guide


HP ProCurve MSM317 Access Device
Installation and Getting Started Guide

Copyright and Disclaimer Notices
© Copyright 2010 Hewlett-Packard Development Company, L.P. The
information contained herein is subject to change without notice.
This document contains proprietary information, which is protected by
copyright. No part of this document may be photocopied, reproduced,
or translated into another language without the prior written consent of
Hewlett-Packard.
Publication Number
5998-0319
April 2010
Applicable Products
Trademark Credits
Windows NT®, Windows®, and MS Windows® are US
registered trademarks of Microsoft Corporation.
Disclaimer
HEWLETT-PACKARD COMPANY MAKES NO WARRANTY OF
ANY KIND WITH REGARD TO THIS MATERIAL, INCLUDING,
BUT NOT LIMITED TO, THE IMPLIED WARRANTIES OF
MERCHANTABILITY AND FITNESS FOR A PARTICULAR
PURPOSE. Hewlett-Packard shall not be liable for errors
contained herein or for incidental or consequential damages in
connection with the furnishing, performance, or use of this
material.
The only warranties for HP products and services are set forth
in the express warranty statements accompanying such
products and services. Nothing herein should be construed as
constituting an additional warranty. HP shall not be liable for
technical or editorial errors or omissions contained herein.
Hewlett-Packard assumes no responsibility for the use or
reliability of its software on equipment that is not furnished by
Hewlett-Packard.
Warranty
See the Customer Support/Warranty booklet included with the
product.
A copy of the specific warranty terms applicable to your
Hewlett-Packard products and replacement parts can be
obtained from your HP Sales and Service Office or authorized
dealer.
Open Source Software Acknowledgement
Statement
This software incorporates open source components that are
governed by the GNU General Public License (GPL), version 2.
In accordance with this license, ProCurve Networking will
make available a complete, machine-readable copy of the
source code components covered by the GNU GPL upon
receipt of a written request. Send a request to:
Hewlett-Packard Company, L.P.
GNU GPL Source Code
Attn: ProCurve Networking Support
Roseville, CA 95747 USA
Safety
Before installing and operating this product, please read Safety
information on page 1-8.
MSM317 Access Device (US: J9422A, WW: J9423A)
MSM710 Access Controller J9328A
MSM710 Mobility Controller J9325A
MSM730 Access Controller J9329A
MSM730 Mobility Controller J9326A
MSM750 Access Controller J9330A
MSM750 Mobility Controller J9327A
MSM760 Access Controller J9421A
MSM760 Mobility Controller J9420A
MSM765zl Mobility Controller J9370A
Hewlett-Packard Company
8000 Foothills Boulevard
Roseville, California 95747
www.hp.com/go/procurve.com
Contents
1Introduction
About this guide ...........................................................................................................1-2
Products covered...................................................................................................1-2
Important terms.....................................................................................................1-2
Conventions ..................................................................................................................1-3
Management tool ............................................................................................1-3
Warnings and cautions ...................................................................................1-4
Commands and program listings ..................................................................1-5
New in this release ......................................................................................................1-5
Introducing the MSM317 Access Device ...................................................................1-6
Key features............................................................................................................1-7
802.11b/g radio ................................................................................................1-7
Pass Through port...........................................................................................1-7
PoE support.....................................................................................................1-7
Safety information........................................................................................................1-8
Professional Installation Required ...............................................................1-8
Servicing .................................................................................................................1-8
HP ProCurve Networking support.............................................................................1-9
Before contacting support .............................................................................1-9
Getting started ..............................................................................................................1-9
Online documentation .................................................................................................1-9
2Installation
Hardware overview......................................................................................................2-2
External interfaces and status lights...................................................................2-2
External interfaces .........................................................................................2-2
Status lights .....................................................................................................2-3
Punch-down block wiring.....................................................................................2-5
Integrated switch...................................................................................................2-5
Reset button ...........................................................................................................2-6

Contents
iv
Using the reset button ....................................................................................2-6
Power ......................................................................................................................2-6
Faceplate and trim panel ......................................................................................2-7
Installation .......................................................................................................2-7
Removal ...........................................................................................................2-8
Radio and antennas ...............................................................................................2-8
Installing the MSM317 .................................................................................................2-9
Checking status after installation........................................................................2-9
Connecting cables to the MSM317 ......................................................................2-9
Additional configuration.......................................................................................2-9
3Configuration
Important configuration information ........................................................................3-2
Provisioning the MSM317............................................................................................3-2
Directly provisioning the MSM317 ......................................................................3-3
Connectivity page ...........................................................................................3-5
Discovery page ................................................................................................3-7
Location page ..................................................................................................3-8
Configuring the switch ports ......................................................................................3-8
Important note regarding controller teaming ....................................................3-8
Switch ports page ..................................................................................................3-8
Port configuration page ........................................................................................3-9
Port settings ...........................................................................................................3-9
Port name.......................................................................................................3-10
Flow control ..................................................................................................3-10
Power over Ethernet ....................................................................................3-10
Quality of service.................................................................................................3-10
Default traffic priority ..................................................................................3-11
Priority lookup ..............................................................................................3-12
DiffServ (Differentiated Services) ..............................................................3-12
Rate limiting .........................................................................................................3-12
Ingress rate ....................................................................................................3-13
Egress rate .....................................................................................................3-13
MAC filter .............................................................................................................3-13
VLAN .....................................................................................................................3-15
Port type.........................................................................................................3-15

Contents
v
VLAN ID .........................................................................................................3-16
Quarantine VLAN ..........................................................................................3-17
Allow dynamic VLAN assignment...............................................................3-18
VSC binding ..........................................................................................................3-19
Binding to an access-controlled VSC .........................................................3-20
Binding to a non-access-controlled VSC....................................................3-27
Authentication .....................................................................................................3-29
802.1X .............................................................................................................3-30
MAC-based.....................................................................................................3-30
RADIUS ..........................................................................................................3-30
Viewing status information .......................................................................................3-31
AP details .......................................................................................................3-31
Diagnostic information ................................................................................3-33
Networking information - Controller .........................................................3-34
Networking information - Manager ............................................................3-34
Maintenance information.............................................................................3-34
Security information.....................................................................................3-35
Wireless clients..............................................................................................3-35
Port statistics.................................................................................................3-36
Bridge port statistics ....................................................................................3-38
Bridge status..................................................................................................3-38
Bridge forwarding table ...............................................................................3-39
Switch forwarding table...............................................................................3-39
ARegulatory information
Notice for U.S.A. ................................................................................................... A-2
Notice for Canada................................................................................................. A-3
Notice for the European Community................................................................. A-3
Disposal of Waste Equipment by Users in Private Household in the
European Union ............................................................................................. A-4
Notice for Brazil.................................................................................................... A-4
Notice for Japan.................................................................................................... A-5
Notice for Korea ................................................................................................... A-5
Notice for Taiwan ................................................................................................. A-5

Contents
vi

Chapter 1: Introduction
1
Introduction
Contents
About this guide ...........................................................................................................1-2
Products covered...................................................................................................1-2
Important terms.....................................................................................................1-2
Conventions ..................................................................................................................1-3
New in this release.......................................................................................................1-5
Introducing the MSM317 Access Device ...................................................................1-6
Key features............................................................................................................1-7
Safety information........................................................................................................1-8
Servicing .................................................................................................................1-8
HP ProCurve Networking support.............................................................................1-9
Getting started ..............................................................................................................1-9
Online documentation .................................................................................................1-9

Introduction
About this guide
1-2
About this guide
This guide explains how to install, configure, and operate the MSM317 Access Device using
both its provisioning tool and the management tool of an MSM7xx Controller.
Products covered
The guide applies to the following products:
MSM317 Access Device (J9422A) USA version
MSM317 Access Device (J9423A) Worldwide version
This guide also provides information on configuring the MSMS317 with the following
products:
Important terms
The following terms are used in this guide.
Model Part
MSM710 Access Controller J9328A
MSM710 Mobility Controller J9325A
MSM730 Access Controller J9329A
MSM730 Mobility Controller J9326A
MSM750 Access Controller J9330A
MSM750 Mobility Controller J9327A
MSM760 Access Controller J9421A
MSM760 Mobility Controller J9420A
MSM765zl Mobility Controller J9370A
Term Description
MSM AP Refers to any HP ProCurve Networking MSM3xx or MSM4xx Access
Point. Specific model references are used where appropriate.
MSM7xx
Controller
Refers to any HP ProCurve Networking MSM7xx Controller, including
both Access Controller and Mobility Controller variants.

Introduction
Conventions
1-3
Conventions
Management tool
This guide uses specific syntax when directing you to interact with the provisioning tool
interface on the MSM317 and the management tool interface on an MSM7xx Controller. Refer
to the following images for identification of key user-interface elements and then the table
below for sample directions:
MSM317 provisioning tool
Information
pane
Main menu
Sub-menu
MSM7xx Controller management tool

Introduction
Conventions
1-4
Warnings and cautions
Do not proceed beyond a WARNING or CAUTION notice until you fully understand the
hazardous conditions and have taken appropriate steps.
Warning Identifies a hazard that can cause physical injury or death.
Caution Identifies a hazard that can cause the loss of data or configuration information, create a non-
compliant condition, or hardware damage.
Example instructions in this guide What to do in the user interface
Select Provisioning > Discovery.On the MSM317
On the main menu select Provisioning, and then select
Discovery on the sub-menu.
For Password specify secret22.On the MSM317 and an MSM7xx Controller
In the Password field enter the text secret22 exactly as
shown.
Select Controller >> Security > Firewall.On a non-teamed MSM7xx controller
In the Network Tree select the Controller element, then on the
main menu select Security, and then select Firewall on the
sub-menu. All elements to the left of the double angle brackets
>> are found in the Network Tree.
On an MSM7xx controller team
In the Network Tree on the team manager, select the Team
[team-name] element, then on the main menu select
Security, and then select Firewall on the sub-menu. All
elements to the left of the double angle brackets >> are found
in the Network Tree.
Select Controller > VSCs > [VSC-name]
>> Configuration.
On a non-teamed MSM7xx controller
Expand the Controller branch (click its +symbol), expand the
VSCs branch, select a [VSC-name], then select
Configuration on the main menu.
On a MSM7xx controller team
In the Network Tree on the team manager, expand the Team
[team-name] branch (click its +symbol), expand the VSCs
branch, select a [VSC-name], then select Configuration on
the main menu.

Introduction
New in this release
1-5
Commands and program listings
Monospaced text identifies commands and program listings as follows:
New in this release
The following new features and enhancements have been added in releases 5.4.x:
Example Description
use-access-list Command name. Specify it as shown.
ip_address Items in italics are parameters for which you must supply a value.
ssl-certificate=URL [%s] Items enclosed in square brackets are optional. You can either include
them or not. Do not include the brackets. In this example you can either
include the “%s” or omit it.
[ONE | TWO] Items separated by a vertical line indicate a choice. Specify only one of
the items. Do not include the vertical line.
New feature For information see...
Support for LLDP MSM7xx Controllers Management and Configuration Guide
Support for sFlow MSM7xx Controllers Management and Configuration Guide
802.1X supplicant 802.1X on page 3-6

Introduction
Introducing the MSM317 Access Device
1-6
Introducing the MSM317 Access Device
The MSM317 Access Device
revolutionizes the way wireless
and wired IP-based services are
delivered to hospitality and
residential properties. The
MSM317 integrates wired and
wireless connectivity into a
small unit that can be quickly
and discretely installed in a
standard wall box. The MSM317
provides four Ethernet ports, a
2.4GHz 802.11b/g wireless
access point, and a pass-through
RJ-45 connection for service and
user connectivity. One of the
Ethernet ports can be
configured as an IEEE 802.3af-compliant PoE (power over Ethernet) port to enable service
devices such as IP telephones to be powered directly from the MSM317. The MSM317
requires a single powered cable drop to unlock its utility and, through the reduction in
cabling, switch ports, and power-sourcing equipment, the MSM317 represents the best value
for the delivery of next generation voice, data, and entertainment services.
A wide variety of devices can be connected to the MSM317. For example:
NEMA-WD6 Version
(J9422A)
BS 4662 Version
(J9423A)

Introduction
Introducing the MSM317 Access Device
1-7
Key features
802.11b/g radio
Software-controllable output power.
Frequency bands: 2.412 to 2.462 GHz, 2.412 to 2.484 GHz.
Operating channels configurable based on country regulations.
802.11b at 1, 2, 5.5, 11 Mbps.
802.11g at 6, 9, 12, 18, 24, 36, 48, 54 Mbps.
Two integrated 2.4GHz directional antennas with diversity.
Pass Through port
Unmanaged RJ-45 connection for service and user connectivity.
A non-blocking managed Layer 2 switch, featuring:
Support for four 10/100 Mbps ports with Auto-MDX support.
Rate limiting.
IEEE 802.1Q VLANs.
Four priority queues mapped to
IEEE 802.1p or DiffServ.
IEEE 802.1X for device authentication.
PoE support
The MSM317 Access Device can supply PoE power on port 1. Two PoE power settings are
available as follows:
When set to 802.11af Class 1 to 2, port 1 supports an 802.3af Class 1 or Class 2 device
drawing a maximum of 6.49 watts.
When set to 802.11af Class 0 to 3, port 1 supports 802.3af Class 0, 1, 2, and 3 devices.
For the MSM317 to provide 802.11af Class 0 and 3 support, it must be powered by an
802.3at or PoE+ source with an output power greater than 23 watts. For example, the
HP ProCurve 2910al-POE+ switch provides up to 30 watts per port.

Introduction
Safety information
1-8
Safety information
Take note of the following safety information during installation of the MSM317:
Warning Professional Installation Required
Prior to installing or using a controller, consult with a professional installer trained in RF
installation and knowledgeable in local regulations including building and wiring codes,
safety, channel, power, indoor/outdoor restrictions, and license requirements for the intended
country. It is the responsibility of the end user to ensure that installation and use comply with
local safety and radio regulations.
Cabling: You must use the appropriate cables, and where applicable, surge protection, for
your given region. For compliance with EN55022 Class-B emissions requirements use
shielded Ethernet cables.
Country of use: In some regions, you are prompted to select the country of use during
setup. Once the country has been set, the controller will automatically limit the available
wireless channels, ensuring compliant operation in the selected country. Entering the
incorrect country may result in illegal operation and may cause harmful interference to other
systems.
Safety: Take note of the following safety information during installation:
Communications wires and cables which are installed in building locations shall be listed
CM type in accordance with ANSI/NFPA 70, the National Electrical Code (NEC), in
particular Section 800.179 (Communications Wires and Cables).
Conductors and equipment shall be installed in accordance with ANSI/NFPA 70, the
National Electrical Code (NEC), in particular Section 725.133 (Installation of Conductors
and Equipment in Cables, Compartments, Cable Trays, Enclosures, Manholes, Outlet
Boxes, Device Boxes, and Raceways for Class 2 and Class 3 Circuits).
Wiring methods and materials shall be in accordance with NFPA 70, the National
Electrical Code (NEC), in particular Section 725.130.
The MSM317 does not have a power switch. It is powered-on when the Uplink port is
plugged into a PoE power source.
The MSM317 and all interconnected equipment must be installed indoors within the same
building (except for outdoor models / antennas), including all PoE-powered network
connections as described by Environment A of the IEEE 802.3af standard.
It is normal for the rear metal cover of the MSM317 to get hot during operation. The cover
is a heat sink and is used to dissipate the heat generated by the MSM317.
Servicing
There are no user-serviceable parts inside HP ProCurve products. Any servicing, adjustment,
maintenance, or repair must be performed only by trained service personnel.

Introduction
HP ProCurve Networking support
1-9
HP ProCurve Networking support
HP ProCurve Networking offers support 24 hours a day, seven days a week through a number
of automated electronic services. See the Customer Support/Warranty booklet included with
your product.
The HP ProCurve Networking Web site, www.hp.com/go/procurve/support provides up-to-
date support information.
Additionally, your HP-authorized network reseller can provide you with assistance, both with
services that they offer and with services offered by HP.
Before contacting support
To make the support process most efficient, before calling your networking dealer or HP
Support, you first should collect the following information:
Getting started
Get started with your MSM317 by following the directions in the next chapter of this guide.
Online documentation
For the latest documentation, visit the HP ProCurve Networking manuals Web page at:
www.hp.com/go/procurve/manuals.
Collect this information Where to find it
Product identification. On the MSM317.
Software version. On the MSM7xx Controller, select the MSM317
under Controlled APs in the Network Tree, then
select Overview > AP details.
Network topology map, including
the addresses assigned to all relevant
devices.
Your network administrator.

Introduction
Online documentation
1-10

Chapter 2: Installation
2
Installation
Contents
Hardware overview......................................................................................................2-2
External interfaces and status lights...................................................................2-2
Punch-down block wiring.....................................................................................2-5
Integrated switch...................................................................................................2-5
Reset button ...........................................................................................................2-6
Power ......................................................................................................................2-6
Faceplate and trim panel ......................................................................................2-7
Radio and antennas ...............................................................................................2-8
Installing the MSM317 .................................................................................................2-9
Checking status after installation........................................................................2-9
Connecting cables to the MSM317 ......................................................................2-9
Additional configuration.......................................................................................2-9

Installation
Hardware overview
2-2
Hardware overview
This section provides detailed descriptions of the MSM317 hardware and its functionality.
External interfaces and status lights
External interfaces
The MSM317 features the following external interfaces:
Front interfaces Description
Port 1, 2, 3, 4 Auto-sensing 10/100 Mbps Ethernet port with RJ-45 connector.
Managed by the MSM317.
Port 1 provides PoE for use by devices such as a VoIP phone.
Any IP address that is assigned to the Uplink port is also
assigned to Ports 1, 2, 3, and 4.
Port 5 Port with RJ-45 connector.
Not managed by the MSM317.
Traffic on this port is hard-wired to the Pass Through port on
the rear of the MSM317 and is not handled by the internal
Ethernet switch.
Other manuals for ProCurve MSM317
3
Table of contents
Other HP Wireless Access Point manuals

HP
HP ProCurve Wireless Access Point 530 User manual

HP
HP E-MSM466 Assembly instructions

HP
HP J9845A User instructions

HP
HP Aruba AP-587 Installation instructions

HP
HP V-M200 User manual

HP
HP 527 User manual

HP
HP M210 802.11n User manual

HP
HP MSM422 User manual

HP
HP ProCurve Radio Port 230 User manual

HP
HP M210 Instruction Manual