manuals.online logo
Brands
  1. Home
  2. •
  3. Brands
  4. •
  5. HPE
  6. •
  7. Control Unit
  8. •
  9. HPE G2 R5000 Assembly instructions

HPE G2 R5000 Assembly instructions

Other manuals for G2 R5000

1

This manual suits for next models

1

Other HPE Control Unit manuals

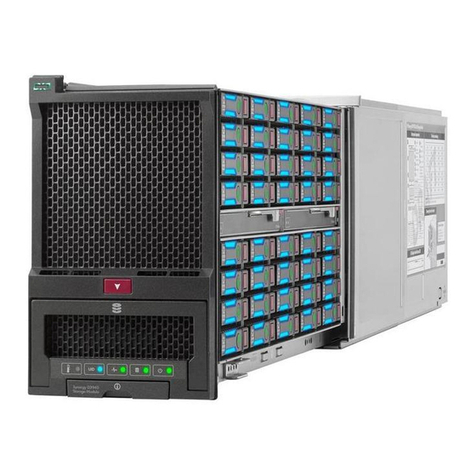
HPE Synergy D3940 Assembly instructions
HPE

HPE Synergy D3940 Assembly instructions

HPE AQUA AAC01 Series User manual

HPE

HPE AQUA AAC01 Series User manual

HPE StoreEver MSL3040 User manual

HPE

HPE StoreEver MSL3040 User manual
HPE Moonshot 45Gc User manual

HPE

HPE Moonshot 45Gc User manual

HPE X130 10G SFP+ LC LRM User manual

HPE

HPE X130 10G SFP+ LC LRM User manual

HPE Synergy 660 Gen9 User manual

HPE

HPE Synergy 660 Gen9 User manual

HPE Synergy 660 Gen10 Manual

HPE

HPE Synergy 660 Gen10 Manual
HPE LSWM124XG2Q User manual

HPE

HPE LSWM124XG2Q User manual

HPE Synergy 620 Gen9 User manual

HPE

HPE Synergy 620 Gen9 User manual

HPE JH182A User manual

HPE

HPE JH182A User manual

HPE SFP28 User manual

HPE

HPE SFP28 User manual

Popular Control Unit manuals by other brands

Seitz 14A80 user manual

Seitz

Seitz 14A80 user manual

Wilo RS485 Installation and operating instructions

Wilo

Wilo RS485 Installation and operating instructions

Becker CentralControl CC41 Commissioning Instruction

Becker

Becker CentralControl CC41 Commissioning Instruction

SICK CDB650 operating instructions

SICK

SICK CDB650 operating instructions

Panduit NetKey NKP5E88M Series installation instructions

Panduit

Panduit NetKey NKP5E88M Series installation instructions

MX Options Concentric Petite Fitting instructions

MX

MX Options Concentric Petite Fitting instructions

Clean Water Systems Fleck 2510 Installation & start?up guide

Clean Water Systems

Clean Water Systems Fleck 2510 Installation & start?up guide

Fairchild FSB44104A user guide

Fairchild

Fairchild FSB44104A user guide

LEGRAND Wattstopper LMIN-104 installation instructions

LEGRAND

LEGRAND Wattstopper LMIN-104 installation instructions

PMK ATT10BNCS instruction manual

PMK

PMK ATT10BNCS instruction manual

Tektronix TDS3FFT user manual

Tektronix

Tektronix TDS3FFT user manual

Woodward easYgen Technical manual

Woodward

Woodward easYgen Technical manual

Balluff BNI EIP-502-105-R015 user guide

Balluff

Balluff BNI EIP-502-105-R015 user guide

NXP Semiconductors TWR-LS1021A Getting started

NXP Semiconductors

NXP Semiconductors TWR-LS1021A Getting started

Advantech PCM-3117 Startup manual

Advantech

Advantech PCM-3117 Startup manual

Danfoss MCO 101 manual

Danfoss

Danfoss MCO 101 manual

Moons' Lin Engineering R701P user manual

Moons'

Moons' Lin Engineering R701P user manual

Aventics RV1 operating instructions

Aventics

Aventics RV1 operating instructions

manuals.online logo
manuals.online logoBrands
  • About & Mission
  • Contact us
  • Privacy Policy
  • Terms and Conditions

Copyright 2025 Manuals.Online. All Rights Reserved.

MF877-00 Page 1
Template Revision A
HPE instructions for this template are available at MF877-01
Product End-of-Life Disassembly Instructions
Product Category: Other Products
Marketing Name / Model
[List multiple models if applicable.]
HPE G2 R5000/6000 3U WW ERM
Purpose: The document is intended for use by end-of-life recyclers or treatment facilities. It provides the basic
instructions for the disassembly of HPE products to remove components and materials requiring selective treatment,
as defined by EU directive 2012/96/EC, Waste Electrical and Electronic Equipment (WEEE).
1.0 Items Requiring Selective Treatment
1.1 Items listed below are classified as requiring selective treatment.
1.2 Enter the quantity of items contained within the product which require selective treatment in the right column, as
applicable.
Item Description Notes
Quantity
of items
included
in product
Printed Circuit Boards (PCB) or Printed Circuit
Assemblies (PCA)
With a surface greater than 10 sq cm
2
Batteries
All types including standard alkaline and lithium
coin or button style batteries
30
Mercury-containing components
For example, mercury in lamps, display
backlights, scanner lamps, switches, batteries
0
Liquid Crystal Displays (LCD) with a surface
greater than 100 sq cm
Includes background illuminated displays with gas
discharge lamps
0
Cathode Ray Tubes (CRT)
0
Capacitors / condensers (Containing PCB/PCT)
0
Electrolytic Capacitors / Condensers measuring
greater than 2.5 cm in diameter or height
0
External electrical cables and cords
0
Gas Discharge Lamps
0
Plastics containing Brominated Flame Retardants
weighing > 25 grams (not including PCBs or
PCAs already listed as a separate item above)
0
Components and parts containing toner and ink,
including liquids, semi-liquids (gel/paste) and
toner
Include the cartridges, print heads, tubes, vent
chambers, and service stations.
0
Components and waste containing asbestos
0
Components, parts and materials containing
refractory ceramic fibers
0
Components, parts and materials containing
0
MF877-00 Page 2
Template Revision A
HPE instructions for this template are available at MF877-01
Item Description Notes
Quantity
of items
included
in product
radioactive substances
2.0 Tools Required
List the type and size of the tools that would typically be used to disassemble the product to a point where
components and materials requiring selective treatment can be removed.
Tool Description
Tool Size (if
applicable)
Star Head Screw Driver
M3
Cross Head Screw Driver
M3, M4
Plastic Nipper
Normal
Nut Driver
M4
Electric Iron
Normal
3.0 Product Disassembly Process
3.1 List the basic steps that should typically be followed to remove components and materials requiring selective
treatment:
1. Remove the middle bezel, and then loosen the screws to remove the main panel..
2. Loosen screws on cover with Cross Head Screw Driver, and then take off the cover.
3. Loosen the screws fixing the battery door, remove the battery door, remove the wires from the battery terminal,
and pull out the battery pack.
4. Remove the plastic cover from the battery pack, and then remove all the connected wires.
5. Loosen the screws on the rear panel. Separate panel from the main Frame.
6. Loosen the screws fixing the PCB and terminal, remove them.
7. Loosen the screws fixing the plates, remove them.
3.2 Optional Graphic. If the disassembly process is complex, insert a graphic illustration below to identify the items
contained in the product that require selective treatment (with descriptions and arrows identifying locations).
MF877-00 Page 3
Template Revision A
HPE instructions for this template are available at MF877-01