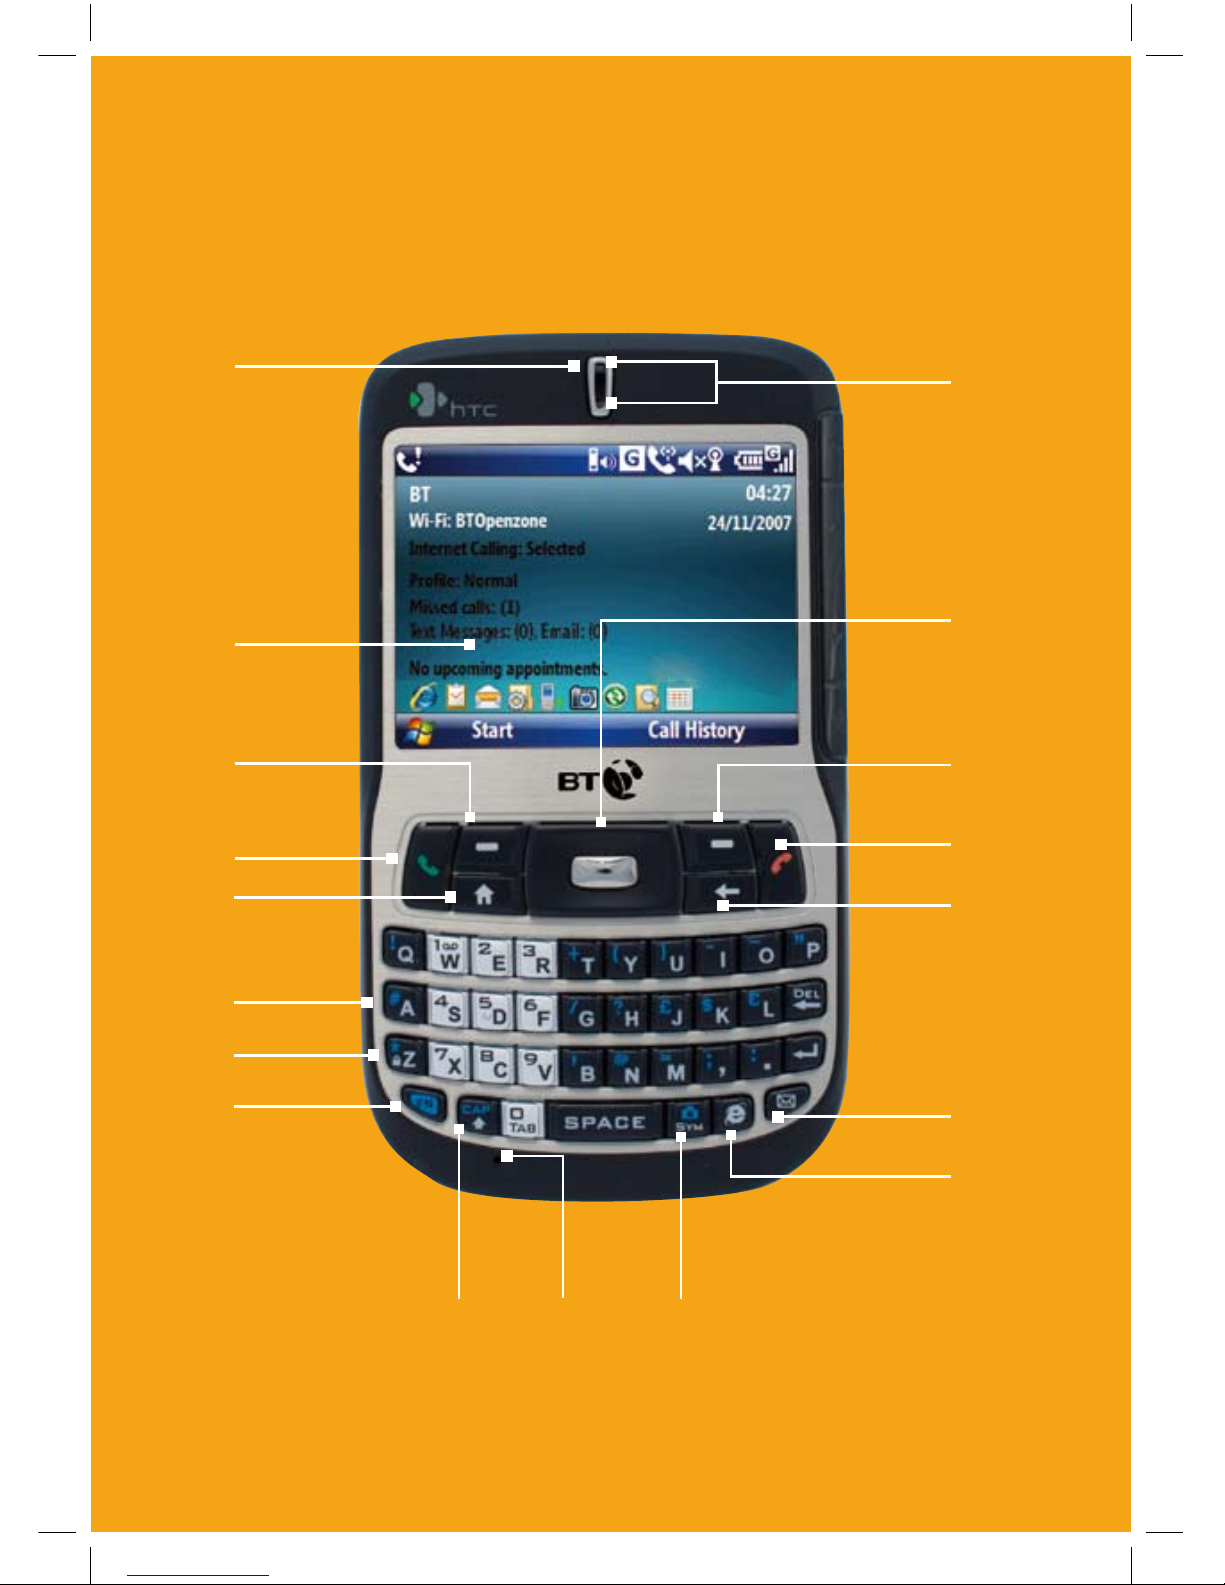
Getting to know your phone
Item Function
1. Speaker Listen to a phone call.
2.
Display Screen
3. Left SOFT KEY Press to perform the command shown in the label above
the button.
4. TALK
Press to dial a phone number, answer a call, switch to
another call, or put a call on hold. Press and hold to activate/
deactivate speakerphone mode
.
5. HOME Press to go to the Home Screen.
6. QWERTY Keyboard This is similar to a standard keyboard on a PC.
7. Keypad Lock Press and hold to lock and unlock the keypad.
8. Key
Press once to type symbols (characters in blue) and enter
numbers in text fields. Press twice for continuous symbol
or number entries.
9. Key Press to type a single capital letter. Press the FN key then
this key to type in all caps.
10. Microphone Speak into the microphone when receiving or making a
phone call or during voice recording.
11. Key Press to open the Symbol table (when typing text) or the
Camera program.
12. Key Press to open Internet Explorer Mobile.
13. Key Press to open the Messaging program.
14. BACK Press to go to the previous screen, or backspace
over characters.
15. END Press to end a call, or press and hold to lock the phone.
16.
Right
SOFT KEY
Press to perform the command shown in the label above
the button.
17. NAVIGATION
CONTROL/ENTER
Use to scroll left, right, up, or down. Press the centre to
use as the ENTER button.
18. LED Indicators The top LED indicators (green/red/amber) notify you of
the battery and network status of your phone respectively,
while the bottom indicators (blue/green) notify you
of Bluetooth and Wi-Fi connectivity status. For more
information about LED Indicators, see the table at the end
of this section.
1