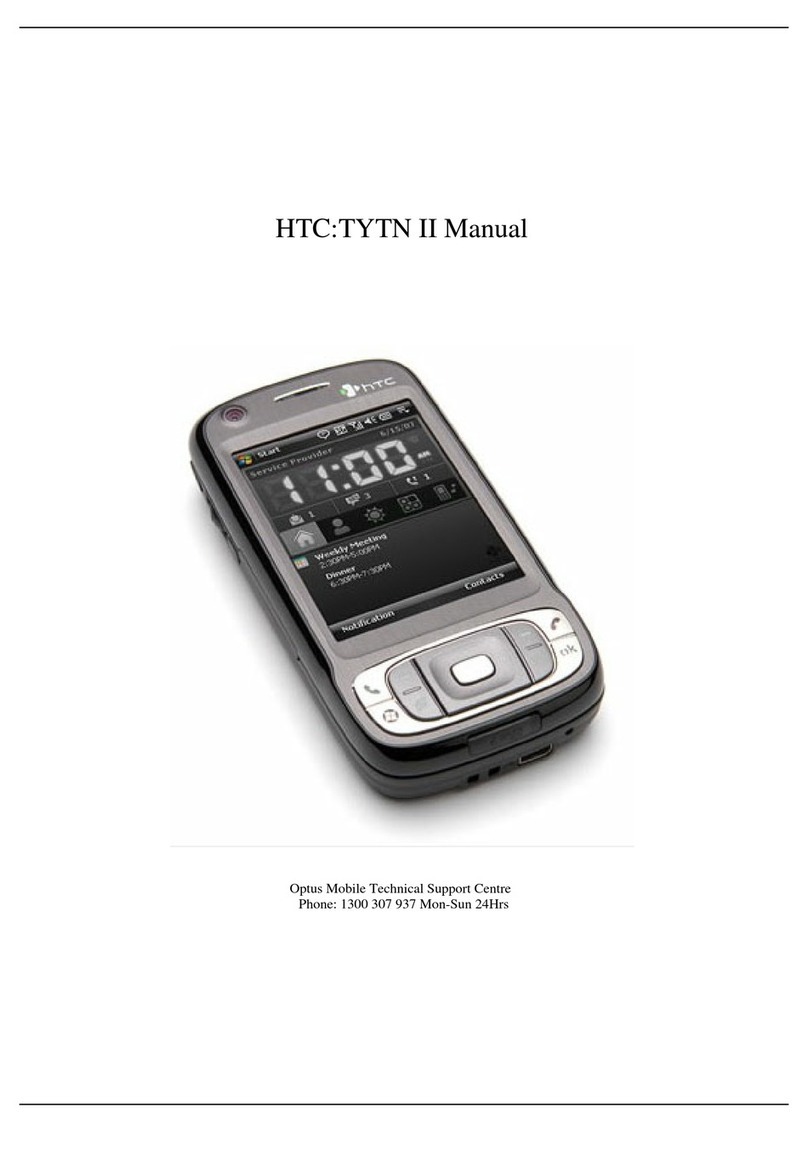
HTC Touch Pro User manual

S
SM
MA
AR
RT
TP
PH
HO
ON
NE
E
G
GU
UI
ID
DE
E

SMARTPHONE GUIDE
P A GE 2
The materials contained herein are the proprietary information of Impact Resource Group.
No dissemination of these materials is permitted without expressed written consent.
Impact Resource Group © 02072012
TABLE
OF
CONTENTS
SECTION 1 – GENERAL PHONE INFORMATION .................................... 3
A
CCESSING THE
O
WNER
’
S
M
ANUAL
................................................................................ 3
S
MARTPHONE
P
OWER
.................................................................................................... 4
U
SING YOUR
S
MARTPHONE
............................................................................................. 4
S
TORING YOUR
S
MARTPHONE
......................................................................................... 4
SECTION 2 – TAKING & DOWNLOADING PHOTO’S ..............................5
C
AMERA
C
ONTROLS
...................................................................................................... 7
Z
OOMING
....................................................................................................................... 9
C
APTURING
P
HOTO
........................................................................................................ 9
SECTION 3 – ACCESSING YOUR EMAIL............................................... 10
SECTION 4 – TECHLINK FOR SMARTPHONE’S ................................... 14
S
ECTION
4
A
–
C
OMPLETING
SISO
R
EQUIREMENTS
........................................................ 14
S
ECTION
4
B
-
T
ECHLINK
R
EPORTING FOR
I
N
-S
TORE
A
SSEMBLIES
................................... 17
S
ECTION
4
C
-
T
ECHLINK
R
EPORTING FOR
F
URNITURE
A
SSEMBLIES
................................. 23
S
ECTION
4
D
-
T
ECHLINK
R
EPORTING FOR
R
ESETS AND
I
NSTALLATION
P
ROJECTS
............ 26
S
ECTION
4
E
-
S
MARTPHONE OR
T
ECH
L
INK
S
UPPORT
..................................................... 31
SECTION 5 – FREQUENTLY ASKED QUESTIONS................................ 33

SMARTPHONE GUIDE
P A GE 3
The materials contained herein are the proprietary information of Impact Resource Group.
No dissemination of these materials is permitted without expressed written consent.
Impact Resource Group © 02072012
Section 1 – General Phone Information
The Smartphone is a mobile phone, but includes advanced capabilities and features beyond that
of a typical phone. It contains the functionality of a personal computer; the versatility of touch or
keyboard inputs, and it is mobile. Smartphone’s are issued to full time field employees to
provide them the ability to complete their reports while at the work location. This reduces
dependence on paper-based reporting methods, and offers our customers the chance to approve
our work in a real time.
Section 1 provides a quick synopsis of information you should know along with links to access
the online owner’s manual for the smart phone you were issued.
Accessing the Owner’s Manual
There are three types of Impact issued Smartphone’s. The most
common Smartphone that we issue is the Sprint Mogul (pictured to
the right).
To access the Sprint Mogul owner’s manual online, navigate to:
•
http://www.sprint.com/cdma/assets/pdfs/phone_guides/htc/ppc_6800_gsg.pd
f
The owner’s manual is an illustrated listing of all the Smartphone’s
parts and accessories, as well as detailed instruction on all the device
features and operations. Review the owner’s manual to gain a basic
understanding of the device’s phone functions.
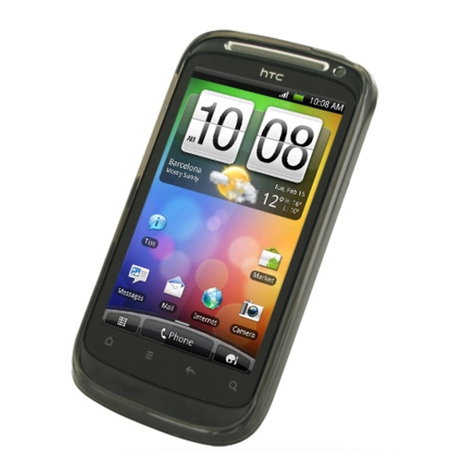
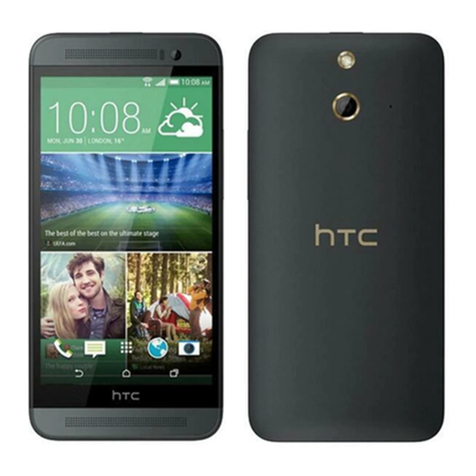
The HTC Touch Pro and HTC Touch Pro 2 will also be issued, but they are not quite as common
as the Sprint Mogul. They have all the same functions, but the layout will look different. To
access the owner’s manual online, navigate to:
HTC Touch Pro:
•
http://member.america.htc.com/download/
web_materials/Manual/HTC_Touch_Pro/H
TC_Touch_Pro_English_UM.pdf
HTC Touch Pro 2:
•
http://member.america.htc.com/download/
Web_materials/Manual/HTC_Touch_Pro2
_Sprint/Englishpdf.pdf

SMARTPHONE GUIDE
P A GE 4
The materials contained herein are the proprietary information of Impact Resource Group.
No dissemination of these materials is permitted without expressed written consent.
Impact Resource Group © 02072012
Smartphone Power
When you receive your device, plug in and charge the unit for
at least 8 hours. Failure to maintain a fully charged Smartphone
will cause the device not to have the power needed to record
and report your work.
If the Smartphone loses power, it is possible that you could
lose all entries that have been made since the previous sync
operation. A fully charged Smartphone should provide several
hours of continuous use. Always carry your power cord with
you.
Using your Smartphone
You can use your Smartphone to report various types of work orders. You can also contact your
District Manager and other technicians using the device’s telephone function. To contact your
District Coordinator, dial 1.866.462.3336. The Smartphone is to be used for company business
only. If there are any complication with your unit because of personal use, management will be
notified.
Storing your Smartphone
Avoid excessive temperature changes and moisture. Protect your device and the battery from
dirt, dust, food, liquid, temperature extremes, and overexposure to sunlight. The Smartphone
should not be left in your vehicle for extended periods of time.

SMARTPHONE GUIDE
P A GE 5
The materials contained herein are the proprietary information of Impact Resource Group.
No dissemination of these materials is permitted without expressed written consent.
Impact Resource Group © 02072012
Section 2 – Taking & Downloading Photo’s
Sprint Mogul – Taking Photo’s
Taking photos is easy with the built-in camera. To take photos, follow these instructions below.
To open the Camera screen:
•Press and hold the (1) Camera Key on your device.
—or—
•Tap Start > Programs > Camera.
—or—
•Tap Start > Programs > Pictures & Videos > Camera
icon.
To exit the Camera:
•Tap the Exit icon.
Capture Modes
The camera on your device allows you to capture pictures and video clips. The camera is set to
the photo capture mode by default. The upper left corner of the screen displays the (2) current
capture mode; to switch capture modes, do either of the following:
•Tap the (3) left or right arrows on the screen or press the Navigation Control left or right.
For photos, make sure the Smartphone is set to the photo capture mode.
•The image resolution can be changed on the Smartphone. To change the resolution, tap the
top middle of the screen until you reach the desired (4) resolution setting.
For most work orders, set the resolution to the “L” setting as shown below. You should only
reset the camera to the higher resolution if it is specified on the work order as a client
requirement. To set the resolution to 1600 x 1200 pixels, 2M, on the
Smartphone, tap the screen to toggle between resolutions.
To take the picture, you can press the camera key, enter button, or jog button. Make sure you
hold the phone steady to get clear pictures. It may be harder to get a clear photo with a
Smartphone than it is with a camera.
1
2
3
4

SMARTPHONE GUIDE
P A GE 6
The materials contained herein are the proprietary information of Impact Resource Group.
No dissemination of these materials is permitted without expressed written consent.
Impact Resource Group © 02072012
Sprint Mogul - Downloading Photos
For Windows XP Users
If it is not already installed, you must download Microsoft’s
ActiveSync program. Go to:
http://www.microsoft.com/windowsmobile/enus/downloads/eulas/
eula_activesync45.mspx?ProductID=76.
Click on accept, then download, and then click on run to install the
software.
ActiveSync will install the drivers needed for your laptop to
recognize the Smartphone. Once (1) ActiveSync is installed and
you attach the Smartphone with a USB cable to the laptop, the
Microsoft ActiveSync program will start retrieving your settings.
After this has finished, you can close down the ActiveSync window. Then double click on My
Computer (on your desktop) and you should see under other— (2) Mobile Device. Double click
on My Windows Mobile-Based Device. If your phone has a storage card, a storage card folder
will appear. Double click on that, then My Documents, then My pictures. This is where the
photos are stored.
The storage card is located right above
the power cord. It is a micro SD card.
If your phone does not have a storage
card, all you have to do to retrieve
your pictures is double click on My
Computer— (2) Mobile Device then
(3) My Pictures.
For Windows Vista Users
Plug the USB cable into the laptop and
let Vista find and install the drivers
automatically. This will take a few minutes. When finished it will tell you your device is ready
to use. Double click on My Computer on your desktop, and look for Mobile Devices. Once you
click on the mobile device, there are two options, one is the Smartphone and the other should say
storage card if there is one. If you have a storage card, then click on it, then My Documents, then
My Pictures. If there is not storage card, all you would see is the (2) Mobile Device and then go
to My Documents, then (3) My Pictures.
It is best to move the photos from your Smartphone to your laptop for reporting purposes if you
have been issued a laptop computer.
1
2
3

SMARTPHONE GUIDE
P A GE 7
The materials contained herein are the proprietary information of Impact Resource Group.
No dissemination of these materials is permitted without expressed written consent.
Impact Resource Group © 02072012
HTC Touch Pro – Taking Photo’s
Use the Camera to take photos. You can either use the main (back) camera or second (front)
camera to take photos.
To open the Camera screen
On the Home screen, slide to the Photos and Videos tab and then tap the camera icon ( ). The
screen orientation automatically switched to landscape mode when you open the Camera.
Tip: You can also tap Start > Programs > Camera to open the Camera program.
To Exit the Camera
Tap the Exit icon ( ) on the Camera screen. Tap the screen to show the Camera screen icons.
Capture Modes
The camera on your device allows you to capture pictures by using various built-in modes that
provide you flexibility in taking your shots.
To change the capture mode:
Press NAVIGATION left or right (Landscape orientation).
Tap the middle icon at the bottom of the screen (the icon displayed is
based on the current Capture mode.) On the on-screen menu, tap the
capture mode you want to use.
You can select from the following capture modes:
Camera Controls

SMARTPHONE GUIDE
P A GE 8
The materials contained herein are the proprietary information of Impact Resource Group.
No dissemination of these materials is permitted without expressed written consent.
Impact Resource Group © 02072012
The camera comes with an auto-focus function to let you capture sharp and crisp photos of your
subject. Depending on the Shoot Option you have chosen, you will need to either touch or press
the ENTER button to activate auto-focus. When auto-focus is activated, it is indicated by a
flashing white bracket ( ). When the focus is set, the bracket changes to a steady green bracket
( ).
By default, you need to touch (do not press) the ENTER button to activate auto-focus and then
when focus is set, press the ENTER button to take the shot or start capturing video. For example,
in Photo mode, touch ENTER to activate auto-focus; when focus is set, press ENTER to take the
shot.
HTC Touch Pro 2 – Taking Photo’s
Use your device’s built-in camera to take photos. To launch the camera navigate to the Home
screen, slide to the Photos & Videos tab, and then tap the camera icon ( ). The screen
orientation automatically switches to landscape mode.
Tip: You can also tap Start > Camera to launch the camera.
To turn off the camera tap and then tap on the camera screen.
To adjust the resolution, click (1) , then select the (2) wheel icon. From here you will select
the (3) Wheel Advanced icon. Select (4) Resolution from the Advanced options menu. Your
setting should normally be on (5) L (640x384), but for a High Resolution option, select (6) 3M
(2048x1216), pictures for a Chrysler project is a good example of the need for a high resolution
picture.

SMARTPHONE GUIDE
P A GE 9
The materials contained herein are the proprietary information of Impact Resource Group.
No dissemination of these materials is permitted without expressed written consent.
Impact Resource Group © 02072012
Zooming
Before capturing a photo, you can zoom in or out on your subject. To zoom in or out, slide your
finger up or down on the Zoom bar while holding the device sideways. While you are sliding
your finger on the Zoom bar, the level of zoom is shown on the zoom control bar at the left side
of the screen.
Capturing Photo
By default, the Camera automatically takes the shot after you have set the focus. In photo mode,
touch the Virtual Camera button ( ) to activate Auto Focus. When focus is set, the Camera
automatically takes the shot.
After capturing a photo, the Review screen is displayed. Tap one of the following icons at the
bottom of the screen:

SMARTPHONE GUIDE
P A GE 10
The materials contained herein are the proprietary information of Impact Resource Group.
No dissemination of these materials is permitted without expressed written consent.
Impact Resource Group © 02072012
Section 3 – Accessing your email
When you receive your phone your email will already be set up with your IRG email account. If
you ever experience an issue that requires your email box to be reconfigured here are the
instructions to reset your email for the three different phone types.
Configuring your Email on the Spring Mogul
To be able to access email on your Smartphone, you must
configure it. Follow these steps to enable your Smartphone
to receive email.
From the main menu, tap (1) Start, then tap (2) Programs.
In the next screen, tap (3) Messaging which will take you
to the E-mail Setup screen. In the (4) E-mail address:
field, type your first and last name, leaving no space
between your names, followed by @irgemail.com. In the
(5) Password field enter the last 4 digits of your social
security number or the new password you created. Make
certain that the (6) Save password box is checked. When
you are done, tap (7) Next to continue.
1
2
4
5
6
3
7

SMARTPHONE GUIDE
P A GE 11
The materials contained herein are the proprietary information of Impact Resource Group.
No dissemination of these materials is permitted without expressed written consent.
Impact Resource Group © 02072012
Uncheck the (1) Try to get e-mail settings
automatically from the Internet box. Tap (2)
Next to proceed.
For (3) Your e-mail provider, select (4) Internet
e-mail from the drop down menu. Tap (5) Next to
continue.
In the (6) Your name: field, type your first and last
name, leaving a space between your names. In the
(7) Account display name, type IRG email. Tap
(8) Next to continue setting up your Smartphone
email.
1
2
3
4
5
6
7
8

SMARTPHONE GUIDE
P A GE 12
The materials contained herein are the proprietary information of Impact Resource Group.
No dissemination of these materials is permitted without expressed written consent.
Impact Resource Group © 02072012
Next, in the (1) Incoming mail server: field, type
mail.irgemail.com. In the (2) Account type: field,
select POP3. Tap Next.
In the (3) User name: field should be your first and
last name (johnsmith), as shown in the example
below. Once again, the (4) Password is the last 4
digits of your social security number. Choose (5)
Save password and tap Next.
The (6) Outgoing (SMTP) mail server: is
mail.irgemail.com. Make certain that both the (7)
Outgoing server requires authentication box and
the (8) Use the same user name and password for
sending e-mail box is checked. Tap (9) Next to
continue.
1
2
3
4
5
6
7
8
9

SMARTPHONE GUIDE
P A GE 13
The materials contained herein are the proprietary information of Impact Resource Group.
No dissemination of these materials is permitted without expressed written consent.
Impact Resource Group © 02072012
Configuring your Email on the HTC Touch Pro and the HTC Touch Pro 2
Configuring your email for your HTC Touch Pro or the HTC Touch Pro 2 follows the same
method. Follow these steps to set up your email:
1. From the start menu, click on Email.
2. Click set up email.
3. Select Other
4. Enter the email address and password.
Using Email
Once your E-mail set up is complete, you can begin sending and receiving email on your
Smartphone. Make certain the (1) Automatic Send/Receive box is marked to update every 2
hours. Tap, (2) Finish.
Your IRG email will appear. It has an (3) Inbox and shows you messages (4) Received. To
create a new message, tap (5) Menu, then tap “New” on the next screen to proceed with writing
your email message.
The example below is for the Spring Mogul, but using your email on any of the Smartphone
options will be the same with a slightly different look.
1
2
3
4
5

SMARTPHONE GUIDE
P A GE 14
The materials contained herein are the proprietary information of Impact Resource Group.
No dissemination of these materials is permitted without expressed written consent.
Impact Resource Group © 02072012
1
Section 4 – Techlink for Smartphone’s
Techlink is our online software equipped with multiple features that assist the field employees
with their daily activities.
After completing this section you will be able to:
Complete your SISO Requirements
Report In-Store Assemblies from your Smartphone
Report Furniture Assemblies from your Smartphone
Report Reset and Installation Projects
Identify how to obtain Techlink support
Section 4a – Completing SISO Requirements
The SISO Function
Regardless of which type of work order you are assigned, as
discussed later in this guide, you are required to SISO (sign in and
sign out).
Once you login to the Smartphone the Work Orders screen to the
right will display. Next, you will need to select the work order
corresponding to the work location where you just arrived. This
will display the (1) SISO button.
For the most reliable and successful SISO function, once you
arrive and are exiting your vehicle, press the SISO button of the
work order where you want to sign in.
GPS SISO
The GPS SISO screen will
display and prompt you with a
message instructing you to be
outside with a clear, unobstructed
view of the sky. When these
conditions are met, press the (2)
OK button to continue with the
SISO process. This will display a
message indicating the device is
(3) detecting your GPS
location.
2
3

SMARTPHONE GUIDE
P A GE 15
The materials contained herein are the proprietary information of Impact Resource Group.
No dissemination of these materials is permitted without expressed written consent.
Impact Resource Group © 02072012
Detecting GPS Location
When GPS coordinates are detected,
the device will display a message
indicating the (1) coordinates and
show success. However, if your GPS
coordinates cannot be detected, then a
(2) GPS Detection Failed message
will display. In this situation, press (3)
OK and then press the (4) Retry
option.
To help ensure a higher degree of
success when detecting GPS
coordinates, follow the directions
below.
Procedures for Successful Detection of GPS Coordinates
The procedures for successfully detecting your GPS coordinates includes performing these
functions after you arrive at a location, but before walking into a store.
When you arrive at the work order site, exit your vehicle and then turn on the Smartphone.
Login, select your work order and then press the SISO button as you are walking to the store’s
entrance. However, before walking in to the store, you are to check to see if the GPS coordinates
are found. If not, then retry SISO again before walking into the store.
The GPS usually picks up satellites quickly and with the time between leaving your vehicle and
walking to the entrance of a store, this should give the Smartphone plenty of time to register your
location.
1
2
3
4

SMARTPHONE GUIDE
P A GE 16
The materials contained herein are the proprietary information of Impact Resource Group.
No dissemination of these materials is permitted without expressed written consent.
Impact Resource Group © 02072012
Detecting SISO Status
When GPS
coordinates are found,
the device will
continue and display a
message about (1)
Detecting SISO
Status.
When SISO status is
established, another
success status will
display and a (2)
drop down menu
will be provided for
you to select your
SISO option. Once
the selection is made,
press the (3) SISO
button to continue.
When you have signed in to the work order, you will see a (4) successful sign in message and
you can press the (5) OK button.
SISO Options
The SISO options that appear in the (2) drop down menu will vary depending on when you
perform the SISO function. For example, if you have already signed in to a work order and you
perform the SISO function, then you will have the additional options of signing out for lunch or
signing completely out of the work order.
Always read the SISO options available and only select the one the matches the function you
want the device to perform.
1
2
3
4
5

SMARTPHONE GUIDE
P A GE 17
The materials contained herein are the proprietary information of Impact Resource Group.
No dissemination of these materials is permitted without expressed written consent.
Impact Resource Group © 02072012
5
4
Section 4b - Techlink Reporting for In-Store Assemblies
Log In Screen
Once you launch the TechLink program, the login screen shown right will display. Enter your (1)
EID and (2) password (last four of your social security number) in the appropriate fields. Press
the (3) Log In button to continue.
Work Order List Screen
After you log in, the Work Order screen shown below
left will load and display a list of work orders assigned
to you.
From this screen, you can access additional information
about a particular work order by clicking on the (4) line
where the work order is listed. Once an entry is
selected, it will highlight yellow.
You then can click the (5) View option on the bottom
menu bar, which provides a list of items to access
additional information about the work order selected,
such as matrix codes, manifest comments and store
address information.

SMARTPHONE GUIDE
P A GE 18
The materials contained herein are the proprietary information of Impact Resource Group.
No dissemination of these materials is permitted without expressed written consent.
Impact Resource Group © 02072012
Preparing to Enter Product Assemblies
Once you have a work order entry selected, click the blue (1)
View button that is displayed in the same area as where the
work order is listed. This is done to access the next set of screens
where you will begin entering the bikes you have assembled
followed by any repairs you have completed.
Adding Product Assemblies to Your Report
The Assembly List screen, shown right, is where you enter the
products you have assembled. The first step to do this is to
click the (2) “+” symbol. This will load the Add Assembly
screen, shown below right.
From the Add Assembly screen press the (3) Product Code
drop down list and then select the item you assembled. Next,
click the (4) Qty drop down list and select the number of
items you assembled of the product chosen. To add this entry
to your report, click the (5) Save button.
You will be returned to the Assembly List where the products
you entered will be (6) listed with the quantity, SKU and product
type.
2
3
4
5
6
1

SMARTPHONE GUIDE
P A GE 19
The materials contained herein are the proprietary information of Impact Resource Group.
No dissemination of these materials is permitted without expressed written consent.
Impact Resource Group © 02072012
Deleting Product Assemblies from Your Report
If you make a wrong entry and need to clear it from your
report, click on the (1) line that contains the information
you want to remove, which will highlight yellow. Next,
click the (2) “X” symbol to delete the entry.
Press the (3) Next option located at the bottom of the
screen to continue your report entries, which will include
entering repairs.
Managing Repairs
The Repair List screen, shown right, is the main entry
screen for repairs where you enter new, verify existing
and mark repairs complete. From this screen, you have
the main options to (1) View Pending and (2) View
Completed repairs. Pending repairs are repairs that
have been entered into the system where a repair tag
has been generated. These are repairs that are waiting
on parts to be received by the store so the repairs can be
completed. The completed repairs are ones you have
finished during your visit. Clicking on either of these
options will change what is displayed on this screen.
If you complete a repair that is shown on this screen,
then select the line containing the bike entry and click
the (3) Mark Complete option available in the bottom
(4) Repair menu choices.
On the other hand, if you make an entry for a bike
repair by mistake, then select the bike entry and click
the (5) Delete option. When you need to add a new
repair to your report, click the (6) Add option to begin
this process. These steps are described beginning on the next page.
Once all repair entries are added and verified, then click the (7) Next button to continue to the
assembly and repair recap screen (presented at the end of this section).
1
2
3
1
2
6
5
3
4
7

SMARTPHONE GUIDE
P A GE 20
The materials contained herein are the proprietary information of Impact Resource Group.
No dissemination of these materials is permitted without expressed written consent.
Impact Resource Group © 02072012
Adding a New Repair
When the Repair Screen loads, it will display a new (1) tag
number for the repairs you will enter. Write this number on the
Waiting for Parts bike tag and attach it to the bike. Multiple
repairs for the same bike can be entered under the same repair
tag number generated during this process. To complete this
screen, enter all the (2) information requested into the fields
that are present. These entries include:
Vendor
Model
Model #
Serial #
Date Code
If a customer is waiting on a repair to be finished, then select the
(3) “Customer Is Waiting On Repair” option. If you are able
to complete the repair using parts available from other units, then
mark the (4) “This Work Has Been Completed Today” option.
Once your entries and selections are made, click the (5) Next
button to continue this process and load the Add Part screen,
shown bottom right.
On the Add Part screen, you will make the following (6) entries
if parts need to be ordered:
Reason
Part
Variation
Quantity Needed
By pressing the (7) Save button, the information you enter will
be added to the Repair Parts screen, which is shown on the next
page.
1
2
3
4
5
6
7
Other manuals for Touch Pro
6
This manual suits for next models
1
Table of contents
Other HTC Cell Phone manuals