Huazheng PHS-2F User manual

PHS-2F
Benchtop pH Meter
Huazheng Electric Manufacturing (Baoding) Co., Ltd

Dear use r:
Thank you for choosing PH S-2F Be nc ht op pH Mete r.
We hope that this instrum ent can mak e your wo rk easier an d mo re
en joya bl e, so that you can ge t th e fee li ng of office automation in the test
an d analysis work.
Before using the instrument, please read this man ua l, an d op er ate and
maintain the in st rument according to the manual to prolong its serv ic e lif e.
"Just a lig ht pr ess, th e test will be completed automatically " is the
op er atin g chara ct eristics of this instru me nt .
If you ar e sat isfied wi th th is in st rument, ple as e tell your col le ag ue s;
if you ar e not satisfied with this instrum en t, please call (0 31 2) 6775656 to
tell you to serve you at all times-Baoding Huazheng Electric Manufact ur ing
Co. , Ltd., our company will definitel y make yo u satisfied !

Contents
I. Installation..................................................................................................................................... 1
II.Specifications and Performance................................................................................................2
III.Operations.................................................................................................................................... 4
IV.Maintenance and Service.......................................................................................................... 8
V .Packing List................................................................................................................................11

1
I. Installation
1.1 Unpacking
In the packing box, users can find below parts:
1. PHS-2F pH meter 1set
3. PHS pH Combination Electrode 1pc
4. Electrode holder 1pc
1.2 Installation of the meter
Front view of PHS-2F
Rear panel of the meter
1. Meter
2. Keypad
3. Screen
4. Electrode Holder
5. PH pH Combination Electrode
6. Meas (PH electrode socket)
7. Ref (Reference probe socket)
8. Fuse
9. Power Switch
10 Power socket

2
1.2.1 Install Electrode Holder
Insert electrode holder (4) in electrode base, and screw the set screw under electrode
holder (4).
1.2.2 Install PH pH Combination Electrode
a)Installation pH Combination pH Electrode (12) on electrode holder (4).
b)Remove BNC short-circuit (11) plug on electrode socket (6).
c) Insert the plug of pH Combination Electrode (12) in pH electrode socket (6)
II.Specifications and Performance
2.1 Introduction
Note following problems when using:
Ensure a good grounding.
Prevent corrosive gas invasion.
Keep the instrument interface clean, dry, and avoid contact with acid, alkali, salt
solution.
11. BNC Short Circuit
12. pH Combination Electrode
13. Electrode Protective Cover
1
1
1
3
12

3
This instrument is available for long-term stable usage. After test samples, the electrode
should be immersed in DI water.
Keep the instrument interface clean, dry, and avoid contact with acid, alkali, salt
solution. Insert short circuit when the instrument is not in use to avoid open circuit damage.
2.1.1 Terms
pH slope: The potential variation for each pH change, usually expressed as mV/pH
or %.
pH E0: Also called “zero potential”, usually refers to the potential value of the pH=7.
pH one-point calibration: Calibrate with one pH buffer solution.
pH multi-point calibration: Calibrate with two or more pH buffer solution.
2.1.2 Features
Adopt new design appearance, big LCD segmented display.
It is mainly used to measure the pH value and potential value (mV) of water solution in
the field of research institute, industrial, mining enterprises, universities and colleges.
Besides, It can also measure electrode potential when matched with ion selected electrode
2.1.3 Main technical performance
1. Measuring range
a. pH:(0.00~14.00)pH;
b. mV:-1400mV~1400mV;
2. Minimum display unit: 0.01pH, 1Mv
3. Temperature compensation range: Manual (0~60)℃
4. Electronic unit accuracy
a. pH: ±0.01pH;
b. mV:±0.1%FS
5. Accuracy of meter: ±0.02pH±1bit;
6. Input current of electronic unit: ≤1×10-12A
7. Input impedance of electronic unit: ≥l×1012Ω
8. Error of temperature compensation: ±0.01 pH
9. Repeatability error of electronic unit:

4
pH:0.01pH
mV:1mV
10. Repeatability error of meter: ≤0.01pH
11. Repeatability of electronic unit: 0.01 pH±l bit/3h
12. Size: ( length × width × height, mm): 290×210×95
13. Weight, kg:1.5kg
14. Normal working conditions:
a) Ambient temperature: (5~40)℃;
b) Relative humidity: ≤85%;
c) Power supply:220V 50Hz
d) There is no vibration which affects performance nearby.
e) There is no corrosive gas nearby.
f) There is no magnetic interference except field.
2.1.4 Keyboard
The meter has 5 operating keys.
“pH/mV”: Double-function key. In measuring state, press once to enter “pH measuring
state”, press again to enter “mV measuring state”; it is cancel key when set temperature, E0
and slope, press this key to exit function module and back to measuring state.
“E0”: Press this key to adjust E0 value, “△” to increase, “▽” to decrease.
“Slope”: Press this key to adjust slope value, “△” to increase, “▽” to decrease.
“Temp”: Press this key to adjust temperature value, “△” to increase, “▽” to decrease.
Enter: Press this key to confirm last operation.
III.Operations
3. 1 Turn On
Properly installed and maintained is the first place for successful operation. Before
turning on, make sure the meter is well grounded. The probe connection must be
reliable to prevent the invasion of corrosive gas.
Connect the meter with power and turn it on. The meter enters measuring state
shown as below. Heat up the meter for 30 minutes to do measurement.

5
The diagram of starting interface
In which: Above the screen is the current pH value, the below is setting temperature. In
measuring state, press “mV/pH” key to switch between potential and pH value. Press
“Temp” to set current temperature. Press “Position” and “Slope” to calibrate electrode
slope.
3.2 Function Set
Set Temperature
If users need to set temperature, measure the temperature of tested solution
with thermometer, and press “Temp △” or “Temp ▽” key to make the screen
displays the temperature of tested solution. Then press ‘Enter’ to confirm current
temperature or press “pH/mV”’ to back to measuring state.
The preparation of pH electrode
1. Remove the protective cover (13) of pH electrode, and pull down the rubber
case of electrode to expose the upper small hole.
2. Rinse the electrode with DI water.
1. In order to maintain the instrument and achieve better performance, check
electrode socket each time before power on. Make sure sockets are connected with
short circuit or electrode to avoid damage of high resistance.
2. When the instrument is not in use connect short circuit to avoid damage of open
circuit.
3. To ensure the accuracy of instrument, heat the instrument for 30min.

6
3.3 To Calibrate pH electrode
Calibrate electrode first before using the instrument. Generally for continuous measuring,
the instrument should be calibrated everyday “E0” key for one point calibration and
“Slope” key for two-point calibration.
If users need to calibrate, adjust the displayed pH value to the standard pH value in
calibrating state of that temperature, then press “Enter”.
One point calibration
One point calibration is one point positioning, calibrate E0 with one kind of standard
buffer solution and the electrode slope is 100%. This method is simplify and suitable
for low precision measurement
1. In measuring state, wash the electrode with distilled water and put it into buffer
solution (such as buffer solution pH=7.00).
2. Measure the temperature of the solution with thermometer and set temperature
value as previous method.
3. After the reading becomes stable, press “E0 △” or “E0 ▽” to adjust the
displayed value as the standard pH value of that temperature.
Then press ‘Enter’ to complete one point calibration. If users want to give up calibration,
press “pH/mV” key to exit calibration state and back to current measuring state.
Two-point calibration
Generally, we use two-point calibration to calibrate the electrode slope.
1. Prepare two kinds of standard buffer solution, such as 7.00pH, 10.01pH;
2. One-point calibrate according to previous method: That is: In measuring state,
The instrument must finish “E0” calibration before “Slope” calibration. Otherwise, the
“Slope” key is invalid.
After one point calibration, the instrument will automatically delete last titration data
and the default slope is 100%.

7
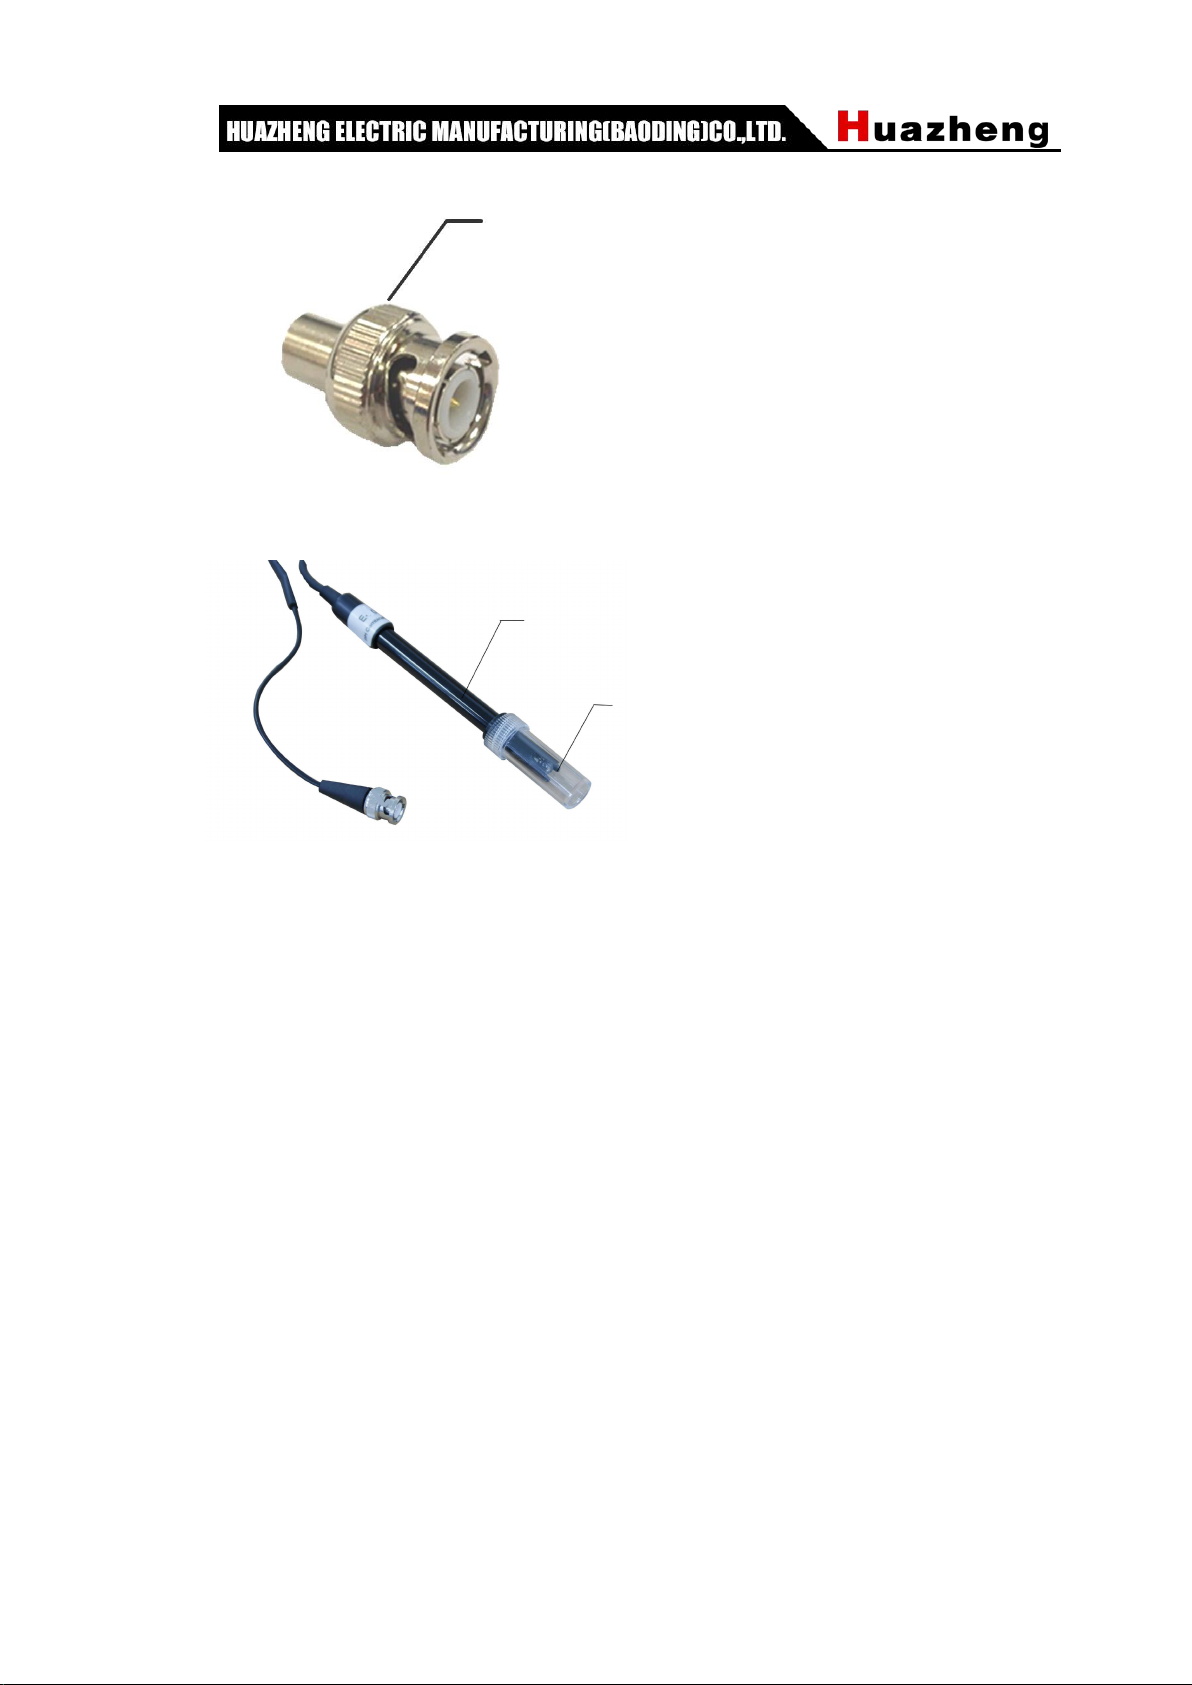
wash the electrode with distilled water and put it into buffer solution 1 (such as buffer
solution pH=7.00). Measure the temperature of the solution with thermometer (such
as 25℃), and set temperature value as previous method. After the reading becomes
stable, press “E0 △” or “E0 ▽” to adjust the displayed value as the standard pH
value of that temperature. Then press ‘Enter’ to complete calibration.
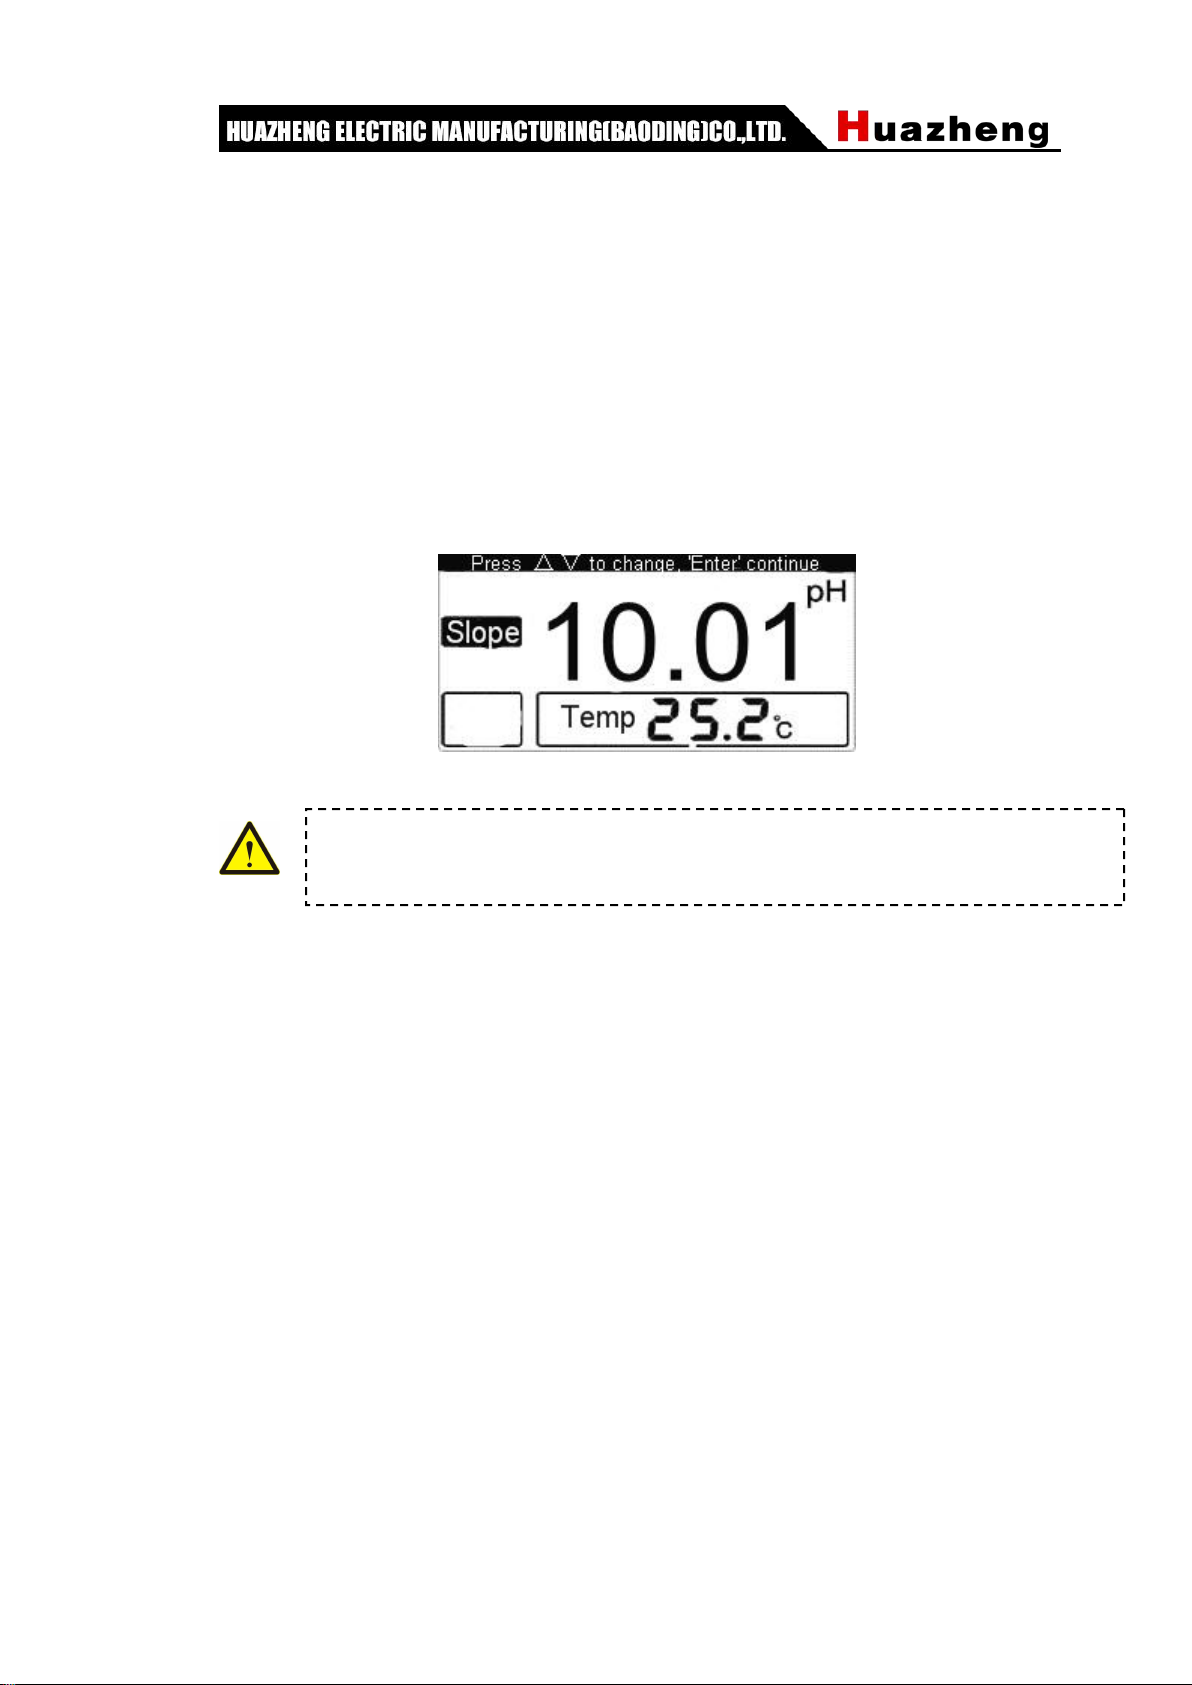
3. Then, rinse the electrode again and put it into buffer solution 2 (such as buffer
solution pH=10.01). Measure the temperature of the solution with thermometer (such
as 25.2 ℃) and set temperature value. After the reading becomes stable, press
“Slope△” or “Slope▽” to adjust the displayed value as the standard pH value of
that temperature, such as 10.01pH. Then press ‘Enter’ to complete calibration.
Then press “Enter” to back to measuring state.
3.4 To measure pH
After the instrument has been calibrated, it can be used to measure test solution. Whether
the temperature of test solution and standard buffer solution are the same can cause
different measurement procedure.
When the test solution is as same as the buffer solution
1. Rinse the head of electrode with DI water, and rinse it again with test solution.
2. Immerse the electrode into test solution and stir the solution with glass stirring rod to
make the solution evenly. Read the pH value on the screen.
When the test solution is different from the buffer solution
1. Rinse the head of electrode with DI water, and rinse it again with test solution.
2. Measure the temperature of test solution with thermometer.
3. Press “Temp” to make the screen display as solution’s temperature. Then press “Enter”
key.
4. Immerse the electrode into test solution and stir the solution with glass stirring rod to
make the solution evenly. Read the pH value of test solution.
The instrument must finish “Position” calibration before “Slope” calibration.
Otherwise, the “Slope” key is invalid.

8
3.5 To measure potential (mV value)
1. Put measuring electrode (ion selected electrode or mental electrode) and reference
electrode on electrode holder.
2. Rinse the head of electrode with DI water, and rinse it again with test solution.
3. Insert ion electrode into measurement socket (6).
4. Insert reference electrode into reference socket (7).
5. Immerse these two kinds of electrodes in test solution and stir evenly. The screen will
display the potential value (mV) of ion selective electrode as well as the positive and
negative polarities.
6. When measure electrode potential with mental electrode to, insert Q9 socket (with clip)
into measurement electrode socket (6) and connect the clip with mental electrode’s wire.
Or Use electrode converter, insert one side of the converter into measurement electrode
socket (6) and connect another side with the mental electrode. Insert reference electrode
into reference electrode socket (7).
3.6 Turn off
After operation, press “On/Off” to turn off the meter. Immerse electrode into DI water when
finish measurement. If for long-term not in use, please note:
1. Power off!
2. Keep the instrument interface clean, dry, and avoid contact with acid, alkali, salt
solution.
3. Insert short circuit when the instrument is not in use to avoid open circuit damage.
4. Store electrode in reference filling fluid after measurement. For long term not in
use, store in box at room temperature.
IV.Maintenance and Service
4.1 Maintenance
Regularly correct operations and maintenances can ensure a good performance.
Especially instruments like pH meters require more reasonable maintenances because
these instruments have very high input impedance and the operation environment is
regular expose to chemical medicines.
Keep the Input end (measurement electrode socket 6) dry and clean. When not in use,
insert Q9 short-circuit to prevent dust and moisture.
Note: Electrode converter is optional accessory, only for additional purchase.

9
The electrode converter (options) is designed for the use of other electrodes, usually
moistureproof and dustproof.
When measuring, remain the wire of the electrode still, otherwise it will cause unstable
measurement.
The instrument used by power supply should be good grounding.
The instrument adopt MOS integrated circuit, so ensure the soldering iron have good
grounding during maintenance.
When using a buffer solution calibration instruments, to ensure the reliability of the
buffer solution, can't match wrong buffer solution, otherwise will lead to produce error
measurement results.
4.2 Usage and Maintenance of Electrode
The electrode must be calibrated with known standard buffer solution before operation,
and the pH of test solution should be closer to the pH buffer solution.
Remove the electrode cover, avoid the contact of electrode sensitive glass bulb with
hard objects, because any broken or abraded will make electrode invalid.
After measurement, put on protective cover timely. There should be a few reference
filling liquid in protective cover to keep the electrode bubble wet, must avoid immerse
in DI water.
The outer reference filling liquid of combination electrode is KCl solution for 3 mol/L.
Add fluid from the upper hole. When not in use, pull on the rubber case to prevent
liquid dry up.
Keep the electrode terminal clean and dry, absolutely prevent short circuit on both ends
of the output, otherwise will lead to misalignment or failure measurement.
To maintain good performance, match the electrode with pH meter of high input
impedance (≥1012 Ω) .
Avoid long-term immersion in DI water, protein solution, acid and fluoride solution.
Avoid contact with the organic silicone oil low.
After long-term usage, if found that the slope is slightly lower: immerse the bottom of
electrode in 4% HF (HF) in (3 ~ 5) s, rinse with DI water, and then immerse in
0.1mol/L hydrochloric acid solution soak to renew electrode.
If there are substances that can pollute sensitive bulb or block liquid junction in test
solution, the electrode will be passivation and the slope is reduced, the display
reading no phenomenon. Users should use appropriate cleaning solution to renew
electrode according to the nature of pollutants,

10
4.3 Electrode contaminant and cleaning solution
Contaminant
Cleaning Solution
Norganic metal oxides
Organic oils
Resin polymer material
Protein blood deposit
Pigment material
Dilute acid<lmol/L
Diluted detergent (weak alkaline)
Alcohol, acetone, ethyl ether
5% pepsin + 0.1 mol/L Cl solution
Dilute bleaching solution, hydrogen peroxide
4.4 Troubleshooting
1. If the screen does not display when supplied with power, check whether there is voltage
output.
2. Plug in the short circuit plug when the meter is not used in case of dust and humidity.
3. Ensure the meter is in good ground connection in case of corrosive gas.
4. If the meter still does not work well when the previous situations are eliminated, contact
the relevant departments.
1: Do not choose cleaning solutions like carbon tetrachloride, trichloroethylene, and
tetrahydrofuran that can dissolve polycarbonate resin, because the electrode shell is
made of polycarbonate resin. The dissolution of polycarbonate resin will easily pollute
sensitive glass bulb, so that the electrode is invalid. Also, do not use combination
electrodes to measure the solutions above.
2: When using pH combination electrode, the most common problem is the liquid
junction of reference electrode, the congestion of liquid junction is the main reason for
the error.
3: The expression of the use of pH electrode is subject to the pH electrode manual.

11
V .Packing List
No.
Item
Qty
1
pH combination electrode
1
2
Electrode Holder
1
3
Power Liner
1
4
pH Standard Buffer powder
Each/5
5
Fuse
2
6
Protective Caver
1
Table of contents
Other Huazheng Measuring Instrument manuals

Huazheng
Huazheng HZ-600A User manual

Huazheng
Huazheng HZSF-641 User manual

Huazheng
Huazheng HZX52AA User manual

Huazheng
Huazheng HZ2831 User manual

Huazheng
Huazheng HZ1434 User manual

Huazheng
Huazheng HZCT-100B User manual

Huazheng
Huazheng CS2670A User manual

Huazheng
Huazheng HPC500 User manual

Huazheng
Huazheng HZ-8700 User manual

Huazheng
Huazheng HZSF-801 User manual
Popular Measuring Instrument manuals by other brands

AccuEnergy
AccuEnergy AcuRev 1310 Series user manual

Air Monitor Corporation
Air Monitor Corporation VOLU-flo / OAM INSTALLATION PROCEDURE

sauter
sauter FK Series instruction manual

Dragino
Dragino NBSN95 user manual

National Instruments
National Instruments NI 9227 CALIBRATION PROCEDURE

Geovent
Geovent Airbox Lite instruction manual