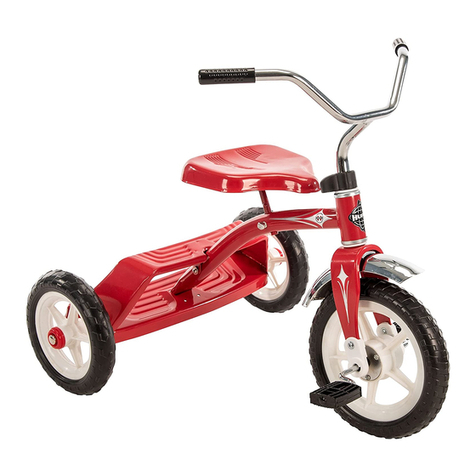
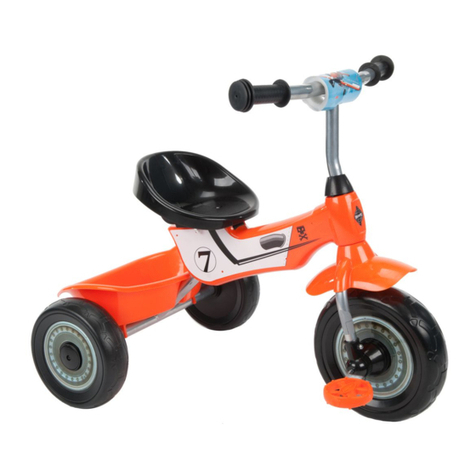
Huffy CLASSIC TRIKE User manual

See back page for Customer Service Information
Consulte el reverso para Servicio de Información al Cliente
Voir pages verso pour des renseignements le service à la clientèle
© Copyright Huffy Corporation 2017
Owner’s Manual
Classic Trike
THIS MANUAL CONTAINS IMPORTANT SAFETY, ASSEMBLY,
OPERATION AND MAINTENANCE INFORMATION.
PLEASE READ AND FULLY UNDERSTAND THIS MANUAL BEFORE
OPERATION.
SAVE THIS MANUAL FOR FUTURE REFERENCE.
H-Sidewalk-Rideon EN-AU 111016 m0205
AU
EN

Manual Index
• Tools Needed......................................................................................... 2
• Safety and Warning Information ...........................................................2-3
• Trike Assembly .....................................................................................4-7
• Parts List................................................................................................ 8
• Maintenance / Torque Chart .................................................................. 9
• Warranty ............................................................................................... 10
• Helmet Warning (Contact info on back cover) ...................................... 11
WARNING TO AVOID SERIOUS INJURY:
Product Specic Warnings:
• This product should only be used by persons 3 years and up.
• Maximum rider weight for this product is 27kg. (60 lbs).
• Do not allow a child to ride in the rear plastic bin (if equipped).
• Maximum weight for the front or rear plastic bin is 2.3kg. (5 lbs) (if equipped).
If you have any questions regarding the operation of this product, please refer to this
owners manual or call Customer Service
- see Consumer Service contact info.
ADDITIONAL SAFETY AND WARNING INFORMATION >>
Tools Needed
Small Adjustable Wrench
(Jaws must open at least 9/16 inch.)
Open-end Wrenches
NOTE: Some models have accessories: Install the accessories (plaque, bell, pad, streamers –
if equipped) onto the handlebar to complete the assembly.

3
Safety and Warning Information
This product, like all wheeled vehicles, will provide safe, enjoyable transportation and
recreation when used and maintained properly. Like bicycling, skateboarding, and in-line
skating, riding this product can be dangerous even under the best of circumstances. We do
not want you to get hurt. Please follow these safety rules.
This symbol is important. It is the WARNING symbol. The warning symbol precedes
safety instructions. Make sure the child understands these instructions. Failure to follow
these instructions may result in injury to the rider or to others, or damage to the product.
WARNINGTO AVOID SERIOUS INJURY:
• Adult assembly required.
• CHOKING HAZARD: Small parts. Not for children under 3 years.
• Keep small loose parts and plastic bags out of the reach of children.
• Not suitable for children under 3 years as foam pieces may break off and pose a choking
hazard. Keep small children away when assembling.
• An adult must unfold and fold this product (as equipped).
• Continuous adult supervision required.
• Never use near motor vehicles.
• Never ride with more than one person.
• Excessive weight may cause a hazardous or unstable condition.
• Protective equipment should be worn. Do not allow a child to ride without a CPSC
approved helmet, with the chinstrap securely fastened. Always wear shoes when using this
product.
• Not to be use in trac.
• Do not allow a child to ride the product at dusk, at night or at times of limited visibility.
• Do not allow a child to ride on roadways or alleys.
• Do not allow a child to ride off road, on grass or wet surfaces.
• Never use near streets, swimming pools (or other bodies of water), hills, steps, or sloped
driveways.
• For use on smooth paved surfaces only.
• Understand all operating procedures before use.
• Do not tow or pull any objects with the product.
• Do not push or pull a child riding on the product.
• Use with caution, since skill is required to avoid falls or collisions causing injury to the user
or third parties.
• Always comply with local laws and regulations.
• If anything does not operate properly, discontinue use.
• Replace worn or broken parts immediately with genuine replacement parts.
• Handlebar hand grip or tube end plugs should be replaced if damaged as bare tubes have
been known to cause injury. All products with capped handlebar ends should be checked
regularly to ensure that adequate protection for the ends of the handlebars are in place.
Safety and Warnings

4
Assemble Rear Frame and Wheels
B
A
G
F
H
C
D
E
Handlebar and Front Wheel:
1. Place a Spacer Aonto the Fork
Tube B.
2. Insert the Fork Tube through the
Head Tube Cfrom bottom.
3. Orient the Slot Din the top Fork
Tube toward the rear of the unit.
4. Place other Spacer A, then the
Clamp Assembly Eonto the
Fork Tube with the open end of
the Clamp in-line with the slot in
the Fork Tube.
5. Slide the Clamp Cover Fas
far up the Handlebar Gas
possible.
6. Insert the Handlebar into the
Fork Tube.
WARNING: Ensure that the
Minimum Insertion Mark Hon the
stem tube is not visible - below the
top of the Fork Tube.
7. Align the Handlebar so that it
is perpendicular with the front
wheel.
8. Secure the Handlebar in the
Fork Tube by tightening the
Clamp EBolt securely (See
torque table for recommended
torque).
9. Check that the Clamp is tight
enough so that the Handlebar
will not rotate inside of the Fork
Tube.
10. Slide the Clamp Cover Fover the Clamp.
11. Install the accessories (bell, pad, streamers – if equipped) onto the handlebar.
Assembly

5
B
A
C
STEPS:
1. Using the supplied zip-ties A, attach Side Panels Bas shown with 4 zip-ties each
side.
NOTE: zip-ties cannot be re-used. Position correctly as shown before inserting end through
lock-head.
WARNING: Sharp cut zip-ties ends can cause injury to child. Position zip-ties as
shown so ends Care not reachable by child.
2. Cut zip-ties ends as short as possible Cand rotate up under frame tubing.
Assembly
Installing the Side Panels

6
Installing the Rear Wheel and Training Wheels
NOTE: See torque table for recommended torques.
1. Attach Training Wheel Ato Stabilizer Bby installing Bolt Cthrough Wheel,
Stabilizer, Washer Dand Locknut E. Tighten securely.
• Repeat for other Stabilizer.
2. Make sure Rear Wheel Axle Fis fully inserted into Frame.
3. If Axle Nut Gand wheel are pre-installed, remove Axle Nut.
4. Place upper end of Stabilizer Hinto Frame Slot Iand onto Axle.
5. With rear Wheel fully inserted into Frame, install Axle Nut securely.
6. Repeat for opposite side.
NOTE: The wheel stabilizers are not intended to be removed. The product will be dicult to
ride without them.
G
E
F
D B A C
HI
Assembly

7
Assembly
Installing the Seat Post Assembly
Seat to Seat Post (Single
Bolt Style): Some models
are equipped with a seat and
seat post assembly that uses
a Single Bolt and Nut Ato
secure the Seat Bto the seat
post. The seat is assembled to
the seat post at the factory.
Ensure the Seat is secure to the
Seat Post and the seat bolt is
tightened. (See torque table
for recommended torque)
INSTALL STEPS:
• If needed, loosen Clamp Nut Cenough to insert the Seat Post D.
• Point the seat forward and insert Seat Post to the Minimum Insertion marks E.
• Tighten Clamp Nut Csecurely so it supports the rider without moving. (See
torque table for recommended torque)
WARNING: To prevent the seat coming loose and possible loss of control, the“MIN-
IN” (minimum insertion) mark Eon the Seat Post MUST be below the top of the Seat Tube
F.
E
B
F
F
C
D
A

8
Parts List
1
5
6
7
9
8
4
2
3
10
15
11
12
13
14
# Description # Description
1Frame 10 Handlebar
2Fork 11 Grips (x2)
3Fender 12 Clamp Cover
4Front Wheel Assembly 13 Handlebar Clamp
5Rear Wheel Assembly 14 Bushing/Spacers
6Training Wheel Set 15 Pad/Bag/Plaque
7Axle Nuts (x2)
8Side Panels (x2)
9Seat/Post Assembly
Parts List

9
Repair and Service
WARNING:
• Inspect the product frequently. Failure to inspect the product and to make repairs or
adjustments, as necessary, can result in injury to the rider or to others. Make sure all
parts are correctly assembled and adjusted as written in this manual and any “Special
Instructions”.
• Immediately replace any damaged, missing, or badly worn parts with original
equipment.
• Make sure all fasteners are correctly tightened as written in this manual and any
“Special Instructions”. Parts that are not tight enough can be lost or operate poorly.
Over tightened parts can be damaged. Make sure any replacement fasteners are the
correct size and type.
NOTE: Have a bicycle service shop make any repairs or adjustments for which you do not
have the correct tools or if the instructions in this manual or any“Special Instructions” are
not sucient for you.
Maintenance

10
General:
• Part or model specications are subject to
change without notice.
• This Limited Warranty is the only warranty for
this product. There are no other expressed or
implied warranties.
• This Limited Warranty extends only to the
original consumer and is not transferable to
anyone else.
• Warranty registration is not required.
• The only uses for this product are described in
this manual.
What does this Limited Warranty cover? This
Limited Warranty covers all parts of the product
except those indicated below as not warranted.
What must you do to keep the Limited Warranty
in effect?
This Limited Warranty is effective only if:
• Product is completely and correctly assembled.
• Product is used under normal conditions for its
intended purpose (see the following section for
excluded activities).
• Product receives all necessary maintenance and
adjustments.
• Product is used for general transportation and
recreational use only.
What is not covered by this Limited Warranty?
• This Limited Warranty does not cover normal
wear and tear, normal maintenance items, or
any damage, failure, or loss that is caused by
improper assembly, maintenance, adjustment,
storage, or use of the Product.
This Limited Warranty will be void if the unit is
ever:
• Used in any competitive sport
• Used for stunt riding, jumping, aerobatics or
similar activity
• Modied in any way
• Modied with the addition of a motor
• Ridden by more than one person at a time
• Rented, sold, or given away
• Used in a manner contrary to the instructions
and warnings in this Owner’s Manual
Huffy will not be liable for incidental or
consequential loss or damage, due directly or
indirectly from use of this product. Some states do
not allow the exclusion or limitation of incidental
or consequential damages, so the above limitation
may not apply to you.
What rights do you have? This warranty gives
you specic legal rights. You may also have other
rights which vary from state to state.
What will Huffy do? Huffy will replace, without
charge to you, the component found to be
defective by Huffy.
CONTACTING CUSTOMER SERVICE:
How do you report a problem with this product
or submit a warranty claim?
• Contact Consumer Service - See included list
for Customer Contact information or visit www.
huffybikes.com/contact.
IN AUSTRALIA:
• Warranty claims can be submitted to;
Hunter Products Pty Ltd - PH: 1800 224 094
2, 424 Warrigal Road, Moorabbin, Victoria 3189
Australia.
The following text is incorporated into this Limited
Warranty if this product was purchased in Australia
(but it is not incorporated if such product was
purchased in New Zealand):
• Our goods come with guarantees that cannot
be excluded under the Australian Consumer
Law. You are entitled to a replacement or refund
for a major failure and for compensation for any
other reasonably foreseeable loss or damage.
You are also entitled to have the goods repaired
or replaced if the goods fail to be of acceptable
quality and the failure does not amount to a
major failure.
Limited Warranty
How long does this Limited Warranty
Last?
All components are warranted for 6 months from
the date of purchase. Electronics: 90 days.
Warranty

• Helmet should sit level on your head and low on your forehead
• Adjust the strap sliders below the ear on both sides.
• Buckle the chin strap. Adjust strap until it is snug.
• No more than two fi ngers should fi t between the strap and your chin.
• A proper fi tting helmet should be comfortable and not rock forward/back-
ward or side to side.
• Always read the user manual that comes with your helmet to make sure it
is fi tted and attached properly to the wearer’s head according to the fi tting
instructions described in the user manual.
Check
www.Huffybikes.com/contact
for the current contact information
WARNING:
ALWAYS WEAR YOUR HELMET
WHEN RIDING THIS PRODUCT!

[ In the US ]
PLEASE - BEFORE RETURNING TO STORE,
CONTACT HUFFY CUSTOMER SERVICE. WE
ARE GLAD TO ASSIST YOU WITH ANY PARTS
OR ASSEMBLY PROBLEMS YOU MIGHT
HAVE!
For Fast Customer Service, go to:
http://www.huffybikes.com/contact
To Order Parts (US only), go to:
http://www.huffybikes.com/parts
OR TEL: 1 800 872 2453 (US only)
For email, go to http://www.huffybikes.com/contact
[ CANADA ]
VEUILLEZ NOTER : AVANT DE
RETOURNER AU MAGASIN,
COMMUNIQUEZ AVEC LE SERVICE
À LA CLIENTÈLE DE HUFFY. NOUS
VOUS AIDERONS VOLONTIERS AVEC
TOUT PROBLÈME CONCERNANT LES
PIÈCES OU LE MONTAGE!
Pour un Service à la clientèle rapide, allez sur le
site :
http://www.huffybikes.com/contact
To Order Parts (CANADA only), go to:
http://www.huffybikes.com/parts
OU appelez le 1 800 872 2453
(CANADA only)
Pour communiquer par courriel
huffycanada@huffy.com
[ MÉXICO ]
ANTES DE DEVOLVER EL
PRODUCTO A LA TIENDA,
COMUNÍQUESE CON SERVICIO
AL CLIENTE DE HUFFY. NOS
COMPLACE AYUDARLO CON
CUALQUIER PARTE O PROBLEMA
DE ENSAMBLADO QUE PUDIERA
TENER.
Para obtener Servicio al cliente rápido, visite:
http://www.huffybikes.com/
O LLAME AL TEL: 01800 1483 391
(Mexico only)
Para comunicarse por correo electrónico:
servicio@huffymex.com
H-Tri_STOP-Global_022217_i0388
Check http://www.huffybikes.com/home/globalcontact
for the current contact information
http://www.huffybikes.com/home/globalcontact
para obtener la información de contacto actual
Vérier http://www.huffybikes.com/home/globalcontact
pour les informations de contact actuelles
Other manuals for CLASSIC TRIKE
1
Other Huffy Bicycle manuals

Huffy
Huffy Green Machine User manual

Huffy
Huffy cruiser User manual

Huffy
Huffy 1C4880-A01 User manual

Huffy
Huffy coaster User manual

Huffy
Huffy KD58C-LCD User manual

Huffy
Huffy M0782 User manual

Huffy
Huffy Minnie Lights & Sound User manual

Huffy
Huffy Coaster Brake Bicycles User manual

Huffy
Huffy Kids Ride-On User manual

Huffy
Huffy Mountain Bikes User manual

Huffy
Huffy coaster User manual

Huffy
Huffy Slider User manual

Huffy
Huffy BMX User manual

Huffy
Huffy BMX bicycles User manual

Huffy
Huffy freewheel User manual

Huffy
Huffy cruiser User manual

Huffy
Huffy Multi-Speed Comfort Bicycles User manual

Huffy
Huffy Green Machine User manual

Huffy
Huffy m0743 User manual

Huffy
Huffy Green Machine User manual