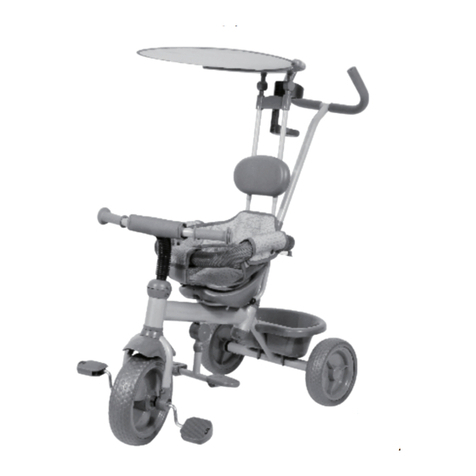
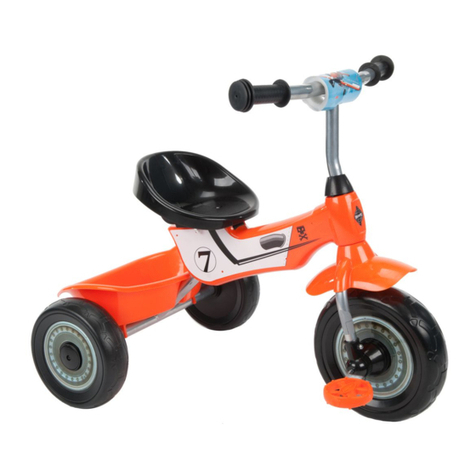
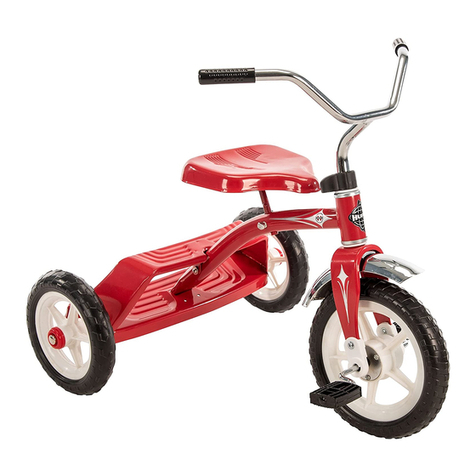
Huffy m0743 User manual

© Copyright Huffy Corporation 2021
Date Code Label
Here
This manual contains important safety, assembly, operation
and maintenance information.
Please read and fully understand this manual before
operation.
Save this manual for future reference.
Always wear approved helmet and safety equipment when
using this product.
See back page for Customer Service Information
EN
H-Storage-Trike Global 09-11-20 m0743
Español >>
Français >>
Owner’s Manual
Storage Trike

2
Manual Index
• Safety Information...............................................................................................................2-5
• Parts View / Tools Needed...................................................................................................6
• Trike Assembly......................................................................................................................7-8
• Maintenance...........................................................................................................................12
• Warranty - US..........................................................................................................................13
• Warranty - Australia..............................................................................................................14
Helmet Warning Information
ALWAYS WEAR
YOUR HELMET
WHEN RIDING THIS
PRODUCT!
Always read the user manual that comes with your helmet to make sure it is tted and
attached properly to the wearer’s head according to the tting instructions described in the
user manual.
WARNING:CHOKING HAZARD:
• Small parts, adult assembly required.
• To reduce the risk of injury, adult supervision is required.
• The user must be 3+ years, and weigh no more than 60 lbs (27kgs).
• Maximum weight for the rear plastic bin is 2.3kg. (5 lbs).
• Do not allow a child to ride in the rear plastic bin.
• Avoid sharp bumps, drainage grates, and sudden surface changes. Scooter may suddenly
stop.
• Avoid excessive speed associated with downhill rides.
• Watch out for pedestrians.
• Check and secure all fasteners before every ride.

3
Safety and Warning Information
This product, like all wheeled vehicles, will provide safe, enjoyable transportation and
recreation when used and maintained properly. Like bicycling, skateboarding, and in-line
skating, riding this product can be dangerous even under the best of circumstances. We
do not want you to get hurt. Please follow these safety rules. Keep children away during
assembly.
This symbol is important. It is the WARNING symbol. The warning symbol precedes
safety instructions. Make sure the child understands these instructions. Failure to follow
these instructions may result in injury to the rider or to others, or damage to the product.
WARNING TO AVOID SERIOUS INJURY:
• Adult assembly required. An adult must unfold and fold this product (as equipped).
Continuous adult supervision required. Do Not modify the product.
• CHOKING HAZARD: Not suitable for children under 3 years. Contains small parts.
• Keep small loose parts and plastic bags out of the reach of children.
• Not suitable for children under 3 years as foam pieces may break o and pose a choking
hazard. Keep small children away when assembling.
• Never use near motor vehicles.
• Never ride with more than one person. Excessive weight may cause a hazardous or
unstable condition.
• Protective Equipment must be worn: Always wear safety equipment such as a helmet
that meets CPSC (or equivalent standard for your country) with chinstrap securely fas-
tened, knee pads, elbow pads, wrist guards, gloves and shoes.
• Do not use in trac.
• Do not allow a child to ride the product at dusk, at night or at times of limited visibility.
• Do not allow a child to ride on roadways or alleys.
• Do not allow a child to ride o road, on grass or wet surfaces.
• Never use near streets, swimming pools (or other bodies of water), hills, steps, or sloped
driveways.
• For use on smooth paved surfaces only.
• Understand all operating procedures before use.
• Do not tow or pull any objects with the product.
• Do not push or pull a child riding on the product.
• Use with caution, since skill is required to avoid falls or collisions causing injury to the user
or third parties.
• Always comply with local laws and regulations.
• If anything does not operate properly, discontinue use.
• Replace worn or broken parts immediately with genuine replacement parts.
• Handlebar hand grip or tube end plugs should be replaced if damaged as bare tubes have
been known to cause injury. All products with capped handlebar ends should be checked
regularly to ensure that adequate protection for the ends of the handlebars are in place.
• Self-locking nuts and other self-locking xings may lose their eectiveness when re-used.
• The toy shall be used with caution, since it requires great skill, so as to avoid falls or colli-
sions causing injury to the user and third parties.
• Ensure all locking devices are engaged before each ride.
Warnings and Safety

4
Warnings and Safety
Safety and Warning Information - Australia
This product, like all wheeled vehicles, will provide safe, enjoyable transportation and
recreation when used and maintained properly. Like bicycling, skateboarding, and in-line
skating, riding this product can be dangerous even under the best of circumstances. We do
not want you to get hurt. Please follow these safety rules.
This symbol is important. It is the WARNING symbol. The warning symbol precedes
safety instructions. Make sure the child understands these instructions. Failure to follow
these instructions may result in injury to the rider or to others, or damage to the product.
WARNING TO AVOID SERIOUS INJURY:
• Adult assembly required.
• CHOKING HAZARD: Small parts. Not for children under 3 years.
• Keep small loose parts and plastic bags out of the reach of children.
• Not suitable for children under 3 years as foam pieces may break o and pose a choking
hazard.
• As required, adults must assist children in the initial adjustment procedures to unfold the
scooter, adjust handlebar and steering to height, and nally to fold the scooter.
• Never ride with more than 1 person.
• Do not modify the product.
• Protective Equipment must be worn: Always wear safety equipment such as a helmet
that meets AS/NZS (or equivalent standard for your country) with chinstrap securely
fastened, knee pads, elbow pads, wrist guards, gloves and shoes.
• While using the product, keep hands and ngers away from wheels and other moving
parts to avoid danger of pinching or entrapment.
• Ride on smooth paved surfaces away from motor vehicles. Not for use on roads.
• Avoid sharp bumps, drainage grates, and sudden surface changes. Scooter may suddenly
stop.
• Avoid streets and surfaces with water, sand, gravel, dirt, leaves, and other debris. Wet
weather impairs traction, braking and visibility.
• Do not ride at night, dusk, or at times of limited visibility.
• If equipped, brake will get hot from continuous use. Do not touch after braking.
• Avoid excessive speed associated with downhill rides. It may be dicult to stop or
maneuver quickly. Maximum recommended speed is 6 MPH (10 KPH).
• Obey all local trac and scooter riding laws and regulations.
• Watch out for pedestrians.

5
Warnings and Safety
Safety and Warning Information - Australia
• Do not wear headphones or anything else that would impair your ability to hear or see.
• Practice riding in large, at areas.
• Avoid steeply sloped areas. Get o and walk.
• Know your limits. Be familiar with your scooter and your abilities. Use common sense.
• Handlebar hand grip or tube end-plugs should be replaced if damaged as bare tubes have
been known to cause injury.
• All products with capped handlebar ends should be checked regularly to ensure that
adequate protection for the ends of the handlebars are in place.
• Ensure all locking devices are engaged before each ride.
• Check and secure all fasteners before every ride.
• Replace worn or broken parts immediately with original equipment.
• Before each ride, check that the steering system is correctly adjusted and that all
connection components are rmly secured and not broken.
If you have any questions regarding the operation of this product, please refer to this owners
manual or contact customer service.

6
# Description # Description
1 Handlebar 14 Pedal (x2)
2 Grips (x2) 15 Front Wheel
3 Collar 16 Fender
4 Rear Frame and Attaching
Hardware
17 Seat
5 Attaching Hardware 18 Seat Mounting Hardware (varies)
6 Washer/Spacer 19 Self Tapping Screw and Washer
7 Screw (x2) 20 Self Tapping Screw (m4 x 2)
8 Plastic Bin 21 Handlebar Pad (various models)
9 Axle Cup (x2) 22 Plaque (various models)
10 Rear Wheel (x2) 23 Bag (various models)
11 Axle Cap (x2) 24 Handlebar Accessory (various models)
12 Frame Assembly 25 Basket (various models)
13 Fork Assembly
Parts Assembly
Parts Assembly
19
8
10
17
18
12
21
9
4
20
16
15
6
12
3
24
23
22
711
14
5
13
25
NOTE:
Product may
vary slightly
from that
shown.
Tools Needed: Metric Allen Wrenches (supplied), Phillips Screwdriver, Adjustable Wrench
(some models)

7
REAR FRAME INSTALLATION 1:
1. Insert Rear Frame Aonto Front Frame Tube Bas shown. - Make sure Bin Screw
Hole !is facing UP and Axle is straight on Frame.
2. Install Shoulder Screw Set Cthrough Frame Tubes. Tighten securely.
REAR WHEELS 2:
1. Install Rear Wheels Dover Axle Cups E.
2. Install Axle Cap Fwith screw G. Ensure Axle Cap is seated all the way in.
3. Repeat for opposite side.
4. Tighten Screws Gsecurely but Do Not overtighten.
WARNING: Ensure Wheels turn smoothly. The Wheels can come o if the
Screws are not tight or if the screw threads are stripped.
PLASTIC BIN 3:
1. Snap the two Bin clips Lover Frame Legs M.
2. Install Storage Bin Nusing Screw and Washer Ointo Frame Tube as shown. Do
Not overtighten.
NOTES:
• Weight Limit 5 lbs (2.3 kgs)
• On models with Storage Bin Lid that snaps closed: DO NOT STAND ON LID.
B
A
!
C
O
N
M
E
F
G
L
D
1
3
2
Assembly
Assembly
See Torque Table for Recomended Torque

8
Assembly
SEAT 4OR 5:
4:
• Install Seat Husing 2 Screws Iand Washers Jthrough Seat and into Mounting Plate.
Tighten Securely.
5:
• Install Seat Husing 2 Screws Iand Washers Jthrough Seat and Mounting Plate.
• Install 2 Washers Jand 2 Locknuts K. Tighten Securely.
45
H
J
J
K
II
STEPS:
1. Insert legs of Fork Afully into Fork/Axle
Ends Bso that screw holes line up.
2. Attach with Screw and Nut C. Tighten
securely.
3. Repeat for opposite side.
4. Place Fender Dfully onto Fork assembly as
shown.
Assemble the Fork
A
D
B
C
Assembly
See Torque Table for Recomended Torque

9
STEPS:
1. Ensure Fender Dis over the fork Aas
shown.
2. Slide the Fork assembly into the Frame
B.
NOTE: Ensure frame is right-side up (Seat
Bracket !is facing UP).
3. Place Cap Conto Handlebar E.
4. Make sure Washer Fis in place over Fork
Tube A.
5. Install Handlebar Einto Fork Aso that
screw holes are aligned.
6. Install Hardware Gthrough Handlebar
and Fork holes. Tighten securely.
7. Slide Cap Cdown until the tabs snap in
place.
CAUTION:
• Ensure Handlebars and Fork turn smooth-
ly in both directions and are not loose.
• Ensure front Wheel and Pedals rotate
smoothly.
F
B
D
G
G
E
!
A
C
Assembly - Snap-Down Collar
Assembly
See Torque Table for Recomended Torque

10
STEPS:
1. Ensure Fender Dis over the fork Aas
shown.
2. Slide the Fork assembly into the Frame
B.
NOTE: Ensure frame is right-side up (Seat
Bracket !is facing UP).
3. Place Cap Conto Handlebar E.
4. Make sure Washer Fis in place over Fork
Tube A.
5. Install Handlebar Einto Fork Aso that
screw holes are aligned.
6. Install Hardware Gthrough Handlebar
and Fork holes. Tighten securely.
7. Slide Cap Cdown fully so that Screw
and Locknut t into Cap Slot.
CAUTION:
• Ensure Handlebars and Fork turn smooth-
ly in both directions and are not loose.
• Ensure front Wheel and Pedals rotate
smoothly.
F
B
D
G
G
E
!
A
C
Assembly - Press-Down Collar
Assembly
See Torque Table for Recomended Torque

11
A
B
E
C
D
MOUNT VARIOUS ACCESSORIES AS FOLLOWS AS EQUIPPED:
• Open Pad Aand place rmly over
handlebar.
• Attach Bag Bwith Velcro straps or
buckles.
• Position Bell Con handlebar and tight-
en screws securely. Do not over-tighten.
Bells may have one or two screws.
• Attach Streamers Dby placing attach
pins into open ends of handlebar grips.
• Attach Storage unit to handlebars using
Hook and Loop Straps E.
NOTE: Weight Limit 5 lbs (2.3 kgs)
Assembly
Handlebar Storage Unit - various models
NOTE: Storage Units may have dierent caps, but all mount to Handlebars the same.
E
FB
A
C
D
G
WITH UNIT UPSIDE DOWN:
1. Place Side Pipes Aagainst lip of
Bucket B- both sides.
2. Place Retainer Ring Cover Side
Pipes so that all mounting holes line
up.
3. Install Two Short Screws Ehand
tight.
4. Install Center Cover Dover Retainer
Ring Cso that mounting holes line
up.
5. Install Long Screw Fsecurely.
6. Tighten side Screws Esecurely.
7. Attach Storage unit to handlebars
using Hook and Loop Straps G.
NOTE: Max weight 5 lb (2.3 kgs)

12
Repair and Service
WARNING:
• Inspect the product frequently. Failure to inspect the product and to make repairs or ad-
justments, as necessary, can result in injury to the rider or to others. Make sure all parts are
correctly assembled and adjusted as written in this manual and any“Special Instructions”.
• Immediately replace any damaged, missing, or badly worn parts with original equipment.
• Make sure all fasteners are correctly tightened as written in this manual and any“Special
Instructions”. Parts that are not tight enough can be lost or operate poorly. Over tightened
parts can be damaged. Make sure any replacement fasteners are the correct size and type.
• Self-locking nuts and other self-locking fasteners may lose their eectiveness when re-
used.
NOTE: Have a bicycle service shop make any repairs or adjustments for which you do not
have the correct tools or if the instructions in this manual or any “Special Instructions”are not
sucient for you.
Maintenance
Torque Table - Recommended Torque:
Recommended Torque for clean, dry threads: How to Measure:
Fastener Size Torque (ft-lb / N•m) Screw or bolt size is determined by the
width at the THREADS as shown.
.157 in (4 mm) 3.1 ft-lbs (4.2 N•m)
.196 in (5 mm) 5 ft-lbs (6.8 N•m)
.236 in (6 mm) 7 ft-lb (9.5 N•m)
.275 in (7 mm) 12 ft-lbs (16.3 N•m)
.314 in (8 mm) 17 ft-lbs (23 N•m)
.393 in (10 mm) 33 ft-lbs (44.7 N•m)
Use of a torque wrench is recommended.
Recommended torque for each fastener is
listed below. In addition to tightening to
the recommended torque, please ensure
the parts of the product are suciently
tightened by performing the functional tests
(in the component assembly sections of the
owner’s manual) on each component as it is
tightened.
NOTE: Please check that all fasteners on the
product are torqued according to the table
below:

13
Limited Warranty
General:
Part or model specications are subject to change
without notice.
This Limited Warranty is the only warranty for the
product. ALL WARRANTIES OTHER THAN STATED
HEREIN ARE DISCLAIMED INCLUDING IMPLIED
WARRANTIES OF MERCHANTABILITY AND
FITNESS FOR A PARTICULAR PURPOSE, TO THE
EXTENT ALLOWABLE BY APPLICABLE LAW. ALL
LIABILITY FOR INCIDENTAL, PUNITIVE, SPECIAL,
OR CONSEQUENTIAL DAMAGES ARE EXPRESSLY
DISCLAIMED, TO THE EXTENT ALLOWABLE BY
APPLICABLE LAW.
The only uses for this product are described in this
manual.
Warranty registration is not required.
The Limited Warranty extends only to the original
consumer and is not transferable to anyone else.
What does this Limited Warranty cover?
This Limited Warranty covers defects in
workmanship and materials for all parts of the
product except those indicated below as not
warranted.
What must you do to keep the Limited
Warranty in eect?
This Limited Warranty is eective only if:
• Product is completely and correctly assembled.
• Product is used under normal conditions for its
intended purpose (see the following section for
excluded activities).
• Product receives all necessary maintenance and
adjustments.
• Product is used for general transportation and
recreational use only.
What is not covered by this Limited
Warranty?
This product is designed for recreational use only.
This Limited Warranty does not cover normal
wear and tear, normal maintenance items, or any
damage, failure, or loss that is caused by improper
assembly, maintenance, adjustment, storage, or
use of the product. This Limited Warranty does not
extend to future performance.
This Limited Warranty will be void if the
product is ever:
• Used in any competitive sport
• Used for stunt riding, jumping, aerobatics or
similar activity
• Modied in any way
• Modied with the addition of a motor
• Ridden by more than one person at a time
• Rented, sold, or given away
• Used in a manner contrary to the instructions
and warnings in this Owner’s Manual
What will The Manufacturer do?
Manufacturer’s sole and exclusive obligation
under this Limited Warranty is to repair and/or
replace, at its sole option, any covered defect in
workmanship or materials.
How do you get service?
Contact the Customer Service Department.
• See included list for Customer Contact
information.
What rights do you have?
This Limited Warranty gives you specic legal
rights. You may also have other rights which vary
from state to state, region to region.
For how long does this Limited Warranty
last?
• When used in this Limited Warranty, the phrase
“for life” means for as long as the original
consumer owns the product.
All components are warranted for 6 months
from the date of purchase.
Warranty

14
Limited Warranty (Australia)
General:
Part or model specications are subject to change
without notice.
This Limited Warranty is the only warranty for the
product. ALL WARRANTIES OTHER THAN STATED
HEREIN ARE DISCLAIMED INCLUDING IMPLIED
WARRANTIES OF MERCHANTABILITY AND
FITNESS FOR A PARTICULAR PURPOSE, TO THE
EXTENT ALLOWABLE BY APPLICABLE LAW. ALL
LIABILITY FOR INCIDENTAL, PUNITIVE, SPECIAL,
OR CONSEQUENTIAL DAMAGES ARE EXPRESSLY
DISCLAIMED, TO THE EXTENT ALLOWABLE BY
APPLICABLE LAW.
The only uses for this product are described in this
manual.
Warranty registration is not required.
The Limited Warranty extends only to the original
consumer and is not transferable to anyone else.
What does this Limited Warranty cover?
This Limited Warranty covers defects in
workmanship and materials for all parts of the
product except those indicated below as not
warranted.
What must you do to keep the Limited
Warranty in eect?
This Limited Warranty is eective only if:
• Product is completely and correctly assembled.
• Product is used under normal conditions for its
intended purpose (see the following section for
excluded activities).
• Product receives all necessary maintenance and
adjustments.
• Product is used for general transportation and
recreational use only.
What is not covered by this Limited
Warranty?
This product is designed for recreational use only.
This Limited Warranty does not cover normal
wear and tear, normal maintenance items, or any
damage, failure, or loss that is caused by improper
assembly, maintenance, adjustment, storage, or
use of the product. This Limited Warranty does not
extend to future performance.
This Limited Warranty will be void if the
product is ever:
• Used in any competitive sport
• Used for stunt riding, jumping, aerobatics or
similar activity
• Modied in any way
• Modied with the addition of a motor
• Ridden by more than one person at a time
• Rented, sold, or given away
• Used in a manner contrary to the instructions
and warnings in this Owner’s Manual
What will The Manufacturer do?
Manufacturer’s sole and exclusive obligation
under this Limited Warranty is to repair and/or
replace, at its sole option, any covered defect in
workmanship or materials.
How do you report a problem with this
product or submit a warranty claim?
• Contact Customer Service in Australia or New
Zealand (See included list for Customer Contact
information).
• Warranty claims can be submitted to;
Hunter Products Pty Ltd - PH: 1800 224 094
233 Bay Street, Brighton Victoria, 3186, Australia.
The following text is incorporated into this Limited
Warranty if this product was purchased in Australia
(but it is not incorporated if such product was
purchased in New Zealand):
• Our goods come with guarantees that cannot
be excluded under the Australian Consumer
Law. You are entitled to a replacement or
refund for a major failure and for compensation
for any other reasonably foreseeable loss or
damage. You are also entitled to have the
goods repaired or replaced if the goods fail to
be of acceptable quality and the failure does
not amount to a major failure.
What rights do you have?
This Limited Warranty gives you specic legal
rights. You may also have other rights which vary
from State to State.
For how long does this Limited Warranty
last?
• When used in this Limited Warranty, the phrase
“for life” means for as long as the original con-
sumer owns the product.
All components are warranted for 6 months
from the date of purchase.
Warranty - Australia

© Copyright Huffy Corporation 2021
Este manual contiene información importante de
seguridad, ensamblado, funcionamiento y mantenimiento.
Lea y comprenda este manual por completo antes de usar el
producto.
Guarde este manual para referencia futura.
Use siempre casco y equipo de seguridad aprobados al usar
este producto.
Consulte el reverso para la información sobre el Servicio de
atención al cliente
Date Code Label
Here
SP
Español
Manual del propietario
Triciclo con canasta

16
Índice del manual
• Información de seguridad ............................................................................................ 16-17
• Vista de las partes / Herramientas necesarias ............................................................18
• Ensamblado del triciclo.................................................................................................. 19-23
• Mantenimiento......................................................................................................................24
• Garantía....................................................................................................................................25
Información de advertencia de casco
USE SIEMPRE EL
CASCO
AL MONTAR
ESTE PRODUCTO!
Siempre lea el manual que viene con su casco, para asegurar de que este bien colocado a la
cabeza siguiendo las instruciones que se describen en el manual.
ADVERTENCIA: PELIGRO DE ASFIXIA:
• Partes pequeñas, requiere montaje por un adulto.
• Para reducir el riesgo de lesiones, se requiere la supervisión de un adulto.
• El usuario debe tener más de 3 años de edad y no pesar más de 60 lb (27 kg).
• El peso máximo para la canasta de plástico trasera es de 2.3 kg (5 lb).
• No permita que un niño se suba a la canasta de plástico trasera.
• Evite supercies con irregularidades agudas, las rejillas de drenaje y los cambios repenti-
nos en la supercie.
• El triciclo puede detenerse repentinamente.
• Evite la velocidad excesiva asociada con las bajadas.
• Cuidado con los peatones.
• Revise y asegure toda la tornillería antes de cada uso.

17
Información Sobre Seguridad
ADVERTENCIAPARA EVITAR
LESIONES GRAVES:
• Requiere ensamblado por un adulto. Un adulto
debe plegar y desplegar este producto (si está
equipado). Se requiere la supervisión continua
de un adulto. No modifique el producto.
• PELIGRO DE ASFIXIA: Partes pequeñas. No es
apto para niños menores de 3 años.
• Mantenga las partes pequeñas sueltas y las
bolsas de plástico fuera del alcance de los
niños.
• No es apto para niños menores de 3 años
porque las piezas de espuma se pueden
desprender y causar un peligro de asfixia.
• Nunca use el producto cerca de vehículos
motorizados.
• Nunca conduzca con más de una persona. El
peso excesivo puede causar una condición
peligrosa o inestable.
• Se debe usar el equipo de protección: Lleve
siempre el equipo de seguridad, como un casco
que cumpla con la norma CPSC (o la norma
equivalente para su país) con el barboquejo bien
sujeto, las rodilleras, las coderas, las muñequeras,
los guantes y los zapatos.
• No se debe usar en tráfico.
• No permita que el niño conduzca cuando
está anocheciendo, de noche, ni cuando las
condiciones de visibilidad sean limitadas.
• No permita que el niño conduzca en caminos o
callejones.
• No permita que el niño conduzca fuera de una
superficie pavimentada, ni tampoco sobre pasto
o superficies mojadas.
• Nunca lo use cerca de calles, albercas o piscinas
(u otros cuerpos de agua), colinas, escaleras o
entradas empinadas de cocheras
• Este producto se debe usar solo sobre superficies
uniformes y pavimentadas.
• Es necesario comprender todos los
procedimientos de manejo antes de usarlo.
• No remolque ni jale ningún objeto con el
producto.
• No empuje ni jale a un niño mientras conduce el
producto.
• Se debe usar con precaución debido a que se
requiere destreza para evitar caídas y colisiones
que pueden causar lesiones al usuario o a
terceros.
• Es necesario cumplir siempre con las leyes y
reglamentos locales.
• Si algo no funciona correctamente, deje de usar
el producto.
• Reemplace de inmediato las partes rotas o
gastadas con partes genuinas de repuesto.
• Si se dañan los puños o tapones en el extremo
del tubo, se deben reemplazar porque los tubos
descubiertos pueden causar lesiones.Todos
los productos con manubrios cubiertos en los
extremos se deben revisar con regularidad
para asegurarse de que los extremos de los
manubrios tengan la protección adecuada.
• Tuercas autoblocantes y otras fijaciones
autoblocante pueden perder su eficacia cuando
se re-utilizados.
• El juguete se debe utilizar con precaución, ya que
requiere una gran habilidad, para evitar caídas
o colisiones que causen lesiones al usuario y a
terceros.
• Asegúrese de que todos los dispositivos de blo-
queo estén activados antes de cada viaje.
Este producto, al igual que todos los vehículos con ruedas, pueden proporcionar un medio de transporte
y recreativo seguro y placentero si se usa y mantiene correctamente. Al igual que al usar bicicletas,
patinetas y patines en línea, conducir este producto puede ser peligroso incluso en las mejores
circunstancias. No deseamos que se lastime. Siga estas reglas de seguridad. Mantener fuera del alcance
de los niños pequeños durante el montaje.
Este símbolo es importante. Es el símbolo de ADVERTENCIA. El símbolo de advertencia
precede a las instrucciones de seguridad. Asegúrese de que el niño comprenda estas instrucciones. El
incumplimiento de estas instrucciones puede causar lesiones al conductor o a otros, o daños al producto.
Seguridad y Advertencias

18
19
8
10
17
18
12
21
9
4
20
16
15
6
12
3
24
23
22
711
14
5
13
25
NOTA:
El producto
puede variar
ligeramente
del que se
muestra.
# Descripción # Descripción
1 Manubrio 14 Pedal (x2)
2 Puños (x2) 15 Rueda delantera
3 Collarín 16 Salpicadera
4 Cuadro trasero y ferretería de
acoplamiento
17 Asiento
5 Acoplamiento 18 Tornillería de montaje del asiento
(varios)
6 Arandela/Separador 19 Tornillo autorroscante y arandela
7 Tornillo (x2) 20 Tornillo autorroscante (m4 x 2)
8 Canasta de plástico 21 Acojinado en el manubrio (varios
modelos)
9 Copa del eje (x2) 22 Placa (varios modelos)
10 Rueda trasera (x2) 23 Bolsa (varios modelos)
11 Tapa del eje (x2) 24 Accesorios del manubrio (varios
modelos)
12 Montaje del cuadro 25 Canasta (varios modelos)
13 Ensamblado de la tijera
Ensamblado de partes
Herramientas necesarias: Llaves métricas Allen (suministradas), Desarmador Phillips, Llave
ajustable (en algunos modelos)

19
INSTALACIÓN DEL CUADRO
TRASERO 1:
1. Inserte el cuadro trasero Aen el tubo
del cuadro delantero Bcomo se
muestra. - Asegúrese de que el agujero
del tornillo de la canasta (1) esté
orientado hacia ARRIBA y que el eje
esté recto en el cuadro.
2. Instale el juego de tornillos Ca
través de los tubos del cuadro. Apriete
rmemente.
RUEDAS TRASERAS 2:
1. Instale las ruedas traseras Dsobre las
copas del eje E.
2. Instale la tapa del eje Fcon el tornillo
G. Asegúrese de que la tapa del eje
esté completamente asentada.
3. Repita el procedimiento en el otro lado.
4. Apriete rmemente los tornillos G,
pero no los apriete demasiado.
ADVERTENCIA: Asegúrese
de que las ruedas giren sin problemas. Las
ruedas se pueden desprender si los tornillos
no están apretados o si la rosca de los
tornillos está desgastada.
CANASTA DE PLÁSTICO 3:
1. Encaje los dos clips de la canasta L
sobre las patas del cuadro M.
2. Instale la canasta de plástico Nusando
el tornillo y la arandela Oen el tubo del
cuadro como se muestra. No apriete más
de lo necesario.
NOTA:
• Límite de peso de la bolsa: 5 lb (2.3 kg).
• En los modelos con la tapa del anaquel
que quede cerrado: NO SE PARE SOBRE
LA TAPA.
Ensamblado
B
A
!
C
O
N
M
E
F
G
L
D
1
3
2
Ensamblado

20
Ensamblado
ASIENTO 4O 5:
4:
• Instale el asiento Hutilizando 2 tornillos Iy las arandelas Ja través del asiento y
en la placa de montaje. Apriete rmemente.
5:
• Instale el asiento Hutilizando 2 tornillos Iy las arandelas Ja través del asiento y
la placa de montaje.
• Instalar 2 arandelas Jy dos contratuercas K. Apriete rmemente.
PASO:
1. Inserte las patas de la horquilla A
completamente en los extremos de la
horquilla/eje Bpara que se alineen los
oricios de los tornillos.
2. Acople con el tornillo y la tuerca C.
3. Apriete rmemente.
4. Repita el procedimiento en el otro lado.
5. Coloque la salpicadera Dcompletamente
en el ensamblado de la horquilla como se
muestra.
45
H
J
J
K
II
Conjunto de horquilla del triciclo
A
D
B
C
Ensamblado
Table of contents
Languages:
Other Huffy Bicycle manuals

Huffy
Huffy Green Machine User manual

Huffy
Huffy Kids Ride-On User manual

Huffy
Huffy freewheel User manual

Huffy
Huffy Slider User manual

Huffy
Huffy 1C4880-A01 User manual

Huffy
Huffy Coaster Brake Bicycles User manual

Huffy
Huffy Green Machine User manual

Huffy
Huffy CLASSIC TRIKE User manual

Huffy
Huffy Mountain Bikes User manual

Huffy
Huffy coaster User manual

Huffy
Huffy CLASSIC TRIKE User manual

Huffy
Huffy coaster User manual

Huffy
Huffy cruiser User manual

Huffy
Huffy Cruiser Bicycles User manual

Huffy
Huffy 700c User manual

Huffy
Huffy Multi-Speed Comfort Bicycles User manual

Huffy
Huffy Green Machine User manual

Huffy
Huffy cruiser User manual

Huffy
Huffy Folding Trike User manual

Huffy
Huffy M0782 User manual